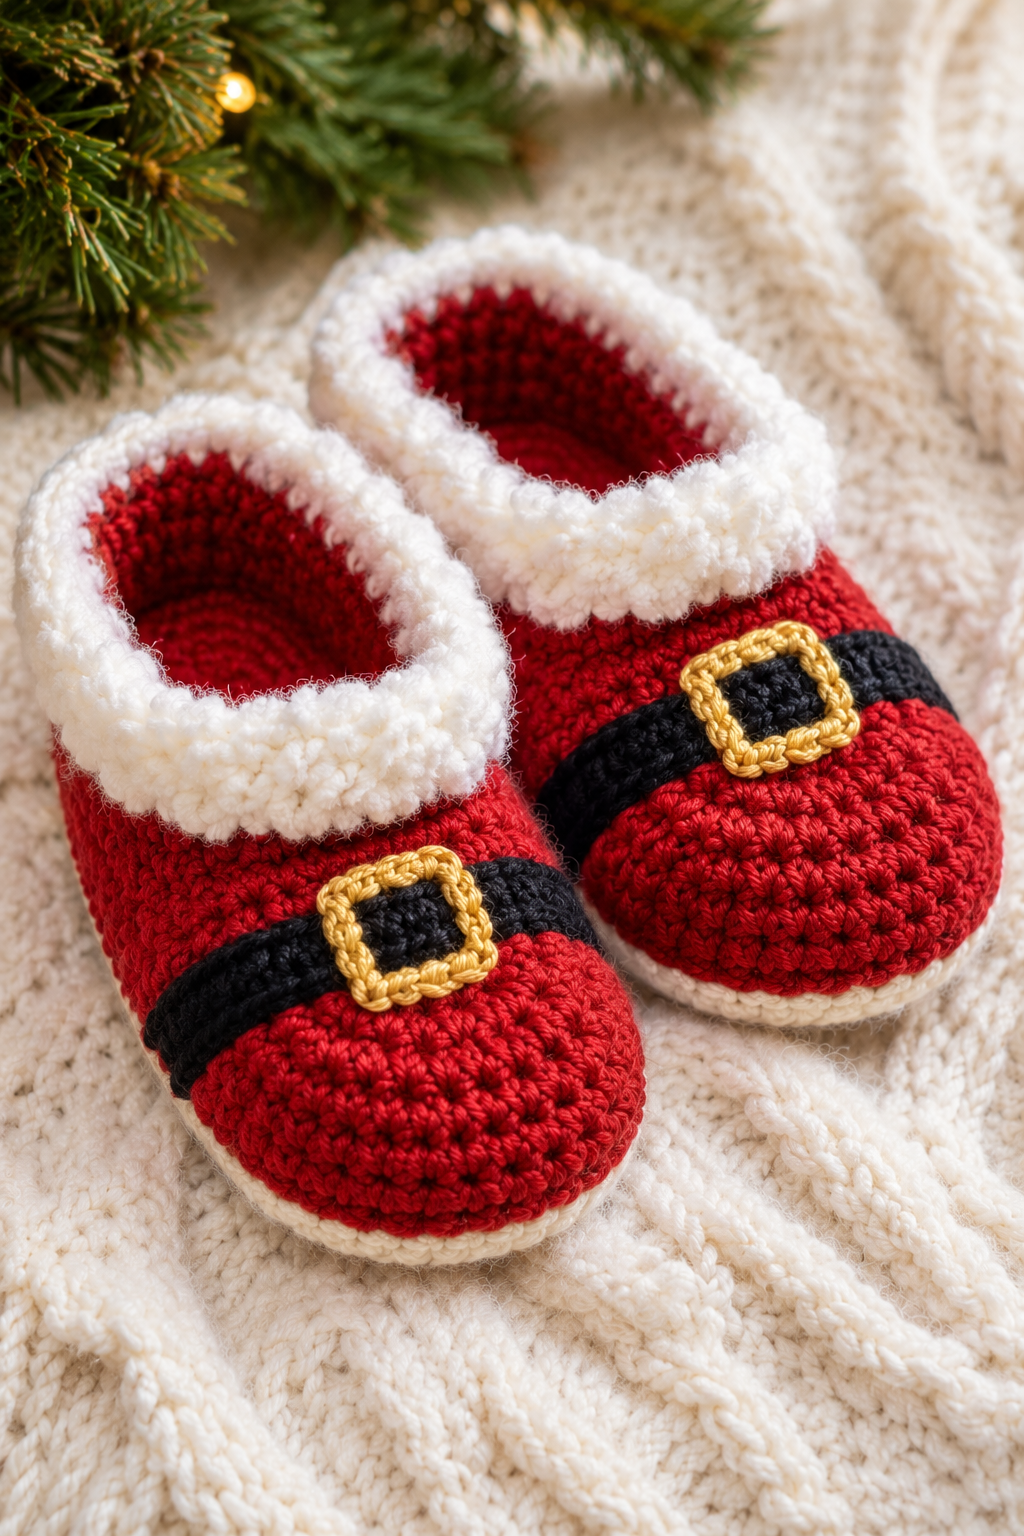
There is a moment every December when my feet get cold, the house smells like pine, and I decide that my slippers are not festive enough. This year I did something about it. I picked up a ball of bright red yarn, a smaller ball of black, a fluffy cream, and a scrap of gold, and I made myself an easy crochet Santa slipper that looks like a tiny pair of Santa’s boots.
The best part is that it is truly easy. There are no complicated stitches, no tricky joins, and no hidden steps that leave you staring at your work in confusion. If you can make a single crochet stitch and work around in a circle, you can make these. I wrote this free Santa slipper crochet pattern the way I wish more patterns were written, with plain words, honest tips, and photos of each stage so you can see what your work should look like.
Whether you want a pair for yourself, a gift for someone you love, or a cheerful little set of booties to hang by the fireplace, this pattern will take you there. Pour yourself something warm, put on some Christmas music, and let us make slippers.
Why You Will Love This Crochet Santa Slipper
First, it is festive without being fussy. The red body, the white fluffy cuff, the black belt, and the golden buckle say Santa at a glance, and everybody understands the joke immediately. Children love them, adults love them, and they photograph beautifully next to a Christmas tree.
Second, the pattern is very forgiving. The slipper is built from a flat oval sole, then simple rounds of single crochet worked straight up. Because the fabric is dense and the shape is simple, small mistakes disappear into the texture.
Third, it is a wonderful way to use leftover yarn. You only need small amounts of black, white, and gold, so this is a great stash buster. The red will use the most, but a single ball goes a long way.
Finally, these make a really thoughtful handmade gift. A pair of Santa slippers feels warm, personal, and fun, and the recipient will probably wear them every Christmas for years.
Materials You Will Need
For the yarn, I used a smooth worsted weight yarn in four colours. The main colour is a vivid Christmas red, and you will need roughly one ball or about 150 grams for an adult size. For the cuff, use a soft cream or white yarn, about 50 grams. A small amount of black, roughly 20 grams, is enough for the belt. For the buckle, use a golden yellow yarn, just a few metres.
I recommend a yarn with a little softness, because these will be touching your feet. Acrylic and cotton blends both work well, and a wool blend is cozy if you want something warmer. Choose something with clear stitch definition, because a smooth yarn shows off the textured red fabric beautifully.
For the hook, I used a 4 mm hook for most of the slipper. You can see a few different hooks in my photos, including a gold hook with a red handle, a silver hook with a wooden handle, and a slim gold hook. They all do the same job. Pick the one that feels best in your hand. If your stitches tend to be loose, drop down half a millimetre so the fabric stays firm.
You will also need a stitch marker, a yarn needle for sewing and weaving in ends, and a pair of sharp scissors. I like to keep a small pair of decorative scissors nearby, partly because they are useful and partly because they look charming in photos.
Abbreviations and Gauge
This pattern is written in US crochet terms. The abbreviations are very simple. Ch means chain. Sc means single crochet. Inc means increase, which is two single crochet stitches in the same stitch. Dec means decrease, which I work as a single crochet two together. Sl st means slip stitch. Blo means back loop only. The numbers in brackets at the end of a round tell you how many stitches you should have.
For gauge, in single crochet with a 4 mm hook, my work measured about four stitches and four rounds to an inch. Gauge is not hugely important for slippers, but if your stitches are very different, your slipper will end up a different size. Work a small swatch if you want to be sure.
The pattern as written fits a women’s medium, which is a foot length of roughly nine inches. I will explain how to resize it near the end, so you can make a pair for anyone in your family.
Step One: Crochet the Oval Sole
Every slipper starts at the bottom. The sole is a flat oval, and it decides how long and wide the finished slipper will be. Take your time here, because a good sole makes the rest of the pattern feel effortless.

In this photo you can see two soles. The one at the top is finished, and the one in my hands is still being worked, with the hook sitting at the edge ready for the next stitch. Notice how flat and even they are. That is exactly what you want.
Begin by chaining 26. Starting in the second chain from the hook, work 3 sc in that chain, then sc in the next 23 chains. Work 3 sc in the last chain. Now turn your work and continue along the other side of the foundation chain, working 1 sc in each of the next 23 chains. You should now have 52 stitches. Place a marker in the first stitch of the round and move it up as you go.
For round two, work 2 sc in each of the three stitches at the first end, then sc in each of the 23 stitches along the side. Work 2 sc in each of the three stitches at the other end, then sc in each of the 23 stitches along the other side. You should have 58 stitches.
For round three, at each curved end, work sc in the first stitch, then 2 sc in the next, and repeat that pair three times, so each end grows from six stitches to nine. Work sc across the 23 stitches along each side. You should have 64 stitches.
For round four, work one sc in each stitch around. This is a plain round and it helps the oval settle into shape. You should still have 64 stitches.
Lay the oval flat on the table. It should not ruffle, and it should not cup. If the edges ruffle, you have too many increases at the ends, and you may need to rip back a round and work fewer increases. If it bowls upward, add a few more increases in the next round. I check my oval after every round, which takes two seconds and saves a lot of frustration later.
Make two soles, one for each slipper. I like to make both ovals before moving on, because it makes the next steps feel like a rhythm. As a bonus, you will have two identical soles to compare, and you can see if one is a little tighter than the other.
Step Two: Build the Red Walls of the Slipper
Now comes the satisfying part. You will turn your flat oval into a cozy little boot by working straight up from the edge.
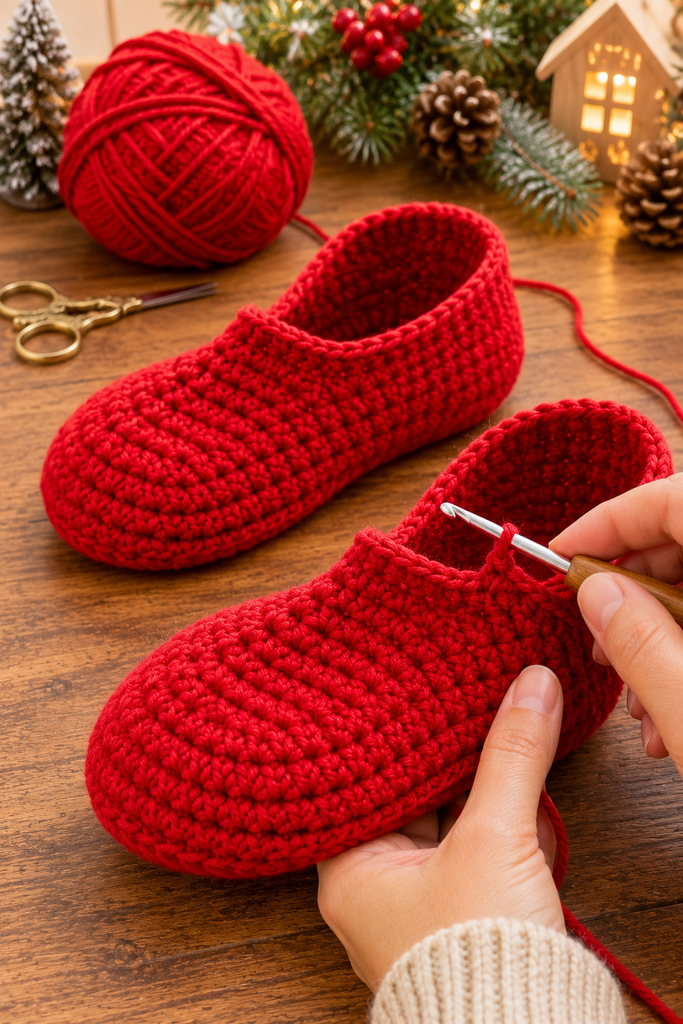
In this photo you can see two slippers that already have their shape. The red walls rise from the sole, and the opening is ready for the next stage. The stitches are dense and even, and the whole piece has a pleasing, structured feel.
To start the walls, work the next round into the back loops only of every stitch. This creates a neat ridge around the base, and it makes the sides stand up naturally. You should have 64 stitches.
Next, work 5 rounds of sc in both loops, one in each stitch, 64 stitches per round. At this point the walls should be about an inch and a half tall, and the slipper should look like a shallow red tray.
Now it is time to shape the toe. Find the centre of the toe end of your oval, and place a marker there. Then count 12 stitches on each side of this marker, making a section of 24 stitches across the top of the toe. For the next four rounds, we will decrease across this section to gently close the front of the foot.
On the first shaping round, work sc around until you reach your 24 toe stitches, then work 6 dec evenly across this section, and sc around the remaining stitches. You should have 58 stitches. On the second shaping round, work 6 dec across the toe section again, giving you 52 stitches. On the third, work 6 more, giving you 46 stitches. On the fourth, work 6 more, giving you 40 stitches. Your slipper now has a rounded toe and a snug opening, and it should look like a little boot.
Try it on your hand or on a small stand to check the shape. If the toe feels too tight, work one fewer decrease on each round. If it feels baggy, add one extra.
Now work straight up in plain sc, one stitch in each stitch, for 8 rounds. This forms the ankle part of the slipper. If you want a taller boot, work a few more rounds. If you want a lower slipper, work a few fewer. When you finish the last round, do not fasten off yet. Slip stitch into the next stitch and carry on, because you will switch colours for the belt.
A quick tip about colour changes. When you finish the last stitch before the change, draw up the new colour through the last two loops of that stitch. This makes the transition neat and avoids a visible jog. Do not worry if it is not perfect on the first try, because the belt will cover most of it.
Step Three: Add the Black Belt and the Fluffy White Cuff
This is the moment when your plain red slipper becomes unmistakably Santa. The black belt and the white cuff are what give it its personality, and both are simple to make.

In this photo, the black belt is already sewn onto both slippers, and the white cuff is being worked at the top of the left slipper. The cream yarn trails up from the work to the hook, and the red, white, and black yarn balls wait patiently in the background.
Start with the belt. Chain 9. Starting in the second chain from the hook, work sc in each chain across, giving you 8 stitches. Chain 1, turn, and sc in each stitch across. Repeat this row until the strip is long enough to wrap around the ankle of your slipper without stretching, which is usually about 40 rows for the size in this pattern. Fasten off, leaving a long tail for sewing.
Wrap the black strip around the red ankle of the slipper, a little lower than the top edge, and join the short ends together with a few small stitches. Then sew the strip to the slipper all the way around, using small, neat stitches that sit between the red stitches so they hardly show. If you want to keep it in place while you sew, use a few stitch markers or safety pins.
Now for the cuff. This is the fluffy white trim that makes a Santa boot look so cozy. Join the white yarn to the top edge of the slipper, and work sc in every stitch around, giving you 40 stitches. Join with a slip stitch.
For the next rounds, I worked in a textured stitch so the cuff looks thick and soft. You can do this by working sc, then a long sc inserted into the stitch below, alternating around. This creates a bumpy, plush surface that looks a lot like fur. Work about 6 rounds of this textured pattern. The cuff should feel thick and spongy, and it should stand up slightly on its own.
If you prefer a simpler cuff, just work plain sc rounds. It will look more like a smooth band than a fluffy trim, but it still looks lovely. Some crocheters like to make the cuff in rows and sew it on later, which gives a ribbed look.
Once the cuff is the height you like, fasten off and weave in your ends. Then fold the cuff down over the top of the slipper. It should sit around the opening like a soft, snowy collar.
Step Four: Make and Sew On the Golden Buckle
A Santa belt is not complete without a shiny golden buckle. The good news is that it is one of the easiest and most satisfying parts of the whole project.
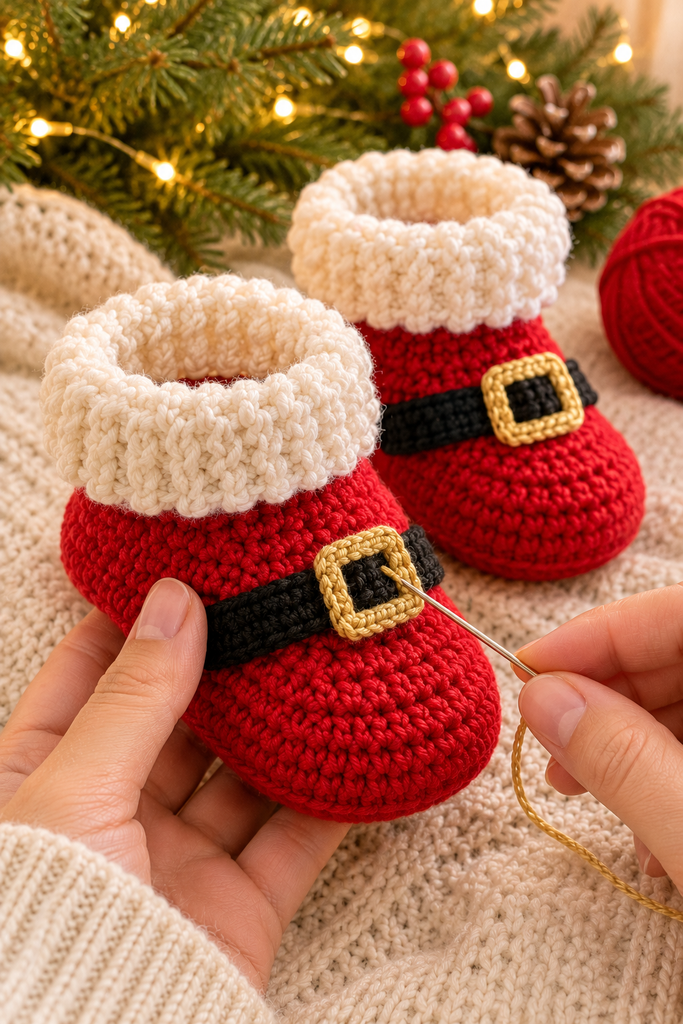
In this photo, the buckle sits right at the centre of the black belt, and a needle with golden thread is stitching it in place. Behind it you can see the second slipper, already finished, with its buckle and its fluffy cuff. The soft light of the Christmas tree makes everything glow.
To make the buckle, use your golden yarn and a smaller hook, around 3 mm, so the stitches are tight and neat. Chain 12 and join with a slip stitch to make a ring. Then work 1 sc in each chain around, which gives you 12 stitches. Work a second round of sc, so the square has some thickness. You now have a small ring, which we are going to shape into a square.
To shape it, work sc in the next 2 stitches, then 3 sc in the next stitch to make a corner, and repeat on all four sides, so that each side has 2 sc between the corners. This gives a neat little square with rounded corners. Slip stitch to join, and fasten off with a long tail.
Lay the square on the black belt, right in the centre, and sew it down with the golden yarn. Use small stitches around the outside edge of the buckle. If you like, you can stitch a short bar across the middle of the buckle using the same gold yarn to suggest the prong of a belt buckle. It is a tiny detail that makes a big difference.
Make sure both buckles are placed at the same height and in the same position on each slipper. I like to put them on the outside edge of each foot, so when you wear them, they face outward and look wonderful from the front.
Finishing Touches
Go around both slippers and weave in every loose end. For a slipper, this is especially important, because your feet will rub against the inside every time you wear them. Weave each end through at least four stitches, change direction, and trim close.
If your slippers feel a little thin on the bottom, you can sew a piece of non slip fabric or a felt sole to the base. This is optional, but it is very useful if you have hardwood floors. You can also dab a few lines of non slip fabric paint across the base, which gives you grip without any sewing.
Give the cuffs a gentle fluff with your fingers. If you want them extra soft, you can brush them very lightly with a clean pet brush. Do this gently, because you want a plush, fluffy look rather than a messy one.
How to Resize the Pattern
One of the lovely things about a slipper with an oval sole is that it is very easy to resize. The only parts that change are the length of the foundation chain and the number of rounds.
To make a larger size, add 2 chains to the foundation chain for every half inch you want to add to the foot length, and add two more stitches to each side of the oval in the later rounds. To make a smaller size, remove chains in the same way. Always keep the same increase pattern at the ends so the oval stays flat.
For a child or a baby bootie, use a thinner yarn and a smaller hook, and start with a chain of about 10 to 14. The shape and steps remain the same. The photos at the top of this post show a smaller pair of booties, and they look adorable. A baby pair makes a perfect gift for a first Christmas.
If you want taller boots, work extra rounds in the ankle section before you add the belt. If you want shorter slippers, work fewer rounds. Remember to measure the belt and cuff against the new circumference so they still wrap neatly.
Common Problems and How to Fix Them
If your sole is ruffling, you are probably adding too many stitches. Check the numbers in each round and make sure you only increase at the curved ends. If your slipper walls lean outward, switch to a smaller hook, because loose stitches lose their shape. If the toe is too tight, work fewer decreases in the shaping rounds. If the toe is too baggy, work more.
If your belt keeps curling, make sure you are working into both loops of each stitch and that your chain at the beginning of each row is not too tight. If the cuff looks flat, try a thicker yarn or work extra rounds. If the buckle looks lopsided, undo it and make the corners again, taking care to place three stitches in each corner stitch.
And if you ever feel stuck, put the project down for a day. A fresh pair of eyes can solve most crochet puzzles in a few minutes.
Colour Ideas and Fun Variations
Red and white is the classic, but you can have lots of fun with colour. A pink and white version looks like a sweet candy cane. A green and red version gives you an elf slipper. A blue and silver pair feels wintry and frosty. A cream and gold pair looks elegant and calm.
You can also change the decoration. Add a small pom pom to the back of each slipper, or sew a tiny jingle bell to the front. A little holly leaf in green and red on the cuff looks wonderful. For something playful, make one slipper in red and the other in green.
For an even bigger festive effect, make a matching set. A pair of slippers for yourself, a pair of mini booties for a baby, and a pair of tiny ornaments for the tree all look charming together. You can use the same pattern for all three by changing the yarn weight and hook size.
Gift and Styling Ideas
These slippers are wonderful for gifting. Wrap a pair in tissue paper and tie it with a ribbon, or tuck a small chocolate bar or a sachet of tea into each slipper. For a child, add a handwritten note saying that Santa’s boots are for cozy toes.
You can also use the mini version as a Christmas decoration. Hang a pair of booties from the mantel, tie them to a wreath, or place them on a shelf with candles and pinecones. The fluffy cuffs and golden buckles look stunning in warm light.
If you sell handmade items, a set of Santa slippers is very popular at holiday markets. Always check whether you are allowed to sell items made from a pattern, and credit the designer if the terms ask you to.
Caring for Your Crochet Slippers
To keep your slippers looking fresh, wash them gently by hand in cool water with a mild soap. Do not wring them out. Press out the water with a towel, reshape the slippers, and let them dry flat. Avoid tumble drying, because heat can damage the yarn and change the shape.
Store your slippers in a dry place, and brush the cuffs lightly if they get squashed. With a little care, they will look cheerful year after year.
Frequently Asked Questions
Is this crochet Santa slipper pattern really free?
Yes. Everything you need is written here in this post, so you can make the slippers without paying for anything.
Is it suitable for beginners?
Yes. If you can chain, single crochet, increase, and decrease, you can make these. The only slightly fiddly part is sewing on the belt and buckle, and I have shared tips to make it easier.
How long does it take to make a pair?
Most people finish a pair in a weekend. Each slipper takes about three to four hours, depending on your speed.
What yarn is best?
A smooth worsted weight yarn in acrylic or a cotton blend works well. Choose one that is soft against the skin and holds its shape.
Can I wash them?
Yes, gently by hand. Avoid hot water and tumble drying.
Can I make them for a baby?
Absolutely. Use thinner yarn, a smaller hook, and a shorter starting chain. Keep the same steps, and double check that there are no small parts that could come loose.
What if I do not want to sew on a buckle?
You can embroider the buckle straight onto the belt using golden yarn. It looks just as charming and has no loose pieces.
Final Thoughts
There is something wonderfully joyful about making a pair of Santa slippers. Each step is small and simple, but together they build something that feels like pure Christmas. The red body, the fluffy cuff, the neat black belt, and the little golden buckle all come together in a way that makes people smile before they even know what it is.
I hope this easy crochet Santa slipper pattern brings you as much happiness as it brought me. Make one pair for yourself, make another for someone you love, and maybe make a tiny pair for the tree. Your feet will be warm, your home will feel more festive, and you will have the satisfaction of wearing something you made with your own hands.
Happy crocheting, and merry Christmas.