There are decorations that sparkle for a season and decorations that become part of the family. A vintage petrol blue bell ornament belongs in the second group. It has the deep, moody color of an antique glass bauble, a scalloped hem edged in glimmering gold, delicate golden snowflakes embroidered across the front, and a tiny brass jingle bell that hangs inside like a hidden surprise. Hang it on a pine branch among warm fairy lights and it looks as though it has been lovingly passed down for generations, even though it was made last week with a ball of cotton and a small hook.
I designed this crochet Christmas decor for crocheters who love timeless style. The pattern is worked from the top down in simple single crochet, so the shaping is gentle and the stitches are easy to follow. The details that make it feel vintage, namely the scalloped edge, the gold trim, the snowflakes, and the little bell, are all explained clearly, step by step. You do not need advanced skills, only patience, tight stitches, and a love of beautiful things. By the end, you will have an ornament that looks like it belongs in a boutique, along with the knowledge to make a whole collection in different colors.
What Makes an Ornament Look Vintage
Before we begin, it helps to understand why some handmade ornaments feel modern and others feel nostalgic. Vintage style comes from a handful of choices that work together. The first is color. Vintage decorations favor deep, slightly muted shades such as petrol blue, forest green, burgundy, and antique gold, instead of bright primary colors. These shades look rich and calm, and they glow beautifully against evergreen branches and warm lights.
The second is metallic detail. Old ornaments often featured gold or silver trim, painted patterns, and glittering accents. In crochet, we echo that with metallic thread, which catches the light and adds a gentle shimmer without looking flashy. The third is ornate but restrained decoration, such as scalloped edges, small snowflakes, and tiny beads, which add interest without crowding the design. The fourth is a sense of craft. A vintage ornament looks made by hand, with visible stitches and thoughtful finishing, and crochet is perfect for that.
This bell combines all four. The petrol blue body gives depth, the gold edging and embroidery give sparkle, the scalloped hem adds charm, and the real jingle bell inside brings a tiny sound that feels like an old fashioned Christmas morning.
Why Petrol Blue Is Such a Beautiful Choice
Petrol blue sits between teal and deep navy. It has a quiet richness that works equally well on a traditional tree, a modern minimalist display, or a rustic mantel. Against gold, it looks luxurious. Against cream and white, it looks fresh and wintry. Against natural green boughs, it looks deep and elegant.
It is also a very forgiving color for crochet. Dark yarns can hide small inconsistencies in tension, so your first bell will look neat even if your stitches are not perfect. The embroidery stands out dramatically, since gold on petrol blue has high contrast, and every little snowflake is easy to see. If you want a different mood, the same pattern works in forest green with silver, burgundy with gold, or ivory with pale blue. Choose a color you love and a metallic that complements it.
Materials You Will Need
For the main color, choose a smooth, mercerized cotton in DK weight. Mercerized cotton has a subtle sheen that gives the bell a polished, almost glass like quality, and it holds its shape beautifully when stiffened. You will need about 80 yards of petrol blue for the bell and the hanging loop. A softer acrylic will also work, but cotton gives crisper stitches and a firmer finish.
For the gold details, you will need about 30 yards of metallic gold thread or fine gold yarn. Choose a smooth, lightly twisted thread that is easy to crochet and embroider with. If your metallic thread is very thin, you can use two strands together for edging, and a single strand for embroidery. Test a short length first, to make sure it does not fray or snag easily.
For the hook, a 2.5mm hook works well with DK cotton. Because the bell needs to be firm, you want your stitches tight and even, so choose a hook slightly smaller than the label suggests. If your fabric looks loose or gappy, go down half a millimeter. A smaller hook for the gold edging, around 2mm, makes it easier to work neat stitches in the thin thread.
You will also need a brass or gold jingle bell, about 20mm across, a yarn needle, a pair of sharp scissors, and stitch markers. A stitch marker is important because the bell is worked in a continuous spiral, and it is easy to lose your place. For embroidery, you will need a sharp embroidery needle with an eye large enough for the metallic thread, and a few tiny gold seed beads, about 2mm each, with a beading needle or fine sewing needle and gold thread to attach them.
For stiffening, you will need a fabric stiffener or a mixture of white craft glue and water in equal parts, a soft paintbrush, plastic wrap, and a mold. A small bowl or tall cup, about 3 inches across at the opening, covered in plastic wrap, works well as a mold. Do not skip the stiffening step. It is what turns a soft crochet shape into a crisp, bell shaped ornament that holds its form for years.
Size, Gauge, and Abbreviations
The finished bell measures about 4 inches tall, not including the loop, and about 3 inches across the hem. With the loop, it hangs about 6 and a half inches. Gauge is not critical, but aim for 7 single crochet stitches and 8 rounds in one inch, with tight, even tension.
This pattern uses standard US crochet terms. Mr means magic ring. Ch means chain. Sc means single crochet. Inc means increase, which is 2 sc in the same stitch. Dc means double crochet. Sl st means slip stitch. The bell is worked in a continuous spiral without joining, so do not chain at the start of a round. Mark the first stitch of each round with a marker and move it up as you go. When you reach the scalloped hem, we will work in joined rounds, and I will explain that clearly.
Step One: Start With the Crown
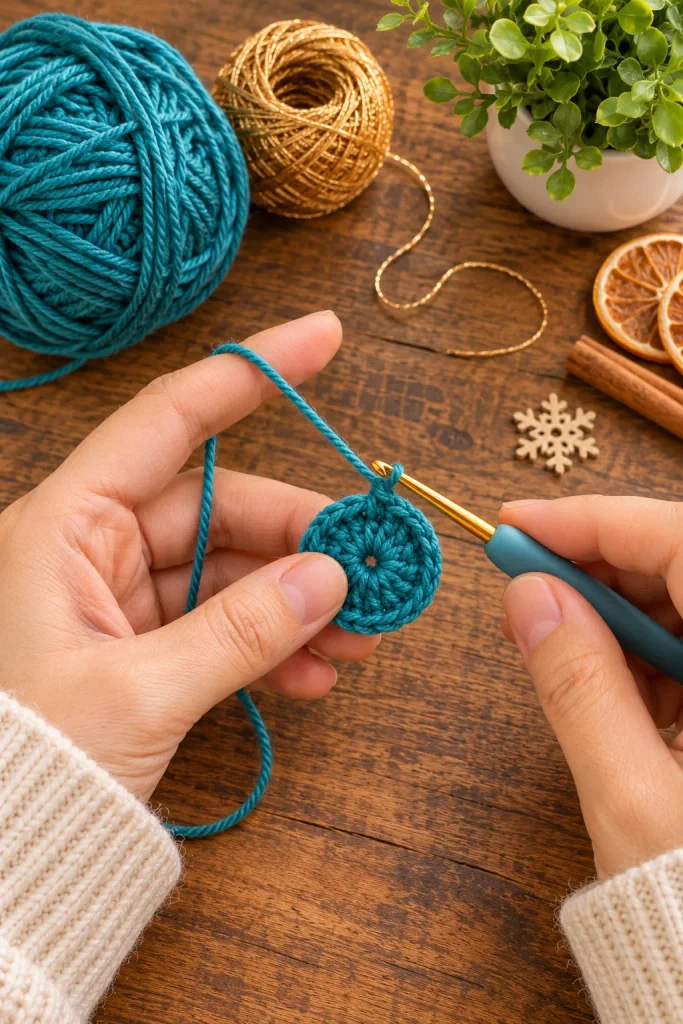
Every bell begins at the top. A neat crown gives the whole ornament a refined shape, so take a moment to make your magic ring tight and clean.
Using petrol blue yarn, make a magic ring and work 6 sc into it. Pull the tail to close the ring firmly. Place a marker in the first stitch. For round two, work inc in each stitch around, giving 12 stitches. For round three, work sc in the first stitch and inc in the next, repeated around, giving 18. For round four, work sc in the next 2 stitches and inc in the next, repeated around, giving 24 stitches.
Now you have a small, flat circle about an inch and a half across. Lay it on a table and check that it lies flat. If it ruffles, you have too many increases. If it cups, you have too few. At this stage, count your stitches carefully, because the crown sets the shape for the whole bell. If you are off by even one stitch, the sides of the bell will lean, so fix it now.
Work rounds five and six in plain sc, 24 stitches each. This begins to lift the crown into a gentle dome, which will become the shoulder of the bell. You will notice the fabric starting to curl upward at the edges, which is exactly what we want.
Step Two: Shape the Bell Body
Now we let the bell grow, widening slowly in even steps. The secret to a graceful bell shape is spacing the increases evenly, so each widening round is followed by a few plain rounds. This creates a smooth, gentle curve instead of a stiff cone.
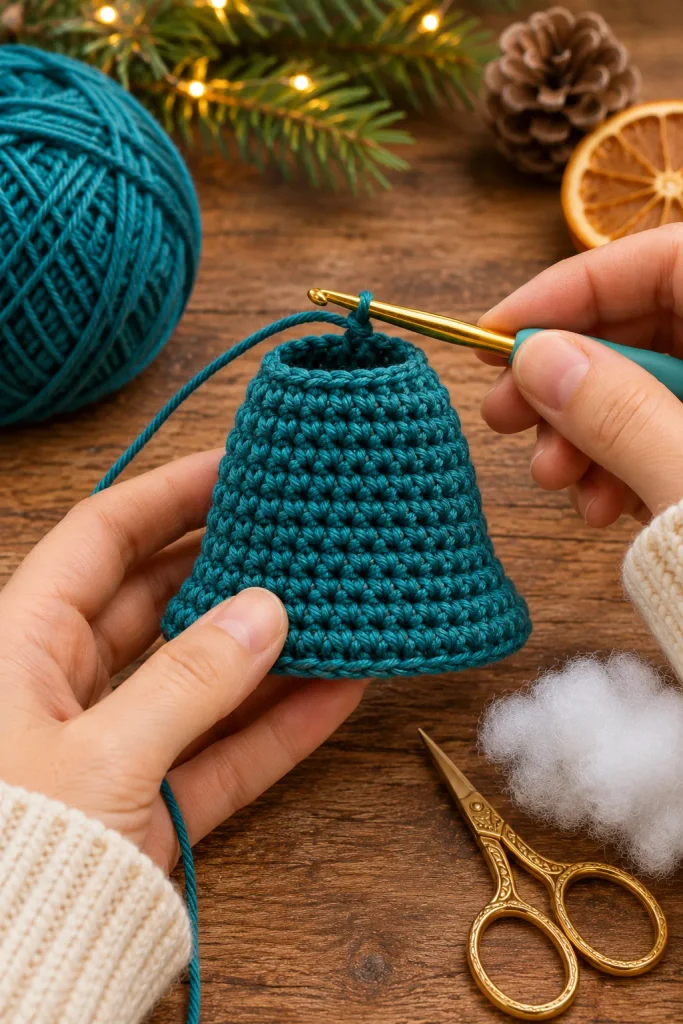
For round seven, work sc in the next 3 stitches and inc in the next, repeated around, giving 30 stitches. Work rounds eight through ten in plain sc, 30 stitches each. For round eleven, work sc in the next 4 stitches and inc in the next, repeated around, giving 36 stitches. Work rounds twelve through fourteen in plain sc. For round fifteen, work sc in the next 5 stitches and inc in the next, repeated around, giving 42. Work rounds sixteen through eighteen in plain sc.
For round nineteen, work sc in the next 6 stitches and inc in the next, repeated around, giving 48 stitches. Work rounds twenty and twenty one in plain sc. For round twenty two, work sc in the next 7 stitches and inc in the next, repeated around, giving 54 stitches. Work round twenty three in plain sc, 54 stitches.
At this point, the bell should be about 3 inches tall, with a smooth outward flare. Place it over your hand or on the mold and check the shape. A good bell has a rounded shoulder, a slightly concave waist, and a wide, graceful skirt. If the sides look too straight, add a plain round or two between increases. If the flare is too dramatic, reduce the increases by one or two.
To keep the increases from forming visible lines, stagger them slightly from round to round. Instead of placing each increase directly above the last, shift it by one or two stitches. This gives a smooth, round shape rather than a hexagon.
Keep your tension even throughout. Dark yarn can be hard to see, so work in good light and count often. A well counted bell will stand straight and symmetrical, while a bell with uneven counts will lean to one side.
Step Three: Create the Scalloped Hem
The scalloped hem is what gives this bell its vintage charm. It looks like the decorative edge of an antique glass ornament or a delicate lace trim.
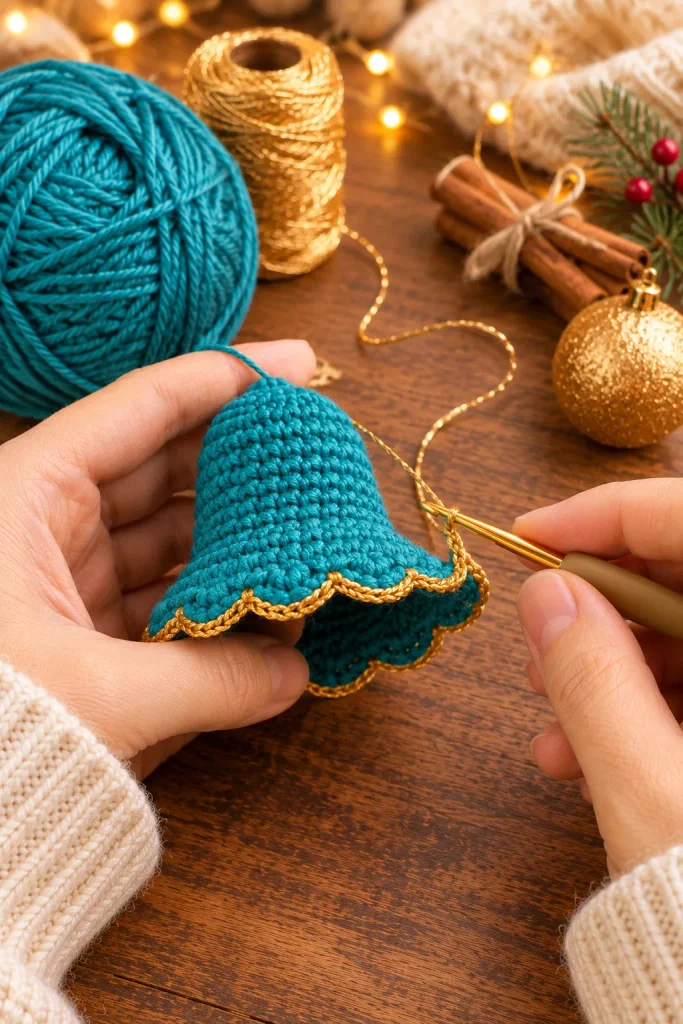
Now we work in joined rounds. For the scallop round, you have 54 stitches, which divide neatly into 9 groups of 6. Skip 2 stitches, work 5 dc in the next stitch, skip 2 stitches, and work a sl st in the next stitch. Repeat this sequence 9 times around. Each repeat uses 6 stitches and forms one scallop. Slip stitch into the first stitch to finish the round, then fasten off, leaving a small tail.
You will see the hem fan out into soft shell shapes. If your scallops look uneven, check that you have skipped the right number of stitches each time. If the scallops curl inward, your dc stitches may be too tight, so loosen your tension slightly. If they flare too much, pull your stitches a little firmer.
Now for the gold edging. Join the metallic thread at the tip of any scallop. Work 1 sc in each dc and each sl st around the scallops, placing 2 sc in the sl st at the dip between scallops so the line stays smooth. When you complete the round, slip stitch into the first stitch. For a braided look, work a second round of reverse single crochet, also called crab stitch, from left to right along the same edge. This twisted edge looks like gold cord and gives the hem a rich, ornate finish.
Work slowly with the metallic thread, and avoid pulling too tightly. Metallic threads can stiffen or break if forced, so use gentle, even tension. If the thread twists, let your hook dangle and allow it to untwist. Keep each length short, so that you do not drag the thread through the stitches too many times.
Fasten off the gold thread and weave in the ends with a needle, tucking them inside the hem. Weave through several stitches to keep them secure.
Step Four: Stiffen the Bell
Stiffening is the secret that turns a soft crochet bell into a sturdy ornament. Without it, the bell would collapse under its own weight and the scallops would droop. With it, the shape stays crisp, the fabric becomes firm, and the ornament lasts for many Christmases.
Cover your mold, a small bowl or tall cup, with plastic wrap, smoothing it flat so that it does not leave wrinkles in the crochet. Place the bell upside down over the mold, so that the crown is at the top and the hem rests on the table. Check that the bell sits evenly and the scallops hang naturally.
Mix equal parts white craft glue and water in a small dish, or use a ready made fabric stiffener. With a soft brush, apply the mixture to the outside of the bell, working in small sections and dabbing it into the stitches. Do not soak the bell, because too much liquid can dull the color or cause the dye to bleed. Aim for a thin, even coating that darkens the fabric slightly. Then brush a thin layer on the inside, especially around the hem, to help the scallops hold their shape.
Use your fingers or a spare brush to arrange the scallops, so each one fans out neatly. Let the bell dry completely, which usually takes 12 to 24 hours. Place it in a warm, dry spot, away from direct sunlight. Do not use a hair dryer, as high heat can distort the shape.
When fully dry, gently lift the bell off the mold. It should now hold its shape firmly, with a smooth, slightly glossy finish. If it feels soft in any area, add another thin coat of stiffener and let it dry again.
The metallic edging may stiffen slightly too, but it should still shimmer. If any glue gets on the gold, dab it off with a damp cloth before it dries.
Step Five: Embroider the Gold Snowflakes
Now comes the most enchanting step. The gold snowflakes make the bell look like it has been dusted with winter frost, and they are far easier than they look.
Thread your embroidery needle with a single strand of gold thread, about 18 inches long, and knot the end. Plan your design lightly, using a water soluble pen or small pins. Place one large snowflake at the center front, a little above the middle of the bell. Place two smaller snowflakes on either side, slightly lower, so the arrangement looks balanced. Small dots between the snowflakes add a sprinkle of detail.
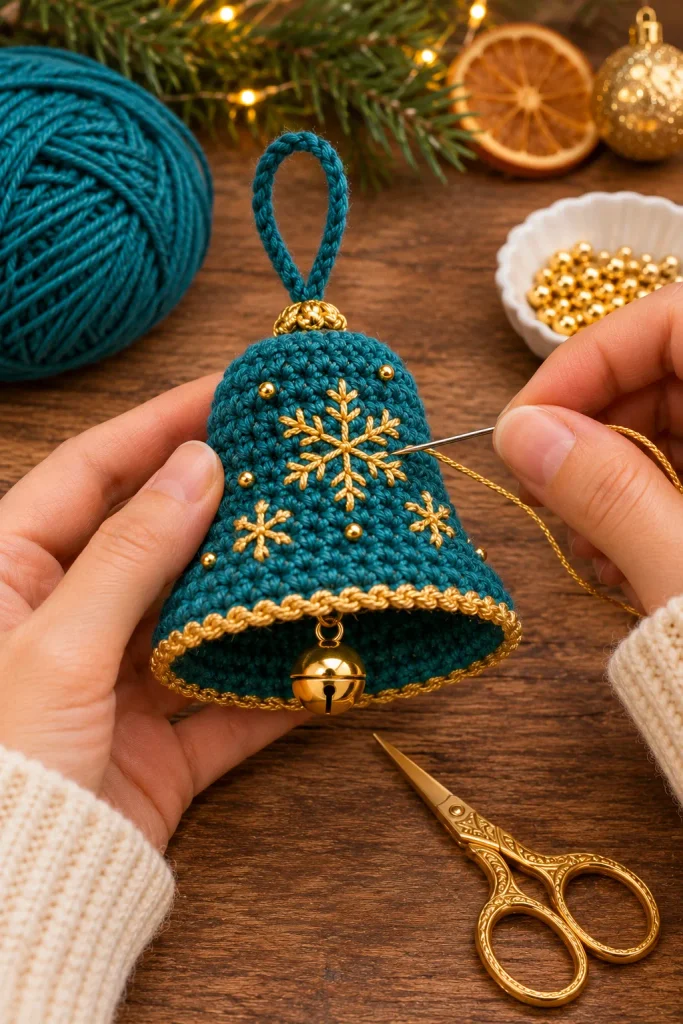
To embroider the large snowflake, start with a vertical line about three quarters of an inch long, using backstitch or stem stitch. Add a horizontal line crossing at the center, and then two diagonal lines to form a six pointed star shape, like an asterisk. Now add the branches. On each of the six arms, work two small V shaped stitches, one near the center and one near the tip, angled outward like little feathers. Finish each arm with a small tip stitch. The result is a delicate, symmetrical snowflake that sparkles against the dark blue.
For the smaller snowflakes, make the same pattern in a smaller size, with arms about half an inch long and a single pair of branches on each arm. To add a variation, make each snowflake slightly different, since real snowflakes are never identical.
For the finishing touch, sew a few tiny gold seed beads between the snowflakes. Bring the needle up from the inside, thread a bead, and go back down next to it, securing with a tiny stitch. Scatter 6 to 10 beads randomly, or in a loose arc around the central snowflake. The beads catch the light like tiny stars.
Work gently when embroidering a stiffened bell. The fabric is firm, so use a sharp needle and push it through carefully. If the needle sticks, pull it through with pliers, taking care not to bend it. Keep the thread tension even, so the stitches lie flat without puckering the fabric.
Metallic thread can fray as you pull it through the fabric, so use short lengths and replace them when they begin to look worn. If the thread tangles, let the needle hang and untwist it.
Step Six: Make the Loop and Add the Jingle Bell
The final details bring the ornament to life. We start with the hanging loop, which is a firm, round cord that looks like a tiny rope.
Using petrol blue yarn, make a magic ring and work 5 sc into it. Continue working in a spiral, with 1 sc in each stitch around, without increasing or decreasing, for about 35 rounds. The fabric will form a slim tube about 4 inches long. Do not stuff it, because it will be firm enough as it is. Fasten off, leaving a tail, and weave the starting tail inside.
Fold the tube in half, so the ends meet, and tie the two ends together in a single overhand knot, which forms the small knot you see at the top of the bell. Trim the ends, leaving about half an inch, and sew them firmly to the crown of the bell, using the tail and small stitches. Pass the needle through the crown several times to secure. For extra strength, work a small cross stitch over the base of the knot.
Now for the jingle bell. Cut a 6 inch length of gold thread. Thread it through the loop of the jingle bell and tie it securely. Pass the needle from the inside of the bell to the outside through the crown, going under the knot of the loop, and then back down to the inside. Pull until the jingle bell hangs about half an inch below the hem, and tie off firmly inside the bell. Add a tiny dab of glue to the knot for security, and trim the ends.
Shake the ornament gently. The little bell should ring with a soft, sweet sound. If it rattles against the hem, shorten the thread slightly so that it hangs free. If it does not ring, make sure the clapper inside the jingle bell moves freely, and that no glue has trapped it.
Finishing Touches
Check the ornament from every angle. Trim any stray threads, tuck in any loose ends, and gently reshape the scallops with your fingers. If the gold edging looks uneven, you can tidy it by adding a few small stitches with matching thread. If the bell leans, press it gently while it is still slightly flexible, or dampen the stiffener with a damp cloth and reshape it.
For extra shine, you can brush a very thin coat of clear acrylic sealer over the bell, avoiding the gold. This protects the color and gives a gentle sheen. Test the sealer on a scrap first, because some brands can dull the metallic thread.
Hang the bell on a sturdy branch of your tree, or from a ribbon on a doorknob, a wreath, or a mantel garland. Because the loop is crocheted, it is strong and will hold the bell securely, but it is wise to hang it where it will not be pulled by small hands or pets.
Care and Storage
A stiffened ornament should not be washed, because water softens the stiffener. If it gets dusty, brush it lightly with a soft brush or a clean makeup brush. If it gets a small mark, dab it very gently with a barely damp cloth, and let it dry flat.
To store, wrap each ornament in tissue paper and place it in a small box, with the bell shape supported so it does not get crushed. Keep it in a cool, dry place, away from sunlight and moisture. Placing a silica gel packet in the box helps prevent humidity from softening the stiffener.
Troubleshooting Common Problems
If your bell looks like a cone rather than a bell, your increases were probably too frequent at the top. Try adding plain rounds between increases to create a gentler curve, and place the larger increases nearer the hem.
If the shape is lumpy, check your stitch count at the end of each round. A missing or extra stitch causes bumps, and it is easier to fix early than late. Stagger the increases to avoid visible lines.
If the scallops curl, your dc stitches may be too tight. Loosen your tension, or use a hook half a size larger for the scallop round. If they look too flat, pull the stitches a little firmer.
If the stiffener leaves white marks, you probably used too much glue. Dilute the mixture more next time, and dab off any excess with a damp cloth before it dries. A thin coat is always better than a thick one.
If the metallic thread breaks, use shorter lengths and avoid sharp bends. Switch to a softer thread if needed. Keep the tension gentle, and do not pull it through the fabric too many times.
If the jingle bell does not ring, check that the clapper moves freely and that the thread does not touch the sides of the hem. Shorten or lengthen the thread slightly until it hangs free.
If your embroidery looks uneven, mark the design first and use small, consistent stitches. A thin metallic thread is easier to control than a thick one. Practice on a scrap swatch before starting on the bell.
Variations and Gift Ideas
Once you have made your first bell, you can create a whole collection. Make a set of three in different sizes by changing the number of rounds, so the bells hang in a graceful trio. Make a deep green bell with silver edging for a woodland look, a burgundy bell with gold for a classic feel, or a pale ivory bell with soft blue embroidery for a winter wonderland theme.
For a personal touch, embroider a name or an initial in gold across the front instead of a snowflake. A personalized bell makes a wonderful gift for a new baby, a newlywed couple, or a family’s first Christmas in a new home. Add the year in small gold numbers on the back, so it becomes a keepsake that records the date.
Package your bells in small gift boxes lined with tissue paper, and tie them with ribbon. A bell in a box with a handwritten tag looks charming, and it feels special to receive. If you sell ornaments, display them on a small artificial tree at your stall, so customers can see how they look when hung.
You can also use the bell as a table decoration. Place a few bells among pine cones, cinnamon sticks, and dried orange slices for a festive centerpiece. Hang several from a wreath or a garland above a window, and the soft jingles will fill the room with holiday spirit.
Frequently Asked Questions
Many readers ask whether this pattern is suitable for beginners. It is a good project for confident beginners, since it uses simple stitches and basic shaping. The scalloped hem and embroidery require a bit of patience, but each step is straightforward. If you are brand new to crochet, practice the magic ring and single crochet increases first, then return to the bell.
People also ask how long it takes. Most crocheters finish the bell in about 3 to 4 hours, the edging in another hour, and the embroidery in about 2 hours. Add drying time for the stiffener, which is 12 to 24 hours. It is a perfect project for a quiet weekend.
Another common question is about yarn. Mercerized cotton gives a crisp, polished finish, while acrylic is softer and may not stiffen as firmly. Avoid fuzzy yarns, because they hide the stitches and make the embroidery harder to see.
Readers also wonder whether the stiffener will ruin the ornament. When used in a thin coat, it does not harm the yarn, and it keeps the shape crisp. Test on a small swatch first, especially with dark colors, to make sure the dye does not run.
Finally, many ask whether they can sell the finished ornaments. You are welcome to sell items made from this pattern. I would be grateful if you credit this blog and link back to the pattern when you share your work.
Final Thoughts
This vintage petrol blue bell ornament is a small project with a big sense of occasion. The deep blue body, the scalloped gold edge, the delicate snowflakes, and the little jingle bell inside all come together to create a decoration that looks and feels like a treasured heirloom. It is a piece you will be proud to hang on your own tree and happy to give to people you love.
I would be delighted to see your finished bells, so share your photos and tell me which colors you chose. Happy crocheting, and may your Christmas be filled with warm lights, soft jingles, and beautiful handmade things.