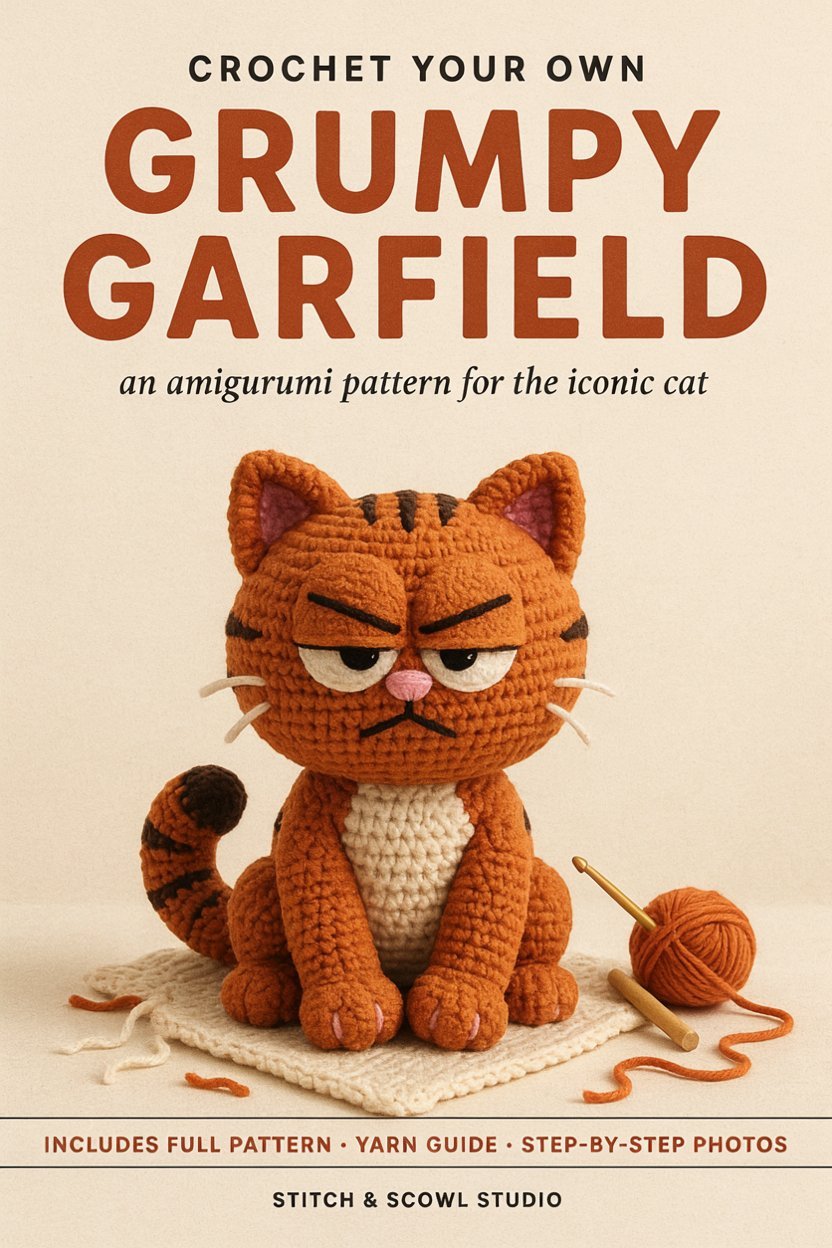
There is something especially fun about turning a familiar cartoon cat into a handmade crochet character. With his sleepy eyes, permanently unimpressed expression, orange fur, and oversized head, Garfield is instantly recognizable—and that makes him a fun subject for an amigurumi project.
This Crochet Garfield Amigurumi Make This Grumpy Iconic Cat project is a great choice if you enjoy making character-inspired crochet, experimenting with facial details, or creating handmade pieces for your craft room and collection.
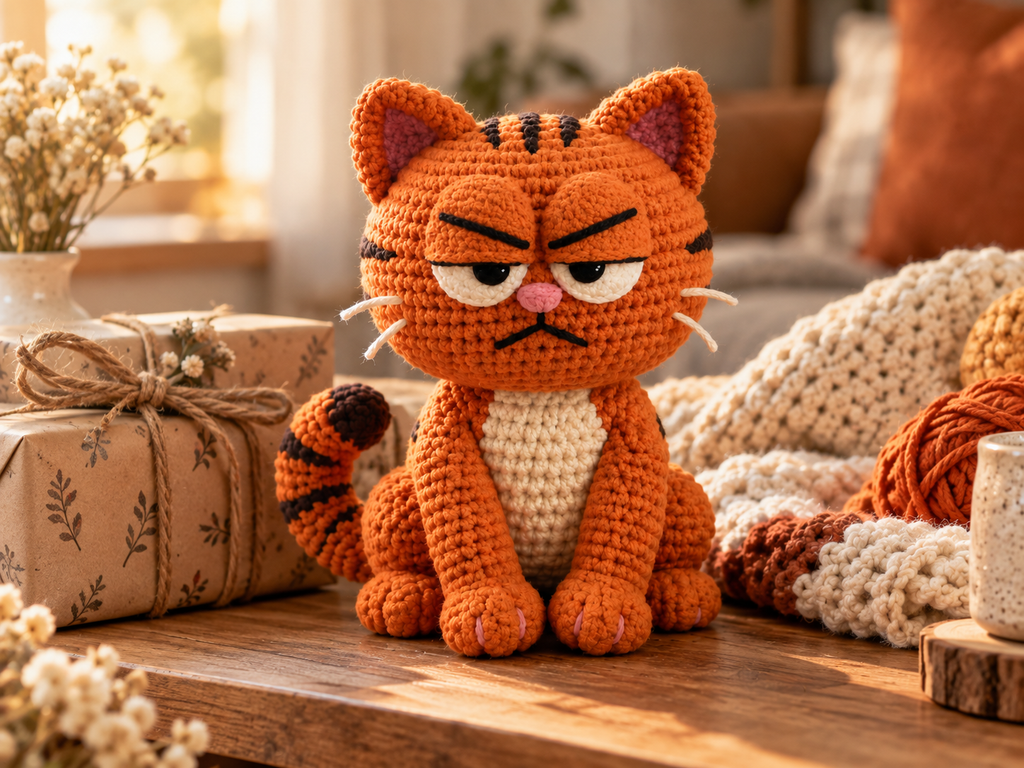
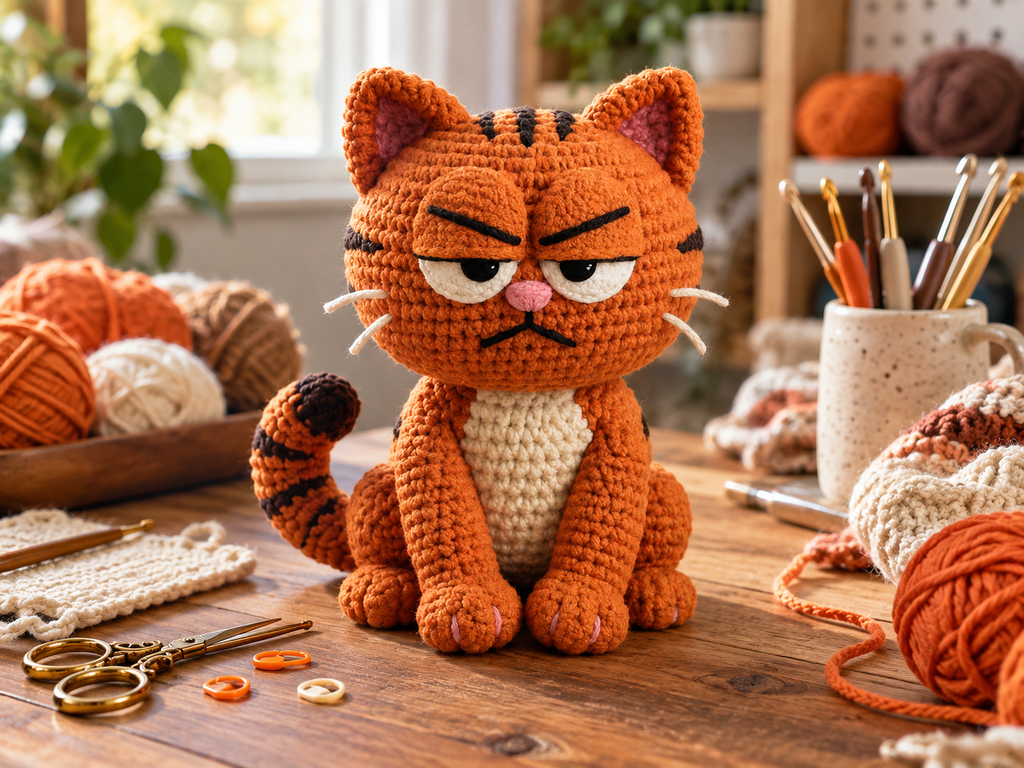
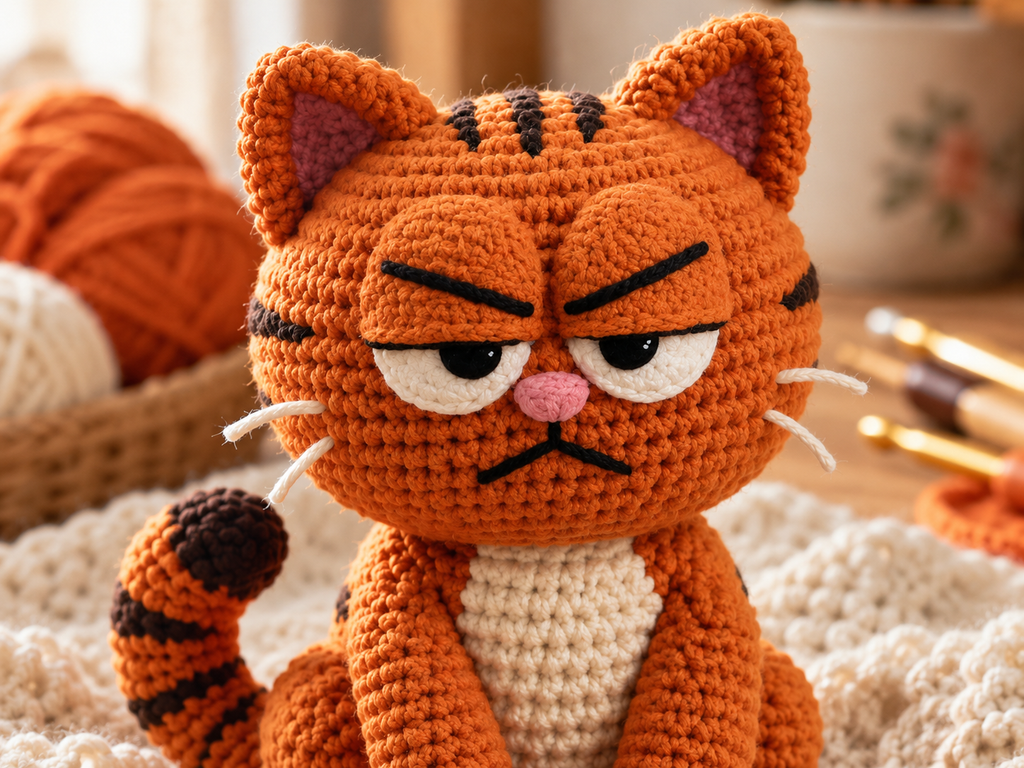
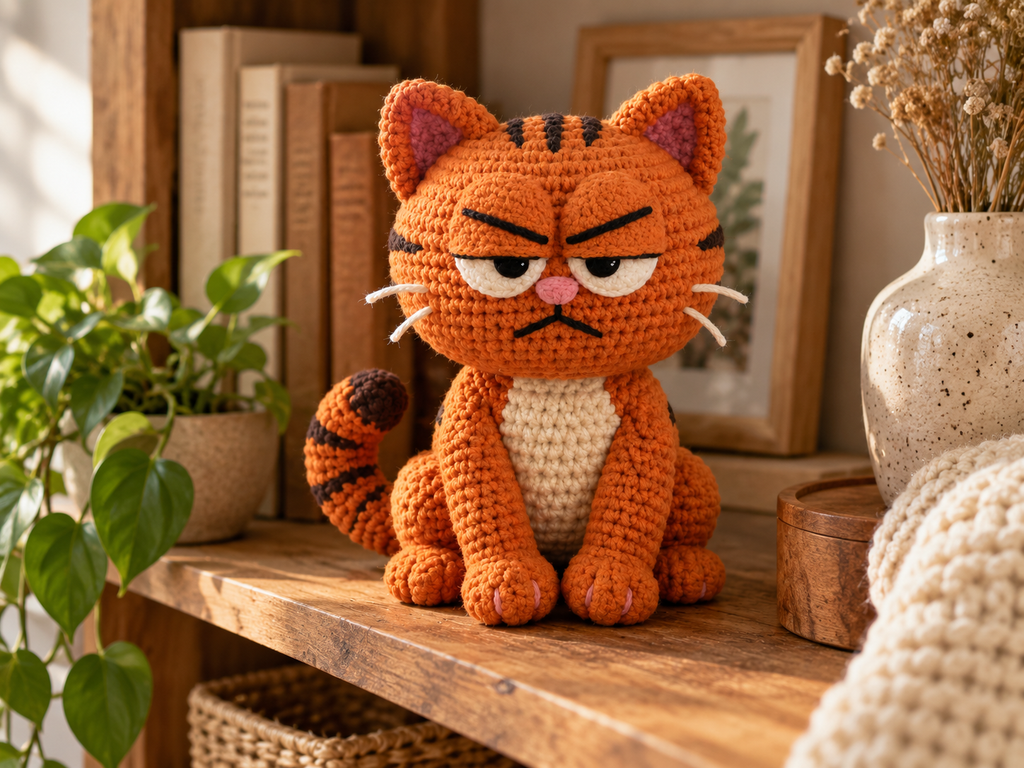
The design shown here features a chunky orange crocheted body, a large rounded head, cream-colored chest and muzzle details, pink nose, embroidered whiskers, expressive dark eyebrows, pointed ears, and the classic striped tail. The face is the real star of the project because small changes in the placement of the eyes, eyebrows, nose, and mouth can completely change the character’s expression.
What Makes a Crochet Garfield Amigurumi So Fun?
Amigurumi is all about turning simple crocheted shapes into recognizable characters. A basic sphere can become a head, a few smaller pieces can become ears and paws, and carefully placed embroidery can give the character its personality.
Garfield works particularly well as an amigurumi subject because his appearance is built around a few strong visual features.
The most important ones are:
- Bright orange body
- Large rounded head
- Pointed ears
- Half-closed eyes
- Heavy expressive eyebrows
- Pink nose
- Small black mouth
- White whiskers
- Cream-colored chest
- Striped tail
- Seated cat pose
You don’t need complicated decorative stitches everywhere to make the character recognizable. In fact, keeping the body relatively simple allows the face to do most of the work.
That is an important lesson for character amigurumi in general: shape and placement often matter more than complicated stitches.
Materials You May Need
Before starting, gather your supplies so you don’t have to stop halfway through the project.
Yarn
A smooth medium-weight yarn is a practical choice for this type of amigurumi.
For a Garfield-inspired color palette, you can work with:
| Color | Suggested Use |
|---|---|
| Orange | Head, body, arms, legs and ears |
| Cream | Chest and muzzle |
| Dark brown | Tail stripes and small details |
| Pink | Nose and small paw details |
| Black | Eyes, eyebrows and mouth |
| White/Cream | Whiskers |
Cotton or cotton-blend yarn is particularly useful for amigurumi because the stitches are easy to see and the finished fabric tends to hold its shape well.
The exact yarn brand isn’t as important as maintaining a consistent yarn weight throughout the project.
Crochet Hook
Use a hook appropriate for your yarn while keeping your stitches fairly firm.
Amigurumi normally needs tighter stitches than an open crochet project because large gaps can allow stuffing to show through.
If you’re unsure, crochet a small sample first. If you can easily see large spaces between the stitches, try a smaller hook.
Stuffing
Polyester fiberfill is commonly used for stuffed crochet toys and decorative amigurumi.
Add it gradually while closing the pieces rather than packing everything in at the end.
Other Supplies
You’ll also want:
- Crochet hook
- Tapestry needle
- Stitch marker
- Scissors
- Polyester stuffing
- Pins
- Black yarn for embroidery
- Pink yarn for the nose
- White or cream yarn for whiskers
Crochet Techniques That Make the Project Easier
You don’t need dozens of advanced techniques to make a character like this.
Being comfortable with a few basic skills is much more important.
Single Crochet
Single crochet creates the dense fabric normally associated with amigurumi.
Keep your tension consistent throughout each piece. If your tension suddenly becomes loose, the shape can change noticeably.
Magic Ring
A magic ring is useful for starting many rounded amigurumi pieces without leaving a large hole in the center.
If you struggle with the magic ring, practice it separately before beginning the main project.
Increases
Increasing adds stitches and makes the crocheted shape wider.
This is especially important when building rounded parts such as the head and body.
Decreases
Decreases gradually make the piece narrower.
When closing stuffed pieces, even decreases help maintain a smooth shape.
Working in Continuous Rounds
Many amigurumi patterns are worked continuously rather than joining every round.
A stitch marker at the beginning of each round can save you from losing your place.
Building the Garfield-Inspired Shape
The easiest way to approach a character amigurumi is to think of it as a collection of simple shapes.
The head is the largest visual element. The body sits underneath it, while the legs and paws create the seated position.
The ears provide the recognizable cat silhouette, and the tail balances the character from behind.
You can think about the construction in this order:
- Head
- Body
- Ears
- Arms
- Legs and paws
- Tail
- Muzzle/chest details
- Facial features
- Final assembly
The exact number of rounds and stitches should come from the specific pattern you are following rather than being guessed, especially when accurate proportions matter.
Getting the Face Right
This is the part where patience really pays off.
With character amigurumi, you can crochet every piece correctly and still end up with a completely different-looking character if the facial features are positioned incorrectly.
Garfield’s expression depends heavily on the relationship between his eyes and eyebrows.
The Eyes
The eyes are intentionally sleepy and partially covered by the upper facial area.
Don’t position them too high. Doing so can make the character look surprised instead of grumpy.
The Eyebrows
The dark embroidered eyebrows are one of the strongest expression cues.
They should angle downward toward the center of the face to create the familiar annoyed expression.
Take a photograph from the front before permanently stitching them.
Your phone camera can actually be useful here because it lets you see the face from a different perspective.
The Nose
The small pink nose sits between the eyes and mouth.
Keep it centered.
Even a slight shift can make the face appear crooked.
The Mouth
The mouth doesn’t need to be large.
A few carefully placed embroidered lines can create the characteristic grumpy expression.
The Whiskers
White yarn or embroidery thread can be used for the whiskers.
Try to keep both sides reasonably balanced, but don’t worry if they’re not mathematically identical. Handmade crochet naturally has small variations, and those little imperfections can add character.
How to Keep Your Amigurumi Proportions Consistent
One of the biggest challenges with stuffed crochet characters is maintaining the intended proportions.
The head should feel large compared with the body, but it shouldn’t be so heavy that the finished character constantly falls forward.
Before final assembly, place the pieces together without sewing them.
Look at the character from:
- Front
- Side
- Three-quarter angle
- Slightly above
This gives you a much better idea of whether the pieces are sitting correctly.
Compare the Ears
Place both ears beside each other.
Check that:
- They are similar in size.
- They have similar shaping.
- They sit at similar heights.
- They create a balanced silhouette.
Check the Paws
The paws should sit naturally beneath the body.
If one is noticeably farther forward than the other, the finished character may look unbalanced.
Position the Tail Last
The striped tail is an important visual feature, but its final position can depend on how the body sits.
Pin it into place first.
Once you’re happy with the angle, sew it securely.
Stuffing Tips for a Smooth Finish
Stuffing seems simple, but it can make or break the final shape.
Don’t Overstuff
If you push too much fiberfill into the head, the crochet stitches can stretch apart.
That can make the surface look uneven and may expose the stuffing.
Instead, add small amounts at a time.
Shape as You Go
After adding some stuffing, gently massage the piece with your fingers.
This helps distribute the filling evenly.
Check the Silhouette
Hold the piece at eye level and look at the outline.
You’re looking for a smooth, rounded shape without obvious dents.
If you find a soft area, add a small amount of stuffing rather than packing the entire piece more tightly.
A Simple Way to Make Assembly Easier
Assembly is often the most time-consuming part of an amigurumi project.
Rather than immediately sewing everything together, use pins first.
Start with the major components:
- Position the head.
- Pin the ears.
- Position the arms.
- Place the legs.
- Position the tail.
- Check the overall silhouette.
- Adjust anything that looks uneven.
- Sew the pieces securely.
This approach is much easier than removing a piece after you’ve already sewn it tightly.
Common Mistakes to Avoid
Mistake 1: Using a Hook That Is Too Large
A large hook can create loose stitches.
Fix: Use a smaller hook suitable for compact amigurumi fabric.
Mistake 2: Inconsistent Tension
Changing tension between pieces can result in different-sized ears, paws, or legs.
Fix: Try to maintain the same tension throughout the project.
Mistake 3: Stuffing Too Much
Overstuffing can stretch the fabric.
Fix: Add stuffing gradually and shape the piece as you work.
Mistake 4: Rushing the Face
The facial expression is extremely important for this character.
Fix: Temporarily position the eyes, eyebrows, nose, and mouth before securing them.
Mistake 5: Skipping Stitch Counts
Losing or adding a stitch can gradually change the shape.
Fix: Use a stitch marker and count your stitches regularly.
Mistake 6: Sewing Pieces Without Checking the Pose
Once sewn, moving a piece can be difficult.
Fix: Pin everything first and inspect the finished silhouette.
Choosing the Right Yarn Colors
The orange yarn is the most important color choice because it covers most of the character.
Look for a warm orange rather than an extremely bright neon shade if you want the finished piece to have the softer handmade appearance shown in the reference.
Cream works nicely for the chest and muzzle because it creates enough contrast without looking stark.
For the darker stripes, a deep brown works particularly well with warm orange.
A small amount of pink for the nose adds just enough contrast to make the face stand out.
If you’re creating your own fan-made interpretation, you can also experiment with slightly different shades while keeping the same overall color relationship.
How to Make Your Crochet Character Look More Professional
You don’t need expensive equipment or complicated techniques.
Clean finishing goes a long way.
Before calling the project finished, inspect the character carefully.
Look for:
- Loose yarn ends
- Uneven seams
- Visible stuffing
- Crooked facial features
- Uneven ears
- Loose attachments
- Uneven tail stripes
- Unwanted gaps between stitches
Then gently shape the pieces with your fingers.
The final step is often the difference between a project that looks “almost finished” and one that looks polished
Where Can You Display a Crochet Garfield?
A finished character amigurumi doesn’t have to stay in your crochet basket.
Because of its compact size, it can work nicely as a decorative piece.
Try displaying it on:
A Bookshelf
Place it between books or beside other handmade pieces.
A Craft Room
A crochet character looks right at home beside yarn, hooks, and other finished projects.
A Desk
It can add a playful handmade touch to a workspace.
A Bedroom Shelf
A neutral shelf with a few handmade decorations can give the character a cozy setting.
A Handmade Gift Display
If you’re making the piece as a gift, pair it with a handmade card or simple wrapped present.
Is This a Good Amigurumi Project for Beginners?
It depends on your current crochet experience.
If you’ve already made basic amigurami shapes and understand single crochet, increases, decreases, stuffing, and sewing, the construction should feel manageable.
If this is your first-ever amigurumi project, the facial embroidery and multi-piece assembly may take a little extra patience.
A good approach is to practice the basic shapes first.
Make a small stuffed ball and practice:
- Keeping stitches tight
- Increasing evenly
- Decreasing evenly
- Adding stuffing
- Closing the opening neatly
Once you’re comfortable with those skills, larger character projects become much easier.
Can You Change the Design?
Yes, if you’re making a personal craft project, you can experiment with yarn colors, facial embroidery, accessories, and sizing.
However, if you’re publishing or selling a pattern or finished item based closely on a recognizable copyrighted character, it’s important to consider intellectual-property rights and the terms that apply in your country or marketplace.
For a blog, it is also better to clearly distinguish a fan-made character-inspired project from an officially licensed pattern.
This project should not be presented as an official Garfield product unless you have the appropriate rights or licensing.
How to Care for Crochet Amigurumi
Amigurumi is surprisingly durable when handled carefully.
For regular dust, use a soft brush or gently wipe the surface with a clean cloth.
If the yarn becomes stained, check the care instructions for the yarn before attempting to wash the entire piece.
Avoid aggressive scrubbing because embroidery, whiskers, and small sewn components can become loose.
Storage Tips
When storing your finished piece:
- Keep it somewhere dry.
- Avoid prolonged direct sunlight.
- Don’t place heavy objects on top.
- Protect it from excessive moisture.
- Keep small decorative components securely attached.
- Use a clean storage container for long-term storage.
Good storage helps preserve the color and shape of your handmade work.
Frequently Asked Questions
What yarn is best for Garfield amigurumi?
A smooth cotton or cotton-blend yarn is a practical choice because it creates clear, defined stitches and holds its shape well. Choose a yarn weight that works comfortably with your chosen amigurami hook.
Is crochet amigurumi difficult?
The basic techniques are fairly simple, but shaping, stuffing, facial placement, and assembly require practice. Beginners can learn them by starting with smaller projects.
Why are my amigurami stitches too loose?
Your hook may be too large for the yarn, or your tension may be too loose. Try a smaller hook and maintain even tension.
How do I stop stuffing from showing?
Use tighter stitches and avoid overstuffing. A smaller hook can also help create a denser fabric.
How do I get the grumpy facial expression right?
Facial placement is the key. Pay particular attention to the position and angle of the eyes and embroidered eyebrows. Temporarily pinning features before sewing them permanently is very helpful.
Can I use embroidered eyes?
Yes. Embroidered facial features are an alternative to plastic safety eyes and can be especially useful for decorative pieces or projects where small plastic components aren’t appropriate.
Can I sell a Garfield-inspired crochet item?
That depends on the rights involved, the nature of your design, and the laws and marketplace rules that apply to you. Garfield is a protected character, so don’t assume that making a handmade version automatically gives you commercial rights.
How long does an amigurumi project take?
The time varies considerably depending on the pattern, size, yarn, crochet experience, and amount of embroidery and assembly involved. A first attempt will generally take longer than a later project.
What makes character amigurami different from regular crochet toys?
Character amigurami relies heavily on recognizable proportions and facial details. Small changes to the eyes, eyebrows, ears, or body shape can dramatically change the final appearance.
Final Thoughts
Making a Crochet Garfield Amigurumi is a great way to practice the parts of amigurami that really matter: clean shaping, consistent stitches, careful stuffing, and expressive facial details.
The body itself can be built from relatively simple crocheted shapes, but the personality comes from the finishing work. The sleepy eyes, angled eyebrows, pink nose, whiskers, cream belly, and striped tail all work together to create that instantly recognizable grumpy-cat feeling.
Take your time with the face, especially. If something doesn’t look quite right, don’t be afraid to reposition it before permanently sewing it down.
And remember that handmade crochet doesn’t have to look machine-perfect. Consistent stitches and secure construction matter, but small variations are also part of what makes a handmade amigurumi feel unique.
If you enjoyed this project, save this tutorial to Pinterest so you can come back to the color ideas, shaping tips, and finishing advice when you’re ready for your next character crochet project.