
Introduction: Why a Crocheted Jack-o’-Lantern Bag Is the Best Halloween Project This Year
Every October, crocheters start looking for a project that feels festive, finishes quickly, and actually gets used. A jack-o’-lantern pumpkin bag crochet project ticks every one of those boxes. It is a sturdy, bright orange tote shaped like a plump pumpkin, finished with a glowing black jack-o’-lantern face, a leafy green stem, and a long handle that is perfect for little hands.
Unlike a plastic trick-or-treat bucket that cracks after two seasons, a crocheted pumpkin bag can be washed, stored, and pulled out again every Halloween. It also doubles as fall décor when it is not collecting candy. Hang it on a door handle, set it on the porch steps beside a lantern, or rest it on a rustic table with a few real pumpkins, and it instantly looks like part of the display.
In this guide, you will find everything you need to plan your own jack-o’-lantern pumpkin bag: the materials, the construction approach, how to shape the pumpkin ribs, how to add the face and stem, and creative ways to style and use the finished bag. Whether you are a confident intermediate crocheter or a beginner ready to stretch your skills, you will walk away with a clear plan and plenty of inspiration.
Why Crochet a Jack-o’-Lantern Pumpkin Bag?
There are plenty of Halloween crochet ideas out there, from amigurumi ghosts to spooky garlands. So why does the pumpkin bag stand out? Here are the reasons crafters keep coming back to it.
It is practical, not just decorative
Most holiday crochet is meant to sit on a shelf. A pumpkin bag is a real, working item. Children can carry it while trick-or-treating, and adults can use it as a party candy bowl or a gift bag. Because crochet fabric is naturally stretchy and strong, the bag holds a surprising amount of candy without sagging.
It makes a thoughtful handmade gift
A bag filled with sweets is a gift that works for nieces, nephews, grandchildren, neighbors, and classroom friends. Handmade items feel personal, and parents love a keepsake they can bring out year after year.
It is a great skill-builder
The project teaches shaping, working in the round, creating a handle, and attaching appliqué details. None of those skills is difficult on its own, but together they make you a more confident maker.
It photographs beautifully
Bright orange yarn against autumn leaves, pumpkins, and warm candlelight is hard to beat. If you share your crochet on a blog, Pinterest, Instagram, or Etsy, this project is naturally eye-catching and easy to style.
What Makes This Design Work
Before picking up a hook, it helps to understand what makes the jack-o’-lantern bag in the photos so appealing. Looking closely, you can spot a handful of design choices that give it a polished, professional finish.
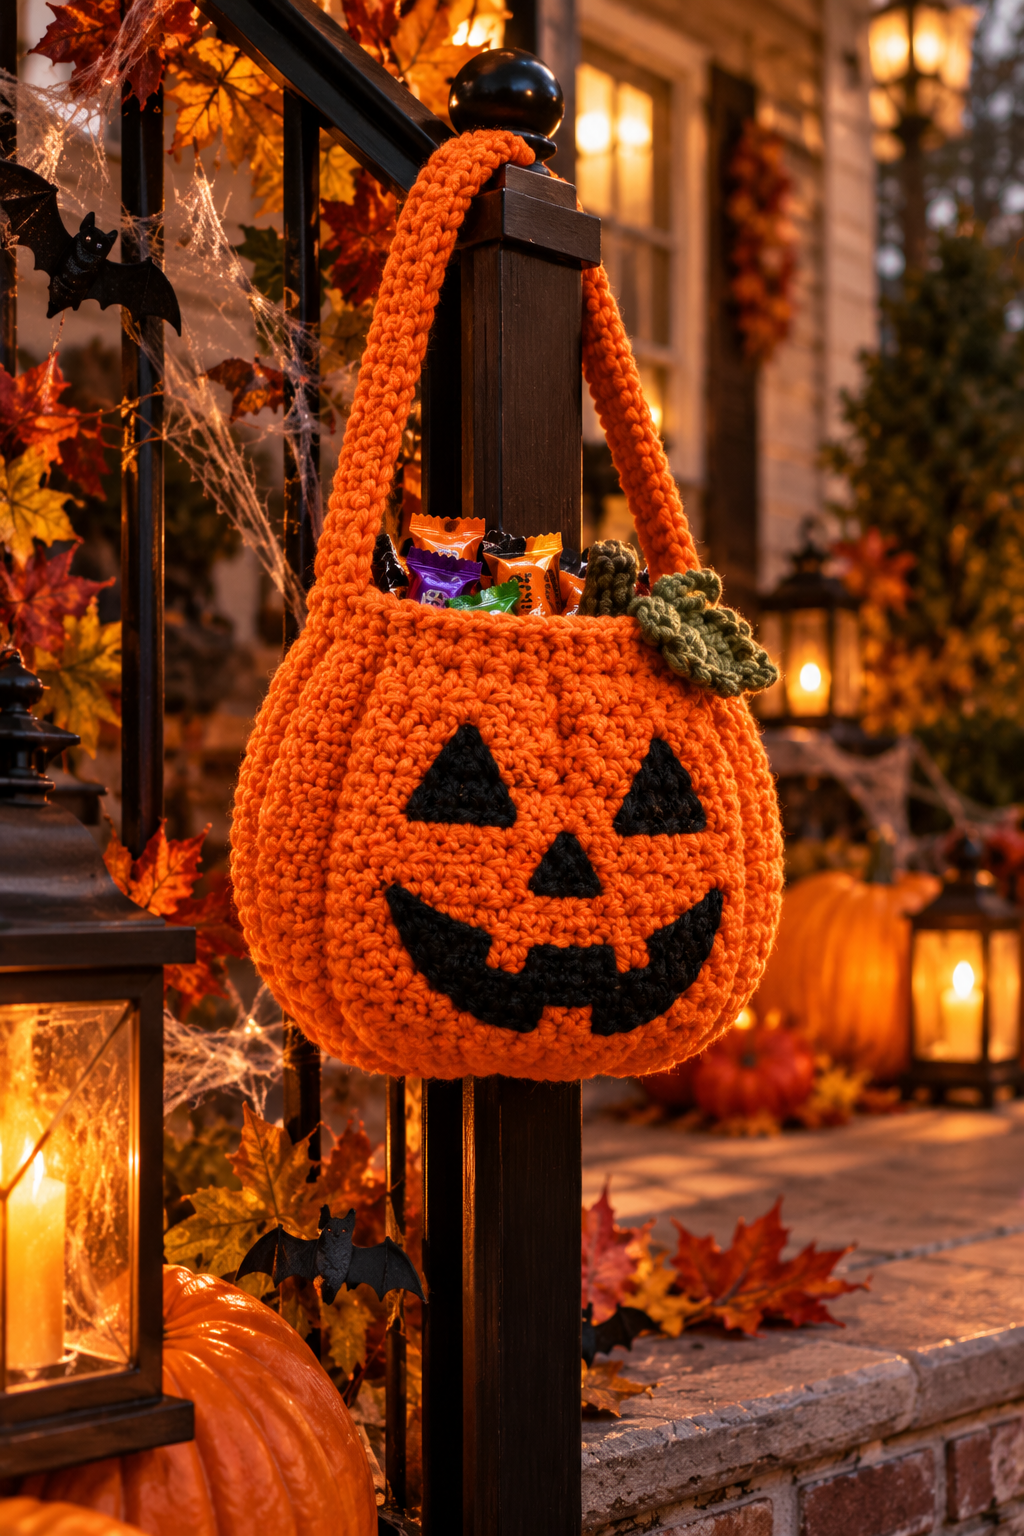
A rounded, plump body. The bag is wider in the middle than at the top, mimicking a real pumpkin. The slightly gathered opening keeps candy from spilling out.
Subtle vertical ribs. Faint curved lines run down the sides of the body, which gives the bag a true pumpkin shape instead of a plain orange ball.
A dense, textured stitch. The fabric looks thick and cushy with a pebbly texture. That density matters because it helps the bag keep its shape when it is full.
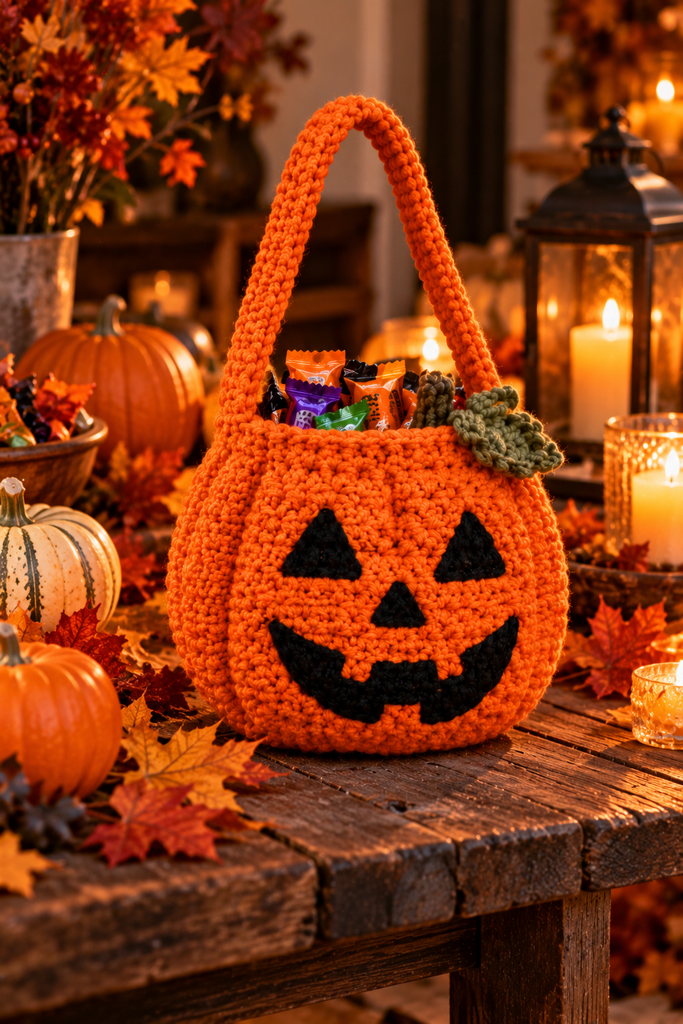
A bold, simple face. Two triangle eyes, a small triangle nose, and a wide curved smile with a couple of little teeth. The shapes are simple on purpose so they read clearly from a distance.
Contrast colors. Deep black features against bright orange create instant jack-o’-lantern recognition.
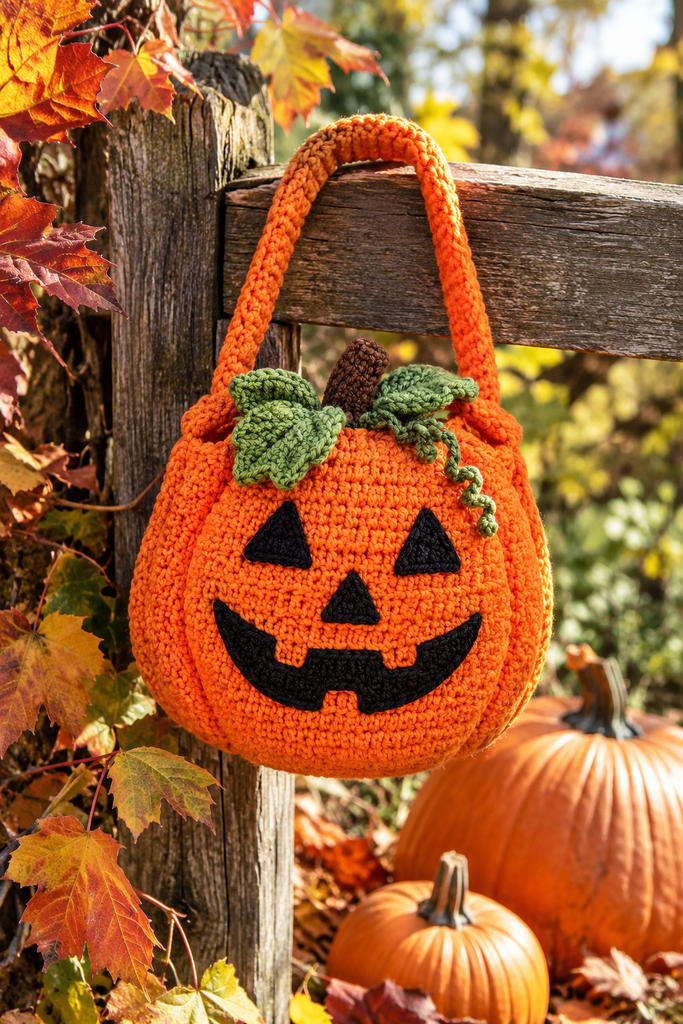
Greenery for personality. An olive or moss green leaf at the rim, plus a stem, makes the bag feel like a real pumpkin. In one version, a brown stem and curling vine add even more charm.
A long, sturdy handle. The handle is firm and rounded, tall enough to hang from a door handle or fence rail but comfortable to hold.
Materials You Will Need
Exact quantities depend on the size you want and the yarn you choose, but this list will get you started.
Yarn
- Orange yarn for the body and handle. Choose a bright, true orange. A worsted weight (medium, category 4) cotton or acrylic blend works well. Cotton gives more structure; acrylic is soft and budget friendly. If you want a bulkier, cushier look like the bag in the photos, hold two strands together or choose a chunky yarn.
- Black yarn for the face. A small amount is all you need. Match the weight of your orange yarn so the pieces sit flat when sewn on.
- Green yarn for the leaves and vine. Olive or moss green looks natural. Bright green can look cartoonish.
- Brown yarn for the stem (optional). If you prefer a classic woody stem, brown works beautifully. You can also crochet the stem in green or olive.
Tools and notions
- Crochet hook. Use a hook smaller than the yarn label suggests. A tighter fabric makes a sturdier bag. If your yarn recommends a 5 mm hook, try 4 mm or 4.5 mm.
- Stitch markers. Essential for working in the round.
- Yarn needle. For weaving in ends and sewing on the face.
- Scissors.
- Optional lining fabric or interfacing. A lining makes the bag even stronger and prevents small candies from poking through stitches.
- Optional stuffing or batting strips. A little stuffing inside the handle gives it a firm, rounded look.
Yarn buying tip
Always buy all your orange yarn from the same dye lot. Orange is a color where small shade differences are very noticeable, and a mismatch halfway through the body would be distracting.
Choosing the Right Stitch for a Sturdy Pumpkin Bag
The texture in the finished bag looks like a tight, bumpy stitch, similar to a moss stitch, a linen stitch, or a half double crochet variation. You have several good options.
- Single crochet. The simplest choice. It creates a dense, firm fabric that is great for beginners.
- Half double crochet in the third loop. This creates a ribbed, textured look that works well for the pumpkin’s vertical lines.
- Moss (linen) stitch. A classic for bags. It is thick, slightly woven looking, and holds its shape.
- Waistcoat or knit-look stitch. If you want a smoother surface, this stitch resembles knitting.
Whichever you choose, aim for a firm gauge. Loose crochet will stretch and gap, and a loaded candy bag is heavy.
How to Construct a Crochet Pumpkin Bag: The Big Picture
There are many ways to build a pumpkin bag, and designers approach it differently. Here is a clear, beginner-friendly overview so you understand the process before you begin. Think of it as a roadmap rather than a stitch-by-stitch pattern.
Step 1: Make the base
Start with a magic ring or a chain and work in the round, increasing evenly to create a flat circle. This circle becomes the bottom of your bag. Keep going until the circle reaches the width you want. For a trick-or-treat bag, a base roughly the size of a dinner plate is a good target, but you can go smaller for a child’s bag.
Step 2: Build the body
Once the base is the right size, stop increasing and work stitches evenly around, going up the sides. For a rounded pumpkin shape, continue with a few more gentle increase rounds so the belly bulges outward, then begin decreasing evenly so the bag curves back in toward the opening. This creates the classic pumpkin silhouette.
Place a stitch marker at the start of each round so you never lose your place.
Step 3: Create the pumpkin ribs
The ribs are what turn a round bag into a believable pumpkin. There are two popular ways to do it.
- Post stitches. Work front post or back post stitches in evenly spaced columns up the body. These create raised or recessed vertical lines.
- Sewn ribs. After finishing the body, thread a length of yarn through a large needle and sew vertical lines from the top to the bottom, pulling gently so the fabric dimples inward. This method is the easiest and lets you adjust the depth of each rib.
Space the ribs evenly. Six to eight ribs around the bag is typical, though the face usually sits across the front two or three sections.
Step 4: Shape the opening
Work a few rounds without increasing so the top of the bag forms a short, straight collar. This keeps the candy contained. Finish with a round of slip stitches or single crochet for a neat edge.
Step 5: Make the handle
The handle is a long, narrow tube or strip. You can:
- Chain the length you want, then work single crochet rows back and forth, folding and seaming the strip into a tube.
- Crochet a spiral tube in the round over a few rounds, stuffing lightly as you go.
- Double the strip and sew it closed for a flat, strong strap.
Attach the handle at both sides of the opening, sewing it on securely with several passes of yarn. This is the part of the bag that takes the most strain, so reinforce it. Stitch through the handle and several rows of the body, and go around more than once.
Crocheting the Jack-o’-Lantern Face
The face is what transforms an orange bag into a jack-o’-lantern, so take your time with it. The good news is that every feature is a simple shape.
The triangle eyes and nose
Crochet small triangles by starting with a short chain and working rows that decrease at each end, or by starting with a few stitches and increasing for an upside-down triangle. Make the two eyes identical, and make the nose a smaller version of the same shape. Slightly rounded corners look friendlier and more charming than very sharp points.
The mouth
The mouth is a curved band that is thicker in the middle and tapers toward the ends. Work it in rows, adding or removing a stitch at the edges to create the curve. For a classic jack-o’-lantern grin, add one or two small rectangular teeth by leaving gaps along the top edge of the mouth, or by crocheting a notch.
Attaching the face
Pin every piece to the bag before sewing. Step back and look at the face from a distance; this is the best way to catch uneven eyes or a crooked smile. Move the pieces until the expression looks right. A mouth that sits a little higher gives a cheerful look, while one that slopes downward looks spooky.
Sew each piece on with a whipstitch around the edge, using black yarn so your stitches disappear. Keep the tension even so the pieces lie flat and do not pucker the bag fabric.
Tip: Want a no-sew option? Work the face directly into the bag using surface crochet or tapestry crochet. It takes planning, but it is very secure, and many crocheters prefer the clean finish.
Adding the Stem, Leaves, and Curly Vine
The finishing touches make the bag look handmade and special rather than generic.
The stem
Crochet a short, thick tube in brown or green, working in the round with a few decreases at the top for a slightly tapered end. Stuff it lightly and sew it to the top center of the bag, or tuck it near the rim and secure it with a few firm stitches.
The leaves
Leaves are usually worked from a short chain with stitches of increasing height, such as single crochet, half double crochet, and double crochet, to form a pointed, ruffled shape. Make two or three leaves in slightly different sizes so they look natural. Sew them at the base of the stem or along the opening of the bag.
The curly vine
A curly tendril is a delightful detail. Chain a length and work two or three stitches into each chain, which makes the strand twist into a spiral on its own. Attach one end near the leaves and let the curl hang down the side of the bag.
Placement matters
In the photos, the leaf cluster sits at the rim, slightly off-center. This asymmetry feels organic and relaxed. A perfectly centered stem looks more formal, so choose whichever matches the style you want.
Styling Ideas: How to Display Your Pumpkin Bag
Once your bag is finished, the fun begins. Here are some ways to put it to work and show it off.
On the porch
Set the bag on a stone step surrounded by lanterns, mums, and real pumpkins. The warm candlelight makes the orange yarn glow. Fill it with wrapped candy for trick-or-treaters, or keep it as a welcoming decoration.
On the front door
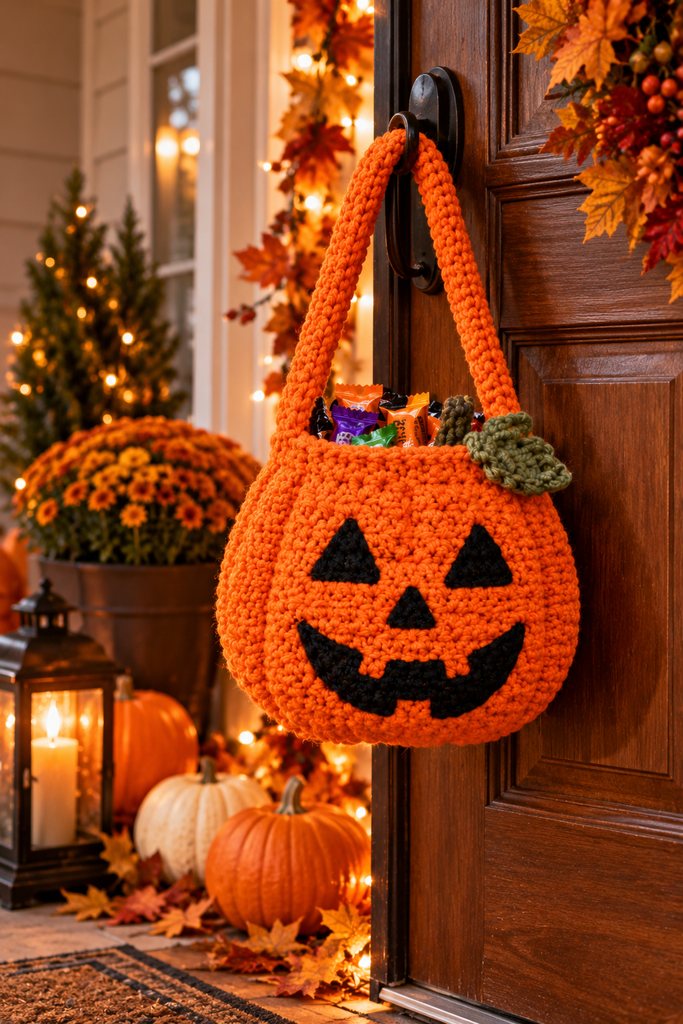
Hang the bag from a door handle or knocker. The long loop handle makes this effortless, and the bag stays visible to guests. Add string lights or a fall wreath nearby for a cozy entry. Just be sure to bring it in if you expect rain, and never leave unattended candy outside for long.
On a party table
Use the bag as a candy station at a Halloween party. Place it on a rustic table with gourds, leaves, and flameless candles. Guests can grab a treat, and the bag doubles as a centerpiece.
As a trick-or-treat bag
This is the original purpose. A child can carry the bag by its handle or loop it over an arm. Choose a handle length that suits the age of the child. Shorter handles keep the bag from dragging on the ground.
As a classroom or office gift
Fill a small bag with treats and give it to a teacher, coworker, or friend. It is far more memorable than a store-bought card.
For photos
If you are taking pictures for a blog or shop, golden hour light and autumn props make the colors pop. A wooden fence, a stone step, or a rustic table all work beautifully as backdrops.

Tips for a Professional-Looking Finish
These small habits make a big difference in how your bag turns out.
- Swatch first. Make a small square and check that it feels firm. A swatch saves hours of frogging later.
- Keep your tension consistent. Uneven tension shows up clearly in a solid-color bag. Try to hold your yarn the same way throughout.
- Hide your joins. Change colors or add new balls at the back of the work or inside the bag.
- Block lightly. A gentle steam or damp block helps the shape settle and evens out stitches. If you use acrylic, steam carefully and do not let the iron touch the yarn.
- Reinforce the handle. Sew it on firmly and add extra rows of stitches at the attachment points.
- Test the capacity. Fill the bag with a few handfuls of candy and see how it holds. If it sags or stretches, add a lining.
- Weave in every end. Loose tails can come undone in a bag that gets handled often.
Common Mistakes to Avoid
- Using a hook that is too large. This creates holes that candy can slip through and a floppy bag.
- Skipping the stitch markers. In a round project, a lost marker can cause a crooked body.
- Making the handle too thin. A narrow strip will stretch under weight. Make it thick or stuff it.
- Placing the face too low. A face that sits near the bottom looks odd. Keep it centered across the widest part of the bag.
- Sewing the face on loosely. Loose stitches create gaps and make the appliqué curl up at the edges.
- Using very fuzzy yarn for the face. Fuzzy yarn blurs the edges of the shapes. Smooth yarn gives crisp lines.
Easy Variations to Try
Once you master the basic jack-o’-lantern bag, you can personalize it in endless ways.
- Mini bag. Use fingering or sport weight yarn and a small hook to make a tiny treat pouch.
- Different faces. Try a silly face, a surprised face, or a spooky face with jagged teeth.
- Other pumpkin colors. White, pale blue, or pink pumpkins are trendy and unique.
- Glow-in-the-dark face. Use glow-in-the-dark yarn for the eyes and mouth so the pumpkin shines after sunset.
- Lined and zippered. Add a fabric lining and a zipper to make a pumpkin purse for adults.
- Bat or ghost bag. Use the same body shape and swap the face for a ghost or bat design.
- Add a name. Embroider or crochet a child’s initial on the back so every bag is personal.
Can You Sell Finished Pumpkin Bags?
Many crafters sell their work at fall markets and online shops, and a jack-o’-lantern pumpkin bag is a popular seasonal item. If you sell, remember a few practical points.
- Check the pattern license. If you are using a designer’s pattern, read the terms. Some allow selling finished items with credit, others do not.
- Price for your time. A dense, bulky bag takes hours to make. Factor in yarn, labor, and packaging.
- Take excellent photos. Warm, autumn-themed photos, like the ones in this article, attract buyers.
- Offer care instructions. Include a small card saying how to wash the bag.
Safety and Care Notes
A handmade bag for children deserves a little extra attention.
- Secure every attachment. Leaves, stems, and vines should be sewn firmly so small parts cannot be pulled off. For very young children, skip loose vine details or sew them down flat.
- Avoid flammable decorations. Keep the bag away from open flames. Use flameless candles in your display.
- Wash gently. Hand wash in cool water with mild soap, press out the water, and lay flat to dry. Check your yarn label for specific care instructions.
- Store it flat or stuffed. Fill the bag with tissue paper in the off-season so it keeps its round shape.
Frequently Asked Questions
How long does it take to crochet a jack-o’-lantern pumpkin bag?
It depends on your speed and the yarn weight. Many crocheters finish a bag in a few evenings or over a weekend. Bulky yarn works up faster, while thinner yarn with a tight gauge takes longer.
Is this project good for beginners?
It is suitable for confident beginners who know single crochet, increasing, decreasing, and working in the round. The face pieces and leaves are small, so they are good practice for new techniques.
What yarn is best for a crochet pumpkin bag?
Cotton or a cotton blend gives the most structure. Acrylic is soft and affordable and comes in great oranges. Choose a smooth, non-fuzzy yarn so the stitch texture shows.
How do I keep the bag from stretching?
Use a smaller hook, a dense stitch, and consider adding a fabric lining. Reinforcing the handle also helps.
How much candy can the bag hold?
A medium bag holds a few handfuls of wrapped candy comfortably. The exact amount depends on your size and stitch density.
Can I wash a crocheted pumpkin bag?
Yes. Hand wash gently in cool water, reshape, and let it dry flat. Avoid hot water and the dryer, which can distort the shape.
Can I use this idea for other holidays?
Absolutely. Change the colors and face to make a snowman bag, a Christmas treat bag, or an Easter basket using the same basic construction.
Final Thoughts
A crocheted jack-o’-lantern pumpkin bag is one of those projects that delivers more than you expect. It is cheerful, useful, beautiful in photos, and meaningful as a gift or family keepsake. From the plump orange body and ribbed sides to the bold black face and leafy stem, every detail adds up to something that feels like autumn in yarn form.
If you are planning your Halloween crochet list, make this one a priority. Pick your favorite orange yarn, choose a sturdy stitch, and start with the base. By the time the leaves are falling and the lanterns are lit, you will have a handmade treat bag ready for the porch, the party, or the neighborhood candy run.
Have you made a pumpkin bag of your own, or do you have a favorite face design? Share your thoughts in the comments below, and save this idea to your Halloween crochet board so you can find it again next season. Happy crocheting, and happy Halloween!
5 thoughts on “Jack-o’-Lantern Pumpkin Bag Crochet Halloween Idea”