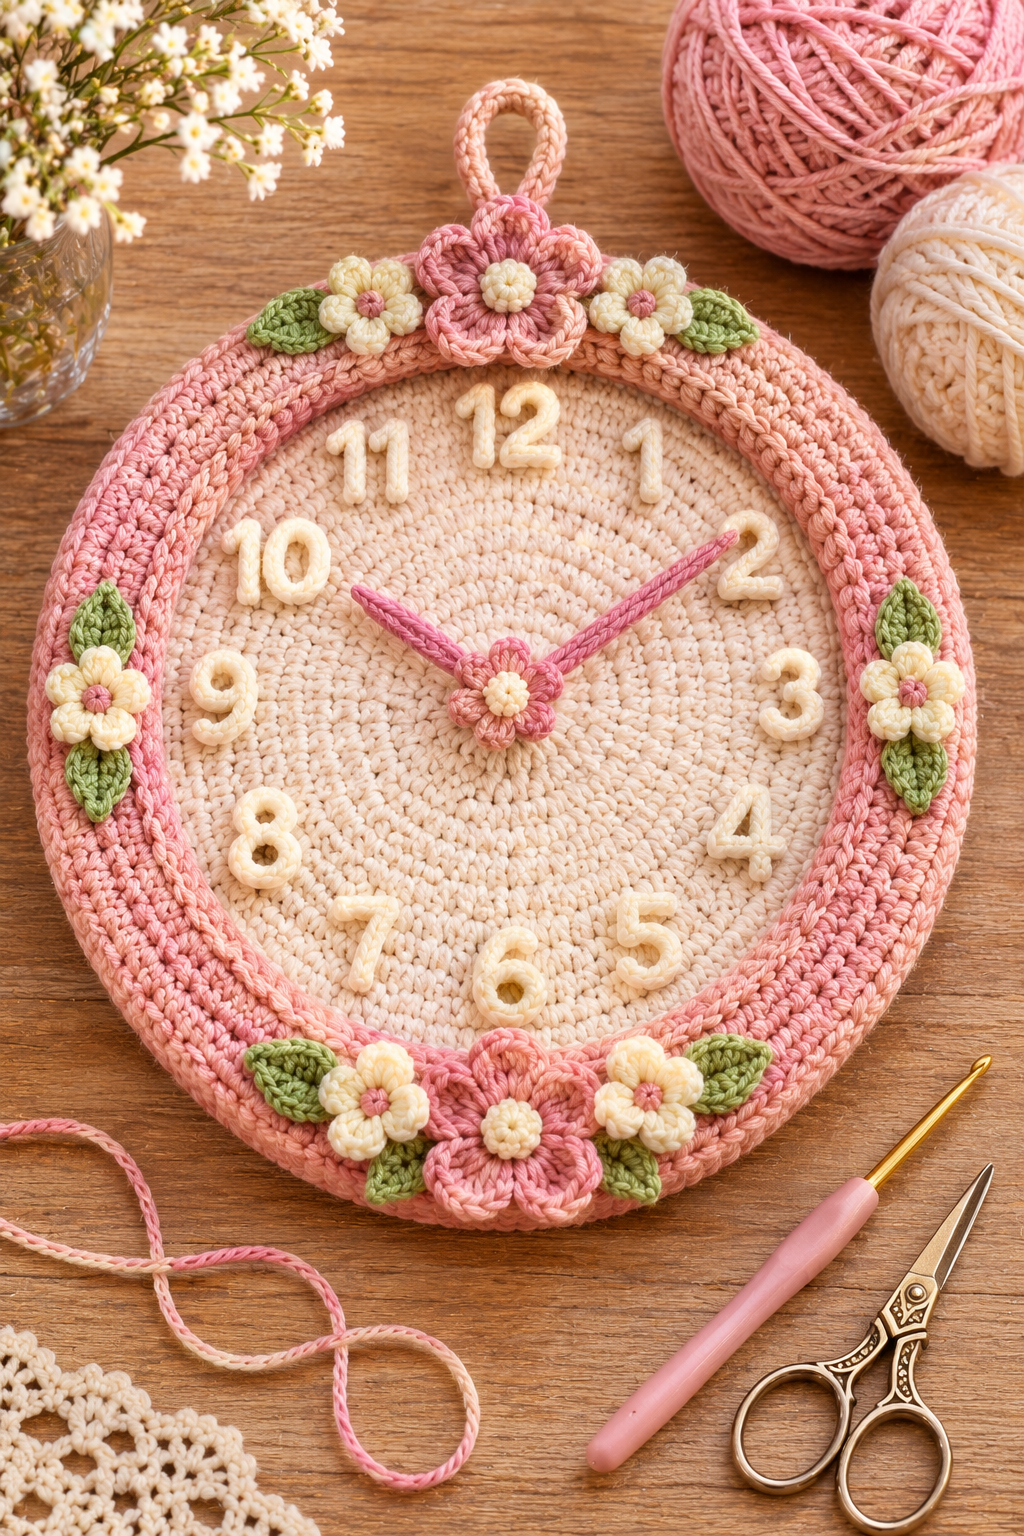
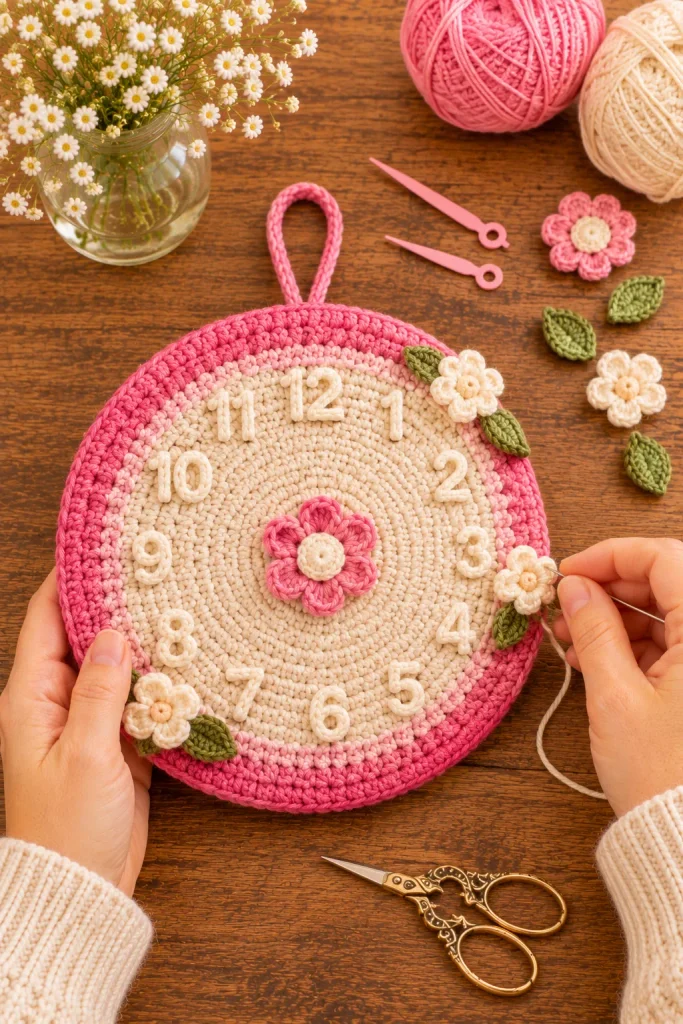
Some handmade projects look so sweet that you want to hang them up the moment they are done. This DIY pink crochet wall clock is exactly that kind of project. It has a creamy textured face, a thick rim in shades of rose and peach, little crochet flowers with green leaves tucked around the edge and soft puffy numbers that look like they were made from tiny ropes of cream yarn. Even the clock hands are crocheted, and they come together in the middle with a pretty pink flower.
When I first imagined this clock, I wanted something that felt gentle and nostalgic, the kind of decoration you might see on the wall of a cozy cottage kitchen or in a baby girl’s nursery. I wanted the colors to feel like a bowl of strawberries and cream, and I wanted every part of it to be crocheted so the whole piece felt warm and soft. The result is a piece of handmade room decor that is a conversation starter, a useful clock and a lovely way to use up leftover cotton yarn.
In this tutorial I will walk you through every step. We will start with materials and measurements, then move through the cream clock face, the ombre rim, the numbers, the hands, the flowers and leaves and finally the assembly. I will also share color ideas, decorating tips, troubleshooting advice and answers to common questions. You do not need to be an expert, but a little comfort with basic stitches will help you enjoy the process.
Why You Will Love This Crochet Wall Clock
The first reason to love this project is the way it combines function and beauty. A clock is something people look at many times a day, so it deserves to be pretty. Instead of a plain plastic one, you get to hang something that shows your handiwork and personality. Each time you check the time, you also get a little reminder of the afternoons you spent stitching.
The second reason is that the project is built from simple shapes. A flat circle forms the face, a wider ring forms the rim, small flowers and leaves are made from tiny petals and the numbers are simply chains worked into soft cords. There are no tricky color changes or complicated shaping. If you can work single crochet in a spiral and make a basic chain, you can finish this clock.
The third reason is that it is a fantastic stash buster. You only need a few colors in small amounts, and you can mix leftover pinks, creams and greens from other projects. If you own a ball of variegated pink yarn that shifts between rose and peach, it will give you the lovely ombre look you can see on the rim of my clock.
Finally, this project is a wonderful gift. A handmade clock is personal and practical, and it suits so many rooms. Think of a baby shower present, a housewarming gift, a birthday surprise for a friend who loves crochet or a thoughtful addition to a craft fair booth. Whoever receives it will treasure it.
Materials You Will Need
Let us gather everything before we start. Having your supplies ready keeps the process calm and enjoyable.
For yarn, I used a smooth DK weight cotton, which gives clean and defined stitches and holds its shape beautifully. You will need cream for the clock face and the numbers, a variegated pink and peach for the rim, a solid dusty pink for the hands, large flower and flower centers, a soft cream for the small flowers, a leafy olive green for the leaves and a little extra cream for the flower centers. If you do not have variegated yarn, you can create an ombre effect by changing colors every couple of rounds between rose pink and light peach.
For your hook, I recommend a 3 millimeter hook. In my photo the hook has a soft pink handle with a golden tip, which feels lovely in the hand. Because we want firm fabric that will not stretch over the backing board, crochet slightly tighter than you normally would. If your stitches feel loose, drop to a 2.75 millimeter hook.
You will also need a round backing board. I use sturdy cardboard or a thin foam board cut into a circle about 9 inches across, which is roughly 23 centimeters. A cake board works nicely too. Choose something rigid but light so the clock does not become heavy on the wall.
For the clock mechanism, buy a small quartz clock movement kit with a battery, which usually comes with a hanging bracket, a shaft, a nut and a set of plastic hands. Check that the shaft is long enough to pass through your backing board and your crochet layers. Many kits offer a longer shaft for thicker materials.
Other supplies include a yarn needle, polyester fiberfill or thin batting for the optional padding, a small piece of felt for covering the back, strong fabric glue, stitch markers, straight pins, a pair of sharp scissors and a few lengths of thin florist wire if you want to stiffen the hands. A small sharp craft knife or a skewer will help you make the hole for the clock shaft.
Understanding the Structure of the Clock
Before we begin, it helps to picture how everything fits together. The clock has a flat backing board at the bottom, which provides structure. On top of the board lies a crocheted cream disc, which becomes the face. Around the disc runs a wide pink ring, which forms the rim and wraps over the edge of the backing board. The numbers are stitched onto the face, the flowers and leaves are stitched onto the rim and the hands are attached to the clock movement in the center. A small flower covers the center nut so that the mechanism stays hidden.
This approach has two big advantages. First, the board keeps the crochet flat and prevents it from drooping. Second, the clock movement can be installed neatly in the center, since the board is strong enough to hold it. If you prefer a purely decorative piece that does not tell the time, you can skip the mechanism and sew the hands directly onto the face with the center flower on top.
A Quick Note on Gauge and Size
This pattern is flexible because the pieces are sized to fit each other rather than a strict gauge. My cream face has 108 stitches in its final round, and the rim begins with 108 stitches so that the two pieces match perfectly. With my yarn and hook, the face measures about 6 inches across and the finished clock measures about 9 inches across.
If your tension is different, do not worry. Simply work the face until it measures the diameter you want, count the stitches in the final round and use that number as the starting count for your rim. As long as the starting rim count matches the face edge, everything will join beautifully. Always measure your disc against your backing board and make sure there is enough room for the rim to cover the edge.
Step One: Crocheting the Cream Clock Face
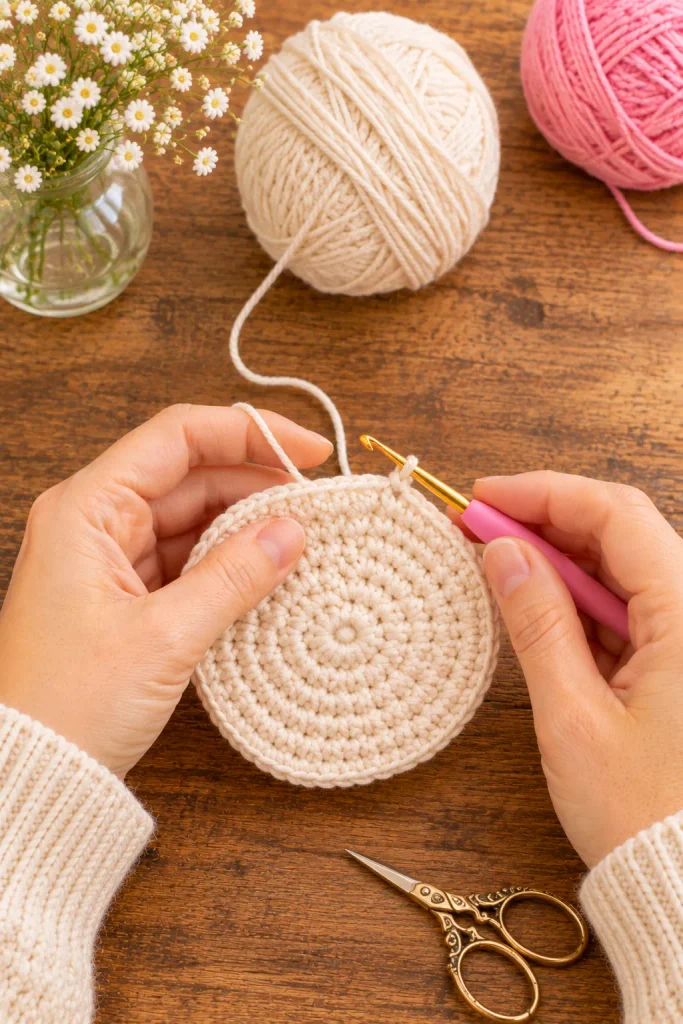
The clock face is a perfectly flat circle of cream single crochet, and it is the calmest part of the project. It is also the foundation, so take your time and keep your stitches even.
Begin with cream yarn and make a magic ring. Round 1: work six single crochet into the ring and pull it tight. For each following round, use this simple rule. In Round 2, increase in every stitch, which gives you twelve stitches. In Round 3, work one single crochet in the next stitch and then one increase, six times, giving you eighteen. In Round 4, work one single crochet in each of the next two stitches and then one increase, six times, giving you twenty four. Continue in this way, adding one more single crochet between each increase on every round, so that you always add six stitches per round.
Keep working until you finish Round 18, which has 108 stitches. Place a stitch marker in the first stitch of each round so that you do not lose track. After the last round, work a slip stitch into the next stitch, fasten off and leave a tail of about twelve inches for sewing.
Now lay your disc flat. If it ripples or cups, you may have missed an increase. Count the stitches in each round and fix any mistakes. If it is slightly bowl shaped, a gentle blocking with a damp cloth will flatten it. Press the disc under a book while it dries if needed.
One more tip for the center. Because the clock shaft will pass through the middle, make sure the first round has no tiny holes. Pull the magic ring tight and weave the starting tail into the stitches. We will make the hole for the mechanism later.
Step Two: Making the Pink Ombre Rim
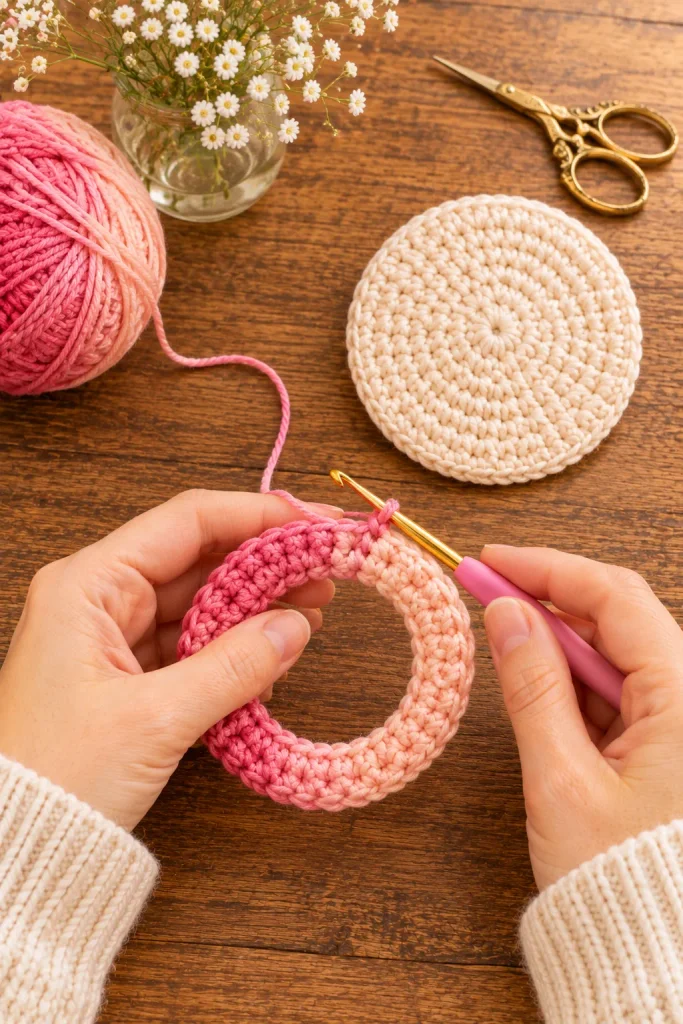
The rim is a wide ring of textured pink crochet that frames the face. This is where the clock gets its sweet color, so choose your yarn carefully. In my version, I used a variegated cotton that melts between rose and peach, and the color changes give the surface a soft watercolor look.
Start with a chain of 108 stitches and be careful not to twist it. Join with a slip stitch to the first chain to form a ring. Round 1: work one single crochet in each chain around, giving you 108 stitches. This round matches the edge of the face disc.
For Rounds 2 to 7, work one single crochet in each stitch while adding nine evenly spaced increases in each round. A simple way to space them is to work one increase every twelve stitches. Because the ring is flat, these increases make it widen as it grows outward, rather than curl into a tube. After Round 7, you will have 162 stitches, and the ring will be about one and a half inches wide.
For Round 8, work one half double crochet in each stitch around to create a plump, slightly raised edge. This last round forms the outer lip of the rim, and it gives the finished clock a rich, rounded border. Work a slip stitch to join, fasten off and leave a long tail.
If you want more texture, try working Rounds 3 and 5 in the back loops only. This creates ridges that look wonderful when the light catches them. The rim in my photo has this kind of ribbed texture, and it makes the border feel like a thick, cozy braid.
Step Three: Joining the Face and Rim
Now the two big pieces become one. Lay the rim on a flat surface with the right side facing up. Place the cream disc inside the ring so that the edge of the disc touches the inner edge of the rim. Because both pieces have 108 stitches at the join, they should match stitch for stitch.
Pin the pieces together at four points, then add pins between them until the pieces are held evenly. Thread your yarn needle with the tail from the disc and join the two pieces with a neat whip stitch, going under both loops of each stitch edge. Work all the way around, keeping your stitches small and even. If one piece seems bigger, ease it in gently and spread the extra along the full circle.
You could also join the pieces with a round of slip stitches worked from the front, which creates a decorative seam. If you choose this method, use cream or pink yarn depending on whether you prefer the seam to blend with the face or the rim.
When you are done, you will have one large crocheted circle. Lay it over the backing board and check the fit. The outer edge of the crochet should overlap the board by about half an inch all around, so that you can wrap it behind. Trim the board if necessary to get that perfect fit.
Step Four: Making the Crochet Numbers
The numbers are the cutest detail of the clock, and they are easier than they look. Each number is a soft cord made by working single crochet along a chain, which gives a rounded, puffy look. You can see how plump and neat they appear on the cream face in my photo.
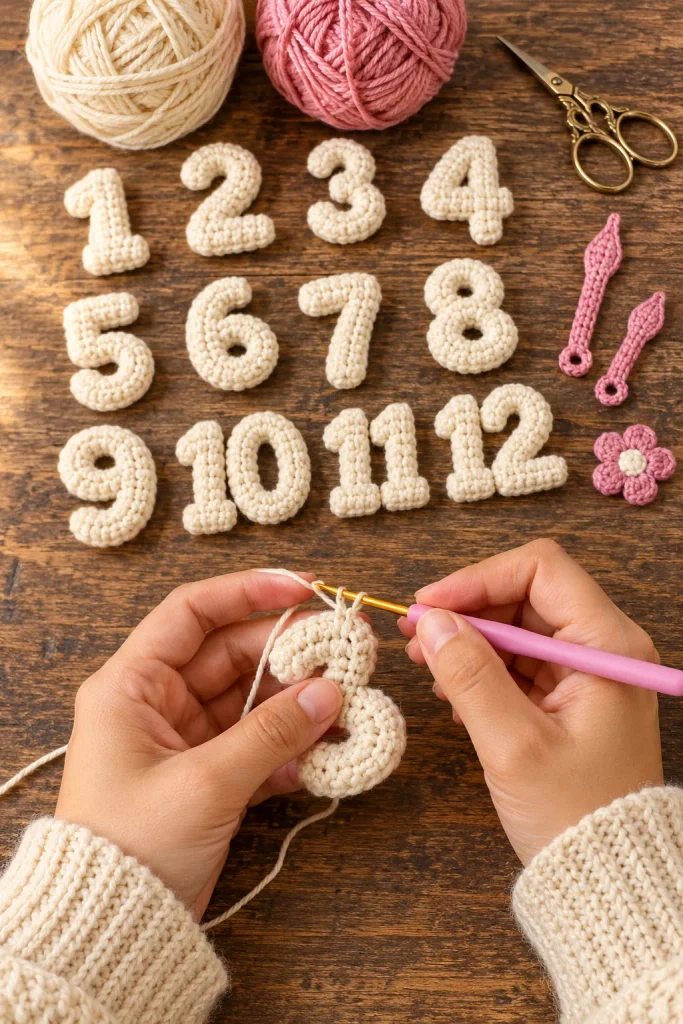
For each number, begin with cream yarn and chain between 8 and 12 stitches, depending on the shape. Numbers such as 1 and 7 need fewer chains, while rounded numbers such as 6, 8 and 9 need a few more. Starting in the second chain from the hook, work one single crochet into the back bump of each chain until you reach the end. This turns the chain into a firm cord. Fasten off and leave tails at both ends.
Now shape the cord into the number you need. For a 1, simply leave it straight and curl the top slightly. For a 2, curve the top into an arch, then bring the cord diagonally down and across the base. For a 3, make two stacked curves. For a 4, bend the cord into a corner and add a straight line. For 5, 6, 8 and 9, round the curves carefully and overlap the ends so they hide under the cord. For 7, make a horizontal line with a diagonal tail. Use pins to hold the shape, then sew the ends with the tails so the number keeps its form.
Numbers 10, 11 and 12 are made by crocheting two cords and sewing them side by side. For the 1 in these numbers, make a straight cord slightly shorter than the standalone 1 so that the pair looks balanced. Keep all your numbers about one inch tall, and try to chain the same length for numbers of the same type so they look consistent.
To give the numbers extra shape, you can spray them lightly with fabric stiffener or brush on a mixture of white glue and water. Let them dry on a flat surface. This step makes them hold their curves and prevents them from drooping on the face.
Step Five: Crocheting the Clock Hands
The hands are slender pink strips with pointed tips, and they match the flowers in the center. In my photo, the hour hand is shorter and the minute hand is longer, and both are set to a pleasant ten past ten, which is the classic position used in clock photos because it makes the face look like it is smiling.
Use dusty pink yarn. For the minute hand, chain 22. Starting in the second chain from the hook, work single crochet in the back bump of each chain to the end. At the last chain, work three single crochet to create the tip, then continue along the other side of the chain with one single crochet in each remaining stitch. Fasten off and leave a tail.
For the hour hand, chain 15 and follow the same method, giving a shorter hand. If you want the hands to look more dramatic, make them slightly wider by adding a second row of single crochet on each side. For a thick, chunky look, double the yarn.
To keep the hands straight, slide a piece of thin florist wire inside the cord as you crochet over it, or crochet around the plastic hands that came with your clock kit. If you choose the second method, work your single crochet tightly around the plastic hand so that it becomes completely covered. This gives you a strong hand that also fits perfectly onto the clock shaft.
If your clock is only for display, skip the mechanism and sew your hands directly to the face with a few stitches under the center flower. The effect looks identical, and you will not have to worry about battery changes.
Step Six: Making the Flowers and Leaves
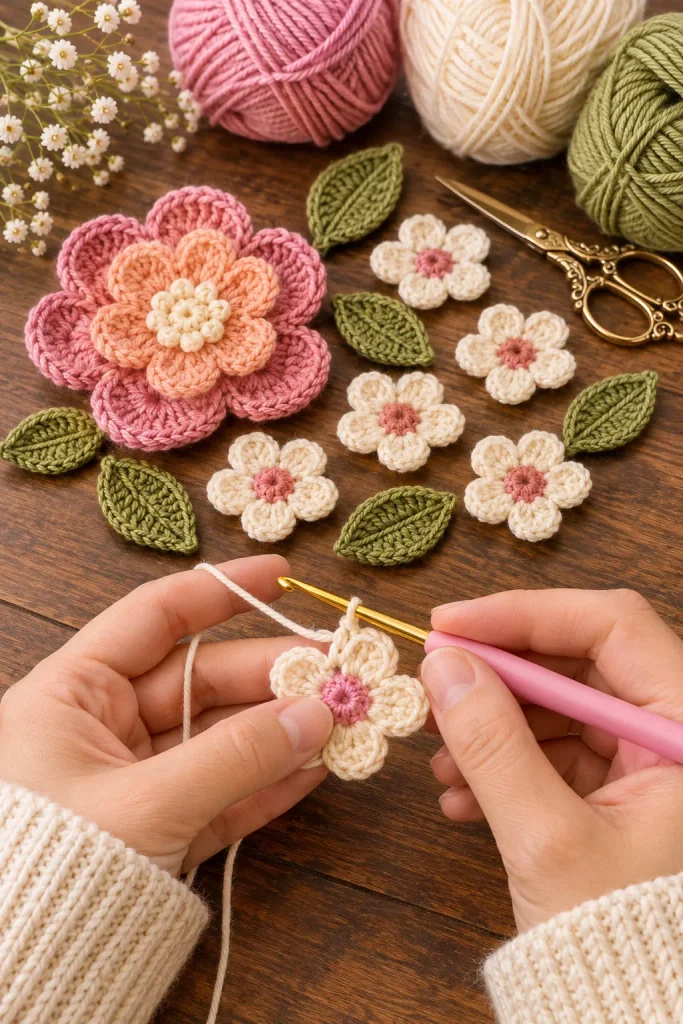
Now comes the playful part. The flowers and leaves are what turn this clock from a simple project into a piece of garden inspired decor. You will need one large pink flower for the top, one for the bottom, one small pink flower for the center, six small cream flowers with pink centers and about twelve green leaves.
For the large pink flowers, use the dusty pink or variegated yarn. Make a magic ring. Work this petal sequence five times into the ring: chain 2, work two double crochet, chain 2 and slip stitch into the ring. This forms five rounded petals. Pull the ring tight and join. For a fuller look, work a second round of larger petals behind the first by chaining 3 between the stitches of the first round and working a slip stitch, chain 3, three double crochet, chain 3 and slip stitch into each chain space. Fasten off and leave a tail.
For the flower center, use cream yarn. Make a magic ring and work six single crochet, then pull it closed. Work a second round of single crochet in each stitch around, stuff with a tiny bit of fiberfill and sew it into the middle of the flower. This gives you the soft, round center you see in my photo.
For the small cream flowers, work the same five petal sequence with cream yarn. For the center, use a tiny pink bobble made from a magic ring with five single crochet pulled tight, or simply embroider a pink French knot.
For the leaves, use olive green. Chain 8. Starting in the second chain from the hook, work one single crochet, one half double crochet, two double crochet, one half double crochet and one single crochet. In the last chain, work three single crochet to turn the point. Work down the other side of the chain with one single crochet, one half double crochet, two double crochet, one half double crochet and one single crochet. Join, fasten off and leave a tail.
Make about twelve leaves, since each flower cluster on the rim will have a leaf on each side. If you like the look of a fuller garland, make a few extra so you can adjust the placement as you sew.
Step Seven: Preparing the Backing and the Clock Mechanism
Before the final assembly, prepare the backing board. Use a pencil to mark the exact center of the board, then use a craft knife, a screw or a skewer to make a hole just large enough for the clock shaft. Test the fit by sliding the shaft through the hole. If the board is thick, you may need to enlarge the hole slightly so that the shaft sits flush.
If you want extra softness, glue a thin layer of batting to the front of the board. This gives the face a slightly puffy look and hides small bumps in the board. Let it dry fully.
Next, lay the joined crochet circle face down on a flat surface and place the board on top. Pull the outer edge of the rim over the board and pin it to the back. Using the long tail from the rim and your yarn needle, lace across the back from side to side like a drawstring bag, pulling each stitch gently so the crochet fits snugly around the board. Secure with a strong knot. If you have trouble keeping the crochet in place, add a bit of fabric glue under the edge.
Find the center of the crochet face and poke a hole through it, using a skewer or a knitting needle to gently spread the stitches rather than cutting them. Line the hole with the hole in the board. Slide the shaft of the clock movement through from the back, and tighten the nut at the front. Make sure the movement sits straight and that the hanging bracket points to the top of the clock.
Step Eight: Assembling the Clock
This is where everything comes together. Place the cream numbers around the face, starting with 12 at the top and 6 at the bottom, then fill in 3 and 9 and the rest. Use a ruler and your own eye to space them evenly. Pin each number in place before sewing. Stitch each one on with matching cream yarn, taking small stitches through the numbers and the face, being careful not to pull too tightly.
Next, add the flowers and leaves to the rim, following the arrangement in my photo. Place the large pink flower at the very top and another at the bottom, each with a small cream flower on each side and a leaf tucked behind each cream flower. Add one cream flower to the left and right sides of the rim, at the 9 and 3 o’clock positions, with a leaf above and a leaf below each one. This balanced arrangement makes the clock look like a wreath. Sew each flower and leaf securely using small stitches through the back of each piece and the rim.
For the hanging loop, chain 25 in pink yarn and work single crochet along the back bumps. Fold the cord into a loop and sew both ends firmly to the back of the rim at the top, just behind the large flower. If you used a clock movement, you will also use the metal hanging bracket on the back, so the loop is mainly decorative, but it adds a lovely finishing touch.
Finally, attach the hands. Slide the hour hand onto the shaft first, then the minute hand, and then the center flower on top. If you used crocheted hands over plastic hands, press them gently onto the shaft in the correct order. Set the clock to the right time and insert a battery. Sew the small pink flower over the center nut so that it covers the mechanism. The cream flower center gives the clock a final pop of brightness, exactly like the one in my photo.
Finishing Touches and Felt Backing
To make the back look tidy and keep your lacing hidden, cut a circle of felt slightly smaller than the board. Cut a small hole for the clock movement and a slit for the hanging bracket. Glue or stitch the felt to the back, covering the edges of the crochet and lacing. This step is optional, but it makes the clock feel professional and protects your wall from scratches.
Give the whole clock a last inspection. Trim loose ends, adjust any flowers that tilt and check that the numbers are straight. If anything looks wavy, a light steam from a distance or a gentle press with your hands will help. Avoid direct heat on cotton that has stiffener applied.
Color Variations to Try
While I love the pink and cream palette, this clock is wonderful in many colors. A soft blue and white version looks fresh in a kitchen or a boy’s nursery. A sage green rim with cream flowers feels natural and calm, perfect for a living room. A bold yellow and white version brings sunshine to a laundry room, and a lavender and cream version adds a gentle floral touch to a bedroom.
You can also change the floral arrangement. Instead of flowers at only four positions, add a full garland around the rim. Replace the flowers with tiny strawberries for a farmhouse kitchen, or with small pumpkins and leaves for an autumn version. For Christmas, try red and white with holly leaves and berries. The base pattern is the same, so you can build a whole collection that matches the seasons.
If you want a minimalist version, skip the flowers entirely and focus on the ombre rim and soft numbers. The result is simple and modern, and still has all the crochet charm.
Where to Display Your Crochet Clock
A clock this pretty deserves a special spot. A nursery wall is a natural choice, since the pastel colors and soft textures create a sweet and peaceful atmosphere. In a cottage style kitchen, the clock pairs beautifully with wooden shelves, jars of dried flowers and gingham curtains. In a craft room, it becomes a bright piece of inspiration above your yarn shelves.
You can also use it in a living room gallery wall, mixed with frames and woven baskets. Place it on a hallway wall where you pass by it often, or in a teenager’s room that needs a feminine, cottagecore touch. Since it is lightweight, it will not strain a small nail or an adhesive hook, but always check the weight of your finished piece before hanging it.
Selling and Gifting Your Clock
If you plan to sell your finished clocks, you will find that they photograph wonderfully. Place them on a wooden table with a few balls of yarn, a hook and a small vase of baby’s breath, just like in my main photo. Buyers love seeing the materials and the process, and it adds to the story of your product.
As a gift, package the clock with a note about the yarn and care instructions. If you are giving it to a new mother, add a little card saying that it was made to celebrate her baby’s time of arrival. People always remember a gift that has a story.
Troubleshooting Common Problems
If your cream disc curls up like a bowl, you probably have too few increases. Count your stitches in each round and add the missing ones. If it ruffles like a flower, you have too many increases, so unravel and redo the round.
If the rim does not lie flat, check that you are increasing evenly. Uneven increases cause bumps and ripples, so try marking the increase points with stitch markers each round.
If your numbers look uneven, make a sample of each shape before sewing it on. Compare sizes, and rework any that look too big or small. Keep one number as a reference so the rest match.
If the hands droop, add thin wire or crochet over the plastic hands from the movement kit. A little stiffener spray will also help.
If the clock does not keep time, make sure the battery is fresh and the shaft is properly secured. Avoid pressing the crochet against the moving parts of the mechanism, because yarn fibers can get caught. A tiny piece of cardboard between the crochet and the movement can prevent this.
Caring for Your Crochet Clock
Because cotton collects dust, give the clock a gentle brush with a soft cloth every few weeks. If it becomes dirty, never submerge it, since the cardboard and the mechanism will not survive water. Instead, dab the crochet lightly with a damp sponge and a drop of mild soap, then let it air dry. Keep it out of direct sunlight to prevent fading, especially if you used bright pink yarn, and avoid hanging it above a stove or a steamy bathroom.
Frequently Asked Questions
How long does it take to make this clock? Most crocheters finish the whole project in about ten to fourteen hours, spread over several days. The flowers and numbers take the most time, but they are good projects to pick up in short sessions.
Can I make it without a clock mechanism? Yes. Skip the movement and sew the hands to the face, covering the center with a flower. It becomes a beautiful decorative wall piece.
What yarn is best? A smooth cotton in DK weight works best because it is firm and shows stitch definition. Acrylic is fine too, but cotton holds its shape better and does not stretch over time.
Can I make it larger? Of course. Use a bigger board and continue the face for more rounds, adding six stitches per round. Make sure the rim begins with the same number of stitches as the final face round, and add a few extra rounds to keep it in proportion.
Is it suitable for beginners? If you can crochet in the round and make simple flowers, you can do it. Take it one piece at a time and you will be surprised at how quickly it comes together.
Can I sell items made from this pattern? Many crafters sell their handmade work. Please link back to the original tutorial if you share photos online, because it helps others find the pattern.
Final Thoughts
There is nothing quite like seeing a handmade piece come to life on your wall. Every stitch in this crochet clock carries a bit of your time and care, and every glance at it reminds you that something beautiful can come from a ball of yarn and a small hook. It tells the time, but it also tells a story about patience, color and creativity.
I hope this tutorial inspires you to make your own pink crochet wall clock. Begin with the cream face, add the ombre rim, stitch the soft numbers and finish with flowers and leaves. When you hang it up, step back and enjoy the way it brightens the room. If you make one, I would love to see it, so share your photos and tell me which colors you chose. Happy crocheting, and may every hour be a cozy one.