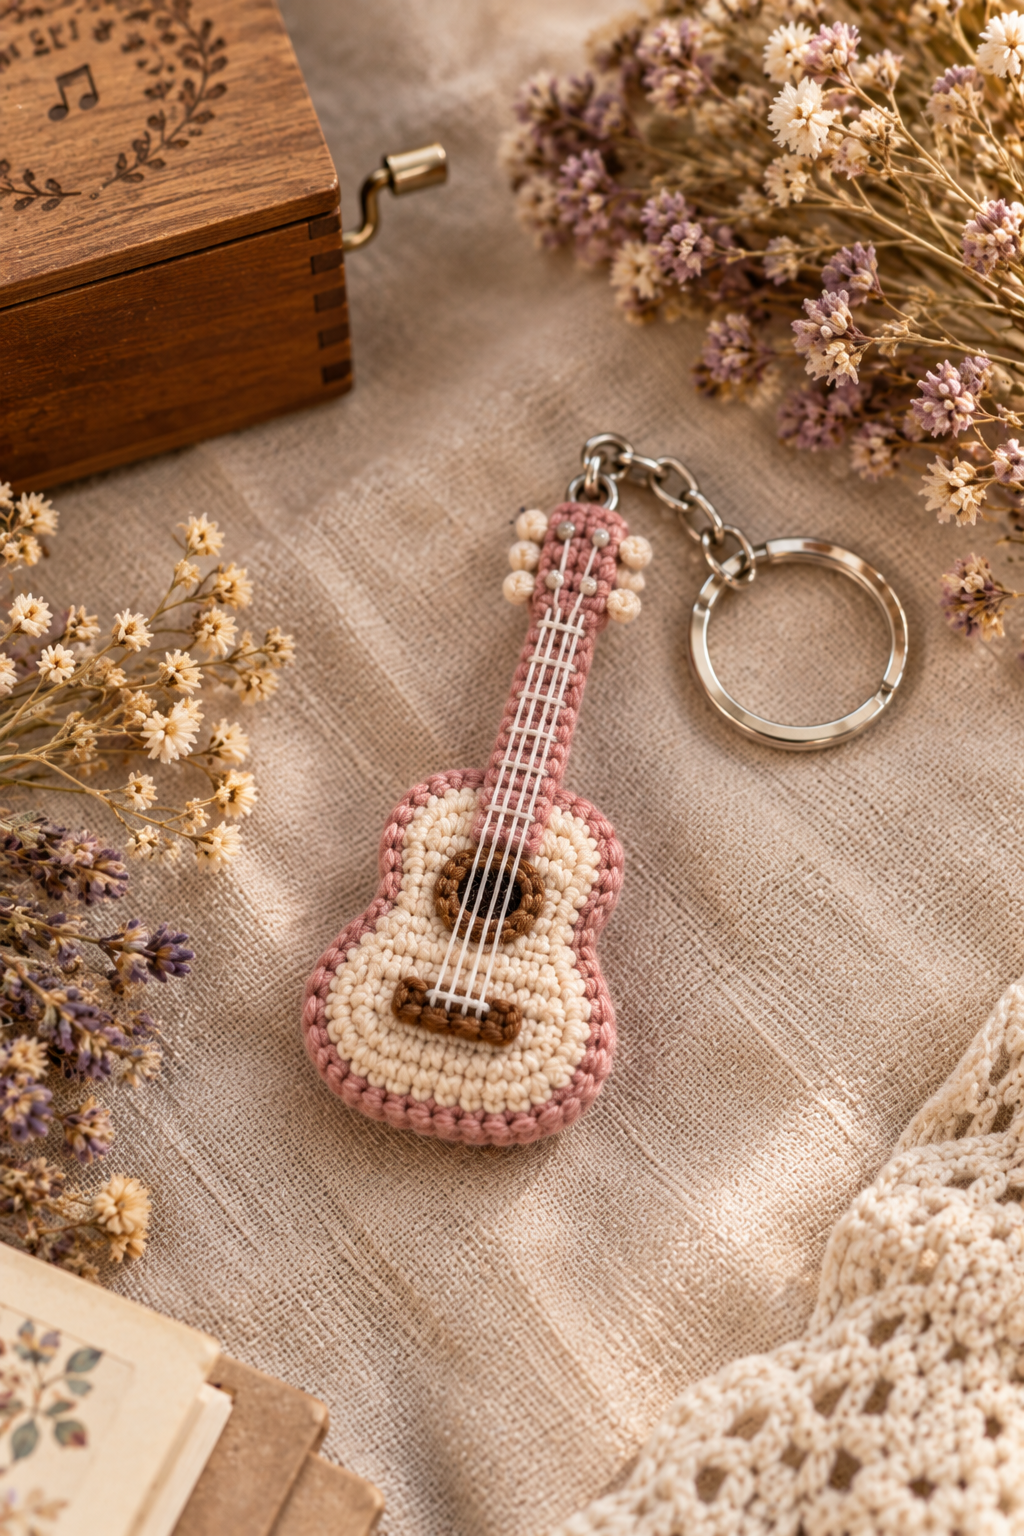
If you love tiny crochet projects, music-themed gifts, or handmade keychains, a mini guitar crochet keychain amigurumi pattern is a fun project to add to your collection. This little guitar combines simple crochet shapes with embroidery and basic assembly to create a miniature accessory that can be attached to keys, backpacks, purses, or gift packages.
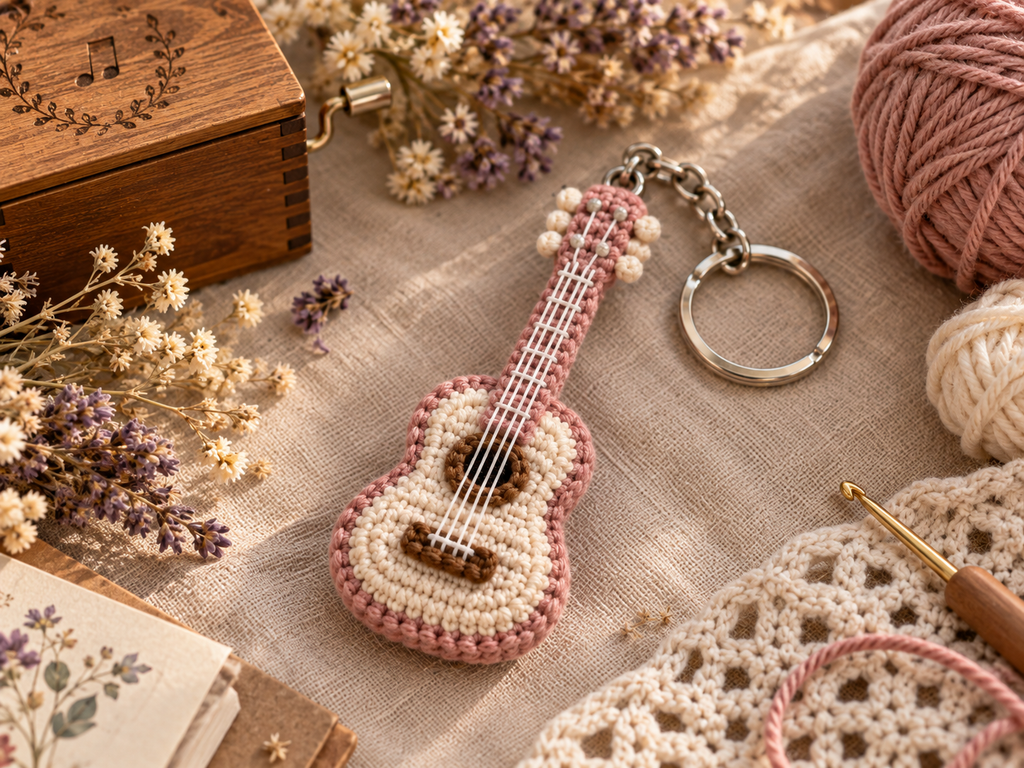
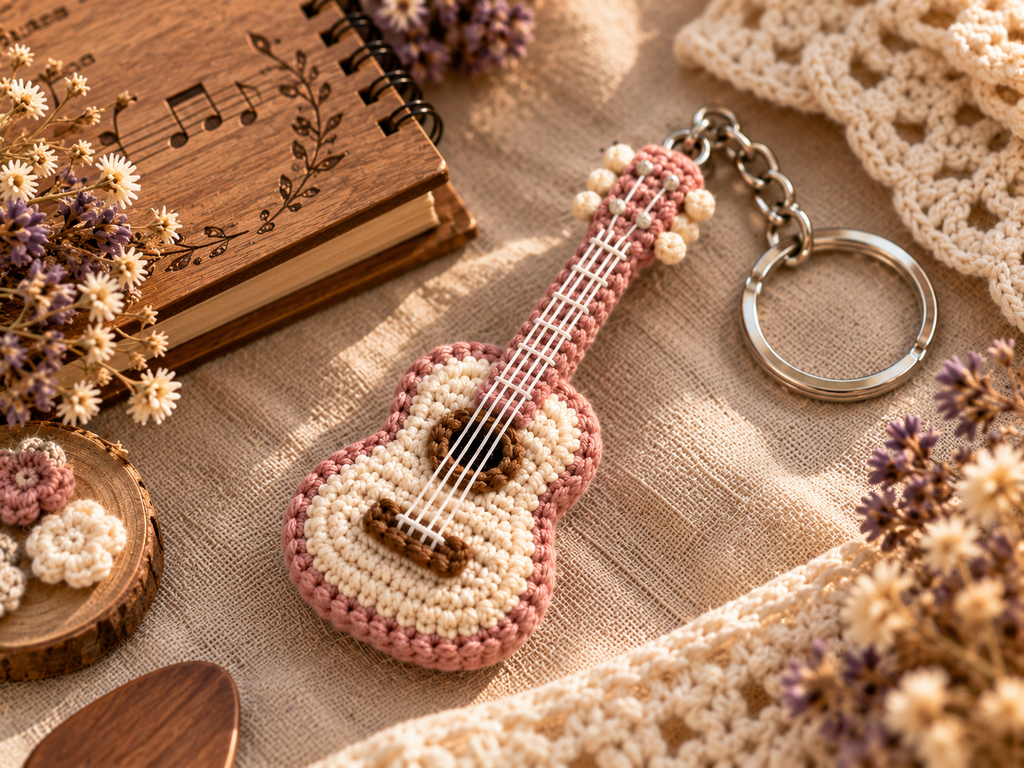
The finished design has a soft cream guitar body surrounded by a dusty-rose border, a matching narrow neck, embroidered strings, a brown soundhole and bridge, small decorative details, and a silver keyring. Because the finished piece is small, even small amounts of leftover yarn can be useful.
This guide walks through the materials, construction process, finishing techniques, and practical tips that can help you get a cleaner miniature guitar.
What Makes a Mini Guitar Crochet Keychain Special?
Miniature crochet projects are all about proportion and detail. A guitar keychain is especially interesting because the basic shape is recognizable even at a very small size.
The design combines several elements:
- A rounded guitar body
- A narrow crocheted neck
- A contrasting outer border
- A small circular soundhole
- A crocheted or embroidered bridge
- Fine yarn strings
- Decorative details around the upper neck
- A metal keyring and short chain
The contrast between the cream center and dusty-rose edging gives the finished piece a soft, handmade appearance while the brown details help define the guitar.
For an Etsy seller or crochet enthusiast, it can also make a thoughtful handmade gift for musicians, music students, guitar lovers, or anyone who enjoys miniature accessories.
Materials You’ll Need
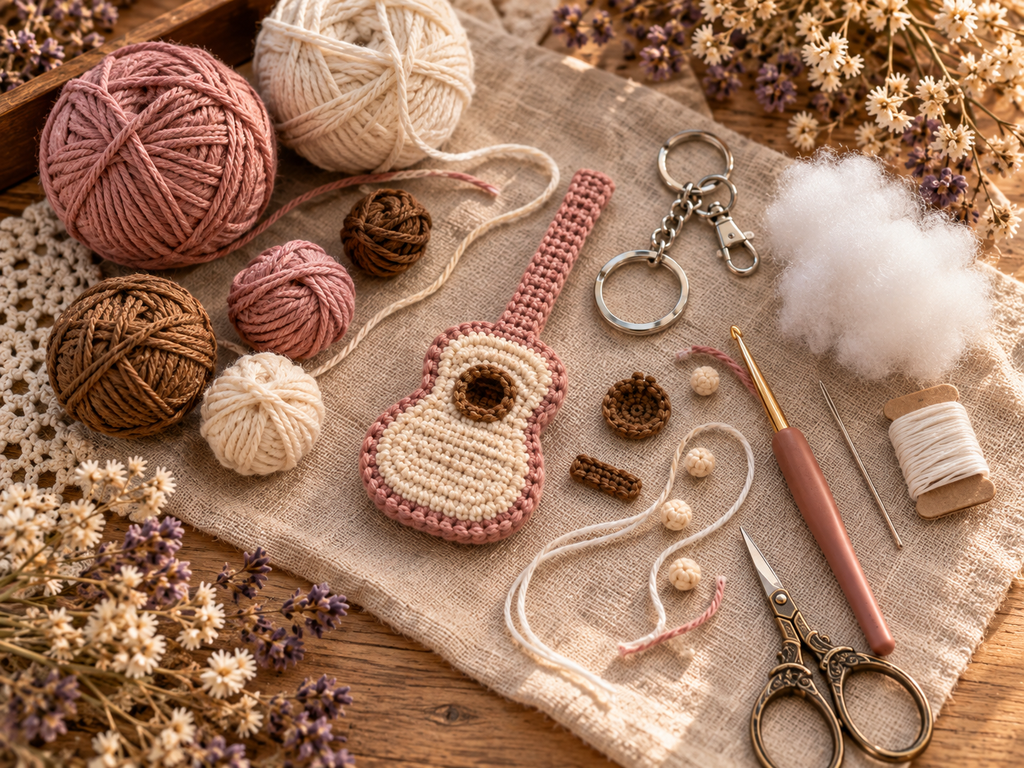
Before starting, gather all of your materials. Working with a small project is much easier when the yarn, tools, stuffing, embroidery materials, and hardware are ready beforehand.
Yarn
For a design similar to the one shown, prepare:
| Material | Suggested color | Main use |
|---|---|---|
| Cotton yarn | Dusty rose/pink | Border and guitar neck |
| Cotton yarn | Cream/off-white | Guitar body |
| Cotton yarn | Brown | Soundhole and bridge |
| Fine white yarn/thread | White/cream | Guitar strings |
| Cotton yarn | Cream | Decorative bobbles |
Cotton yarn is particularly useful for miniature crochet because it tends to produce defined stitches and holds small shapes well.
Other Supplies
You may also need:
- Crochet hook appropriate for your yarn
- Small amount of polyester fiberfill
- Tapestry or embroidery needle
- Small scissors
- Silver keyring
- Short metal chain or keychain connector
- Stitch marker, if needed
- Pins for positioning pieces
- Optional small beads or similar decorative elements, depending on your chosen design
For a beginner-friendly result, avoid using yarn that is extremely fluffy. Fuzzy yarn can hide the small stitches that give miniature amigurumi their shape.
Choosing the Right Yarn and Hook
The exact yarn weight and hook size will affect the final dimensions of your keychain.
A slightly smaller hook than you might normally use for the same yarn can create tighter stitches. This is useful for amigurumi because you generally want the stuffing to remain inside rather than showing through large gaps.
However, don’t automatically choose the smallest hook possible.
Your stitches should be:
- Tight enough to hold the stuffing
- Comfortable enough to work
- Consistent in size
- Easy to see while crocheting
If your fabric becomes extremely stiff and difficult to work, your hook may be too small.
Likewise, if you can clearly see large gaps between stitches after stuffing, consider adjusting your tension or hook size.
Understanding the Construction of the Mini Guitar
One of the easiest ways to approach a miniature crochet project is to divide it into separate components instead of trying to understand the entire finished object at once.
For this guitar design, think of it as several sections:
- Guitar body
- Contrasting body border
- Guitar neck
- Soundhole
- Bridge
- Decorative details
- Strings
- Keychain attachment
This makes the project much easier to organize.
The body provides the main silhouette, while the neck creates the recognizable guitar shape. The embroidery and small crocheted pieces are then used to add the details that make the finished piece look like a miniature instrument.
Step 1: Crochet the Guitar Body
The guitar body is the most visually important part of the project.
The goal is to create a compact shape with a wider lower section and a narrower upper section. The finished body should have enough structure to maintain its shape after light stuffing.
If your pattern uses separate front and back pieces, crochet both pieces carefully and compare them before joining.
Pay particular attention to:
- The center line
- The curves on both sides
- The narrow waist of the guitar
- The width of the lower body
- The transition toward the neck
Small differences can become very noticeable once the pieces are assembled.
A useful beginner tip
Count your stitches at the end of each round or row rather than waiting until the entire piece is finished.
With miniature crochet, missing just one or two stitches can noticeably change the silhouette.
Step 2: Add the Cream Center and Pink Border
The contrasting colors give the guitar its characteristic appearance.
The cream section forms the main face of the instrument, while the dusty-rose stitches create a defined outer edge.
When working around a curved shape, maintain even tension. Uneven tension can make one side of the guitar look fuller than the other.
Don’t pull the yarn excessively tight around the curves. The border should follow the body naturally without puckering.
Step 3: Crochet the Guitar Neck
The neck is much narrower than the body, so stitch consistency becomes even more important here.
A good miniature guitar neck should look:
- Straight
- Compact
- Proportionate to the body
- Firm but not overly stiff
The neck can be crocheted separately and attached to the body once the main sections are ready.
Before sewing it permanently, place it against the body and check the alignment from several angles.
A useful trick is to use a few temporary pins to hold the neck in position. This allows you to make small adjustments before securing it.
Step 4: Create the Soundhole
The soundhole is one of the details that immediately makes the piece recognizable as a guitar.
For this design, a small brown circular detail works well against the cream body.
Keep the soundhole centered as accurately as possible.
Rather than judging its position only from the top, look at the guitar from a short distance. Small details sometimes appear centered up close but slightly off-center when the whole piece is viewed.
If you’re sewing the soundhole onto the body, use small, even stitches around its perimeter.
Step 5: Add the Bridge
The bridge sits lower on the guitar body and provides another strong visual contrast.
A small brown crocheted or embroidered bridge works particularly well with the warm cream and dusty-rose color combination.
Because this piece is tiny, neat attachment is more important than adding excessive detail.
Secure the bridge firmly, but avoid pulling the stitches so tightly that the cream body becomes distorted.
Step 6: Add the Guitar Strings
The strings are one of the smallest but most important finishing details.
Use fine white or cream thread and position the strings so they run cleanly from the neck toward the bridge.
Try to keep the spacing as even as possible.
For cleaner-looking strings:
- Use a fine thread rather than bulky yarn.
- Mark the approximate positions before stitching.
- Keep the tension consistent.
- Secure the ends carefully on the back.
- Avoid pulling so tightly that the body bends.
At this scale, perfectly straight strings aren’t always necessary. What matters most is that they look intentional and remain securely attached.
Step 7: Add the Small Decorative Details
The miniature guitar shown in the design has small cream decorative elements near the upper portion of the neck.
These details add personality without making the project complicated.
When attaching small pieces, check their spacing before sewing them permanently.
A simple way to improve symmetry is to position the pieces first, photograph the arrangement with your phone, and then use the photograph as a quick reference while attaching them.
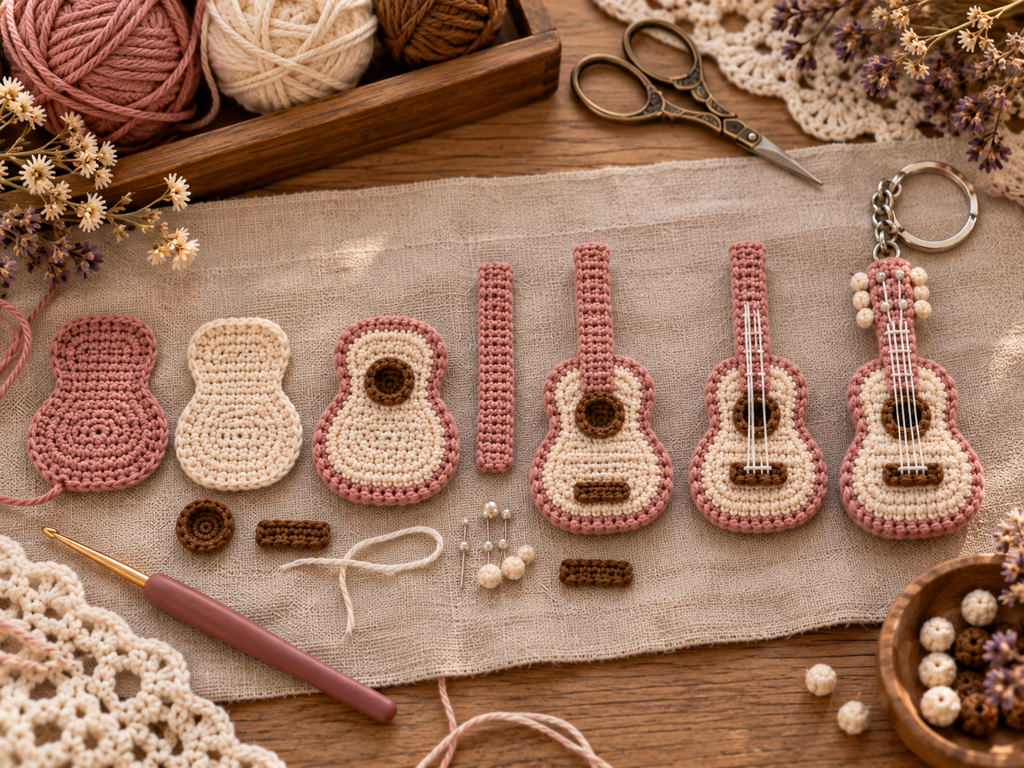
Step 8: Assemble the Keychain Hardware
Once the crochet portion is complete, the final step is connecting the guitar to the keychain hardware.
A short metal chain can be attached to the upper end of the guitar, followed by the keyring.
This connection needs to be secure because the keychain will experience more movement and pulling than a decorative amigurumi sitting on a shelf.
Before considering the project finished, gently test the attachment.
Check that:
- The crochet loop is firmly secured.
- The chain doesn’t pull directly against loose stitches.
- The metal ring opens and closes properly.
- The guitar hangs naturally from the ring.
- No loose yarn ends are visible.
If the attachment feels weak, reinforce it before using the keychain.
How to Make Your Mini Guitar Look Neat
Small projects can actually require more attention to finishing than larger crochet pieces.
Here are some of the most useful finishing tips.
Keep your tension consistent
Uneven tension can change the shape of the guitar body.
If one side looks noticeably different from the other, check your stitch count before continuing.
Hide yarn tails carefully
Loose yarn ends can make a small finished piece look unfinished.
Weave the tails securely into the back or between stitches and trim them only after they’re properly secured.
Don’t overstuff the body
The guitar should have enough stuffing to hold its shape, but too much stuffing can stretch the stitches and make the surface uneven.
Add small amounts gradually rather than pushing in a large amount at once.
Check symmetry before sewing
Before permanently attaching the neck, soundhole, bridge, and decorations, step back and look at the entire guitar.
This simple check can prevent many finishing problems.
Common Problems When Making Mini Crochet Keychains
The body looks uneven
This can happen because of inconsistent tension or missed stitches.
Try this: Count your stitches and compare both sides before joining or finishing the body.
Stuffing is visible
This usually means the stitches are too loose or the piece has been overstuffed.
Try this: Use slightly tighter tension and add less stuffing.
The neck looks crooked
The neck may have been attached slightly off-center.
Try this: Mark the center of the guitar body before sewing the neck in place.
The strings look messy
Fine thread can move while you’re stitching it.
Try this: Mark the string positions first and attach each line individually with consistent tension.
The keyring feels loose
The attachment point may not have enough reinforcement.
Try this: Reinforce the crocheted attachment loop and make sure the chain is connected to a structurally strong area.
How to Use a Mini Guitar Crochet Keychain
Once finished, this miniature guitar can be used in several ways.
As a keychain
The obvious option is attaching it to your everyday keys.
As a backpack accessory
The small size makes it suitable for decorating a backpack, tote, or purse.
As a handmade gift
It can make a thoughtful small gift for:
- Guitar players
- Music teachers
- Music students
- Band members
- Handmade-gift lovers
- Crochet enthusiasts
As a gift topper
You can also attach the guitar to a wrapped present instead of using a traditional gift tag.
That makes the accessory part of the gift rather than something that gets thrown away.
Tips for Making This Pattern Your Own
One of the best things about miniature crochet is how easily you can change the color palette.
Instead of dusty rose and cream, you could experiment with:
- Black and cream
- Sage green and ivory
- Navy and white
- Terracotta and beige
- Lavender and cream
- Brown and natural cotton
You can also change the color of the soundhole, bridge, strings, or decorative details.
If you’re making several guitars as gifts or for a handmade collection, using different color combinations can make each one feel unique while keeping the same basic design.
Why Small Crochet Projects Are Great for Leftover Yarn
A mini guitar uses relatively small quantities of yarn compared with larger crochet projects.
That makes it a useful project for using up leftover yarn from blankets, bags, amigurumi, or other accessories.
Instead of storing small balls of yarn indefinitely, you can turn them into:
- Keychains
- Bag charms
- Gift decorations
- Mini ornaments
- Small handmade accessories
Just make sure your yarn weights and textures are reasonably compatible with the pattern you’re following.
Frequently Asked Questions
Is a mini guitar crochet keychain suitable for beginners?
Yes, especially if you already understand basic crochet stitches and simple amigurumi construction. The small size makes the project relatively manageable, although the finishing details require patience.
How much yarn does a mini guitar keychain need?
The amount depends on the yarn weight, hook size, finished dimensions, and pattern construction. Because the project is miniature, only small quantities of each color are generally needed.
What type of yarn is best for a crochet guitar keychain?
Cotton yarn is a practical choice because it provides defined stitches and tends to hold its shape well. A smooth yarn also makes embroidery details easier to add.
Can I change the guitar colors?
Absolutely. The cream-and-dusty-rose combination creates a soft vintage-inspired look, but you can adapt the colors to match your own style.
How do I attach the keyring securely?
Use a strong crocheted loop or reinforced attachment point connected to the upper part of the guitar. Secure the connection carefully and test it before putting the keychain into regular use.
Can I sell finished crochet guitars made from a pattern?
That depends on the specific pattern designer’s licensing terms. Always check the individual pattern’s terms before selling finished items made from it. The copyright and commercial-use permissions for the written pattern itself are separate from the finished handmade object.
Is this the same as a full-size guitar crochet pattern?
No. This design is intended as a mini guitar crochet keychain amigurumi, so the proportions, construction, and finishing are designed for a small decorative accessory rather than a full-size crocheted guitar.
Final Thoughts
A mini guitar crochet keychain amigurumi pattern is a small project with plenty of room for creativity. The basic construction isn’t just about crocheting the guitar shape; the final appearance comes from careful proportions, clean color changes, neat embroidery, and a secure keychain attachment.
Take your time with the small details, particularly the soundhole, bridge, strings, neck alignment, and finishing. Those elements are what turn a simple crocheted shape into a recognizable miniature guitar.
Whether you’re making one for yourself, creating a music-themed gift, or building a collection of handmade accessories, this is the kind of project where a little patience can make a big difference.