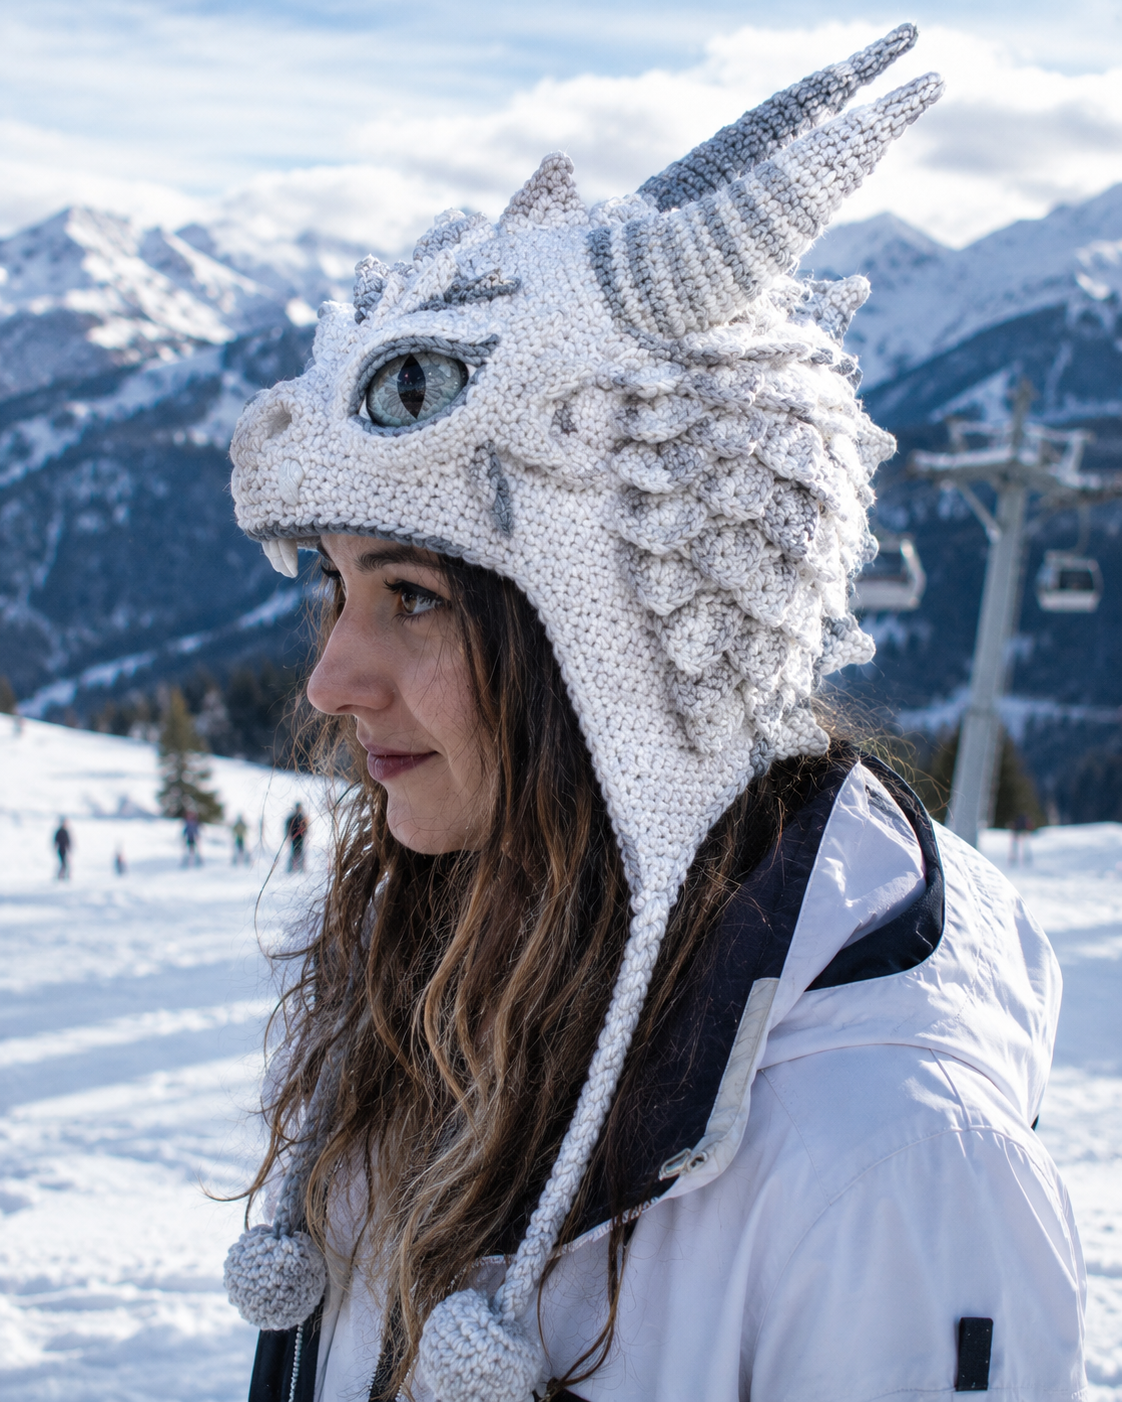
A detailed crochet dragon hat can look intimidating at first. The horns need to stand correctly, the layered scales need to sit neatly, the dragon eye has to align with the brow, and the snout needs enough structure to look like a dragon rather than a simple animal hat.
The good news is that these problems become much easier when you stop treating the hat as one complicated project.
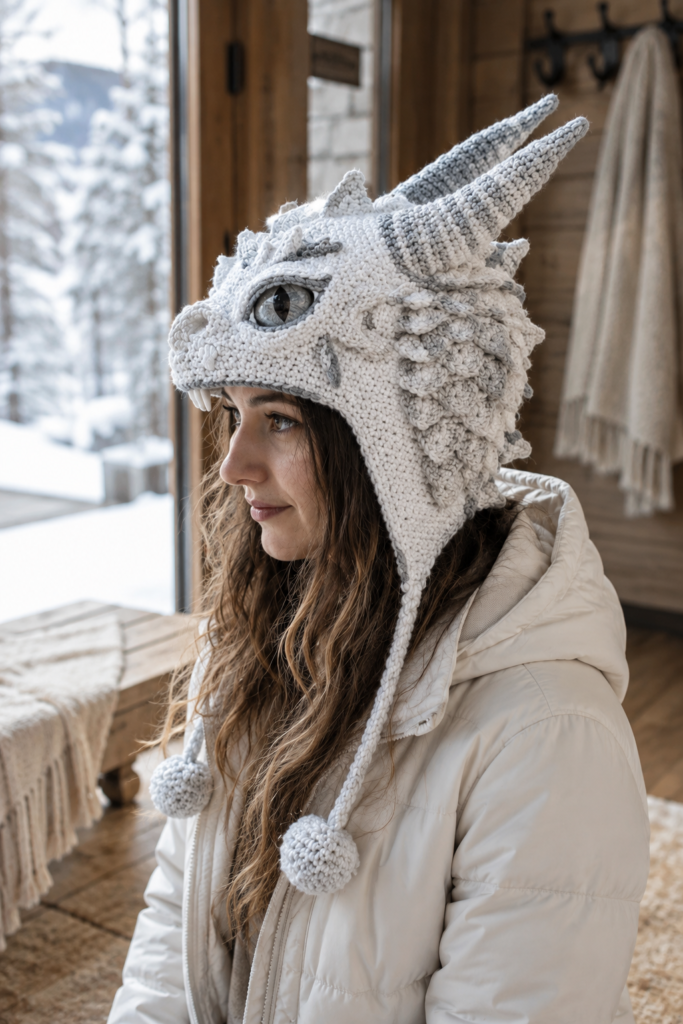
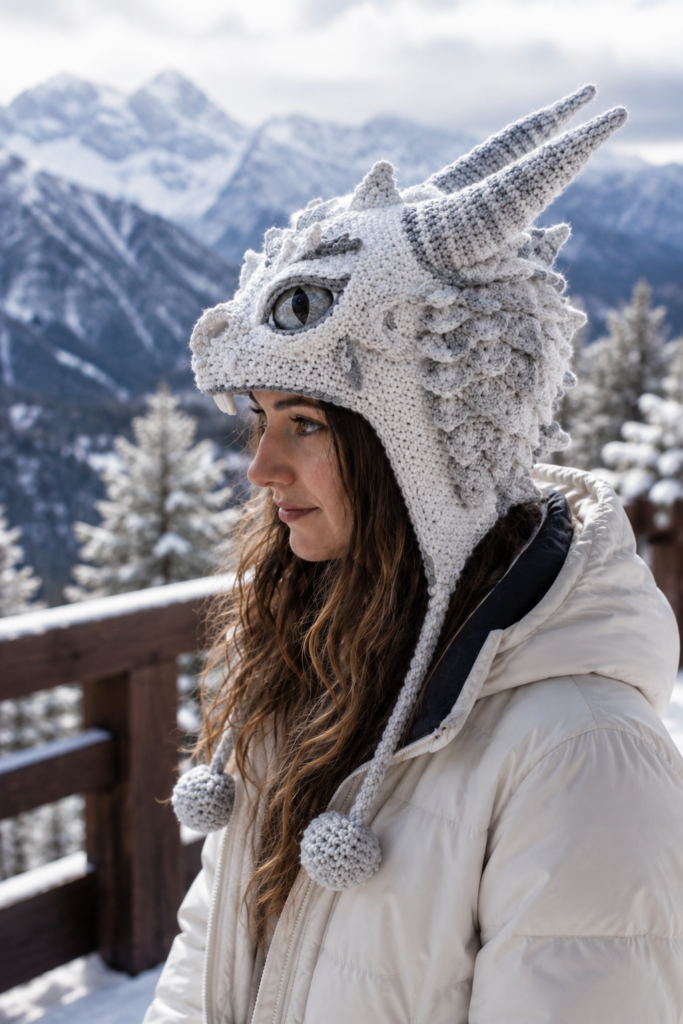
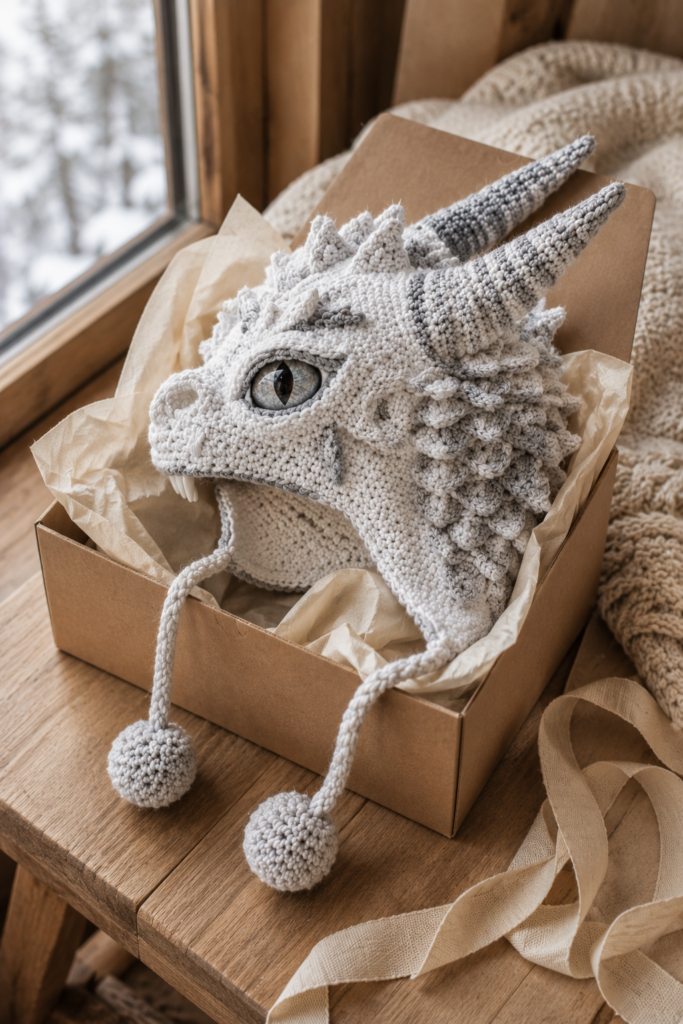
The Winter Ice Dragon Crochet Hat Pattern shown here is built around a few important structural ideas: a firm fitted hood, a shaped dragon snout, two large striped horns, smaller crown spikes, dimensional side scales, ear-covering panels, long ties with pom-poms, and a carefully positioned dragon eye.
This guide focuses on the parts that usually cause crocheters trouble: choosing yarn that can support the details, maintaining the right tension, keeping the horns firm, arranging scales consistently, shaping the snout, placing the eye correctly, and making sure the finished hat remains comfortable enough to wear.
Table of Contents
- Understanding the Ice Dragon Hat Construction
- Skill Level: Is This Hat Beginner-Friendly?
- Materials You Need
- Choosing the Right Yarn
- Choosing Your Hook Size
- Getting the Hat Fit Right
- Building a Strong Dragon Hood
- Shaping the Dragon Snout
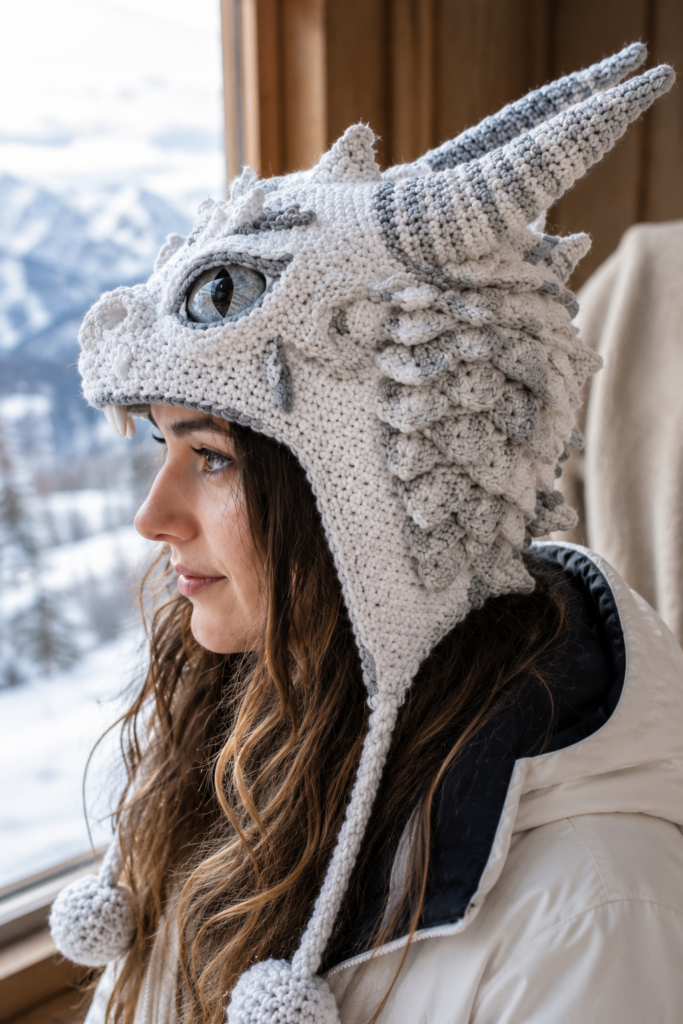
- Creating the Brow and Eye Area
- Making the Large Dragon Horns
- Keeping Crochet Horns From Flopping
- Adding the Smaller Crown Spikes
- Making the Layered Side Scales
- Keeping Both Sides Symmetrical
- Creating Comfortable Ear Panels
- Making the Long Ties and Pom-Poms
- Assembly Order
- Common Problems and Their Solutions
- Finishing Tips
- Care and Storage
- FAQs
Understanding the Winter Ice Dragon Hat
Before picking up your hook, it helps to understand what actually makes this design work.
The hat is not simply a basic beanie with horns sewn onto it.
Its foundation behaves more like a fitted crochet hood. The lower sections extend over the ears, while the front is transformed by a projecting dragon snout and sculpted brow.
Above that structure are two large horns angled upward and backward. Smaller spikes continue the dragon silhouette over the crown.
The sides are much more dimensional. Instead of a flat decorative panel, overlapping crochet scales create the appearance of an icy dragon’s cheek and neck armor.
The dragon eye is surrounded by shaping that visually connects the brow, snout, horns, and side scales.
Finally, the long ties and round pom-poms make the headpiece practical as a winter hat while softening some of its dramatic fantasy character.
Why Understanding the Structure Matters
Many unsuccessful fantasy hats have plenty of decorative details but a weak underlying shape.
If the basic hood doesn’t fit correctly, adding more scales won’t fix it.
If the horns aren’t properly supported, extra decoration won’t make them stand.
And if the eye and snout aren’t aligned, the dragon’s face can look distorted even when every individual piece is beautifully crocheted.
Work from structure to detail, not detail to structure.
Skill Level: Is This Dragon Hat Beginner-Friendly?
This is not the project I would recommend as someone’s very first crochet hat.
The individual stitches may be familiar, but construction and placement require more confidence than a basic beanie.
I would consider it an intermediate crochet project, or a challenging project for an adventurous advanced beginner.
You should be comfortable with:
- chains
- slip stitches
- single crochet
- half double crochet
- increases
- decreases
- working in rounds
- working in rows
- changing colors
- reading stitch counts
- sewing crochet components securely
- weaving in ends
- basic shaping
The biggest challenge isn’t necessarily the stitches.
It’s maintaining consistent proportions across many separate components.
Before Starting
If you’re relatively new to crochet, practice three things first:
Make a small tapered cone. This prepares you for horn construction.
Practice increasing and decreasing without losing your stitch count.
Finally, crochet a few small scale or leaf-shaped pieces so you become comfortable creating pointed shapes.
Those short exercises can make the main project much less frustrating.
Materials for an Ice Dragon Crochet Hat
For a structured hat like this, material choice matters.
Yarn
The master design uses an icy neutral palette.
You will want:
Main color: snow white or soft winter white
Secondary color: pale silver gray
Accent gray: a slightly deeper cool gray for selected horn and scale details
Choose yarns from the same range where possible. That reduces unexpected differences in thickness and texture.
Recommended Yarn Characteristics
Look for yarn that is:
- smooth
- soft enough for skin contact
- reasonably dense when crocheted
- able to hold dimensional stitches
- not excessively fuzzy
Medium/worsted-weight yarn is a practical starting point for this type of hat, although the actual yarn weight should always match the pattern you’re following.
How Much Yarn Should You Buy?
A highly dimensional dragon hat generally uses more yarn than a plain crochet beanie of the same size.
Why?
Because you’re not only crocheting the hood.
You’re also creating:
- two large horns
- smaller spikes
- a projecting snout
- brow details
- many side scales
- ear panels
- two long ties
- two pom-poms
Buy enough yarn to avoid running short midway through the project.
If exact yardage is provided in your pattern, follow that figure rather than relying on a generic estimate.
It’s particularly useful to purchase the main white shade from the same dye lot.
Choosing the Right Yarn
One of the most common problems with dimensional crochet hats is using yarn that is too soft or too fuzzy.
Softness sounds desirable and it is important for a wearable but there needs to be a balance.
If Your Yarn Is Too Limp
Your horns may bend.
The scales can lose definition.
The snout may collapse.
Small spikes may disappear into the rest of the hat.
If Your Yarn Is Too Stiff
The hat can become uncomfortable.
The ear panels may feel rigid against the face.
The entire headpiece can become unnecessarily heavy.
A Good Compromise
A smooth worsted-weight acrylic, wool blend, or other suitable hat yarn with good stitch definition can work well.
For a winter hat, also think about how the fiber behaves against skin.
A yarn that looks beautiful in the skein isn’t useful if the wearer finds it itchy after ten minutes.
Choosing the Right Hook Size
Don’t automatically use the largest hook recommended on the yarn label.
Labels usually provide general guidance. A sculptural crochet hat may require denser fabric.
Your goal is to create stitches firm enough to support the dragon details without making the hood rigid.
Make a Swatch
Yes, even for a fantasy dragon hat.
A small gauge swatch can prevent major sizing problems later.
Measure your stitches without aggressively stretching the fabric.
Then compare them with the pattern gauge.
If you have too few stitches per inch, your stitches are probably larger than required.
Try a smaller hook.
If you have too many stitches per inch, try a slightly larger hook.
Don’t Solve Gauge Problems by Pulling Harder
Trying to consciously crochet much tighter for an entire hat rarely produces consistent results.
Changing hook size is usually more reliable.
Getting the Hat Fit Right
The most impressive dragon details won’t matter if the finished hat doesn’t fit.
Measure the intended wearer’s head circumference before beginning.
Also consider the distance from crown to ear.
Remember Crochet Can Stretch
Depending on the fiber and stitch pattern, crochet fabric may relax with wear.
That means a hat that is already loose when first finished may become even looser.
Follow the pattern’s intended ease.
Test the Base Before Adding Decorations
This is one of the most useful time-saving steps.
Once the main hood is complete, check its fit before attaching the horns, scales, snout, and other major decorations.
Correcting a sizing problem at this stage is annoying.
Correcting it after sewing on dozens of details is far worse.
Building a Strong Dragon Hood
Think of the hood as the skeleton of the entire project.
It carries the weight of the horns and side decorations.
If the fabric is too loose, the added components can pull it out of shape.
Keep your tension consistent and pay particular attention to the crown and upper side areas where the horns will eventually sit.
Don’t Overbuild the Base
The opposite problem is making the hood unnecessarily thick.
Remember that the scales and facial details will add more material later.
You want a stable foundation—not a helmet.
Shaping the Dragon Snout
The projecting snout is one of the defining features of this design.
Without it, the project can look like a horned winter hat rather than a dragon head.
The snout needs enough volume to be visible in profile while remaining light enough that it doesn’t drag the front of the hat downward.
If the Snout Keeps Collapsing
First check your tension.
Loose stitches naturally create softer fabric.
If the construction calls for stuffing, add small amounts gradually.
Do not force a large clump into the snout.
Overstuffing can produce a bulbous shape instead of the broad, controlled dragon muzzle seen in the design.
Pin Before Sewing
If the snout is constructed separately, pin it to the hood.
Put the hat on a head form if you have one.
Look at it from the side.
Then look straight at the front.
Make adjustments before sewing permanently.
Creating the Brow and Dragon Eye Area
The eye is probably the strongest focal point of the entire headpiece.
But the eye alone doesn’t create the expression.
The surrounding crochet brow does much of the work.
A slightly lowered sculpted brow creates the intense dragon expression seen in the master design.
If the brow sits too high, the dragon can look surprised.
If it covers too much of the eye, you lose the striking eye detail.
How to Position the Eye Correctly
Don’t choose the eye position independently.
Use the snout and horns as reference points.
Temporarily position:
- the snout
- the eye
- the brow
- the main horn
- the first few side scales
Then look at the overall dragon profile.
This gives you a much better idea of whether the eye belongs where you’ve placed it.
Important Wearability Point
Any eye component or decorative backing inside the hat should not create a hard or uncomfortable pressure point against the wearer’s head.
The inside should remain as smooth as reasonably possible.
Making the Large Dragon Horns
The two long horns give the hat its dramatic silhouette.
They’re also one of the easiest places for the project to go wrong.
A successful horn needs:
- a firm base
- gradual tapering
- consistent stitch tension
- controlled stuffing if required
- secure attachment
- correct angle
The master design uses subtle gray striping, which adds depth without introducing unrelated colors.
Make Both Horns Together
Rather than finishing one horn and waiting several days before starting the second, make them close together.
Why?
Your natural tension can change from day to day.
Working them in the same period makes matching their length and width easier.
Compare Frequently
After every few sections, place the horns side by side.
Check:
- length
- base width
- taper
- stripe position
- tip thickness
Don’t wait until both are finished.
How to Stop Crochet Horns From Flopping
This is one of the most useful problems to solve on a dragon hat.
Solution 1: Tighten the Fabric
If the horn itself is floppy, your stitches may simply be too loose.
Solution 2: Stuff Gradually
When stuffing is part of the construction, use small pieces.
The base generally needs more support than the tip.
Solution 3: Reinforce the Base Through Attachment
A perfectly firm horn can still fall over if it’s sewn onto the hood weakly.
Attach around the entire horn base rather than securing it at only a few points.
Solution 4: Check the Angle Before Sewing
The horns in this design point upward and backward.
If you attach them vertically, you’ll change the dragon’s silhouette.
Pin them first.
Adding the Smaller Crown Spikes
The smaller spikes connect the major horns visually to the rest of the dragon.
They should support the overall silhouette rather than compete with the horns.
Keep them noticeably smaller.
Avoid Random Placement
Mark the intended centerline or placement path first.
This prevents the spikes from slowly drifting toward one side.
You can use removable stitch markers to plan their positions before sewing.
Making the Layered Side Scales
The side scales are probably the most labor-intensive decorative feature.
They’re also what gives the hat its rich, dimensional appearance.
The important word here is layered.
If every scale sits separately with large gaps, you won’t achieve the same armored dragon effect.
The pieces should overlap visually, creating depth around the side of the head.
Work in Planned Rows
Don’t simply attach scales wherever an empty spot appears.
Establish the overall scale area first.
Then work systematically.
You can begin with temporary markers showing:
- upper boundary
- lower boundary
- front boundary near the eye
- rear boundary toward the back of the head
This keeps the scale cluster controlled.
Mix White and Gray Carefully
The master design uses subtle pale-gray variation rather than bold contrasting stripes.
That helps individual layers remain visible without making the hat look busy.
Keep the gray restrained if you want the icy appearance.
How to Keep Both Sides Symmetrical
Complex fantasy hats can become uneven very easily.
One side may look excellent while the second gradually develops different spacing.
A simple solution is to keep written placement notes.
For example, note which round or row each major component aligns with.
Then repeat that reference on the opposite side.
Photograph the First Side
Take clear photographs before starting the second.
Capture:
- front
- side
- top
You now have a placement reference instead of relying on memory.
Perfect mirror symmetry isn’t necessary for an organic dragon design, but the hat should feel balanced when worn.
Creating Comfortable Ear Panels
The long ear-covering panels serve two purposes.
They continue the dragon silhouette and make the hat practical for winter wear.
Because they sit against the face, comfort matters.
Avoid excessively bulky seams along their inner edges.
Check the Length While Wearing
Before adding the ties, try on the hat.
The panels should cover the ears naturally without pulling the crown downward.
If they’re too narrow, they may curl.
If they’re excessively heavy, they can distort the hat.
Making the Long Crochet Ties
The long ties balance the elaborate top of the hat and give the design a classic winter-headwear finish.
They should be strong enough for handling but not unnecessarily thick.
The reference design finishes them with round pom-poms.
Make the Pom-Poms Match
Uneven pom-poms are surprisingly noticeable.
Trim them gradually rather than cutting aggressively.
Rotate each pom-pom while trimming so you can judge its shape from every direction.
After finishing both, hold them side by side and make final adjustments.
Best Assembly Order
Assembly becomes much easier when you follow a logical sequence.
A practical order for a hat of this type is:
- Complete the main hood.
- Verify fit.
- Establish the snout position.
- Position the eye and brow.
- Pin both large horns.
- Check the overall silhouette.
- Add crown spikes.
- Plan the side-scale areas.
- Attach scales systematically.
- Finish the ear-covering panels.
- Add the long ties.
- Finish and attach the pom-poms.
- Weave in remaining ends.
- Inspect the inside for uncomfortable joins.
- Try the hat on and make final positioning adjustments where possible.
This order prevents you from spending hours on decorative work before discovering a basic structural problem.
Common Problems and How to Fix Them
Problem: My Horns Lean Sideways
Likely cause: Weak attachment, loose stitches, inconsistent stuffing, or incorrect placement.
Fix: Pin both horns before sewing. Check the hat from the front and top, then reinforce each horn around its entire base.
Problem: One Horn Is Larger
Don’t try to disguise a significant difference during attachment.
Compare stitch counts first.
If the counts match but the dimensions don’t, your tension probably changed.
For a highly visible pair of horns, remaking the weaker one can produce a better result than forcing mismatched pieces into position.
Problem: The Scales Look Messy
You probably began attaching them without establishing boundaries.
Remove the most problematic scales if necessary and mark the intended scale area.
Work in deliberate overlapping groups.
Problem: The Dragon Eye Looks Wrong
Don’t immediately replace the eye.
First inspect the surrounding brow.
Often, eye placement seems incorrect because the brow or nearby scales are changing its visual angle.
Temporarily reposition the surrounding pieces before making a final decision.
Problem: The Snout Sags
Check three things:
Tension: Is the fabric too loose?
Stuffing: Is the snout supported evenly?
Attachment: Is the base firmly connected to the hood?
Correct the underlying issue rather than adding more stuffing automatically.
Problem: The Hat Feels Too Heavy
Dimensional crochet naturally adds weight.
Avoid unnecessary overstuffing in horns and facial pieces.
Also check whether your yarn is substantially heavier than the yarn intended by the pattern.
Problem: Stuffing Shows Through
Your hook may be too large for your tension.
Don’t simply keep reducing stuffing until the shape collapses.
The better solution is usually denser crochet fabric.
Problem: The Hat Fits Before Decorating but Feels Different Afterward
Heavy embellishments can change how a hat sits.
That’s why component weight and balanced placement matter.
Large horns and dense scale clusters should be distributed carefully rather than concentrated in a way that pulls the hood backward or sideways.
How to Make the Finished Hat Look More Professional
The difference between an impressive handmade hat and a rushed-looking one often appears during finishing.
Hide Yarn Ends Thoroughly
This project creates many ends.
Don’t leave them until the very last minute.
Weave them in as you complete logical sections of the hat.
It keeps the project manageable and prevents accidental tangles.
Use Matching Yarn for Sewing
Visible attachment stitches can distract from the scale texture.
Whenever possible, sew white components with matching white yarn and gray details with an appropriate matching shade.
Inspect From a Distance
Put the finished hat on a mannequin head, hat form, or wearer.
Step several feet away.
Check:
- horn angle
- horn height
- eye position
- snout projection
- scale balance
- ear panel length
- pom-pom height
Small inconsistencies become much easier to spot.
Don’t Forget the Inside of the Hat
The exterior gets all the attention, but the wearer experiences the inside.
Run your fingers around the interior.
Look for:
- hard knots
- loose yarn tails
- bulky joins
- exposed attachment areas
- anything sharp or uncomfortable
A beautiful hat that is uncomfortable won’t be worn.
This is especially important around the forehead and temple because that’s where several decorative components meet.
Making the Hat Warmer Without Ruining the Design
If warmth is your priority, start with an appropriate yarn and sufficiently dense base fabric.
Don’t assume that adding more decorative layers automatically makes the hat warmer everywhere.
The side scales add thickness locally, but the main hood still determines most of the coverage.
If a pattern allows for lining, choose a lining material and method that doesn’t distort the crochet shell or block its natural stretch.
Remember that lining can also change the finished fit.
Care and Storage
A sculptural crochet hat needs slightly different treatment from an ordinary beanie.
The horns, scales, snout, and eye area can lose shape if handled roughly.
Cleaning
Always begin with the care instructions for your specific yarn and other materials.
For small marks, gentle spot cleaning may be preferable to washing the entire hat.
If full washing is appropriate for the materials, avoid aggressive twisting or wringing.
Reshape While Damp
After cleaning, carefully restore the:
- horn angle
- snout
- brow
- crown spikes
- side scales
- ear panels
Then allow the hat to dry thoroughly according to the fiber’s care instructions.
Storage
Don’t place heavy objects on top of the hat.
The horns and scales may flatten over time.
Ideally, store it upright on a suitable form or in a box large enough that the horns aren’t bent.
Frequently Asked Questions
What skill level is best for a Winter Ice Dragon Crochet Hat?
An intermediate crocheter will generally be most comfortable with a project this detailed. An advanced beginner can attempt it if they’re confident with shaping, increases, decreases, working in rounds, sewing components, and keeping accurate stitch counts.
What yarn is best for a crochet dragon hat?
Choose a smooth yarn with good stitch definition that is also comfortable against skin. The yarn needs enough body to support dimensional horns and scales without making the finished hat excessively stiff.
How do I make crochet horns stand up?
Firm stitches, controlled stuffing when required, and secure attachment around the horn base are the most important factors. The horn itself can be perfectly shaped and still flop if the attachment point is weak.
Why are my crochet horns different sizes?
Changes in stitch count or tension are the most common causes. Work matching pieces close together and compare them frequently instead of waiting until both are finished.
How do I stop crochet scales from looking messy?
Plan the entire scale area before attachment. Mark the boundaries and arrange the scales in deliberate overlapping rows rather than attaching them randomly.
How can I make the dragon eye look more realistic?
The surrounding brow and snout placement matter almost as much as the eye itself. Temporarily position the facial components together before permanently attaching them.
How do I prevent the snout from sagging?
Use sufficiently dense crochet fabric, follow the pattern’s stuffing instructions, and attach the snout securely across its base.
Why is gauge important for a hat?
Gauge determines finished dimensions. Even a small difference across many stitches can produce a hat that’s noticeably too large or too small.
Should I finish all the decorations before checking the fit?
No. Check the main hood fit first. This can save hours of work if sizing needs adjustment.
Can I use chunky yarn instead?
Only if the pattern is designed for it or you’re prepared to recalculate the project. Thicker yarn changes the size of the hood, horns, scales, and facial components.
How should I store a dragon crochet hat?
Store it without crushing the horns or layered scales. A roomy box or suitable hat form is preferable to folding it underneath other winter clothing.
How can I make the inside more comfortable?
Secure yarn tails thoroughly, avoid bulky knots against the skin, and inspect every major attachment point from inside the hat before wearing it.
Final Thoughts
The key to a successful Winter Ice Dragon Crochet Hat Pattern project isn’t adding as many fantasy details as possible.
It’s controlling the details that matter.
Start by getting the hood fit right. Then solve the dragon’s facial structure. Give the snout enough support, position the eye in relation to the brow, make the two horns match, and plan the scale arrangement before sewing.
Most importantly, pin before you commit.
A few extra minutes spent checking horn angle or eye placement can save an hour of removing stitches later.
Once the structure works, the decorative elements become much easier to manage.
The result is a crochet hat that doesn’t simply have dragon decorations attached to it it reads as a complete sculpted ice-dragon headpiece while still functioning as wearable winter crochet. Looking forward for your Lovely response