The first time I crocheted a cardigan, I was convinced I’d mess it up. Sweaters felt like “advanced” territory, full of mysterious shaping and math. I’d made scarves, a few blankets, and some small amigurumi, and that seemed like a comfortable place to stay.
Then I realized something that changed how I saw garment crochet: a cardigan is mostly just rectangles. A back rectangle, two front rectangles, two sleeve rectangles, and some ribbing to tidy up the edges. If you can crochet a flat swatch, you can make a cardigan.
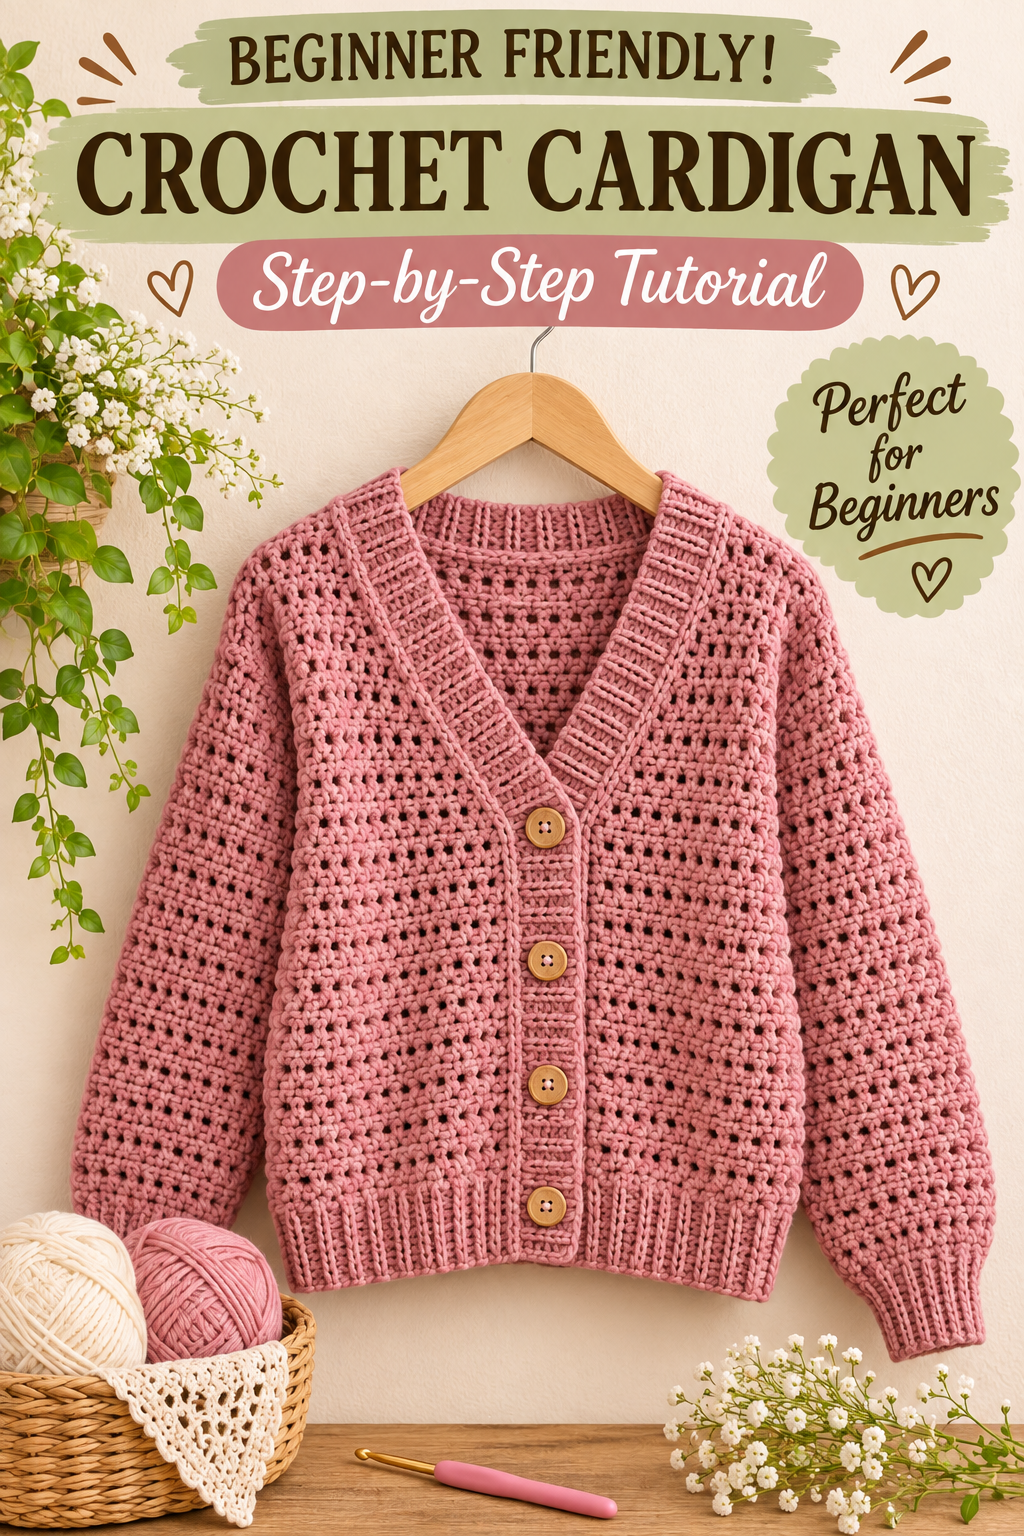
This beginner friendly crochet cardigan sweater tutorial walks you through the whole thing. We’ll make a dusty rose V-neck cardigan with a soft eyelet texture, snug ribbed edges, and wooden buttons. It’s cozy, wearable, and honestly not as hard as it looks.
All terms are US crochet terms. Grab your hook, pick out a yarn you love, and let’s go.
Why You’ll Love This Cardigan
It uses just one main stitch. The whole body is worked in half double crochet (hdc) with a simple eyelet row every four rows. If you know hdc, you already know most of the pattern.
No complicated shaping. The only shaping is a straight V-neck decrease and gentle sleeve increases. There’s no armhole curve, no raglan math, and no top-down construction to figure out.
It’s flexible. You can make it longer, shorter, wider, or narrower just by changing your starting chain.
It looks far more impressive than it is. The eyelet pattern looks delicate, the ribbed bands make it look professionally finished, and the buttons give it that classic cardigan feel.
It’s a wardrobe staple. Throw it over a tee in spring, a dress in fall, or a turtleneck in winter. Dusty rose goes with almost everything, but this pattern looks lovely in any color.
Skill Level and Time
This is a confident beginner project. You should be comfortable with chaining, half double crochet, slip stitches, and basic increases and decreases. You’ll also need to sew pieces together, but I’ll explain how.
Plan on about 30 to 40 hours of crochet time for a size medium. If you work an hour or two each evening, you’ll finish in a month or so. It’s a project to enjoy, not rush.
Materials
- Worsted weight (medium, category 4) yarn in dusty rose. You’ll need about 1,300 to 1,500 yards (1,190 to 1,370 m) for a size medium. A cotton blend or soft acrylic works well. Choose something with a bit of drape and avoid very fuzzy yarns, because they hide the eyelet holes.
- 5.5 mm (I-9) crochet hook for the body and sleeves.
- 4.5 mm (G-6) crochet hook for the ribbing.
- Four wooden buttons, about 1 inch (25 mm) wide.
- Stitch markers, around eight.
- Tapestry needle for seaming and weaving in ends.
- Scissors, measuring tape, and sewing pins.
- Blocking mats and pins, which are very helpful.
A quick yarn tip: buy all your yarn at the same time and check the dye lot numbers. Pink shades can vary a lot between lots, and a slightly different pink halfway up a sleeve is heartbreaking.
Gauge and Size
I know it’s tempting to skip the swatch. Please don’t. Garments are the one place where gauge really matters.
Gauge: 14 stitches and 10 rows = 4 inches (10 cm) in half double crochet with the 5.5 mm hook.
Make a swatch of about 20 stitches and 16 rows, wash it the way you plan to wash the cardigan, and measure it dry. If you have too many stitches per inch, go up a hook size. Too few, go down.
Sample size (Medium, fits a 36 to 38 inch bust with a relaxed fit):
- Finished bust: about 42 inches (107 cm)
- Body length: about 21 inches (53 cm), including the ribbed hem
- Sleeve length: about 19.5 inches (50 cm), including the cuff
To change the size, add or remove stitches in pairs from your starting chain. Each pair adds roughly 1.5 inches (4 cm) of width.
Abbreviations (US Terms)
- Ch: chain
- Sl st: slip stitch
- Sc: single crochet
- Hdc: half double crochet
- Hdc2tog: half double crochet two together (a decrease)
- St(s): stitch(es)
- RS / WS: right side / wrong side
- BLO: back loop only
- Ch-1 sp: the space made by a chain 1
The Eyelet Stitch
This is the only stitch pattern in the whole cardigan, so let’s learn it before we start. It’s a 4-row repeat that works on an odd number of stitches.
- Row 1 (RS): Ch 2 (does not count as a stitch), hdc in each stitch across.
- Row 2 (WS): Ch 2 (does not count), hdc in each stitch across.
- Row 3 (eyelet row, RS): Ch 1 (does not count), hdc in the first stitch, ch 1, skip the next stitch, hdc in the next stitch. Repeat from * to the end of the row.
- Row 4 (WS): Ch 2 (does not count), hdc in each hdc and in each ch-1 space across.
Repeat Rows 1 to 4.
The eyelet row (Row 3) creates the little holes you see in the finished cardigan. Row 4 fills them back in with stitches, so your stitch count never changes. That’s the secret to making this pattern beginner-friendly. You can always check your work by counting.
How the Cardigan Is Built
Here’s the plan:
- Crochet the back panel (one rectangle).
- Crochet two front panels, each with V-neck shaping at the neck edge.
- Crochet two sleeves, each starting at the cuff and widening toward the top.
- Block all pieces.
- Sew the shoulders, then add the sleeves, then close the side and sleeve seams.
- Make the ribbed hem, cuffs, and front band separately and sew them on.
- Add buttons.
It’s a lot of small pieces, but each one is simple. Take it one piece at a time.
Step 1: Start the Back Panel
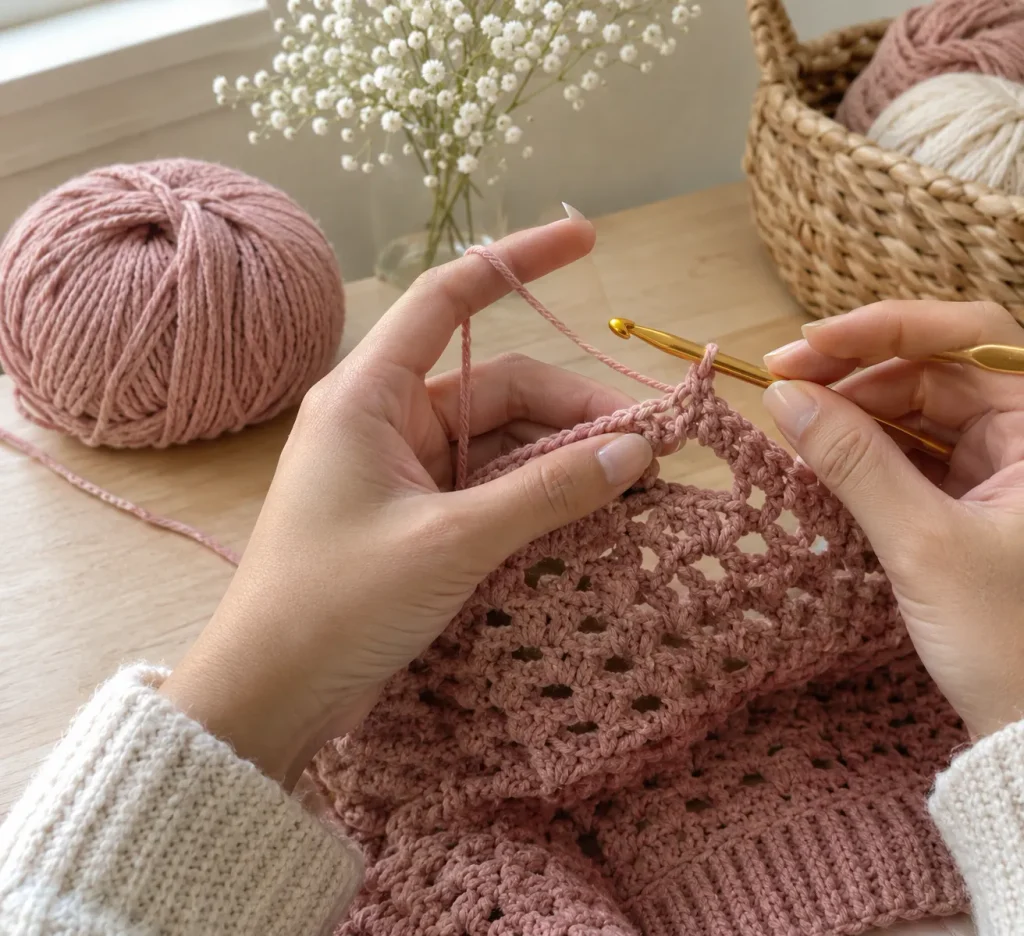
With the 5.5 mm hook, chain 75.
Row 1 (RS): Hdc in the 3rd chain from the hook (the skipped chains don’t count as a stitch) and in each chain across. You should have 73 stitches.
Now work Rows 2, 3, and 4 of the eyelet stitch, then repeat Rows 1 to 4.
A few tips for a good start:
- Chain loosely. A tight foundation chain will pull your panel in at the bottom. If you tend to chain tightly, go up a hook size just for the chain.
- Count your chains in groups. I count in tens and place a stitch marker every ten.
- Keep your edges straight. Make sure you work into the very last stitch of every row. Missing it is the most common reason for wobbly sides.
Step 2: Work the Eyelet Pattern
Keep repeating the 4-row eyelet pattern until the back panel measures about 19 inches (48 cm), which is 48 rows, or 12 full repeats. End after a Row 4.
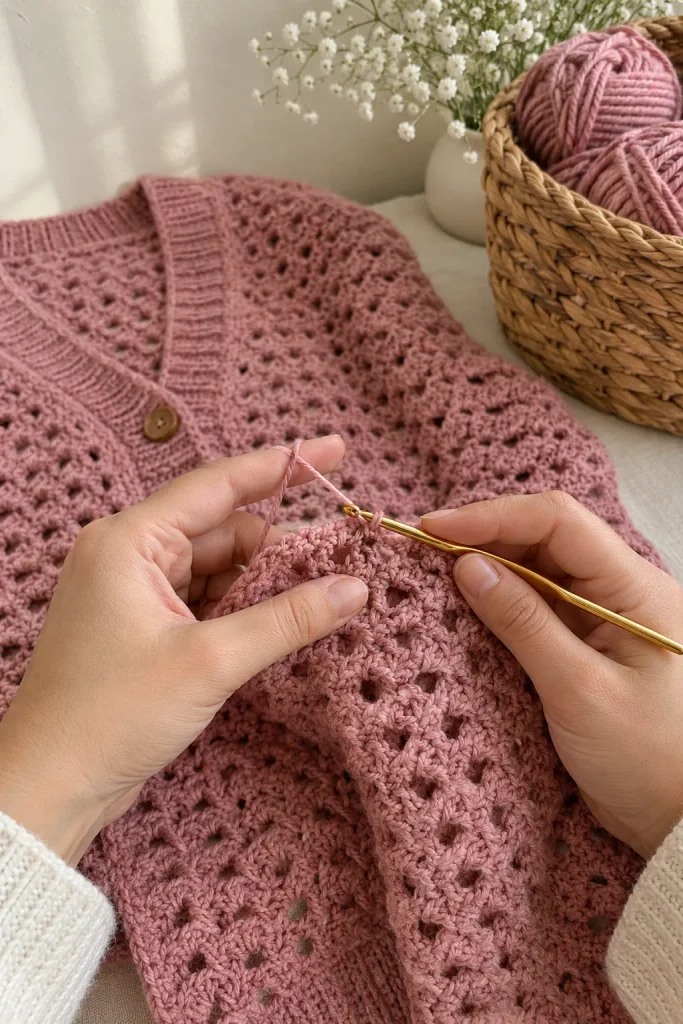
Tips for working the eyelet stitch
Keep your tension relaxed. If your stitches feel tight, the holes will look small and the fabric will feel stiff. Let the hook glide.
Always count after the eyelet row. After Row 3, you should have half of your stitches as hdc and the other half as chain spaces. After Row 4, you’re back to 73 stitches.
Use a stitch marker in the first stitch of the row. It’s easy to lose that first stitch when you’re turning your work. A little marker clipped there saves frustration.
Don’t skip the ch-1 spaces on Row 4. Each hole needs a stitch worked into it. If you skip it, your stitch count drops and the panel starts to narrow.
Take a photo as you go. I look back at mine a lot. It helps me spot a missed row or a wobbly edge early.
When the back panel is done, fasten off and weave in the loose ends later.
Step 3: The Two Front Panels
The fronts are worked just like the back, but narrower, and with a V-neck shaping near the top.
Chain 39. Hdc in the 3rd chain from the hook and across for 37 stitches. Then work the eyelet pattern for 18 rows.
Before you go any further, mark the neck edge with a stitch marker. This is the edge that will sit at the center front, where the band goes. For the first front panel, this is the end of RS rows. For the second panel, it’s the beginning of RS rows. Marking it saves you from making two identical panels, which is the most common cardigan mistake.
V-neck shaping
Starting on Row 19 and continuing on every RS row (Rows 19, 21, 23, and so on up to Row 47), decrease 1 stitch at the neck edge by working hdc2tog over the last two stitches (or the first two, depending on which side you’re on). That’s 15 decreases in total, leaving you with 22 stitches for the shoulder.
Continue the eyelet pattern for the other stitches. When there aren’t enough stitches left on the neck side to form an eyelet pair, just work plain hdc there. Nobody will ever notice.
Work until the front panel has 48 rows, just like the back, and fasten off.
Make the second front panel the same way, but decrease on the opposite edge.
A small trick for matching panels
Write down the row numbers where you decrease on the first panel. When you do the second, follow your list and tick them off. It takes a minute and guarantees both V-necks match.
Step 4: The Sleeves
Sleeves are worked from the cuff up, so the narrow end comes first.
Chain 31 with the 5.5 mm hook. Hdc in the 3rd chain from the hook and across for 29 stitches. Begin the eyelet pattern.
Now for the shaping. Increase 1 stitch at each end of the row every 3rd row, a total of 14 times on each side. That brings you from 29 to 57 stitches at the top.
To increase, work 2 hdc in the first stitch and 2 hdc in the last stitch of the row. If there aren’t enough new stitches to complete an eyelet pair, just work the new ones as plain hdc until there are.
Keep going until the sleeve measures about 17 inches (43 cm), or 44 rows, then fasten off. Make a second sleeve to match.
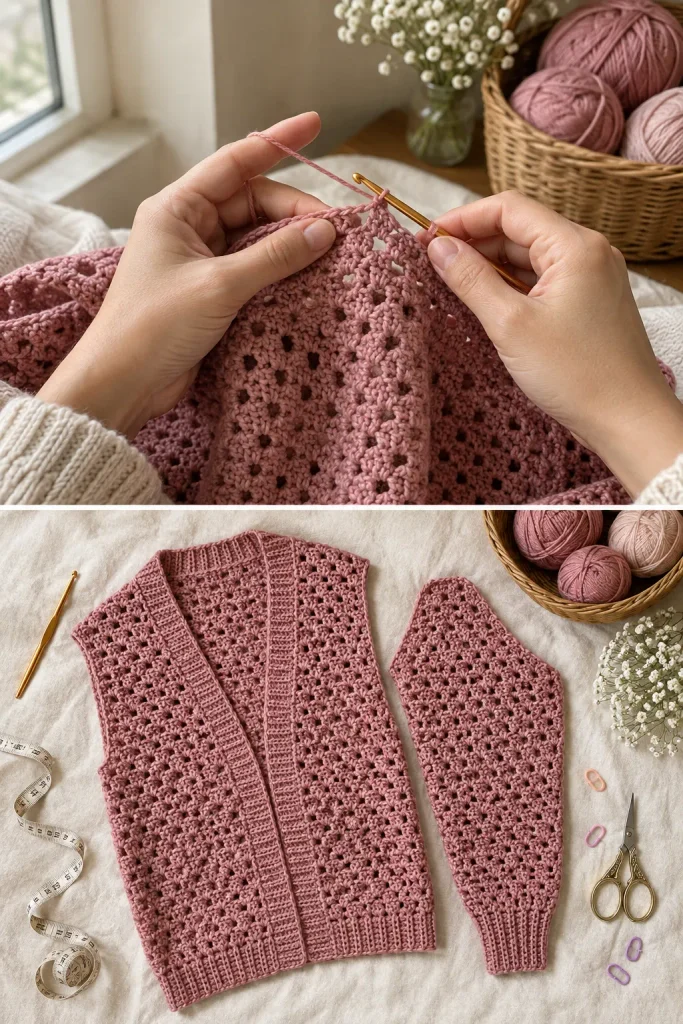
Lay all five pieces flat now and take a look. This is the stage where the project suddenly starts to feel real. Your panels might look a little uneven or curly, and that’s normal. Blocking will take care of it.
Step 5: Block Your Pieces
Blocking is what makes crochet look finished instead of homemade. Don’t skip it.
- Gently wet each piece in lukewarm water, or mist it thoroughly with a spray bottle.
- Press out the water with a towel.
- Lay each piece flat on blocking mats and shape it to the correct measurements.
- Pin the edges, gently opening up the eyelets.
- Let everything dry completely, which can take a day or two.
Compare the pieces to your measurements while they’re pinned. This is the easiest moment to correct any slight differences.
Step 6: Assemble the Cardigan
Use a tapestry needle and a length of your yarn.
- Sew the shoulder seams. Place a front panel on the back panel, right sides together, and sew across the 22 shoulder stitches. A whip stitch or mattress stitch works well.
- Attach the sleeves. Fold each sleeve in half to find the center, and match it to the shoulder seam. Sew the sleeve top to the open armhole edge, spreading the stitches evenly.
- Sew the sleeve and side seams. Starting at the cuff, sew up the sleeve seam to the underarm, then continue down the side of the body to the hem in one line.
Pin everything before you sew. It keeps the pieces from sliding and makes sure the eyelet rows line up on both sides.
Step 7: Ribbed Hem, Cuffs, and Front Band
The ribbing is what gives this cardigan that polished look. It’s worked sideways, in long strips, then sewn on.
The ribbing stitch
Use the 4.5 mm hook. Work hdc in the back loop only (BLO) every row. This creates ridges that look and stretch like knit ribbing.
Hem ribbing
Chain 13. Hdc in the 3rd chain from the hook and in each chain across (12 stitches). Ch 2, turn, hdc BLO in each stitch across. Repeat until the strip measures about 40 inches (102 cm). Fasten off, and sew it to the bottom of the cardigan, easing the ribbing slightly so it sits snug.
Cuffs
Chain 13. Work the same way until the strip measures about 8 inches (20 cm). Sew the short ends together to make a ring, then sew the ring to the sleeve opening. Repeat for the other sleeve.
Front band
This is the long strip that goes up one front, around the back neck, and down the other front.
Chain 11. Hdc in the 3rd chain from the hook and across (10 stitches). Work hdc BLO until the strip is about 46 inches (117 cm), or measure your actual edge and make the strip about 90% of that length. Fasten off.
Buttonholes
On one half of the band (the half that will go on the front you button over), make four buttonholes. On a RS row, ch 2 and skip 2 stitches in the center of the band. On the next row, work 2 hdc into the chain space. Space the buttonholes about 2.5 inches (6 cm) apart, with the first about 1 inch (2.5 cm) above the hem.
Pin the band all the way around the front edges, easing it so it lies flat, and sew it on with mattress stitch or a neat whip stitch.
Step 8: Add the Buttons
Try the cardigan on, or lay it flat and overlap the fronts. Mark where each button should sit, matching the buttonholes. Sew each button on with sturdy thread or a length of your yarn.
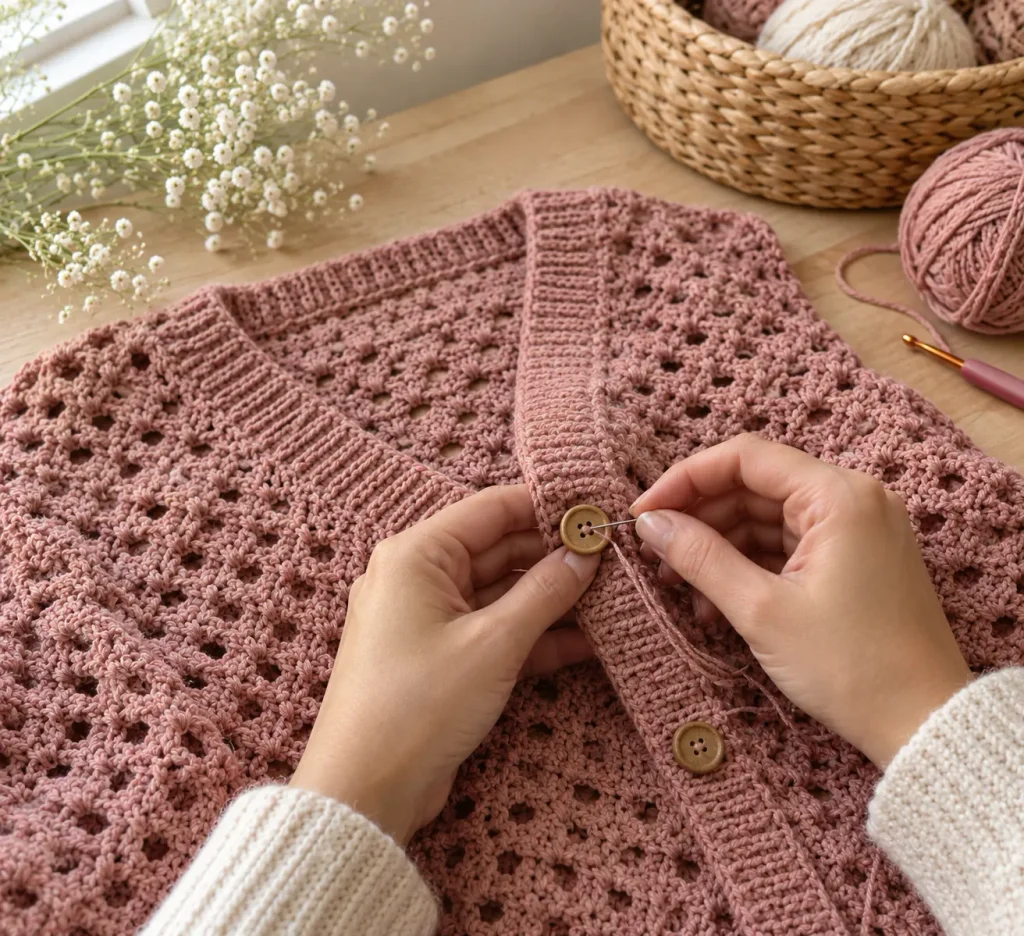
Weave in all the ends, trim them, and give the finished cardigan a final gentle press or steam. Be careful not to flatten the ribbing.
You did it. Put it on, look in the mirror, and enjoy the moment.
Common Mistakes (and How to Avoid Them)
Wobbly edges. This almost always comes from missing the last stitch of a row, or putting an extra stitch in the first. Counting after each eyelet row helps.
Panels that don’t match in length. Count your rows and measure. Use row counters or tally marks on paper.
Tight ribbing. If the hem pulls up, your ribbing strip is too short or too tight. Work it a little looser, or add a few more inches.
Skipping blocking. Unblocked crochet curls and puckers. Blocking solves nearly every small problem.
Buying too little yarn. Running out near the end is miserable. If you’re between sizes, or want a longer cardigan, buy an extra skein.
Sewing seams too tightly. Tight stitches pucker the fabric. Keep your seam tension about the same as your crochet.
Ways to Customize Your Cardigan
Change the color. Cream, sage green, mustard yellow, or a deep navy all look great. Solid colors show the eyelets best.
Go cropped. Work 36 rows instead of 48 for a shorter silhouette.
Make it longer. Add 8 or 12 rows for a relaxed, tunic-length cardigan.
Try different buttons. Mother-of-pearl, brass, or colorful ceramic buttons can completely change the mood.
Leave off the buttons. Skip the buttonholes and make it an open-front cardigan. It’s even simpler.
Make it for kids. Reduce the starting chains and row counts. A mini matching cardigan makes a sweet gift.
How to Care for Your Cardigan
- Hand wash in cool water with a gentle wool wash.
- Don’t wring or twist. Press the water out in a towel.
- Dry flat. Never hang a wet crochet garment, because the weight will stretch it.
- Store folded. Hangers can pull the shoulders out of shape.
- Check the buttons now and then and re-sew any that feel loose.
Frequently Asked Questions
Can I use a different yarn?
Yes. Just do a gauge swatch and adjust your chain and stitch counts. Lighter yarns need more stitches, and chunkier yarns need fewer.
What if I’m a complete beginner?
Start with a smaller project, like a scarf or a simple square, to get comfortable with half double crochet. Then try a swatch of the eyelet stitch before beginning the cardigan.
How much yarn do I need for other sizes?
For a small, plan on about 1,100 yards. For a large or extra large, 1,600 to 1,800 yards is safer. Always buy an extra skein if you can.
Why are my eyelets different sizes?
Usually it’s tension. Try to keep your chain 1 spaces the same size each time.
Can I make it without sewing?
Not easily. The pattern relies on seams. But sewing is straightforward, and a few pins and patience will give you a lovely result.
How do I know where to put the buttons?
Overlap the fronts and mark each buttonhole position with a pin on the other band. Sew each button on directly behind the hole.
Final Thoughts
If you’ve been wanting to make a cardigan but felt nervous, I hope this tutorial shows you that it’s just a series of simple pieces joined together. Take it one rectangle at a time, trust your swatch, and enjoy the way the eyelets slowly appear row by row.
When you finish, I’d love to see your version. Share your color choices, button picks, and any changes you made. Every cardigan turns out a little different, and that’s part of the charm.
Happy crocheting, and enjoy wearing your handmade cardigan!
More handmade ideas to explore next: If you love cozy handmade fashion, you may also enjoy our Easy Cable Knit Vest Tutorial | Classic Sweater Vest Pattern and our [ADD LINK: Chic Knitted Summer Top | Whisper Wind Top Tutorial].