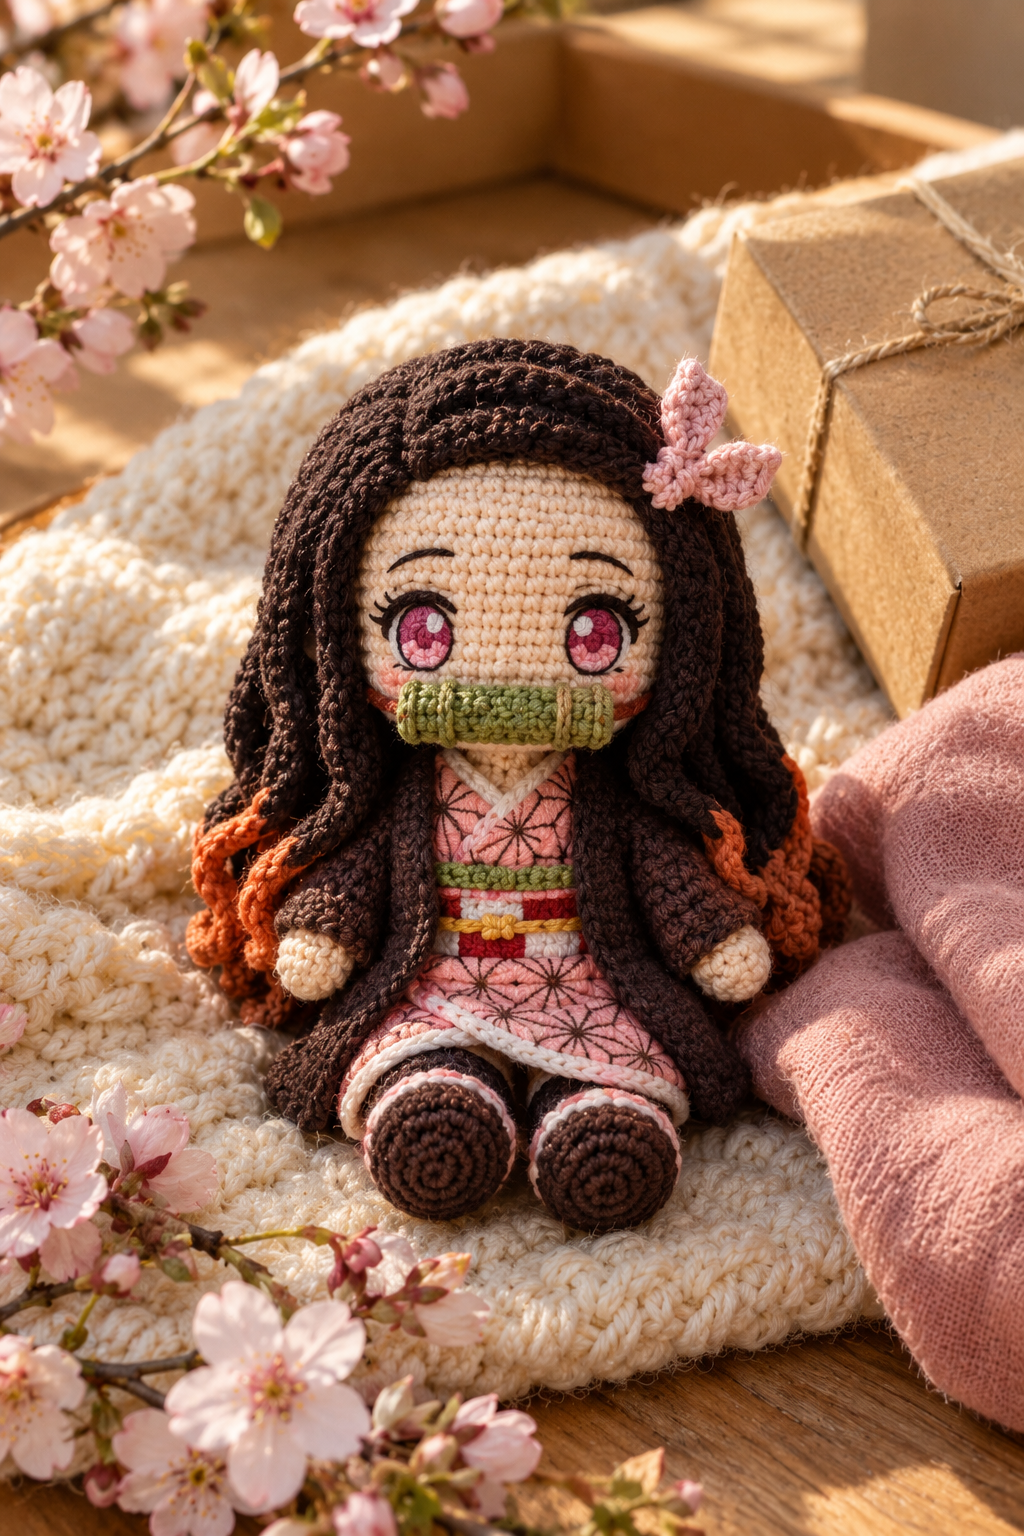
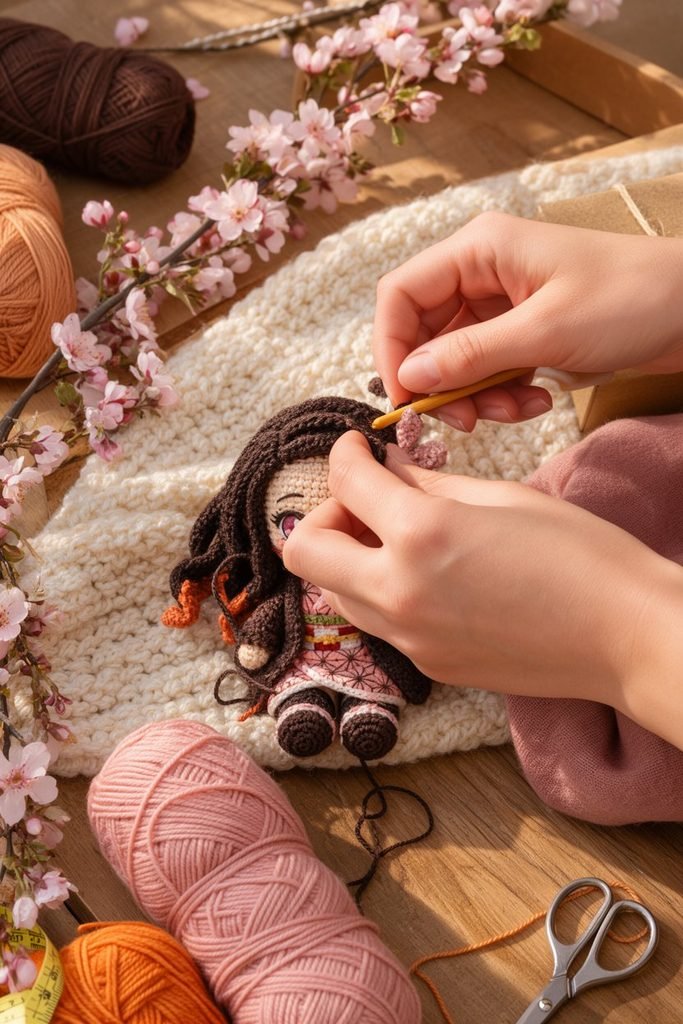
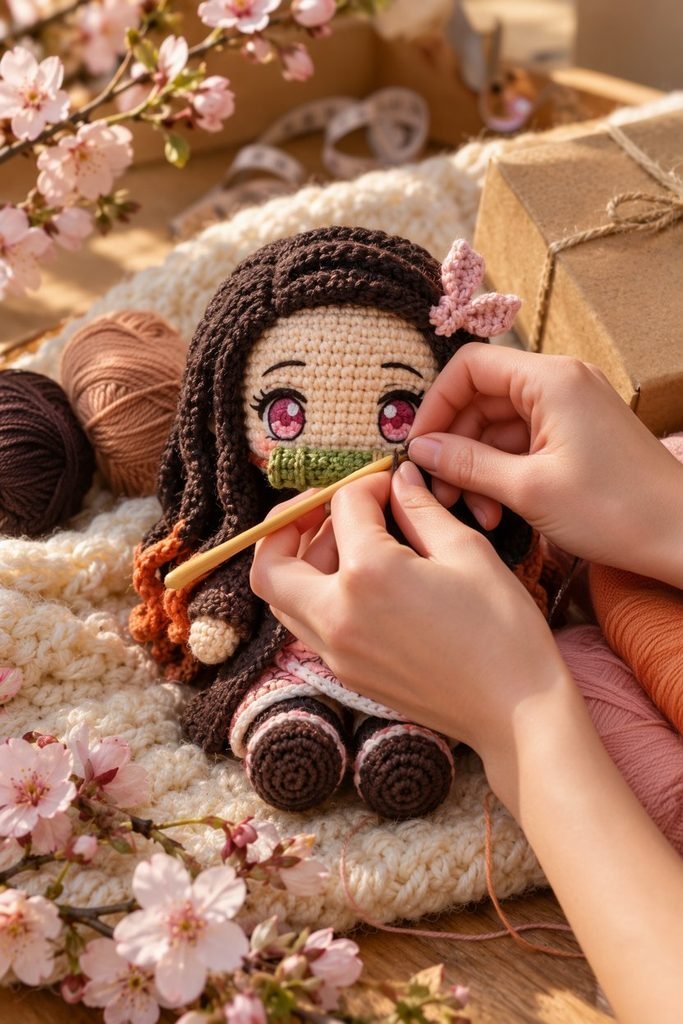
Look at that little face. Big pink eyes, tiny lashes, a green bamboo muzzle held in place by a thin strap, and a soft pink bow tucked into her hair. That is the Nezuko crochet doll you are about to make, and I promise she is easier than she looks.
This pattern is for every anime lover who also loves yarn. She sits by herself on a shelf, she is small enough to hold in one hand, and she is detailed enough that any Demon Slayer fan will recognize her right away. You get the long wavy hair with orange tips, the pink asanoha kimono, the dark brown haori, and those adorable round brown shoes with pink and white striped socks.
I wrote this guide the way I would explain it to a friend sitting next to me. No confusing jargon, just clear steps, a few honest tips, and the little tricks that make the doll look neat. Let’s get started.
Why Nezuko Is Such a Fun Crochet Project
Many amigurumi characters look sweet but feel repetitive to make. Nezuko is different, because every part has its own small challenge.
- The hair is made from thick crochet strands that fall in soft waves.
- The orange tips add a pop of color.
- The muzzle is tiny but gives her instant character.
- The kimono lets you try simple embroidery.
- The shoes and socks are the cutest detail of all.
She also makes a lovely handmade gift. Someone who loves anime will treasure a doll like this far more than anything from a store.
Finished Size and Skill Level
- Height: about 8 to 9 inches (20 to 23 cm)
- Skill level: easy to intermediate
- Time: 10 to 14 hours, depending on how long you spend on the hair
- Terms: US crochet terms
If you have made a basic amigurumi before, you can make her. The hair and the sewing need a bit of patience, but nothing is truly difficult.
Materials You Will Need
Yarn (DK or light worsted, cotton or soft acrylic):
- Cream or light peach for face, hands and body
- Dark chocolate brown for hair, haori and shoes
- Burnt orange for the hair tips
- Soft pink for the bow and kimono
- Dark pink or red for the kimono pattern
- Light green for the bamboo muzzle
- White, gold or yellow for socks and obi stripes
Tools and extras:
- 2.5 mm crochet hook (a light wooden or bamboo hook feels lovely for small work)
- 8 mm safety eyes in pink, or black eyes with pink embroidery
- Black thread for eyebrows and eyelashes
- Fiberfill stuffing
- Stitch markers
- Tapestry needle
- Small sharp scissors
- Tape measure
- Pink pipe cleaner (optional, for the arms)
- Craft glue for tiny details
I like to lay my yarn balls in a circle around me before starting. Seeing the pink, brown and orange together helps me plan the order of the work, and it makes the whole setup feel cozy.
Abbreviations
- MR magic ring
- sc single crochet
- inc increase (2 sc in the same stitch)
- dec decrease (invisible decrease is best)
- sl st slip stitch
- ch chain
- BLO back loop only
- FO fasten off
Work in continuous rounds and place a marker at the start of every round.
A Quick Word About Tension
Go one hook size down from what your yarn label suggests. Tight stitches hide the stuffing and give your doll a clean, professional look. If you can see fluff between stitches, tighten up.
Step 1: Crochet the Head
Use cream or peach yarn.
- Rnd 1: MR, 6 sc (6)
- Rnd 2: inc x 6 (12)
- Rnd 3: (sc, inc) x 6 (18)
- Rnd 4: (2 sc, inc) x 6 (24)
- Rnd 5: (3 sc, inc) x 6 (30)
- Rnd 6: (4 sc, inc) x 6 (36)
- Rnd 7: (5 sc, inc) x 6 (42)
- Rnd 8: (6 sc, inc) x 6 (48)
- Rnd 9 to 17: sc around (48)
Insert the safety eyes between rounds 13 and 14, about 8 stitches apart.
- Rnd 18: (6 sc, dec) x 6 (42)
- Rnd 19: (5 sc, dec) x 6 (36)
- Rnd 20: (4 sc, dec) x 6 (30)
- Rnd 21: (3 sc, dec) x 6 (24)
Stuff the head very firmly now. A soft head will droop once the hair is added.
- Rnd 22: (2 sc, dec) x 6 (18)
- Rnd 23: (sc, dec) x 6 (12)
- Rnd 24: dec x 6 (6)
FO and leave a long tail for sewing the head to the body.
Giving Her Nezuko’s Face
This is where she comes alive.
- Embroider short, gently curved eyebrows in black.
- Add three or four tiny straight stitches on the outer corner of each eye as lashes.
- If you used plain eyes, stitch a pink iris with a small white highlight.
- Add soft blush with pink or orange thread under the eyes.
- Stitch a tiny coral line at the corner of the mouth area, just where the muzzle will sit.
Step 2: Crochet the Body
Use cream yarn for the body base.
- Rnd 1: MR, 6 sc (6)
- Rnd 2: inc x 6 (12)
- Rnd 3: (sc, inc) x 6 (18)
- Rnd 4: (2 sc, inc) x 6 (24)
- Rnd 5 to 8: sc around (24)
- Rnd 9: (2 sc, dec) x 6 (18)
- Rnd 10 to 12: sc around (18)
- Rnd 13: (sc, dec) x 6 (12)
Stuff the body and leave the top open for sewing. For a longer neck, add two extra rounds of 12 sc.
Step 3: Legs, Socks and Shoes (Make 2)
I love this part. The shoes are round and dark brown, and a pink and white striped sock peeks out above them, just like in the feature photo.
Shoe (dark brown):
- Rnd 1: MR, 6 sc (6)
- Rnd 2: inc x 6 (12)
- Rnd 3: (sc, inc) x 6 (18)
- Rnd 4: BLO, sc around (18)
- Rnd 5 to 6: sc around (18)
- Rnd 7: (sc, dec) x 6 (12)
Sock: change to white.
- Rnd 8 to 9: sc around (12)
- Rnd 10: change to pink, sc around (12)
- Rnd 11: change to white, sc around (12)
- Rnd 12 to 14: change to cream, sc around (12) for the leg
Stuff lightly, flatten the top, and sew both legs to the bottom of the body so she sits on her own.
Step 4: Arms (Make 2)
- Cream for the hand: MR, 6 sc, then 2 rounds of sc (6)
- Change to dark brown for the haori sleeve: sc around for 7 rounds, with one increase in the middle (7)
Stuff lightly and sew to the sides of the body. A pink pipe cleaner inside the arm lets you pose her.
Step 5: The Hair (The Star of the Show)
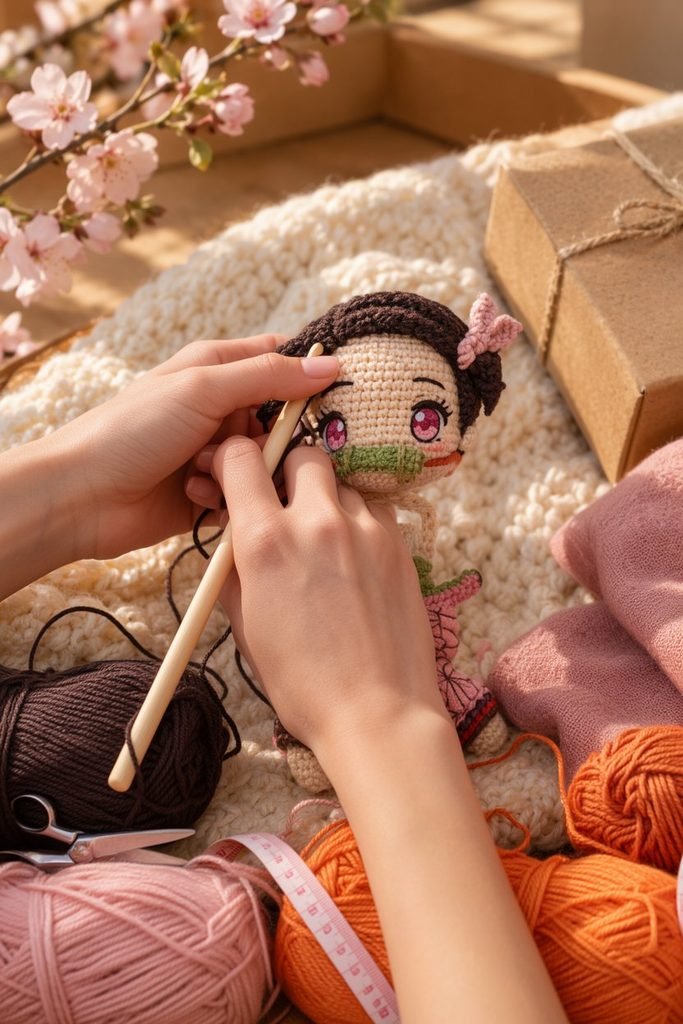
I will be honest: the hair takes the longest. But it is also what makes your doll special. In the photos, the hair is made of thick crochet strands that fall in soft waves, with bright orange tips at the bottom.
The Hair Cap
- In dark brown, work a flat circle: MR, 6 sc, then increase each round like the head until you reach 42 stitches.
- Work 3 to 4 rounds of plain sc so the cap hugs the back and sides of the head.
- Sew the cap to the head with the front edge about two rounds above the eyebrows.
The Hair Strands
- Chain 40 to 45 in dark brown.
- Work sc in the 2nd chain from the hook and along the chain.
- Chain 1, turn, and work sl st along the edge. This curls the strand into that soft rope-like wave.
- Change to orange for the last 6 to 8 stitches to form the tip.
- FO and leave a tail for sewing.
Make 16 to 20 strands. Make a few shorter ones (about 30 chains) for the sides of the face.
Sew the strands onto the cap in layers, starting at the bottom and moving up. The upper layers will cover the sewing lines of the lower ones.
Tip: Let the strands twist naturally. That is what gives the hair its wavy anime look.
Bangs and Side Pieces
Make 4 short strands (12 to 15 chains) and sew them across the forehead, curved slightly to one side. Two longer strands in front of the shoulders frame the face nicely.
Adding the Orange Tips Afterwards (Optional)
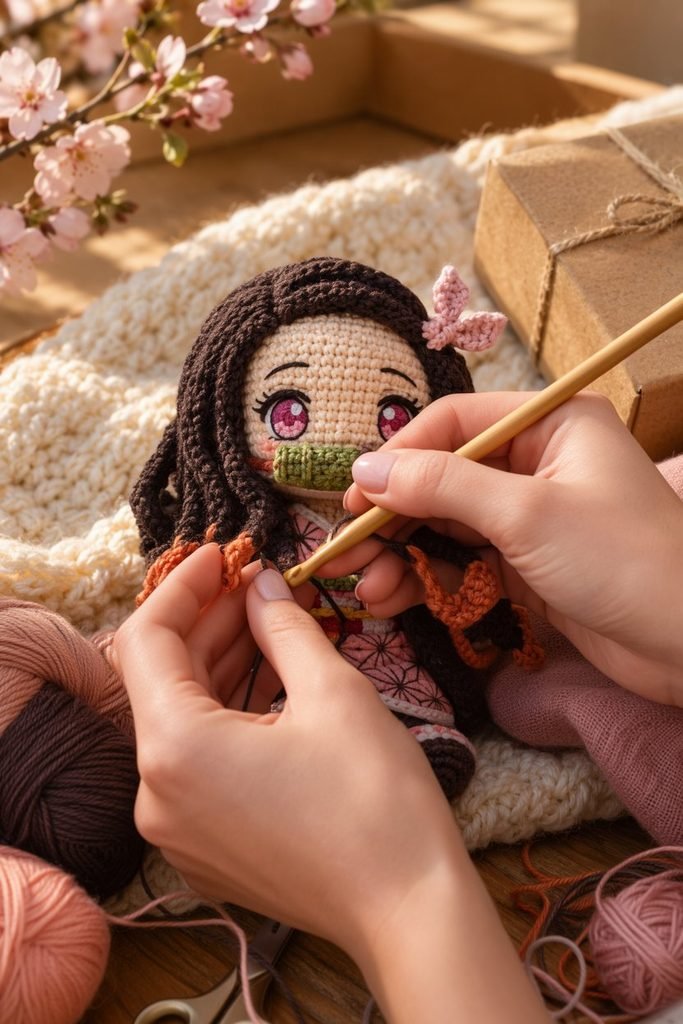
If you prefer, make all strands brown and add the orange later. Attach orange yarn at the end of each strand with a slip stitch and work 6 chain loops. This creates a fluffy flame-like end, exactly like in the photo where the orange yarn is being joined by hand.
The Pink Bow
Nezuko’s ribbon is a pale pink bow on the side of her head.
- Chain 12 and work 2 rows of sc.
- Wrap the middle with pink yarn and pull it tight.
- Sew it on top of the hair on one side, slightly toward the back.
Step 6: The Pink Asanoha Kimono
The kimono has a soft pink base with a geometric star pattern called asanoha. You can recreate it with simple embroidery.
Kimono body (soft pink, worked flat):
- Chain 24
- Row 1: sc across (23)
- Row 2 to 12: ch 1, turn, sc across (23)
Sleeves: The brown haori covers them, so keep them short. Chain 10, sc across for 5 rows, fold and sew.
Embroidering the pattern:
- Use dark pink or deep red yarn or thread.
- Mark a light grid with pins.
- Stitch straight lines from a center point outward in a star shape, then connect the tips into diamonds.
- Repeat over the skirt area.
It does not need to be perfect. Small differences make the doll look handmade, and that is the charm.
Collar and hem: Work a row of sl st in white around the collar and the bottom edge for a clean finish.
Step 7: The Obi Belt
- Chain 40 in green and sc across for 3 rows.
- Add a thin red stripe and a gold or yellow stripe in the middle.
- Wrap it around the waist and sew at the back.
This tiny belt adds so much detail for so little work.
Step 8: The Dark Brown Haori
The haori is the loose jacket over the kimono. In the feature photo it is dark brown with sleeves that hang down to her little hands.
- In dark brown, chain 26 and work 10 rows of sc for the back panel.
- Add two front panels, each 10 stitches wide and 8 rows high.
- Sew the shoulders together and attach the sleeves (chain 12, sc for 8 rows).
- Slip it over the kimono and sew it loosely at the shoulders.
Leave the front open so the pink kimono pattern shows.
Step 9: The Green Bamboo Muzzle
This is the detail fans look for first, so give it some love.
- With light green yarn, chain 9.
- Work sc in the 2nd chain from the hook and across (8).
- Work 3 rows of sc in the back loops only for a ribbed bamboo texture.
- Add one dark green stitch across the middle to mimic the bamboo joint.
- Sew it onto the face, covering the mouth.
The strap:
- Chain 25 in pink or soft orange.
- Sew one end to each side of the muzzle.
- Tuck the strap under the hair at the back.
Your hook is very handy here. In the feature photo you can see it used to pull the strap through at the side of the muzzle, which keeps the stitches neat and hidden.
Step 10: Final Assembly
- Stuff and sew the head to the body. Go around the neck twice for a strong join.
- Attach the arms and legs.
- Dress her in the kimono, obi and haori.
- Sew on the hair strands and the pink bow.
- Attach the muzzle and strap.
- Weave in all ends and trim.
Place her on a soft surface and look at her from every angle. Adjust any hair strands that look uneven. A slight tilt of the head makes her look even sweeter.
Pro Tips for a Cleaner Doll
- Use invisible decreases so the face stays smooth.
- Stuff firmly, especially the head.
- Use the same dye lot of brown yarn for hair, haori and shoes so the colors match.
- Work the hair in natural light. Dark brown yarn hides stitches easily.
- Steam the hair strands lightly to make them softer and wavier.
- Take progress photos. They are great for Pinterest and Instagram.
Photo Setup Ideas to Bring in More Readers
The photos in this article have a soft, cozy spring feeling, and that is no accident. A pretty setup helps your pins and posts stand out.
- Use a cream chunky knit blanket as the background.
- Add cherry blossom branches or pink paper flowers.
- Include yarn balls, hook, scissors and a tape measure in the frame.
- Add a small kraft box with twine for a gift feel.
- Shoot near a window in the morning for warm light.
Easy Variations
- Mini Nezuko keychain: thin yarn, no legs.
- Sleeping Nezuko: crochet a tiny bamboo box for her to rest in.
- Chibi version: make the head two sizes bigger.
- Matching set: make Tanjiro, Zenitsu and Inosuke too.
- Gift set: pair the doll with a handwritten note and a small tin of tea.
If you enjoy seasonal handmade ideas, you will also like my Jack-o’-Lantern Pumpkin Bag Crochet Halloween Idea.
Care Instructions
- Spot clean with a damp cloth.
- Do not machine wash if you used glue or felt details.
- Keep her out of direct sunlight so the pink and orange do not fade.
- Gently smooth the hair strands with your fingers now and then.
Can I Sell Dolls Made from This Pattern?
Anime characters belong to their creators and studios. Many makers sell small batches of handmade dolls, but the rules differ by country and platform. If you plan to sell, read your marketplace policy and think about an original “inspired by” design. For gifts and personal use, enjoy the pattern freely.
Frequently Asked Questions
How long does the doll take?
Most people finish in 10 to 14 hours. The hair strands alone take around 3 hours.
Can a beginner make this doll?
Yes, if you know the magic ring, sc, inc and dec. Take it slowly and work on one part at a time.
What yarn should I use?
Cotton gives crisp stitches, while soft acrylic is cheaper and easy to find in many colors.
How do I make the orange hair tips?
Either switch to orange at the end of each strand, or add orange loops afterwards with slip stitches.
Is it safe for children?
Use embroidered eyes and avoid small hard pieces or glue-only attachments.
My doll’s hair looks messy. What can I do?
Trim loose ends and reshape the strands with your fingers. A little steam also helps.
What hook size is best?
A 2.5 mm hook suits most DK yarns. Go smaller if you can see your stuffing.
Final Thoughts
A Nezuko crochet doll brings together everything I love about handmade projects: color, detail, patience and a lot of heart. From the first magic ring to the last tiny strap, each step feels rewarding, and the finished doll looks like something from a little anime boutique.
Set up a cozy corner, put on your favorite playlist, grab your pink, brown and orange yarn, and start with the head. It gets more exciting with every round. When your doll is finished, I would love to see her. Share a photo, leave a comment, and tell me which character you want to crochet next.
Happy crocheting!