There is something especially cute about tiny crochet decorations during the Christmas season. They do not need much space, but they can completely change the feeling of a shelf, Christmas table, gift basket, or little holiday display.
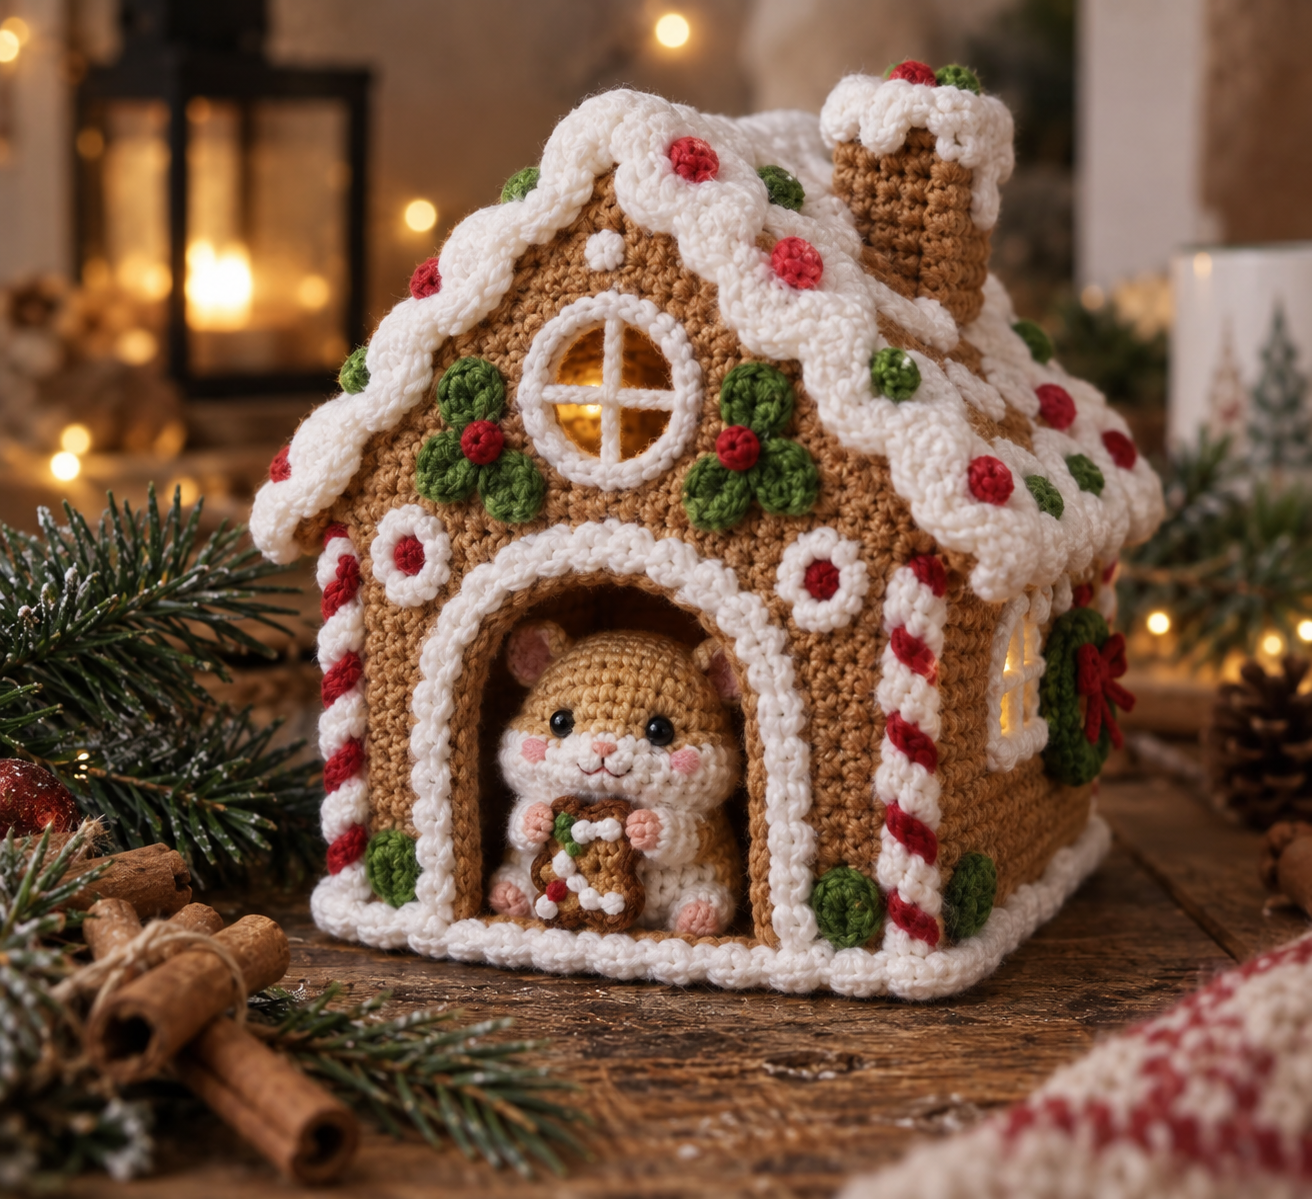
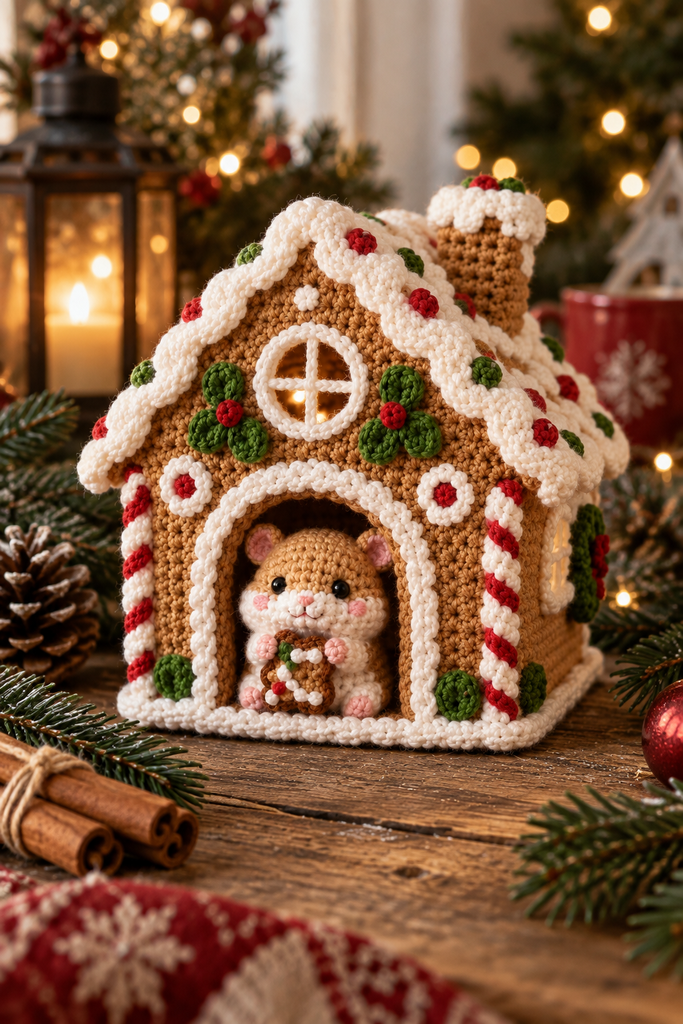
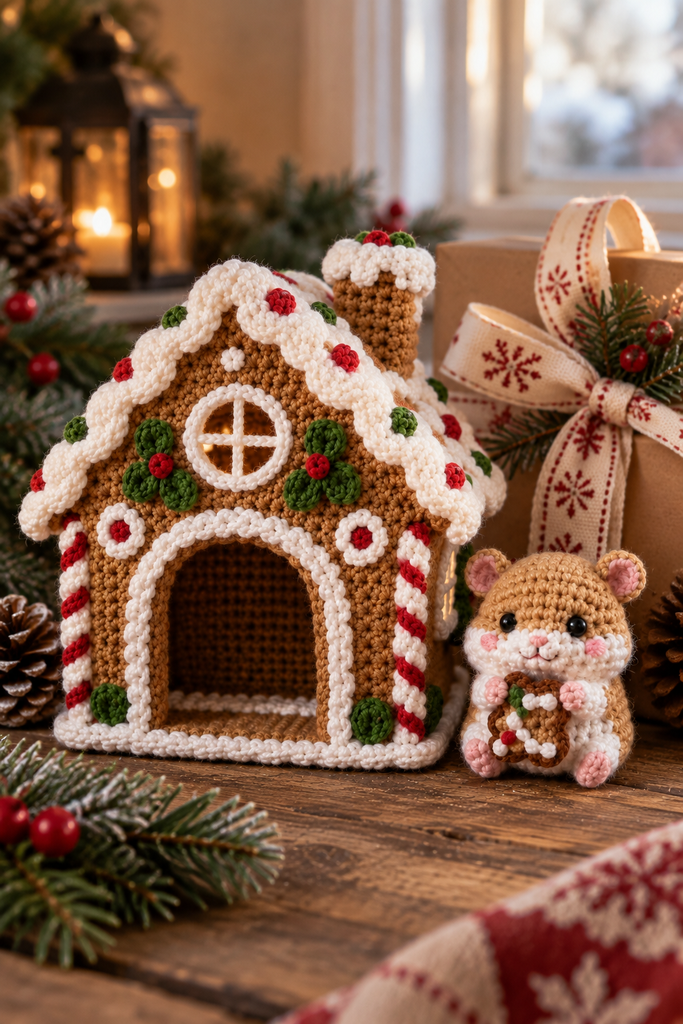
This Miniature Gingerbread Hamster Crochet Pattern for Christmas combines two things that work beautifully together: a tiny handmade hamster and a cozy gingerbread house. The finished piece has the look of a miniature Christmas scene rather than a simple amigurumi, which makes it especially nice for holiday decorating and gifting.
The challenge with a project this small is that every detail matters. A few stitches can change the shape of the hamster’s face, stuffing can affect the proportions, and small decorative pieces need to be attached securely without making the finished piece look bulky.
In this guide, we’ll look at the important parts of making a miniature gingerbread hamster set, from choosing yarn and keeping small pieces neat to shaping the house, creating a balanced hamster, attaching the decorations, and fixing the most common problems.
Why This Miniature Christmas Crochet Project Is So Special
Small crochet projects are often quicker to finish than large amigurumi, but they can require more attention to detail.
This particular design has two focal points:
- the miniature gingerbread house
- the tiny crochet hamster sitting beside it
The gingerbread house provides the larger structure, while the hamster gives the scene its personality.
The warm gingerbread-brown yarn, creamy icing details, green leaves, and small red berry accents create a traditional Christmas color palette. The hamster adds a soft, playful element that makes the finished decoration feel more like a tiny Christmas story.
It is also a versatile project. You can use the finished piece as:
- Christmas shelf décor
- tabletop decoration
- a handmade Christmas gift
- a holiday photo prop
- a small seasonal display
- part of a Christmas centerpiece
- a handmade gift basket addition
- a festive crochet collection
Because the finished item is miniature, it can also be a good project for crocheters who want to practice working with small amigurumi details.
Materials You’ll Need
Before starting, gather everything together. With miniature crochet, stopping repeatedly to search for materials can make the project more frustrating than it needs to be.
Yarn
A smooth cotton or cotton-blend yarn is generally a good choice for miniature amigurumi.
You will need colors similar to:
- gingerbread brown
- cream or off-white
- green
- red
- pink
- a small amount of black
- a small amount of light pink for the hamster’s ears and cheeks
The exact yarn weight should match the pattern you are following.
Why smooth yarn works well
Smooth yarn makes small stitches easier to see. This is particularly important when making a miniature hamster because the face contains several tiny details.
Very fluffy yarn can hide the stitches and make small increases or decreases difficult to identify.
For the gingerbread house, smooth yarn also helps the icing edges look cleaner.
Crochet Hook
Use the hook size recommended for your chosen yarn.
For amigurumi, crocheters commonly use a smaller hook than they would for a loose fabric project. The goal is to create a firm fabric with minimal gaps.
If stuffing is visible through the stitches, your hook may be too large for the yarn or your tension may be too loose.
Stuffing
Use a soft polyester fiberfill or another suitable amigurumi stuffing.
The important thing is not simply how much stuffing you use, but where you put it.
A miniature piece can become misshapen surprisingly easily if too much stuffing is pushed into one area.
Safety Eyes or Embroidered Eyes
The hamster in the reference design has small dark eyes.
Depending on your pattern and intended use, you can use:
- small safety eyes
- embroidered eyes
- another securely attached eye method
If the finished piece may be given to a young child, carefully consider whether safety eyes are appropriate. Embroidered details can be a safer alternative because they do not create a removable hard component.
Other Useful Tools
You may also want:
- stitch marker
- tapestry needle
- scissors
- stuffing tool or blunt pencil
- pins
- small embroidery needle
- measuring tape
- fabric glue only where appropriate for your chosen construction method
A tapestry needle with a comfortable eye makes assembly much easier, especially when several small pieces need to be attached.
Understanding the Construction
Before crocheting, it helps to think about the project as several separate components.
The complete scene can be divided into:
1. Gingerbread house
This is the main structural piece.
2. Gingerbread house roof
The roof gives the house its recognizable shape and provides space for the decorative icing.
3. Icing details
Cream-colored crochet details create the snowy gingerbread appearance.
4. Christmas decorations
Small green and red details add the festive color accents.
5. Hamster body
The hamster needs enough shaping to remain cute and rounded rather than becoming a simple ball.
6. Hamster face
The eyes, muzzle, cheeks, ears, and other facial details are what give the character its personality.
7. Tiny accessory
The hamster shown in the reference image holds a small gingerbread-themed treat, which adds another miniature detail to the scene.
Thinking about these parts separately makes the project much easier to manage.
How to Keep Miniature Crochet Neat
One of the biggest problems with small amigurumi is losing control of your tension.
When working with tiny pieces, it is tempting to crochet faster because the rounds are short. Unfortunately, rushing can create uneven stitches and inconsistent tension.
Instead, concentrate on making each stitch clean.
Keep Your Tension Consistent
Your tension affects:
- finished size
- stuffing visibility
- shape
- stitch definition
- symmetry
If your tension changes halfway through a piece, one side may become larger than the other.
Try to maintain the same hand position throughout the project.
The Gingerbread House: Getting the Shape Right
The house is probably the most visually important structural element.
The goal is to create a firm miniature house that can stand independently.
A common mistake is making the walls too soft.
If the walls collapse when lightly touched, the finished house will not have the clean miniature appearance shown in the reference.
Use Firm Stuffing
If the pattern requires stuffing, add it gradually.
Instead of filling the entire piece at once:
- Add a small amount.
- Push it into the corners.
- Check the shape.
- Add more.
- Rotate the piece.
- Check again.
This allows you to maintain an even structure.
How to Avoid a Crooked Gingerbread House
A miniature house can look crooked if the sides are not aligned properly during assembly.
Before sewing the sections together, lay them flat and compare their edges.
Look for:
- uneven side lengths
- shifted corners
- different roof angles
- loose seams
- inconsistent tension
Pinning the pieces before sewing can help tremendously.
For a clean result, sew slowly rather than trying to complete the seam with long, loose stitches.
Creating the Gingerbread Icing
The cream-colored icing is one of the details that makes this project instantly recognizable as a gingerbread house.
The most important thing is consistency.
If one icing section is thick and another is extremely thin, the house may look unfinished.
Try to maintain:
- similar stitch tension
- consistent width
- smooth curves
- clean corners
The icing should look decorative rather than overpowering the gingerbread base.
Adding the Christmas Decorations
The red berries and green leaves are tiny, but they make a big difference.
When working with miniature decorations, placement matters more than quantity.
You do not need to cover every available space.
Instead, create a balanced arrangement.
For example, if you have a green leaf cluster on one side of the house, a smaller detail on another area can help balance the composition.
The same principle applies to the red accents.
Too many decorations can make the house visually crowded.
Making the Crochet Hamster
The hamster is the character of this project.
Its body should have a soft, rounded appearance while still maintaining enough structure to stand or sit properly.
The most important areas are:
- body
- head
- ears
- muzzle
- cheeks
- eyes
- paws
- feet
Small changes in these areas can dramatically change the expression.
The Secret to a Cute Amigurumi Face
With miniature animals, facial placement is extremely important.
The eyes should be positioned evenly.
Before permanently attaching them, place them temporarily and look at the hamster from several angles.
Check:
- Are the eyes level?
- Are they the same distance from the center?
- Is the face centered?
- Does the hamster look straight ahead?
- Is the muzzle positioned correctly?
Do not sew everything permanently until you are happy with the expression.
This simple step can save a lot of frustration.
Creating the Hamster’s Cheeks
The soft pink cheeks help give the hamster a warm, playful appearance.
However, they should remain subtle.
If the cheeks are too large, they can cover the muzzle and make the face look crowded.
If you are embroidering them, use small controlled stitches rather than pulling the yarn too tightly.
How to Keep Tiny Pieces From Becoming Bulky
Miniature crochet often has the opposite problem from large amigurumi.
With larger projects, you usually worry about getting enough definition.
With miniature projects, adding too much material can quickly make the design bulky.
For small parts:
- use small amounts of stuffing
- avoid excessive yarn tails
- hide joining points carefully
- use controlled embroidery
- trim excess yarn after securing it
Do not force large amounts of stuffing into tiny pieces.
Sometimes a small amount is enough to give a part the correct shape.
Common Problem: The Hamster Looks Too Large
If your hamster looks noticeably larger than the house, first check your gauge.
The most common causes are:
- larger yarn
- larger crochet hook
- loose tension
- additional rounds
- excessive stuffing
The easiest solution is usually to compare the finished measurements of your pieces with the intended proportions before assembling them.
Common Problem: The House Won’t Stand Properly
If the house keeps falling over, check the base first.
The bottom needs to be relatively flat.
A common mistake is adding too much stuffing toward the bottom, which creates a rounded base.
Try redistributing the stuffing so the bottom remains stable.
You can also gently shape the base by hand before closing the piece.
Common Problem: Stuffing Is Showing
If you can see white stuffing between your stitches, do not ignore it.
It usually means the fabric is too loose.
Possible causes include:
- hook too large
- tension too loose
- too much stuffing
- yarn too thin for the selected hook
For a polished amigurumi finish, the stitches should hold the stuffing securely inside.
Common Problem: The Face Looks Uneven
This is extremely common with tiny crochet animals.
Before deciding that the whole head needs to be remade, check the placement of the facial details.
Sometimes the crochet itself is perfectly fine, but one eye is slightly higher than the other.
Lay the hamster on a flat surface and photograph it from the front.
A photograph can make asymmetry much easier to spot than looking at it directly.
Common Problem: The Roof Looks Uneven
The roof should visually sit centered over the house.
If one side is longer, compare the stitch counts and tension of both sections.
Also check the sewing.
Even correctly crocheted pieces can look uneven if one side is sewn more tightly than the other.
Pinning before sewing can help keep both sides aligned.
Choosing the Right Yarn for Miniature Amigurumi
If you plan to make several miniature Christmas characters, it is worth developing a small yarn collection.
Look for yarn that has:
- clear stitch definition
- minimal fuzz
- consistent thickness
- good color availability
- enough durability for small decorative pieces
Cotton is particularly useful when you want crisp stitches.
Acrylic can also work well depending on the design and the finished texture you want.
The best choice ultimately depends on the pattern gauge and the appearance you want.
How Long Does a Miniature Crochet Project Take?
The time varies significantly depending on:
- crochet experience
- yarn thickness
- pattern complexity
- number of decorative pieces
- sewing experience
- embroidery speed
The project may look small, but miniature does not always mean extremely fast.
The hamster’s face and the gingerbread house decorations can require more concentration than a larger, simpler crochet item.
If you are a beginner, give yourself extra time for assembly.
The actual crocheting may be the easy part. Getting all the tiny components positioned correctly is where patience becomes important.
Beginner Tips for a Better Result
If this is your first miniature amigurumi project, keep these tips nearby.
Count carefully
Small pieces can change shape dramatically when a few stitches are added or missed.
Use a stitch marker
Do not rely on memory for where a round begins.
Stuff gradually
It is much easier to add stuffing than to remove it.
Check proportions before sewing
Place all the components together before attaching them.
Photograph your work
A phone photo can reveal crooked facial features or uneven assembly.
Don’t rush the details
The decorative pieces are what make this project special.
How to Make Your Crochet Look More Professional
Professional-looking amigurumi is not necessarily about using complicated stitches.
It is often about clean finishing.
Pay attention to:
- consistent tension
- invisible joins
- neat yarn tails
- secure attachments
- balanced facial placement
- smooth stuffing
- clean embroidery
- symmetrical details
Take a few extra minutes at the end to inspect the piece.
Look at it from the front, sides, and slightly above.
Small adjustments can make a surprisingly large difference.
Decorating With Your Finished Gingerbread Hamster
Once complete, this little Christmas scene can be displayed in several ways.
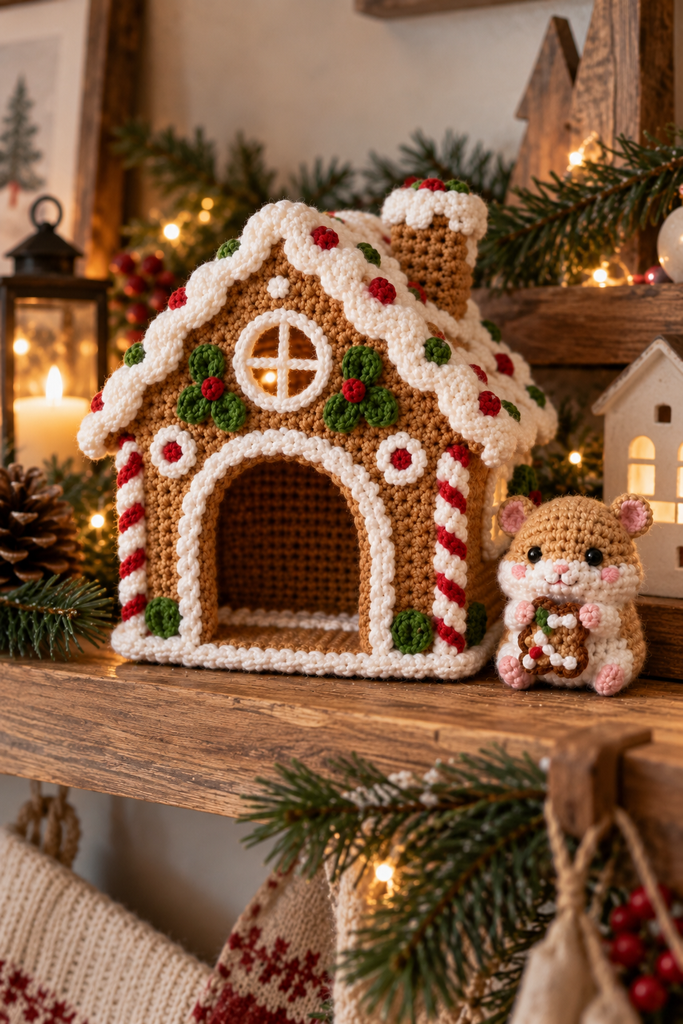
Christmas Shelf
Place it on a shelf alongside greenery, wooden ornaments, candles, or other handmade decorations.
Because the project is small, it works particularly well in a small Christmas vignette.
Christmas Table
A rustic wooden table provides a beautiful contrast against the warm gingerbread colors.
Keep the surrounding decorations simple so the crochet piece remains the main focus.
Gift Basket
A miniature crochet piece can make a thoughtful addition to a Christmas gift basket.
It can be paired with:
- hot chocolate
- cookies
- a Christmas mug
- handmade ornaments
- cozy socks
- a small candle
Handmade Christmas Display
If you enjoy crocheting seasonal decorations, this hamster can become part of a larger handmade Christmas collection.
Caring for Your Crochet Decoration
Crochet decorations can last for years when stored properly.
Keep It Dry
Avoid leaving the piece in damp areas for long periods.
Moisture can affect yarn and stuffing and may eventually cause unpleasant odors.
Avoid Direct Sunlight
Long-term exposure to strong sunlight can fade yarn colors.
A shelf away from direct sunlight is usually a better location.
Dust Carefully
For light dust, gently use a soft brush or a low-power vacuum with a protective attachment.
Avoid pulling on tiny decorations.
Store It Properly
When Christmas is over, place the piece in a clean storage container.
Do not compress it underneath heavy decorations.
Keeping the hamster and house protected will help preserve their shape.
Why Handmade Christmas Decorations Make Great Gifts
Store-bought decorations can be beautiful, but handmade pieces have something different.
They carry the time and effort of the person who made them.
A miniature gingerbread hamster is especially suitable for someone who enjoys:
- crochet
- handmade décor
- miniature collectibles
- Christmas decorations
- cute animals
- cozy home décor
Because the piece is relatively small, it can also be an affordable handmade gift while still feeling personal.
Frequently Asked Questions
Is this miniature gingerbread hamster crochet pattern beginner-friendly?
The project can be approachable for a confident beginner, but miniature amigurumi requires careful tension and attention to detail. If you are new to crochet, becoming comfortable with basic amigurumi techniques before starting will make the process easier.
What yarn is best for a miniature gingerbread hamster?
A smooth yarn with clear stitch definition is usually the easiest choice. Cotton and cotton-blend yarns are particularly useful for miniature amigurumi because they allow small stitches and details to remain visible.
Why is my crochet hamster larger than the example?
Your yarn weight, hook size, tension, stuffing, or number of rounds can affect the final size. Always check your gauge and compare your measurements with the intended dimensions.
How do I stop stuffing from showing?
Use a smaller hook if appropriate for your yarn, maintain tighter tension, and avoid overstuffing. The stitches should be close enough together that the stuffing remains inside.
How can I make the hamster’s face symmetrical?
Place the eyes and other facial pieces temporarily before sewing them permanently. View the hamster directly from the front and take a quick photograph to check alignment.
Can I use acrylic yarn?
Yes, acrylic can work for amigurumi, provided it produces the desired stitch definition and works with your pattern gauge. Smooth yarn is generally easier to use for tiny details.
How should I store the finished gingerbread house?
Store it somewhere dry and clean, protected from dust and strong sunlight. Avoid placing heavy objects on top of it because miniature crochet pieces can lose their shape when compressed.
Can I make this as a Christmas gift?
Absolutely. A miniature handmade Christmas decoration can make a thoughtful gift for crochet lovers, collectors, and anyone who enjoys cozy seasonal décor.
Tips for Making Multiple Christmas Crochet Pieces
If you enjoy making seasonal crochet decorations, consider treating this project as the beginning of a collection.
Once you understand the basic techniques, you can create a small group of coordinating pieces using the same color palette.
For example, warm gingerbread brown combined with cream, red, and green creates a traditional Christmas appearance.
Keeping your color palette consistent makes separate handmade pieces look like they belong together.
You can create a small Christmas display featuring several different crochet characters without needing every piece to be the same size.
How to Improve Your Crochet Skills With This Project
One reason miniature amigurumi is useful for learning is that it forces you to pay attention.
You practice:
- working in tight rounds
- increasing
- decreasing
- shaping
- stuffing
- joining pieces
- embroidery
- facial placement
- finishing techniques
These skills transfer directly to many other amigurumi projects.
Once you become comfortable with small pieces, larger amigurumi can often feel much easier.
A Simple Finishing Checklist
Before calling your project finished, take a few minutes to inspect it.
Crochet
- Are the stitches even?
- Are there any accidental holes?
- Are the seams secure?
- Are all yarn tails hidden?
Hamster
- Are the eyes level?
- Is the face centered?
- Are the ears positioned evenly?
- Are the paws secure?
- Is the body sitting correctly?
Gingerbread House
- Is the base stable?
- Is the roof centered?
- Are the icing details secure?
- Are the red and green decorations firmly attached?
Final Appearance
- Does the hamster look balanced beside the house?
- Are there any loose threads?
- Does the finished piece match the intended proportions?
- Can it stand or sit without falling over?
This final inspection is worth doing before photographing or gifting your finished project.
Final Thoughts
A miniature Christmas crochet project does not need to be complicated to be special.
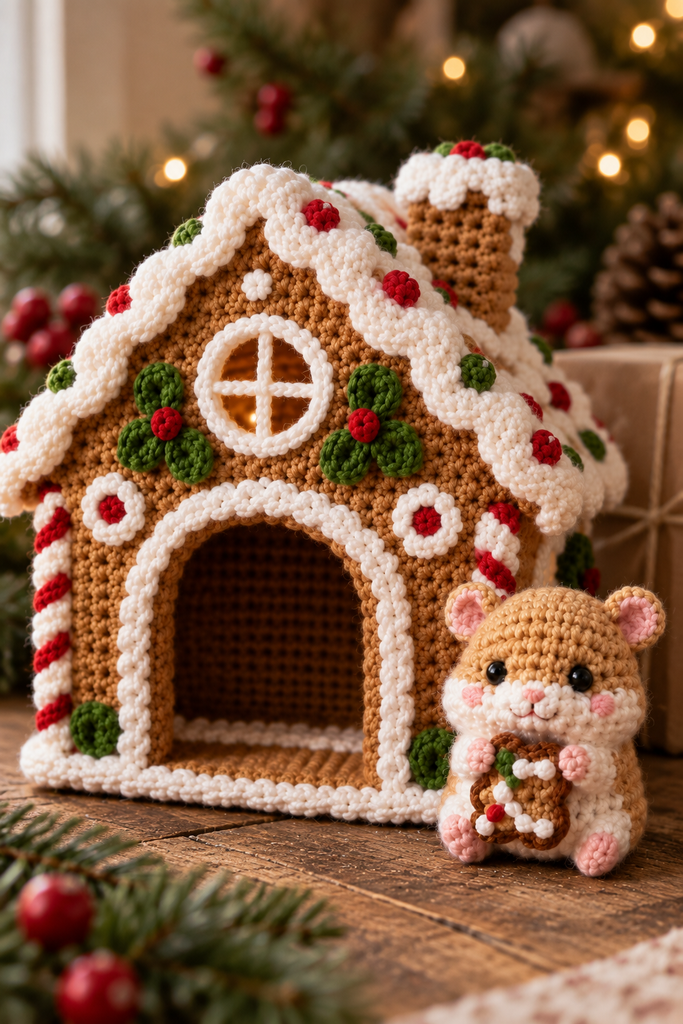
The charm of this Miniature Gingerbread Hamster Crochet Pattern for Christmas comes from the combination of a tiny character, a detailed gingerbread house, and traditional holiday colors.
The biggest lesson with miniature crochet is to slow down.
Keep your tension consistent. Check your proportions before sewing. Use small amounts of stuffing. Take your time with the face and decorative details. And most importantly, don’t be afraid to undo a small section if something doesn’t look right.
With amigurumi, a few extra minutes spent fixing a small problem can make the finished piece look dramatically better.
Whether you are making the gingerbread hamster for your own Christmas display or creating it as a handmade gift, the finished piece has the kind of cozy, personal character that makes handmade decorations so enjoyable.
If you love miniature crochet and Christmas projects, save this idea for your holiday crochet list and come back to it when you’re ready to start your next festive make.