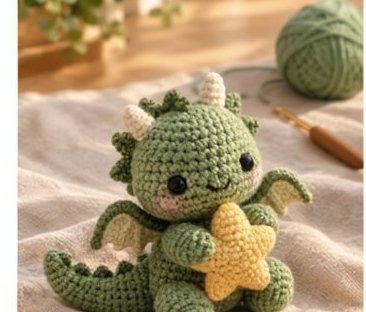
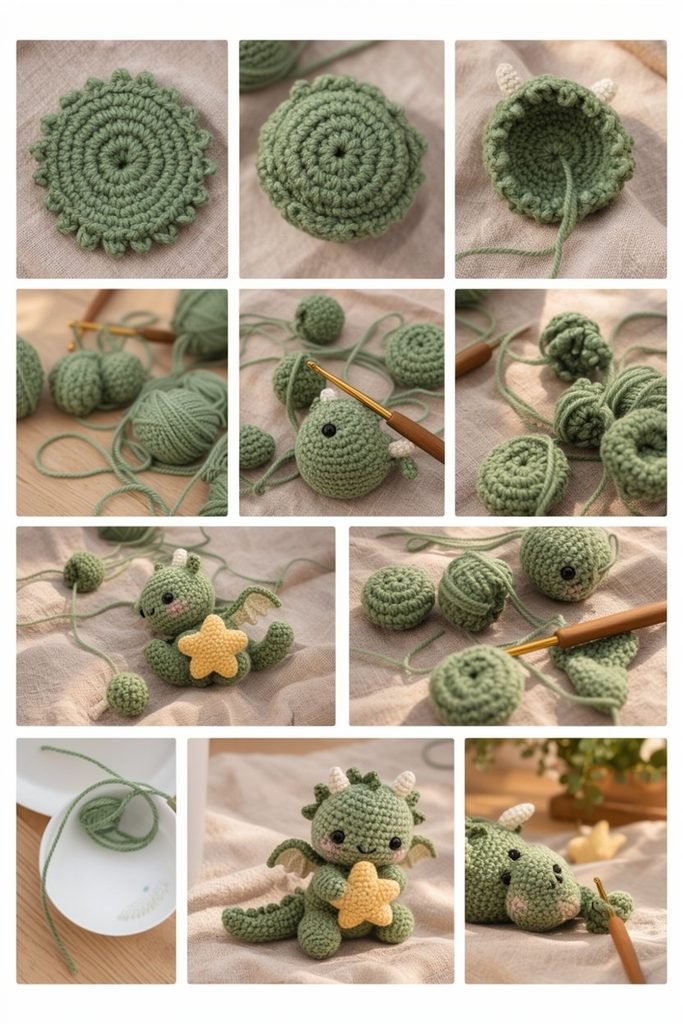
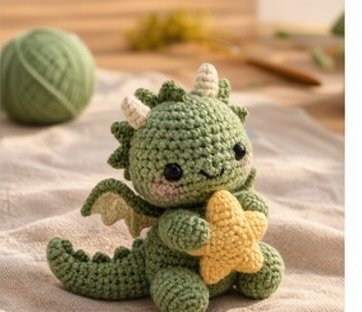
Some amigurumi are cute. Others make you stop mid-scroll and say “wait, I need to make that.” This adorable crochet baby dragon with a star is the second kind. He has a round, squishy head, tiny cream horns, soft wings, a curled tail, rosy cheeks, and a little golden star hugged tight against his chest.
This amigurumi pattern is written for crocheters who already know the basics and want a project that feels special. It is made in pieces: head, body, limbs, tail, wings, and star. Every piece is simple on its own, and the personality comes from how you put them together. I have included stitch counts for each round, photo guidance for every stage, and troubleshooting notes to save you from the usual amigurumi headaches.
Whether you want a gift for a child, a collectible for your shelf, or a mascot for your craft table, this baby dragon is a very good way to spend a weekend.
Why You’ll Love This Crochet Dragon Pattern
He is beginner-friendly but not boring. The pattern uses only single crochet, increases, decreases, and a few chain-based details. The result looks far more advanced than the stitches suggest.
He is made in small, quick pieces. If you only have an hour in the evening, you can finish a leg or a wing. That makes the project easy to fit into real life.
He is endlessly customizable. Sage green is lovely, but this dragon works in lavender, ocean blue, coral, or even a rainbow of scraps. The star can match or contrast.
He makes a great gift. Dragons are popular with kids, gamers, fantasy readers, and anyone who likes something a little magical. The star adds a gentle, sweet touch.
He uses very little yarn. One skein of green and small amounts of cream and yellow are enough, so this is a good stash-buster.
Materials and Tools
Yarn
- Main color (sage green): about 80 to 100 meters of DK or light worsted cotton or cotton-blend yarn
- Cream: a small amount for horns and wing membranes
- Yellow: a small amount for the star
- Pink or blush crayon, pastel, or embroidery thread: for the cheeks
- Black embroidery thread: for the smile
Tools
- Crochet hook: 2.5 mm to 3.0 mm. Go smaller than the yarn label suggests so the fabric stays dense and the stuffing does not show.
- Safety eyes: 8 mm black, or black embroidery thread for toys intended for very young children
- Polyester fiberfill
- Yarn needle
- Stitch markers: at least two
- Small sharp scissors
- Pins: for positioning pieces before sewing
A note on yarn choice
Cotton gives crisp stitches that show off the texture of the dragon’s skin. Acrylic is softer and cheaper but has more stretch, so crochet a little tighter. Avoid fuzzy yarns for this pattern, because they hide the stitches and the small details like spikes and horns.
Finished size
With DK yarn and a 2.5 mm hook, the dragon is about 15 to 18 cm (6 to 7 inches) tall when seated. Heavier yarn and a bigger hook will make a larger dragon.
Abbreviations (US Terms)
- MR: magic ring
- sc: single crochet
- inc: two single crochets in the same stitch
- dec: single crochet decrease (invisible decrease recommended)
- sl st: slip stitch
- ch: chain
- hdc: half double crochet
- BLO: back loop only
- (…): stitch count at the end of the round
- …: repeat the instructions between the asterisks
All pieces are worked in continuous spiral rounds unless the pattern says otherwise. Mark the first stitch of every round.
Before You Start: Five Tips for Better Amigurumi
- Crochet tightly. If you see stuffing between stitches, drop a hook size.
- Always count. The count at the end of each round is your safety net.
- Stuff as you go. Closing a piece before stuffing is the most common mistake.
- Leave long tails. Leave at least 25 cm when fastening off any piece that will be sewn on.
- Place the eyes before closing the head. You can adjust them while you still have access to the back.
Step 1: The Head Base (Flat Disc)
Every amigurumi head begins as a flat circle. This one is the foundation, so a neat start pays off later.
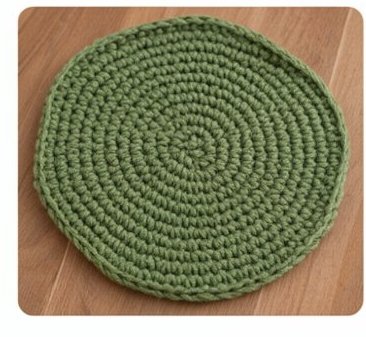
Look at how evenly the rounds spiral out from the center, with no puckers and no ruffles. That is your target.
Pattern
- Round 1: MR, 6 sc. (6)
- Round 2: inc in each stitch. (12)
- Round 3: sc, inc repeat 6 times. (18)
- Round 4: 2 sc, inc repeat 6 times. (24)
- Round 5: 3 sc, inc repeat 6 times. (30)
- Round 6: 4 sc, inc repeat 6 times. (36)
Tips for a flat circle
- If the disc ruffles, you have too many increases or your tension is too loose. Pull a little tighter.
- If it cups upward, you are missing increases. Recount.
- Pull the magic ring tail firmly before you move on.
Step 2: Turn the Corner
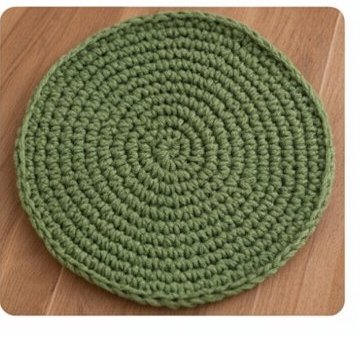
The next round is what turns your flat disc into the sides of a head.
- Round 7: sc in the BLO of every stitch. (36)
Working in the back loops creates a ridge. That ridge is the “corner” where the flat base becomes a wall, and it keeps the shape crisp rather than blobby.
From here on, you stop increasing and start building upward.
Step 3: Build the Sides of the Head
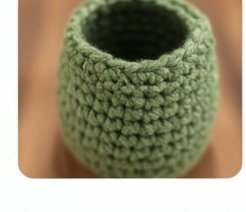
Now your disc becomes a cup. Keep your stitches even and let the piece grow straight up.
- Rounds 8 to 14: sc in every stitch around. (36)

This is a good moment to pause. Your piece should look like a small jar with straight, even walls. If one side is taller than the other, check where your marker is. You may have lost track of the start of the round.
Placing the safety eyes
Insert the safety eyes between Round 10 and Round 11, about 6 stitches apart. Do not attach the backs yet. Hold the piece up and look at it from a distance. Dragons look cutest when the eyes are low and wide-set, so move them down a round if you want an even younger look.
Closing the head
Start stuffing, then decrease:
- Round 15: 4 sc, dec repeat 6 times. (30)
- Round 16: 3 sc, dec repeat 6 times. (24)
- Round 17: 2 sc, dec repeat 6 times. (18)
- Round 18: sc, dec repeat 6 times. (12)
- Round 19: dec 6 times. (6)
Add the last pinch of stuffing before Round 18. Fasten off, thread the tail through the front loops of the last 6 stitches, pull tight, and weave in.
Step 4: Horns and Head Spikes
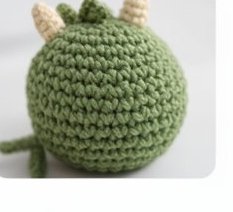
The horns and spikes give your dragon his character. Notice how in the photo they sit slightly forward and apart, which makes him look cheerful rather than fierce.
Horns (make 2, cream yarn)
- Round 1: MR, 4 sc. (4)
- Round 2: sc, inc repeat 2 times. (6)
- Rounds 3 to 4: sc in each stitch. (6)
Fasten off with a long tail. Stuff the tip lightly. Sew each horn to the top of the head, roughly 5 stitches apart, using the tail and a few small stitches around the base.
Head spikes (green)
Attach green yarn to the head between the horns. Work along the center line:
ch 3, sc in the second chain from the hook, sl st in the third chain, then sl st into the next stitch of the head. Repeat 3 to 5 times.
If you want more spikes, add a few along the back of the neck. Keep them small and flexible.
Step 5: The Body
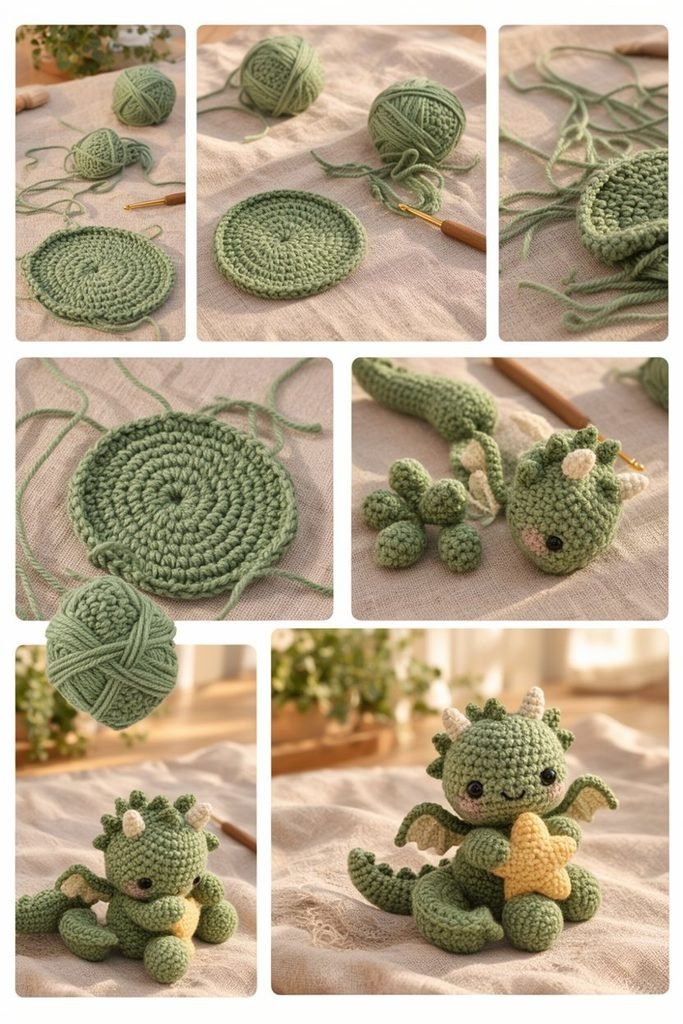
The body is a soft, rounded pear shape that sits comfortably on its own.
- Round 1: MR, 6 sc. (6)
- Round 2: inc in each stitch. (12)
- Round 3: sc, inc repeat 6 times. (18)
- Round 4: 2 sc, inc repeat 6 times. (24)
- Rounds 5 to 10: sc in each stitch. (24)
- Round 11: 2 sc, dec repeat 6 times. (18)
- Rounds 12 to 13: sc in each stitch. (18)
- Round 14: sc, dec repeat 6 times. (12)
Stuff the body firmly, especially at the bottom, so your dragon can sit without toppling. Fasten off, leaving a long tail for sewing the head on.
Step 6: Arms and Legs
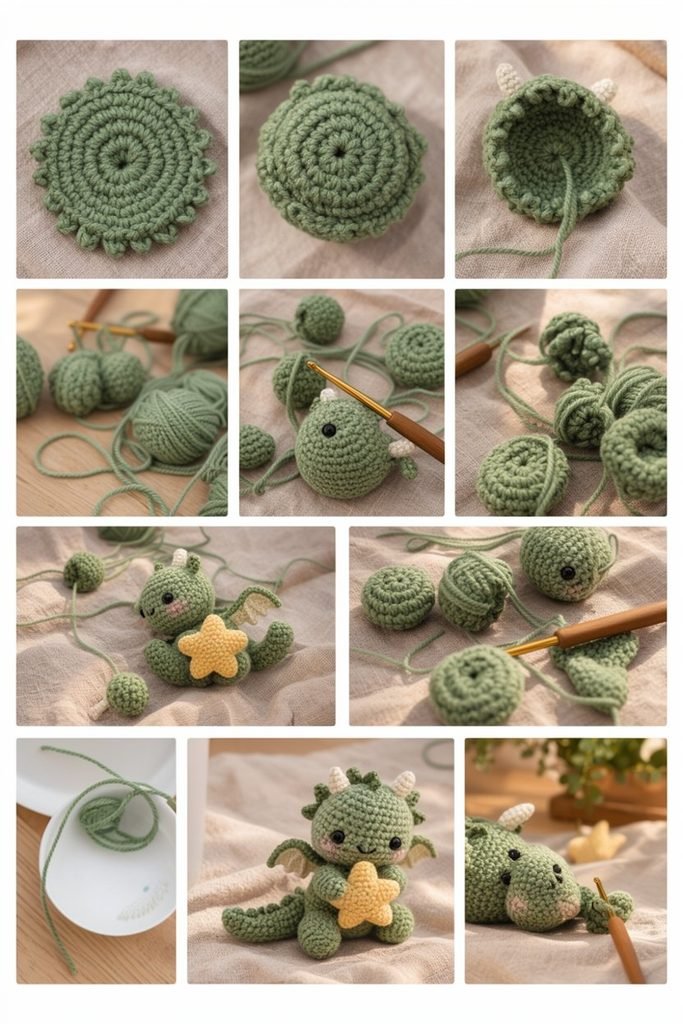
Arms (make 2)
- Round 1: MR, 6 sc. (6)
- Round 2: sc, inc repeat 3 times. (9)
- Rounds 3 to 6: sc in each stitch. (9)
- Round 7: sc, dec repeat 3 times. (6)
Stuff very lightly so the arm can bend around the star. Fasten off with a long tail.
Legs (make 2)
- Round 1: MR, 6 sc. (6)
- Round 2: inc in each stitch. (12)
- Rounds 3 to 5: sc in each stitch. (12)
- Round 6: 2 sc, dec repeat 3 times. (9)
- Rounds 7 to 8: sc in each stitch. (9)
Stuff firmly. Fasten off with a long tail. The round feet at the base are what give him his baby-dragon stance.
Step 7: The Tail
The tail is worked from the tip toward the body.
- Round 1: MR, 4 sc. (4)
- Rounds 2 to 4: sc in each stitch. (4)
- Round 5: sc, inc repeat 2 times. (6)
- Rounds 6 to 8: sc in each stitch. (6)
- Round 9: 2 sc, inc repeat 2 times. (8)
- Rounds 10 to 13: sc in each stitch. (8)
Stuff lightly. Fasten off with a long tail.
Tail spikes
Work a few tiny spikes along the top of the tail, just as you did on the head: ch 3, sc in the second chain from the hook, sl st in the third chain, sl st into the next stitch. Spacing them 2 or 3 stitches apart looks natural.
Step 8: The Wings (make 2)
Wings are flat and quick, and they add a lot of charm.
In cream yarn:
- Row 1: ch 6, sc in the second chain from the hook and across. (5)
- Row 2: ch 1, turn, sc in each stitch. (5)
- Row 3: ch 1, turn, sc2tog, sc, sc2tog. (3)
- Row 4: ch 1, turn, sc3tog. (1)
Edging in green: Join green yarn at the tip. Work sc evenly around the entire edge, making 2 sc in each corner. Fasten off with a long tail.
The green frame with a cream center gives the wings that soft layered look you see on the finished dragon. Gently steam or press them flat before sewing.
Step 9: The Golden Star
The star is the heart of the design, and it is easier than it looks. Make two identical pieces.
Make 2 in yellow yarn:
- Round 1: MR, 5 sc. (5)
- Round 2: inc in each stitch. (10)
- Round 3: ch 4, sc in the second chain from the hook, hdc in the next chain, hdc in the next chain, sl st in the next 2 stitches of Round 2. Repeat 5 times for 5 points.
Hold the two stars wrong sides together and sc through both layers around the edge. Before closing, add a small amount of stuffing. Do not overstuff, because the star should feel soft and slightly flat, like a plush cushion.
Fasten off and weave in.
Step 10: Assembly, the Part That Brings Him to Life
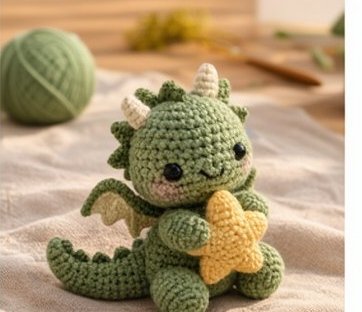
Assembly decides whether the dragon looks charming or lopsided. Take your time and use pins.
Order of assembly
- Head to body. Pin the head so the face looks slightly upward. Sew all the way around with small, even stitches.
- Legs. Position them at the front bottom, slightly apart and angled outward. Test that the dragon can sit before sewing.
- Arms. Sew at the shoulder line, 1 or 2 rounds below the head. Angle them inward so they can hold the star.
- Tail. Attach at the back bottom so it curls to one side.
- Wings. Sew them high on the back, one on each side, slightly angled upward.
- Star. Place it between the arms and stitch it lightly to the paws or chest so it stays put.
Face details
- Embroider a small smile centered below the eyes, 2 or 3 stitches wide.
- Blush the cheeks with a soft pink pastel or crayon, or embroider tiny pink circles.
- If using safety eyes, make sure the washers are secure before you stuff the final round.
Show Image
[IMAGE PLACEHOLDER: tutorial_page_3.jpg (alternate crop). Dragon pieces laid out next to the head: limbs, wings, and tail ready for assembly.]
Pattern Overview at a Glance
If you like to see the whole sequence in one glance: start with the base discs, build up the head and body, add horns, wings, and tail, and finish with the star. This overview works well as a printable reference for yourself or your readers.
Customization Ideas
Once you have made one, you will want to make a dragon family.
Color ideas
- Lavender dragon with a pale yellow star
- Ocean dragon in teal with a pearl-white star
- Sunset dragon in coral with a golden star
- Midnight dragon in navy with a silver star
- Rainbow scrap dragon: use leftover yarn for each body part
Things to hold instead of a star
- A heart for Valentine’s Day
- A tiny egg for a “baby dragon with hatchling” set
- A flower for spring
- A moon for a bedtime theme
- A candy cane or snowflake for winter
Size changes
Use a thicker yarn and a 4 mm hook for a larger cuddle toy. Use fingering weight yarn and a 2 mm hook for a miniature that can be turned into a keychain or ornament.
Troubleshooting Common Problems
My head looks flat on top. You may have under-stuffed. Add stuffing before the last two decrease rounds and shape with your hands.
The dragon leans or will not sit up. Stuff the bottom of the body more firmly, or add a small weighted pellet bag at the base if the toy is for display only.
My wings curl. Press them flat with steam, or sew a few small stitches along the back to hold them in position.
The star looks too stiff or too floppy. Adjust the stuffing. A little goes a long way. If the points are too thin, use ch 5 instead of ch 4 for chunkier points.
The head leans to one side after sewing. Remove a few stitches and re-pin from the back. Check that the head is centered on the body before restitching.
There are visible gaps between stitches. Use a smaller hook. This is the single best fix for amigurumi that shows its stuffing.
Safety Notes for Toys
If the dragon is for a baby or a child under three:
- Replace safety eyes with embroidered ones.
- Embroider the cheeks and smile rather than using beads.
- Sew all parts on very firmly, using doubled yarn.
- Skip the horns and spikes if the child tends to chew toys, or work them very short and sew them down securely.
Care Instructions
- Spot clean with a damp cloth and a little mild soap.
- If you used washable yarn and embroidered the face, you may machine-wash in a mesh bag on a gentle cycle. Air-dry fully.
- Keep away from direct heat, which can deform acrylic yarn.
- Re-stuff if the shape sags over time.
Frequently Asked Questions
Is this baby dragon amigurumi pattern beginner-friendly?
It is ideal for advanced beginners. If you can crochet in the round, increase, and decrease, you can make him. The only unusual parts are the chain-based spikes and the star.
How long does it take to make?
Most people finish in 8 to 12 hours, spread across a few sessions. Assembly alone takes about an hour.
How much yarn do I need?
About 80 to 100 meters of green, plus small amounts of cream and yellow.
What size hook should I use?
A 2.5 mm hook with DK yarn is a good starting point. Choose a hook that makes tight, dense stitches.
Can I sell the finished dragons?
Many makers sell finished items. If you share or sell this pattern, please link back to the original source and use your own photos.
Can I make him bigger?
Yes. Use a thicker yarn and a larger hook. Stitch counts stay the same.
Final Thoughts
The adorable crochet baby dragon with a star is a pattern with personality. It is cuddly, a little magical, and proof that simple stitches can make something that feels far more special than the sum of its parts. Take your time with the assembly, give him the smile he deserves, and tuck that star between his arms.
When you finish yours, I would love to see him. Share a photo, give him a name, and consider making a friend for him. Dragons, after all, are happiest in company.
Happy crocheting!