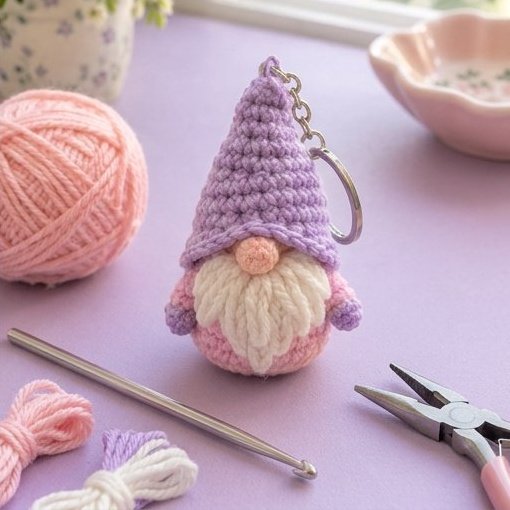
If you have been looking for a quick, adorable project that you can finish in one cozy afternoon, this cute mini crochet gnome keychain amigurumi pattern is for you. This little gnome is only a few inches tall, but he has a lot of personality: a soft lavender hat, a rosy pink body, a fluffy cream beard, and a tiny peach nose peeking out from underneath.
Best of all, he is easy. You only need basic stitches, a few small scraps of yarn, and a keychain ring. Whether you are a beginner who just learned the magic ring or an experienced crocheter who wants a fast gift idea, this mini gnome will make you smile.
In this tutorial, I will walk you through every step, from choosing yarn to attaching the keychain ring. Each stage has a photo placeholder so you can see exactly what your work should look like. By the end, you will have a handmade gnome keychain that is perfect for bags, keys, zipper pulls, or gifts.
Why You Will Love This Mini Crochet Gnome Keychain
Gnomes have become one of the most loved themes in the amigurumi world, and it is easy to see why. They are cheerful, cozy, and endlessly customizable. Here is why this particular pattern is worth your time:
- It is fast. Most crocheters finish one in 2 to 3 hours.
- It is beginner-friendly. You only need single crochet, increases, and decreases.
- It uses scrap yarn. Each gnome needs only small amounts of four colors.
- It makes a perfect gift. Teachers, friends, coworkers, and craft fair customers all love a tiny gnome.
- It is great for selling. Mini amigurumi keychains are popular at markets and online shops because they are small, lightweight, and cheap to ship.
- It is easy to customize. Change the colors and you can make a Christmas gnome, a spring gnome, or a Halloween gnome.
The soft pastel palette used here (lavender, pink, cream, and peach) gives the gnome a sweet, spring-like look, but you can use any colors you love.
Finished Size
When finished with DK weight yarn and a 2.5 mm hook, your gnome will be about 3.5 inches (9 cm) tall including the hat, and about 1.5 inches (4 cm) wide. A slightly thicker yarn will make a slightly bigger gnome, so there is no wrong choice.
Materials You Will Need
Gather everything before you start so you can crochet without stopping.
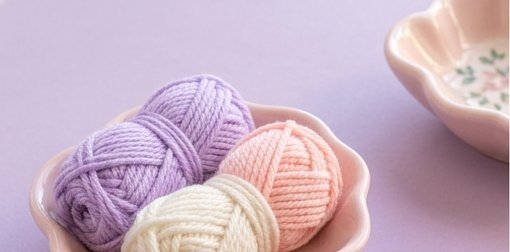
Yarn (DK or light worsted, cotton or acrylic):
- Lavender for the hat and the mittens
- Pink for the body and the arms
- Cream or off-white for the beard
- Peach for the nose
Small leftover amounts are enough. If you want a soft and fluffy beard, choose a slightly fuzzy or wool-blend cream yarn.
Tools:
- 2.5 mm crochet hook (a 2.25 mm to 3 mm hook also works; choose a size that gives tight stitches)
- Yarn needle (tapestry needle)
- Small scissors
- Stitch marker (a locking marker is best)
- Polyester fiberfill stuffing
- Keychain ring with a small chain
- Small jump ring (optional) and a pair of needle-nose pliers

A quick tip on hook size: Amigurumi is worked tightly so the stuffing does not show through the stitches. Using a hook one or two sizes smaller than your yarn label suggests is a good habit.
Abbreviations Used (US Terms)
- MR = magic ring
- sc = single crochet
- inc = increase (2 sc in the same stitch)
- dec = decrease (sc two stitches together)
- sl st = slip stitch
- st(s) = stitch(es)
- BLO = back loop only
- ( ) = total number of stitches at the end of the round
Work all rounds in a continuous spiral, and do not join unless the pattern says so. Use a stitch marker in the first stitch of every round.
Basic Skills You Should Know
If you are new to amigurumi, practice these before you begin:
- Magic ring – the neat, adjustable starting loop that closes the center completely.
- Single crochet – the only stitch used in the main body.
- Increase and decrease – these shape the cone, ball, and tiny nose.
- Invisible decrease (optional) – works the front loops only for a smoother finish.
- Sewing with a yarn needle – for attaching the nose, arms, and hat.
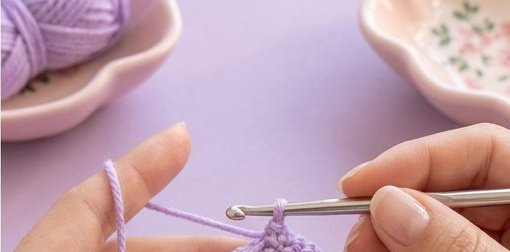
Overview of the Steps
To make this easy to follow, the project is divided into four simple stages, just like the step graphics:
- Step 1: Crochet the lavender hat and the pink body
- Step 2: Add the peach nose and prepare the arms
- Step 3: Form the cream beard
- Step 4: Assemble the gnome and attach the keychain ring
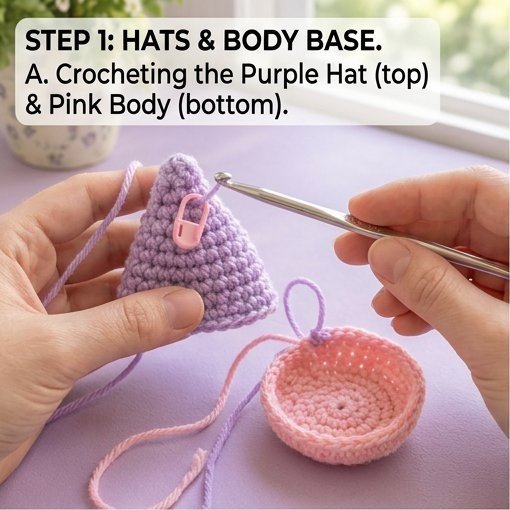
Step 1: Crochet the Hat and the Body Base
A. The Lavender Hat
The hat is a cone, which is the easiest shape in amigurumi. You simply add a few stitches every couple of rounds until it is wide enough to cover the top of the body.
Using lavender yarn:
Round 1: Start 6 sc in a magic ring. (6)
Round 2: sc in each st around. (6)
Round 3: sc, inc repeat 3 times. (9)
Round 4: sc in each st around. (9)
Round 5: 2 sc, inc repeat 3 times. (12)
Rounds 6-7: sc in each st around. (12)
Round 8: 3 sc, inc repeat 3 times. (15)
Rounds 9-10: sc in each st around. (15)
Round 11: 4 sc, inc repeat 3 times. (18)
Rounds 12-13: sc in each st around. (18)
Round 14: 5 sc, inc repeat 3 times. (21)
Rounds 15-16: sc in each st around. (21)
Round 17: 6 sc, inc repeat 3 times. (24)
Round 18: sl st in each st around for a neat edge. (24)
Fasten off, leaving a long tail of about 20 inches (50 cm) for sewing the hat to the body later. Do not stuff the hat. A hollow hat sits more naturally and lets you slide it into place.
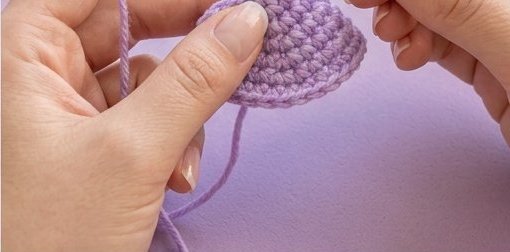
Pro tip: If you want your hat to look extra pointy, add one extra plain round in the middle section. If you want a slightly floppy, cute hat, leave it as written.
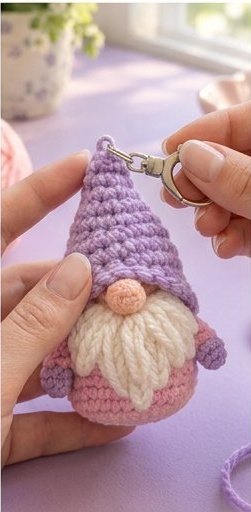
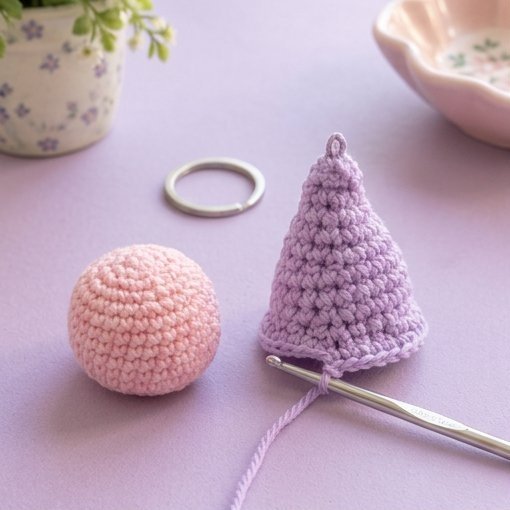
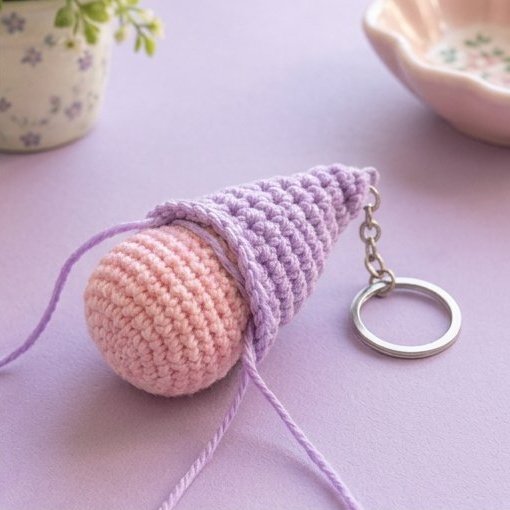
Keychain loop: To attach the ring later, you will pass a jump ring or the keychain chain through the very tip of the hat. A good way to prepare for this is to leave a small gap at the tip when you close your magic ring, or thread a short length of lavender yarn through the tip and knot it into a tiny loop. Image 5 shows this loop at the top of the cone.
B. The Pink Body
The body starts as a little bowl and is finished as a round ball. In the Step 1 graphic, you can see the pink bowl taking shape beside the hat.
Using pink yarn:
Round 1: 6 sc in a magic ring. (6)
Round 2: inc in each st around. (12)
Round 3: sc, inc repeat 6 times. (18)
Round 4: 2 sc, inc repeat 6 times. (24)
Rounds 5-10: sc in each st around. (24)
Round 11: 2 sc, dec repeat 6 times. (18)
Stop here and add stuffing. Fill the body firmly, because a plump, round body makes the gnome look cuter and helps him sit upright.
Round 12: sc, dec repeat 6 times. (12)
Round 13: dec 6 times. (6)
Fasten off, close the opening with your yarn needle, and weave in the end.
A common beginner mistake is under-stuffing. Push small pieces of fiberfill into the bowl, and shape it between your palms as you go. You want a smooth ball with no dents.
Step 2: Add the Nose and Prepare the Arms
C. The Peach Nose
The nose is a tiny ball, and it is the detail that gives your gnome his charm.
Using peach yarn:
Round 1: 6 sc in a magic ring. (6)
Round 2: sc, inc repeat 3 times. (9)
Round 3: sc in each st around. (9)
Round 4: sc, dec repeat 3 times. (6)
Add a tiny bit of stuffing, then fasten off with a long tail. Use your needle to pull the tail through the remaining stitches and close the hole.
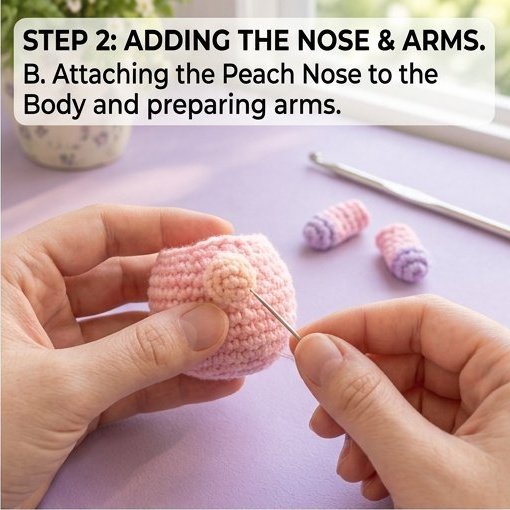
Now place the nose on the pink body. For best results, put it about two rounds below where the edge of the hat will sit, so the hat brim will touch the top of the nose. Pin it in place or hold it with your fingers, then sew around the base using small stitches. Pull gently so the nose sits snug and slightly raised.
D. The Mini Arms (Make 2)
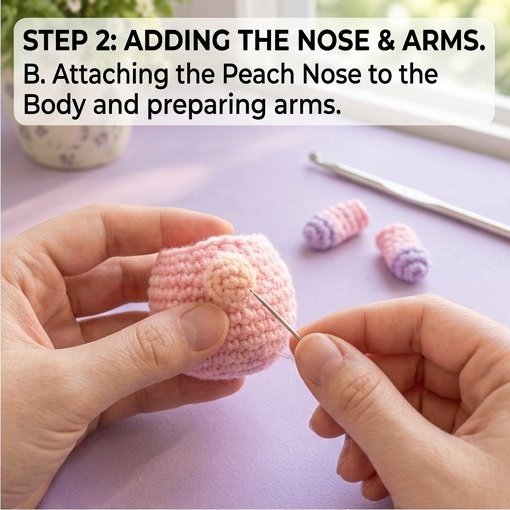
The arms are tiny tubes with lavender mittens that match the hat.
Using lavender yarn:
Round 1: 6 sc in a magic ring. (6)
Round 2: sc in each st around. (6)
Change to pink yarn.
Rounds 3-5: sc in each st around. (6)
Fasten off, leaving a tail for sewing. Stuff very lightly with a small pinch of fiberfill, or leave the arms unstuffed for a floppier, softer look.
Set the arms aside for now. You will attach them at the very end, so they are not in the way when you add the beard.
Step 3: Forming the Cream Beard
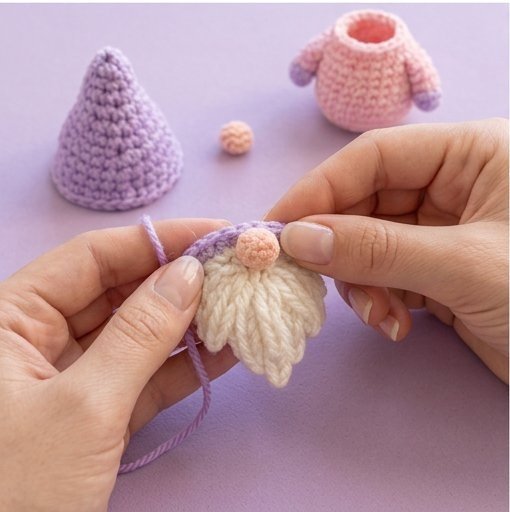
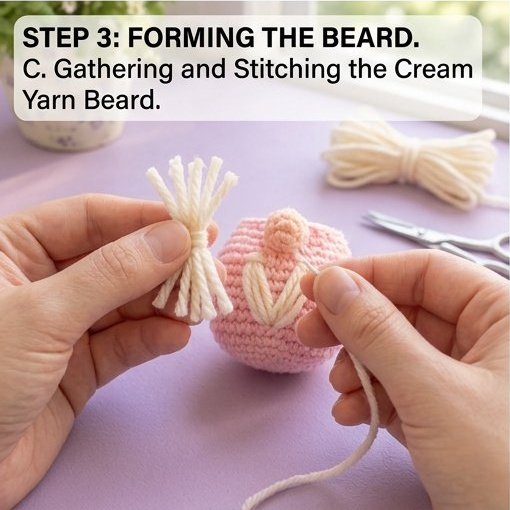
The beard is where your gnome really comes alive. In the photo, you can see how a small bundle of cream yarn is gathered and then stitched into the pink body in layered V shapes.
What You Need
- Cream yarn
- Scissors
- Yarn needle
How to Make It
- Cut the yarn. Cut around 20 to 30 strands of cream yarn, each about 4 inches (10 cm) long. More strands will give you a fuller beard.
- Gather the strands. Hold a handful together and tie a short piece of cream yarn tightly around the middle. This creates a small bundle that looks like a mini tassel. You can see this step in the left hand of the Step 3 image.
- Position the beard. Hold the bundle just below the nose. The beard should start right under the nose and fan downward over the front of the body.
- Stitch it down. Use your yarn needle and a length of cream yarn to stitch through the center of each bundle and into the pink body. Work in rows of V shapes, starting from the top near the nose and moving outward and downward. Each V should overlap the one above it, like leaves or feathers.
- Fill the shape. Keep adding rows until the beard forms a soft, rounded triangle shape that reaches the lower part of the body.
Beard Tips
- Fluff it. Use a stiff brush or the tip of your needle to separate the strands for a fuzzy look.
- Trim it. Cut the ends into a gentle point or a rounded curve for a neat finish.
- Keep it symmetrical. Stitch the left and right sides evenly so the beard looks balanced.
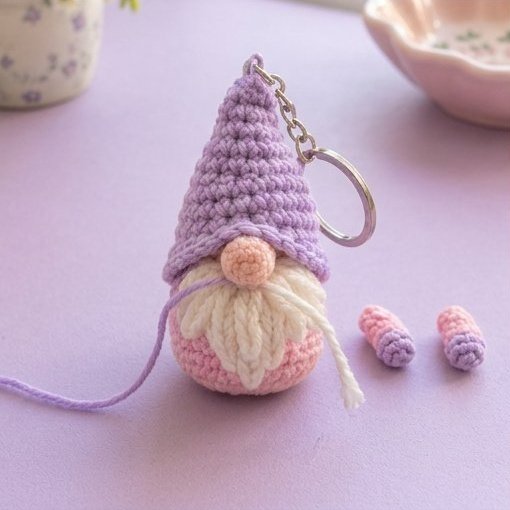
- Long loop option. If you prefer a smoother, sleeker beard, you can stitch long cream loops directly onto the body with your needle, as shown in the finished photo. Each loop is a long stitch pulled through the body and secured on the other side.
Step 4: Assembly and Finishing
This is the most rewarding stage, because your gnome finally comes together.
E. Attach the Hat
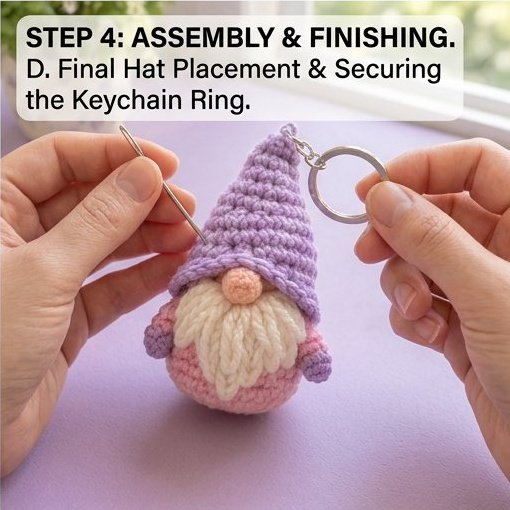
- Slide the lavender hat over the top of the body so that the brim covers the top of the beard sides and sits just over the nose.
- Use the long lavender tail and your yarn needle to sew around the edge of the hat, catching one stitch of the body with each stitch of the hat. Space your stitches evenly.
- Make sure the hat does not cover the nose completely. You want the nose peeking out right under the edge, just like in the photographs.
- Fasten off and weave in the end inside the body.
F. Sew on the Arms
Place one arm on each side of the body, just below the hat brim. The lavender mittens should point slightly downward. Sew them on with the pink tails using small, secure stitches. Check that both arms are at the same height, since uneven arms are the most noticeable flaw.
G. Attach the Keychain Ring
- Open a small jump ring with needle-nose pliers.
- Slide it through the loop at the tip of the hat.
- Attach the keychain chain, and close the jump ring completely.
- Test it by gently pulling. It should feel secure.
If you do not have a jump ring, you can also pass the chain end directly through the hat loop and secure it with a few extra stitches.
Weave in all remaining ends, trim any stray fuzz, and fluff the beard one last time. Congratulations! Your cute mini crochet gnome keychain is done.
Tips for a Perfect Mini Gnome Every Time
1. Keep your stitches tight. Loose stitches let stuffing peek through. Pull your yarn firmly after each stitch.
2. Use a stitch marker. In a continuous spiral, it is very easy to lose your place. Mark the first stitch of every round.
3. Count your stitches. A single extra stitch changes the shape of a tiny project. Check your count at the end of each round.
4. Stuff as you go. The body is closed at the end, but the nose and arms must be stuffed before they get too small to reach.
5. Choose a good yarn. Cotton gives sharp stitch definition. Acrylic is softer and cheaper. Wool-blend yarn makes the best fluffy beard.
6. Take your time with the beard. The beard is what gives the gnome its personality, so patience here pays off.
7. Place the nose first. Sewing the nose before the hat helps you judge the hat’s position.
8. Use a darning needle with a large eye. It is easier to thread thicker yarn, especially for the beard.
Fun Variations to Try
Once you have made the basic gnome, try these creative twists:
- Christmas gnome: red hat, white beard, green body
- Halloween gnome: orange or black hat with a purple body
- Spring gnome: yellow hat with a mint green body and a small crochet flower
- Rainbow gnomes: make a set in every color for a colorful display
- Name gnomes: stitch a tiny initial on the body for personalized gifts
- Bag charm: add a lobster clasp instead of a keyring so the gnome can clip onto backpacks
- Mini ornament: replace the keyring with a ribbon loop and hang it on a tree
Love seasonal crochet? You might also enjoy our Jack-o’-Lantern Pumpkin Bag Crochet Halloween Idea, which is a perfect next project after your gnome. (Add internal links to your other crochet posts here.)
Ideas for Using Your Crochet Gnome Keychain
- Hang it on your house keys so you can find them quickly
- Clip it onto a handbag, backpack, or tote
- Attach it to a zipper pull on a pencil case or jacket
- Hang it from your car rearview mirror
- Give it as a stocking stuffer, party favor, or thank-you gift
- Sell it at craft fairs or in an online shop
- Bundle several together as a gnome garland
How to Care for Your Amigurumi Gnome
To keep your handmade gnome looking fresh:
- Spot clean with a damp cloth and a little mild soap.
- Avoid machine washing, because the beard may tangle.
- Air dry away from direct heat.
- Keep it away from small children because of the small parts, unless you secure everything with extra stitching. Use safety eyes-free designs like this one, which has no plastic parts, for added safety.
- Brush the beard gently to restore its fluff.
Frequently Asked Questions
How long does it take to make a mini crochet gnome keychain?
Most people finish one in about 2 to 3 hours. Once you have made one or two, you can finish a gnome in around 90 minutes.
Is this crochet gnome pattern good for beginners?
Yes. It uses only single crochet, increases, and decreases, plus a bit of simple sewing. If you can make a magic ring, you can make this gnome.
What yarn is best for a crochet gnome keychain?
DK weight cotton or acrylic is ideal. For the beard, a fluffy wool-blend or a brushed acrylic yarn works best.
What hook size should I use?
A 2.5 mm hook is recommended, but you can use any size from 2.25 mm to 3 mm. Choose a hook that gives tight stitches.
Can I make the gnome bigger?
Yes. Use chunky yarn and a larger hook, and your gnome will be a plush toy instead of a keychain. The pattern stays the same.
Can I sell items made from this pattern?
Please check the rules for your own pattern before selling. For your finished handmade items, always credit the pattern source if required.
What can I use instead of a keychain ring?
You can use a lobster clasp, a ribbon loop, a bag charm hook, or a simple piece of cord.
How do I stop the hat from slipping?
Sew it to the body with small, evenly spaced stitches, and catch the stitches on the back of the beard too.
Final Thoughts
This cute mini crochet gnome keychain amigurumi pattern is a delightful project that proves big charm can come in a tiny package. With a lavender hat, a pink body, a fluffy cream beard, and a little peach nose, this gnome is sweet, simple, and fun to make. Every step is easy, every piece is small, and the result is a keepsake that anyone would love to carry.
Make one for yourself, one for a friend, and maybe a whole family of them. Share your finished gnomes on social media and tag us so we can see your colorful creations. Happy crocheting!