Introduction: Why This Little Angel Stole My Heart
Every December, there is one moment I look forward to more than any other. It is the evening when the house goes quiet, the tree lights are glowing, a cup of something warm sits on the table, and a fresh ball of red yarn is waiting beside my hook. That is the moment a Christmas project begins to feel like a real piece of the holiday, and this year that project was a tiny angel in a Santa hat.
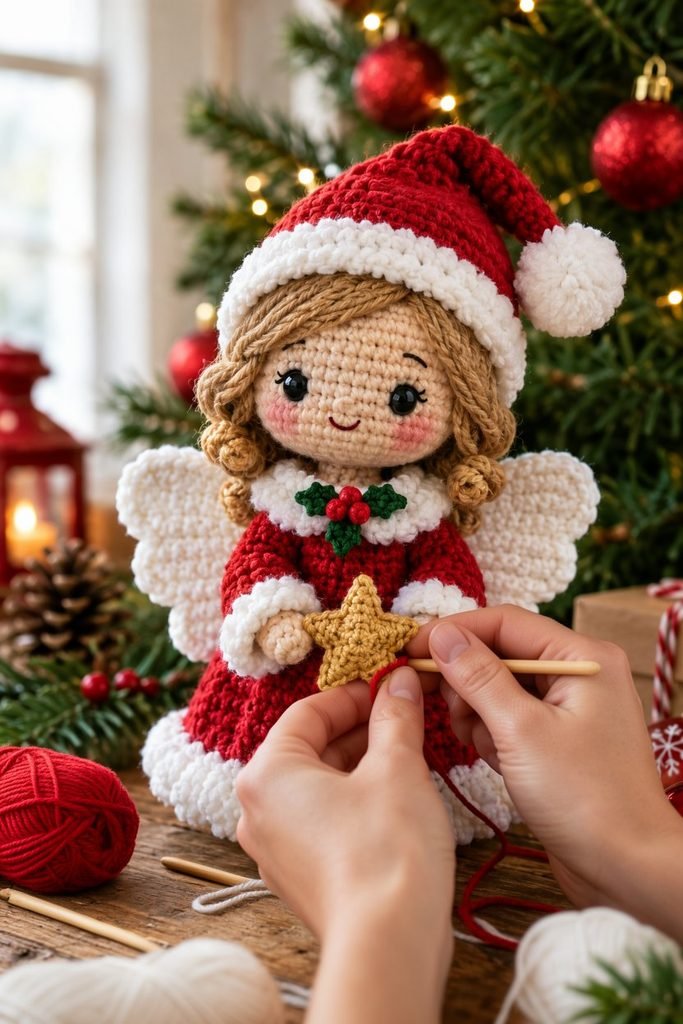
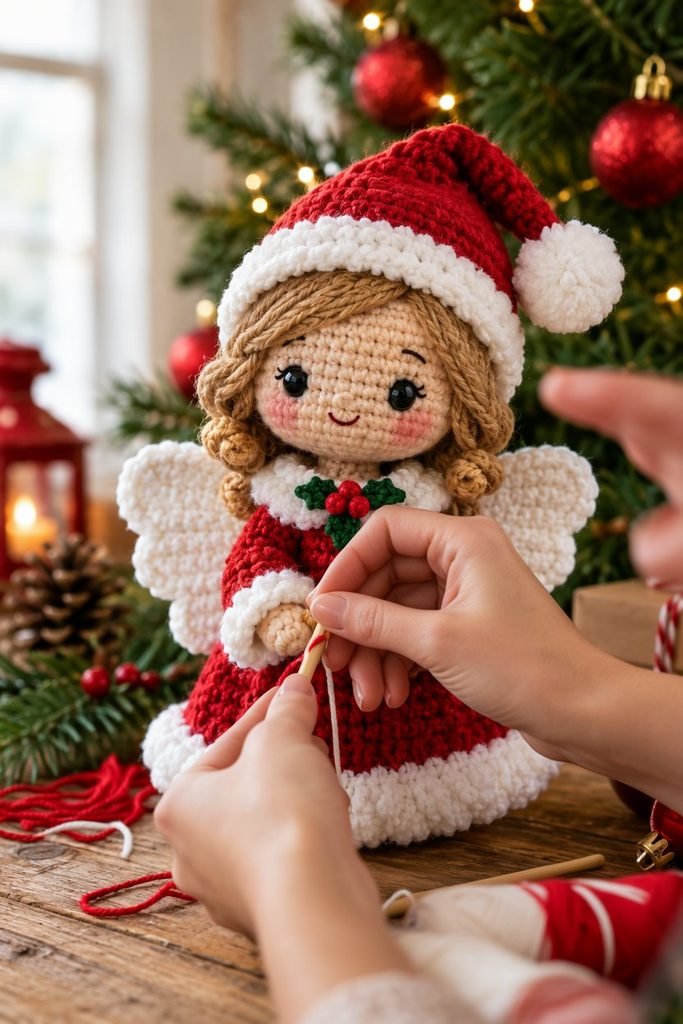
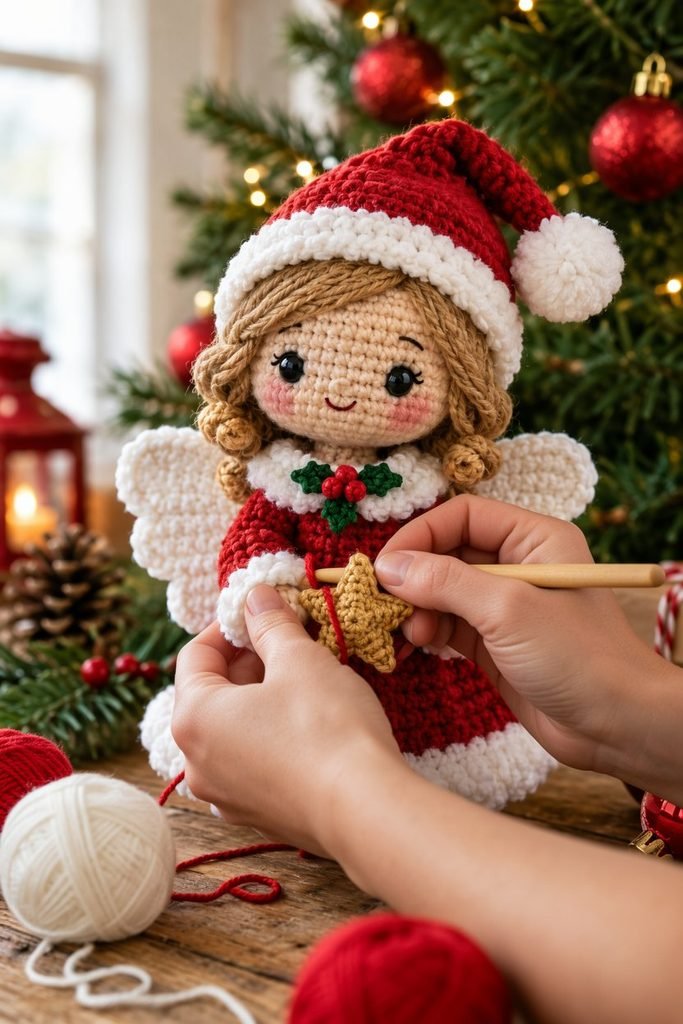
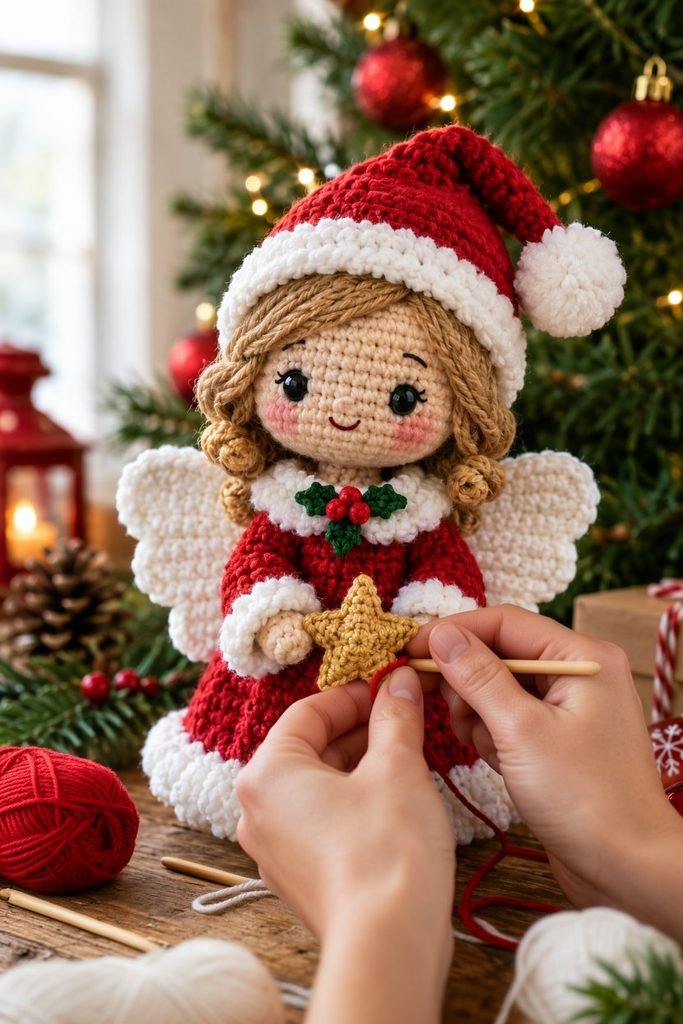
She is a festive Christmas crochet angel, and honestly, she might be the sweetest thing I have ever made. She wears a snug red dress with soft white trim, a Santa hat with a big fluffy pom-pom, and a little holly brooch at her collar. Her wings are white and scalloped, her curls are golden-tan, and she holds a small crocheted star as if she just plucked it from the night sky.
If you have ever wanted a handmade decoration that feels personal, a piece that guests ask about and children want to hold, this is the kind of project that delivers. In this guide, I will walk you through everything that goes into making a doll like this: the materials, the thinking behind the colors, the techniques that give her that polished look, and the small finishing details that turn a nice doll into a keepsake.
This is not a strict row-by-row pattern. It is more like sitting beside a friend who has made a few of these and is happy to share what worked, what did not, and what she would do differently. Whether you are a confident amigurumi maker or someone who has only crocheted a few scarves, you will find something useful here.
Grab your hook, and let’s begin.
Why Handmade Holiday Decor Feels So Different
We live in a world where you can buy a perfectly shaped angel ornament for a few dollars. So why spend hours making one?
For me, it comes down to three things.
It carries your time. A crocheted doll is made of thousands of tiny loops. Each one was placed by hand, and you can feel that when you hold the finished piece. It has weight in a way that factory decor never does.
It is yours alone. No two handmade dolls are identical. Your tension, your yarn choices and your little decisions about the smile or the curls make her one of a kind.
It becomes a tradition. The decorations people remember are rarely the expensive ones. They are the ones with a story attached. “Grandma made this the year we moved” is a sentence that no store-bought ornament can claim.
An angel is especially fitting for this because angels are about comfort, protection and quiet joy. Placing one on a shelf or at the foot of the tree adds a gentle focal point to the room, and a crochet angel brings warmth that glass and plastic simply cannot.
Meet the Design: What Makes This Angel Special
Before picking up a hook, it helps to understand the design choices that give this angel her charm. When you know why something works, you can adapt it to your own style.
The Santa Hat Twist
Most Christmas angels wear halos and flowing white gowns. Giving her a Santa hat is a playful twist that instantly says “holiday” and adds a splash of red at the top of the doll. The hat has a thick white brim worked in a fluffy, textured stitch and a large pom-pom that bounces slightly when she is moved. It draws the eye upward to her face, which is exactly where you want attention to go.
The Face
Her face is worked in a soft cream shade, with glossy black bead eyes, tiny lashes, delicate embroidered eyebrows, a small smile and rosy cheeks. This simple combination is the secret to that “kawaii” look. Eyes set a little wide and low on the face, with cheeks softly blushed, read as sweet and youthful.
The Hair
Her hair is golden-tan yarn arranged in braided strands that sweep across the forehead, finishing in spiral curls on each side. The braiding adds texture and the curls add movement, so even from across the room she looks like she has personality.
The Dress
The dress is worked in a textured red stitch, with white fluffy trim at the collar, cuffs and hem. The white trim echoes the hat brim, which ties the whole outfit together visually. The skirt has a gentle bell shape that lets her sit or stand steadily.
The Details That Finish the Look
Two small details elevate her from cute to unforgettable: the holly and berry brooch at her collar, and the golden star she holds in her hands. The green and red of the holly stand out against the white collar, while the gold star adds a warm glow that matches the fairy lights around her.
The Wings
Her wings are white, scalloped and slightly textured. They are sewn to the back so they peek out on both sides, framing the doll nicely from the front.
Materials You Will Need
Gathering your supplies first makes the whole project smoother. Here is what I recommend.
Yarn
A smooth, soft cotton or acrylic blend works best for amigurumi because the stitches stay defined and the stuffing will not show through. For this angel you will need:
- Red: for the dress and hat
- White (or off-white): for the wings, trims and pom-pom
- Cream or soft peach: for the face, neck and hands
- Golden tan: for the hair
- Gold or mustard: for the star
- Dark green and a bright red scrap: for the holly brooch
Only small amounts of the last three are needed, so leftovers from your stash will do nicely.
For the fluffy trim, consider a slightly fuzzy or brushed yarn, or work the trim in a looped or textured stitch. This gives that cozy, snowy edge you see on the hat, cuffs and hem.
Hooks
Use a hook one or two sizes smaller than the yarn label suggests. Amigurumi needs tight stitches so the filling does not poke through. A wooden or bamboo hook, like the ones in the photos, is comfortable for long sessions and gives a nice grip on the yarn.
Other Supplies
- Black safety eyes or glossy black beads (see the safety note below)
- Polyester fiberfill
- Stitch markers (essential for working in rounds)
- Tapestry needle
- Pink blush, either cosmetic powder or soft pastel chalk, for the cheeks
- Black and brown embroidery thread for the smile and eyebrows
- Small amount of wire or pipe cleaner if you want posable wings (optional)
- Sharp scissors
A safety note: if the doll is for a baby or small child, skip beads and safety eyes entirely and embroider the eyes instead. Even secure eyes can be a risk for very young children.
Choosing Your Color Palette
Color is where a project like this really comes alive. The classic red and white combination feels instantly festive, but there is room to play.
Traditional: Cherry red, snow white and golden-tan hair, exactly as in our photos. Timeless and cozy.
Vintage Christmas: Swap bright red for a deeper cranberry and use cream instead of pure white. The result feels antique and gentle.
Winter Wonderland: Try icy blue and silver with white fluffy trim for a frosty angel that suits modern or Scandinavian decor.
Woodland: Forest green dress, cream trim and chestnut hair for a rustic feel.
Whatever you choose, hold your yarns together in daylight before you start. Colors look different under warm indoor lighting, and it is better to discover a clash now than after fifteen hours of work.
The Big Picture: How the Doll Comes Together
Amigurumi dolls are made in pieces, then joined. Understanding the order helps you plan your time and avoid frustration. Here is the general flow I follow:
- Head
- Body and dress
- Arms
- Hair
- Hat
- Wings
- Holly brooch and star
- Face details
- Final assembly
I like to make the head first because it sets the scale for everything else. If your head turns out larger or smaller than expected, you can adjust the body to suit.
Crocheting the Head
The head is the heart of the doll. It should be slightly wider than it is tall, with a softly rounded shape.
Start with a Magic Ring
Begin in the round with a magic ring and increase evenly until the circle is as wide as you want the head to be. Then work several rounds straight, and decrease gradually to close the top. Keep your stitch count even, and place a marker at the start of every round.
Tension Matters
The single biggest factor in how professional your doll looks is tension. If your stitches are too loose, the white stuffing will peek through gaps. If they are too tight, your hands will ache and the fabric will be stiff.
A simple trick: after finishing a few rounds, hold the piece up to a light. If you can see through the stitches, go down a hook size.
Stuffing Smartly
Stuff in small amounts, pushing each pinch into the corners before adding more. Lumpy stuffing is the most common beginner problem. Use the blunt end of your hook or a chopstick to shape the filling, and stop adding when the head feels firm but still has a little give when squeezed gently.
Placing the Eyes
Set the eyes before you close the head. A good rule is to place them roughly between the lower third and the middle of the head, with about six to seven stitches between them. Lower and wider-set eyes create that sweet, childlike expression. Before you fix them in place, use pins to test positions and photograph each option. Seeing it on screen often makes the best choice obvious.
Giving Her a Face
The face is small, but it carries all the personality.
Embroidering the Smile
Use a single strand of dark red or brown thread for the smile. Keep it short and slightly curved. A tiny smile looks gentle and kind, while a larger one can look mischievous. Insert the needle at the cheek, bring it out where the smile begins, make a small curve with a surface stitch, and then pull the thread through to the other side so the knot hides inside the head.
Eyebrows and Lashes
The delicate eyebrows in our angel are made with just two or three short straight stitches each, angled slightly upward at the outer ends for a soft, happy look. Lashes can be added with tiny stitches at the outer corners of the eyes. Less is more here.
The Blush
For the rosy cheeks, rub a soft cosmetic blush or pastel chalk onto a cotton swab and dab it gently onto the cheeks in a circular motion. Build the color slowly. You can always add more but you cannot take it away. If you prefer a fully yarn-based approach, a small circle of pink embroidery stitches works too.
Making the Hair: Braids and Spiral Curls
Hair is the part people are most nervous about, but it is easier than it looks.
The Foundation
Start by deciding on your hairline. Using pins, mark where the hair will begin on the forehead and where it will end at the nape. Then cut many strands of golden-tan yarn, each long enough to drape from the center part down past the ear.
Attaching the Strands
Sew each strand to the head along the part line, securing it with small stitches. Work in rows from the front toward the back so every layer overlaps the previous one. Dab a tiny bit of fabric glue under strands if you want extra security, but be sparing so the yarn stays soft.
The Braided Sweep
Gather the strands on each side and braid them loosely. Tuck the braids across the forehead and secure them near the ears. The braided texture adds a handmade, storybook feeling that smooth hair cannot match.
Spiral Curls
For the curls at the ends, crochet a few long chains and then work two or three single crochet stitches into each chain stitch so that the piece naturally twists into a spiral. Sew these to the end of each braid. Tiny curls give the doll bounce and make her hair look intentional rather than simply hanging.
A little tip: lightly steam the curls to set their shape. Hold the iron or kettle steam a safe distance away, let the curls relax, then let them cool in position.
The Dress: Texture, Shape and Fluffy Trim
The red dress is a big part of the angel’s identity.
Choosing a Stitch
A plain single crochet works well, but a textured stitch adds a lot of visual interest. The dress in our photos has a bumpy, woven-like texture that catches the light. You could achieve something similar with a moss stitch variation, a waffle stitch, or by alternating single crochet with back-loop-only rounds.
Shaping the Skirt
Begin at the neckline and increase gradually as you work downward, adding increases at evenly spaced points to create a gentle bell shape. The skirt should flare enough that she sits stably but not so much that she looks like a lampshade. Try the doll on a flat surface occasionally to check balance.
Adding the Fluffy Trim
The white trim at the hem, cuffs and collar makes this angel look like she is dressed in snow. There are several ways to achieve it:
- Loop stitch: creates tiny loops on the surface, giving a shaggy, plush look.
- Brushed yarn: use a fuzzy yarn in single crochet for a soft halo effect.
- Brushing the finished trim: gently brush a regular wool-blend trim with a pet slicker brush or a soft toothbrush to raise the fibers.
Whichever method you choose, keep the trim thick enough to be visible from a distance. Thin trim disappears against a bright red dress.
Arms and Hands
The arms are small tubes in the same cream color as the face, with little rounded hands at the ends. Stuff them lightly so they can bend, and attach them slightly forward on the body so that she appears to be holding something in front of her.
The sleeves are worked separately in red, with a white fluffy cuff at the end. Slide the sleeves over the arms before sewing them to the body. This way the cuffs sit naturally around the wrists, as they do in the photos.
Position is important. If the arms are sewn too high, she looks startled. If too low, she looks slumped. Aim for just below the neckline, with the hands meeting near the middle of her chest or slightly to one side where the star will sit.
The Santa Hat
The hat is worked in red in the round, starting at the crown and increasing until it is wide enough to fit around the head. Then decrease slowly toward the tip, bending it into a gentle curve. A slightly longer tip with a curve gives the hat that classic, floppy Santa look.
Attach a thick white brim around the bottom edge. Because the brim is such a prominent feature, use your fluffiest yarn here. Finally, make a pom-pom in white yarn.
Making a Perfect Pom-Pom
- Wrap yarn around a pom-pom maker, or around three fingers, until it feels dense.
- Tie a strong knot around the middle.
- Cut the loops and fluff the ball.
- Trim it into a round shape, being careful not to cut the tying thread.
The more yarn you wrap, the fuller and more luxurious the pom-pom will be. A generous pom-pom is part of this angel’s charm, so do not be shy.
Sew the hat to the head securely, tucking some hair strands out from underneath so the curls peek out on both sides.
The Scalloped Wings
Wings give her the “angel” part of her identity, and thankfully they are one of the easiest elements to make.
Shape and Texture
Crochet each wing as a flat, rounded piece. Work in rows or in a spiral, increasing at the outer edges to form a gentle teardrop shape. The wings in our photos have a slightly textured surface and a scalloped edge, giving them a soft, feathery look.
Scalloped Edging
To create the scalloped border, work a series of shells or clusters around the edge. For example, skip a stitch, work five double crochets into the next stitch, skip a stitch, slip stitch into the next, and repeat. The repeating arcs create that pretty, petal-like finish.
Keeping Them Upright
Soft wings can droop. If you would like them to stand upright, sew a thin piece of craft wire or a pipe cleaner along the inside edge before closing, or use a layer of stiffening spray or diluted fabric glue. Let them dry fully before sewing onto the doll.
Attaching
Sew the wings to the upper back at a slight angle, with the tips pointing out and up. Check from the front to make sure they are symmetrical.
The Holly and Berry Brooch
This tiny accessory looks complicated, but it is quick to make.
- Leaves: Crochet two or three small pointed leaves in dark green. Chain a few stitches, then work single, half double and double crochet along one side, and back along the other. Finish with a slip stitch.
- Berries: Make three tiny red balls using a magic ring with six single crochet, then a round of decreases. Stuff each with a pinch of fiberfill.
- Assemble: Arrange the leaves in a fan and sew the berries in a cluster at the center.
Pin the brooch at the collar and decide on the final placement before sewing it on. A slightly off-center position can look more organic than perfectly centered.
The Golden Star
The star is the final element, and it is the one that makes her special. A five-pointed crochet star can be made by working a flat circle and then shaping five points with chains and slip stitches. Make two matching pieces, sew them together with a bit of stuffing in between, and you have a small padded star with real dimension.
A golden yarn gives warmth, but a metallic thread held alongside it adds a subtle sparkle that catches the tree lights.
Assembly: Bringing Everything Together
This is the stage where patience pays off. Rushing assembly is the quickest way to spoil an otherwise beautiful doll.
Pin Before You Sew
Use pins or stitch markers to hold every piece in place before sewing. Then step back and look at the doll from the front, the side and the back. Ask yourself:
- Is the head centered on the body?
- Are the arms at the same height?
- Do the wings look balanced?
- Does the hat sit evenly?
Fix problems now, because moving a sewn piece later is much harder.
Hidden Stitches
Use a matching color of yarn for sewing so the seams blend in. Whip stitch around the edge of each piece, going through both loops of the stitch on the doll body so the join is strong. Weave in the ends inside the body or underneath trims.
Neck Support
If the head wobbles, add a small circle of cardboard or a firm piece of stuffing at the neck. Sew through the head and into the body several times to create a stable join.
Final Touches
Once everything is attached, give the doll a gentle once-over. Trim stray fibers, fluff the trims, adjust the curls, and set her somewhere with good light to see what needs tidying.
Troubleshooting Common Problems
Even experienced makers run into trouble. Here are the problems I hear about most often and what I do about them.
The stuffing shows through. Your stitches are too loose. Use a smaller hook and consider a slightly thicker yarn.
The head leans forward. The neck is not firmly attached or the head is heavier than the body. Add a bit more stuffing in the body and sew the neck join with extra stitches.
The doll will not sit up. Add a small amount of weighted filling, such as poly pellets in a fabric pouch, to the base of the body. Remember this is not suitable for small children.
The wings flop. Add wire support or stiffener, or sew them closer to the body.
Colors look muddy. Wash your hands before crocheting with white yarn and keep it away from your red yarn while working. Red can transfer slightly onto white, especially when damp.
The face looks uneven. Take a photo and flip it horizontally on your phone. Asymmetry becomes obvious at once, and you can reposition before final stitching.
Styling Your Crochet Angel for the Holidays
Now for the fun part. A finished doll deserves a spot where she can be admired.
On the mantel: Nestle her between pinecones, a few glass baubles and a flickering candle lantern. The red of her dress will pop against greenery.
Under the tree: Seat her among wrapped gifts as a charming little guardian of the presents.
On a bookshelf or entryway table: A single angel next to a stack of books is a simple, elegant seasonal accent.
On a wooden tray centerpiece: Add cinnamon sticks, dried orange slices and fairy lights for a table arrangement that smells as good as it looks.
As a tree topper: If you make her slightly smaller and lighter, she can sit at the very top of your tree. Use a sturdy branch support or attach a loop at the back.
A small tip for photography: shoot in soft window light, with the tree lights behind her for that dreamy glow. A warm lantern in the background, like the one in our photos, adds instant coziness.
Gifting and Selling Your Angel
As a Gift
A handmade angel is a thoughtful present for a grandparent, teacher, neighbor or new parent. Add a little tag with the year and a short message, and tuck her into tissue paper. You could even give her a name, because dolls with names feel like they have a story.
Care Instructions
Include simple care instructions with the gift: spot clean with a damp cloth, keep away from direct heat or open flames, and store in a cool, dry box between seasons.
Selling
If you are thinking of selling your dolls at craft fairs or online, remember that the finished item is yours to sell, but a pattern someone else created has its own license. Always check the pattern designer’s terms. When photographing for listings, use natural light and include a scale reference, such as a hand or coin, so buyers understand her size. Highlight the time and materials involved so people understand why handmade work costs more than mass-produced decor.
Frequently Asked Questions
How long does it take to make a crochet angel like this? For an intermediate crocheter, expect somewhere between 12 and 20 hours spread across several evenings. Beginners may need longer, and that is perfectly fine.
Is this project suitable for beginners? The basic shapes are simple, so a confident beginner who already knows single crochet and working in rounds can manage it. The hair and assembly take the most patience.
What size will the finished doll be? That depends on your yarn and hook. With standard worsted weight yarn and a small hook, a doll like this is typically around 25 to 30 centimeters tall, including the hat.
Can I wash her? Surface cleaning is safest. If you must wash her, use cool water, mild soap and air dry. Remove any beads or wire first.
Can I make her without a Santa hat? Absolutely. Replace the hat with a halo made from gold yarn and a pipe cleaner, or a simple headband with a bow.
What if I do not have the same yarn colors? Use what you have. A stash-busting angel in unexpected colors can be just as charming, and it gives the project a personal twist.
Final Thoughts: Make Something That Feels Like Christmas
When I look at this little angel, I do not just see yarn and stuffing. I see the quiet evenings, the cups of tea that went cold beside my chair, the moments when I held the star against her hands to see how it looked and smiled at the result.
That is what a project like this gives you. Yes, you end up with a beautiful decoration. But you also give yourself a few hours of calm in the middle of a busy season, and that is a gift in itself.
So choose your colors, wind your yarn into a ball, and begin with a single magic ring. Take your time. Enjoy the small victories: the first time the face comes together, the first curl that springs into shape, the moment the star settles into her hands. By the time the last stitch is secured, you will have created something that carries a little piece of your holiday inside it.
If you make your own festive crochet angel, I would love to see her. Share your photos, your color choices and any clever tricks you discovered along the way. Handmade holiday decor is best when it is shared.
Happy hooking, and Merry Christmas.