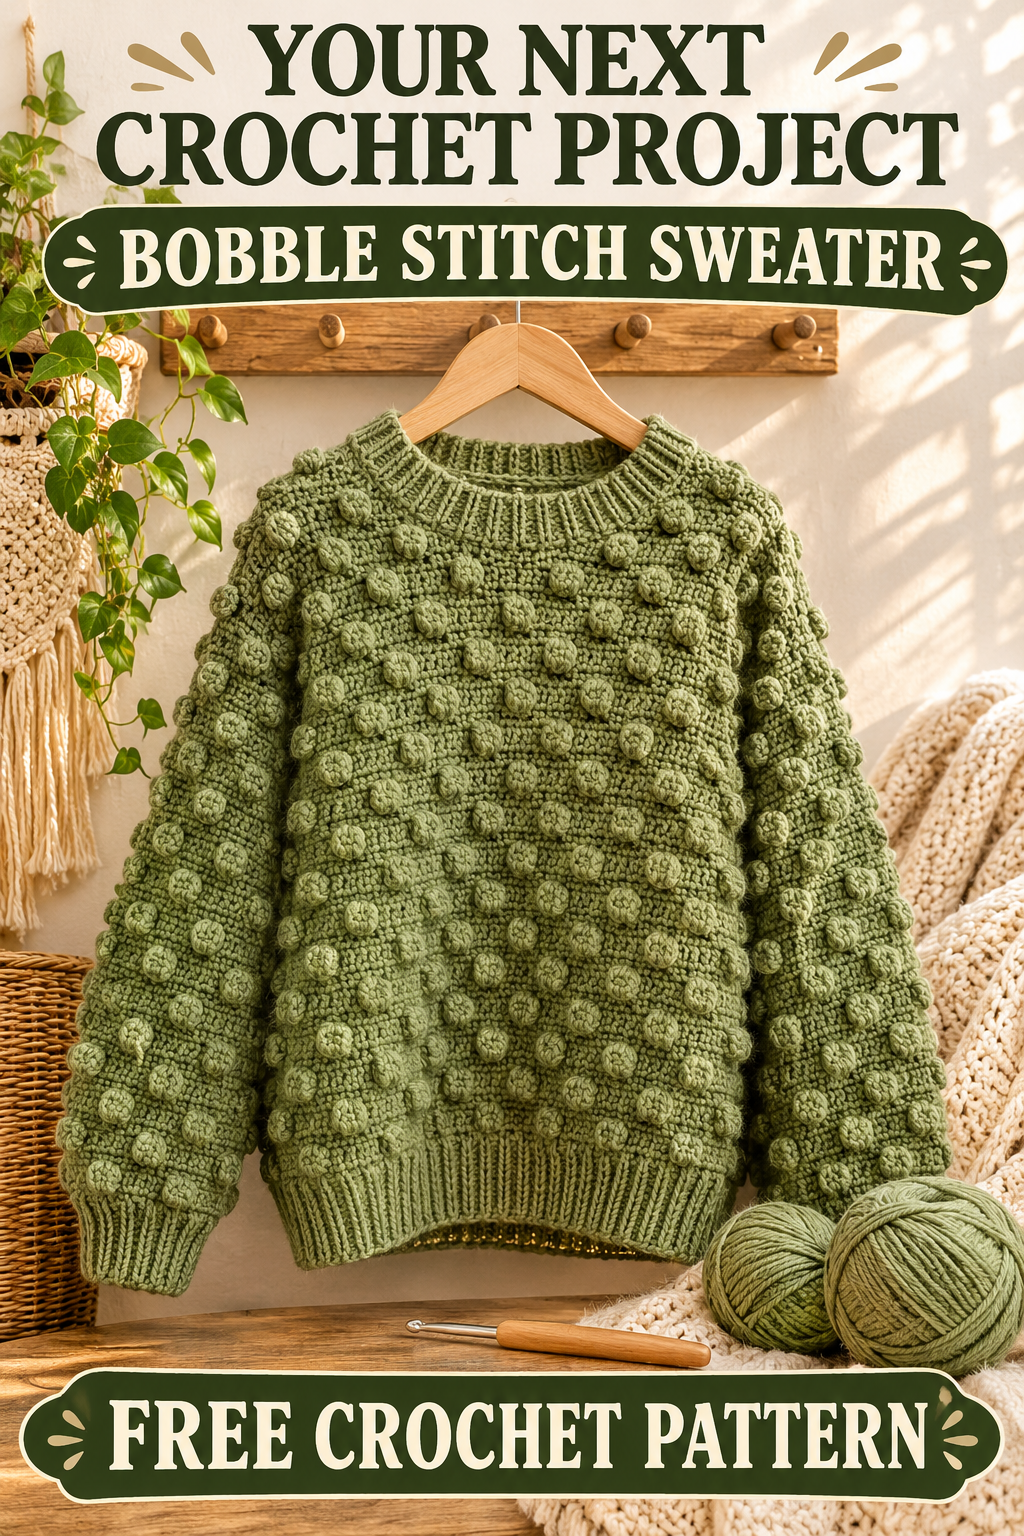
There are projects that make you smile before you have even made the first stitch, and this bobble stitch sweater is one of them. Picture a soft sage green sweater covered in plump, round little bobbles, with a slouchy oversized shape, gently gathered cuffs, and a snug ribbed collar. It looks like something you would spot in a cozy independent shop, yet every part of it is made from simple rectangles and one very friendly stitch that you will learn in about ten minutes.
This free oversized crochet pattern is written for confident beginners and happy intermediates. If you can make a chain, a single crochet, and a double crochet, you already have the skills you need. I will explain the bobble stitch slowly and clearly, show you how to space the bobbles so they look intentional, and walk you through building the body, shaping the sleeves, adding the ribbing, and putting everything together. Settle in with a warm drink, because by the end of this tutorial you will know exactly how to make a handmade sweater you will want to wear on repeat all season long.
Why You Will Love This Bobble Sweater
The first thing people notice about a bobble sweater is the texture. Each bobble is a small raised cluster of stitches that pops out from the fabric like a tiny berry, and when you place them in staggered rows, the whole garment takes on a rich, three dimensional look. It is playful and cozy at the same time, and it photographs beautifully in natural light.
The second reason to love it is the shape. Oversized sweaters are forgiving, which is a gift to anyone making their first wearable crochet project. There is no need to fuss over a tight fit across the bust or waist, and small differences in your tension will not ruin the final result. A relaxed drop shoulder design means that your panels are mostly straight rectangles, and straight rectangles are very kind to beginners.
Finally, the pattern is wonderfully rhythmic. After a few repeats, your hands settle into a flow, and you can follow along while chatting, listening to music, or watching your favorite show. The bobble rows add just enough variety to keep things interesting, while the plain rows between them give your mind a little rest. It is the perfect balance of fun and calm.
Choosing Yarn for Your Oversized Sweater
Yarn is the heart of any sweater, so let me share what to look for. For this design, a smooth worsted weight yarn is the ideal choice. A round, well twisted yarn makes your bobbles look crisp and defined, while a fuzzy or heavily textured yarn can hide them. The sage green yarn in the photos has a gentle sheen and a soft twist, which shows off each little bobble beautifully.
Think about fiber content carefully, because you will be wearing this sweater against your skin and around your neck. A blend of merino and acrylic is cozy, warm, and easy to care for. Cotton blends are cooler and lighter, which is nice for spring and early autumn, though they can feel heavier over a large garment. A superwash wool is a great investment if you want a sweater that you can toss in the washing machine on a gentle cycle without worrying.
How much yarn do you need? For an oversized sweater with a finished chest measurement of around 44 to 48 inches, plan on roughly 1800 to 2200 yards of worsted weight yarn. The bobble stitch uses more yarn than plain single crochet, because each bobble is a cluster of several stitches, so it is wise to buy extra. I always recommend picking up one more skein than the label calculations suggest. Make sure all your skeins come from the same dye lot, since even slight color differences become obvious across a large garment.
Tools and Notions
For hooks, you will need two sizes. A 5.5 millimeter hook works well for the body and sleeves with worsted weight yarn, and a smaller 4.5 millimeter hook is perfect for the ribbed collar, cuffs, and hem. If you tend to crochet tightly, go up one size on both. If you crochet loosely, go down one size. A comfortable ergonomic handle, like the one in the photos, makes a big difference when you are working on a long project.
You will also need a pair of sharp scissors, a large eyed yarn needle for seams, a measuring tape, and a handful of stitch markers. Markers are especially helpful in this project because they help you keep track of the bobble placement and mark the edges when you join pieces. A small dish or tin for storing them keeps your workspace tidy. If you like to stay organized, a notebook for jotting down row counts and measurements is a wonderful companion.
Understanding the Fit and Sizing
An oversized sweater is meant to be roomy, so the finished measurements should be larger than your actual body. A good guide is to add between 8 and 12 inches to your bust measurement. If your bust is 36 inches, a finished chest of about 46 inches gives you that slouchy, relaxed look. If you prefer a slightly less dramatic fit, add 6 to 8 inches instead.
For the length, measure from the base of your neck down to where you want the hem to land. Many people like this style to fall at the hip, which is around 24 to 26 inches for most adults. Then measure your arm from the underarm to the wrist for the sleeve length, which is usually 17 to 19 inches. Because the sleeves in this design are generous and slightly puffed, they will look shorter when finished than the actual numbers suggest, so keep that in mind.
Write down these numbers before you begin. Having them on paper turns the whole project into a simple matter of crocheting rectangles that match your measurements, and that takes away any intimidation.
Making a Gauge Swatch
Please do not skip your swatch. It is the single most important thing you can do to make sure your sweater fits the way you want. With your 5.5 millimeter hook, chain 23 and work the bobble pattern for about 16 rows. This gives you a swatch of about 6 inches wide, which is large enough to measure accurately.
Wash and dry your swatch the way you plan to treat your finished sweater, then lay it flat and measure. In the bobble pattern, a typical gauge with worsted yarn is about 15 stitches and 14 rows over four inches. If you have more stitches than that, your hook is too small. If you have fewer, your hook is too large. Adjust your hook size until you match, or simply recalculate the stitch counts using your own numbers. A few extra minutes now will save you hours of frustration later.
Step One, Start Your Bobble Sweater
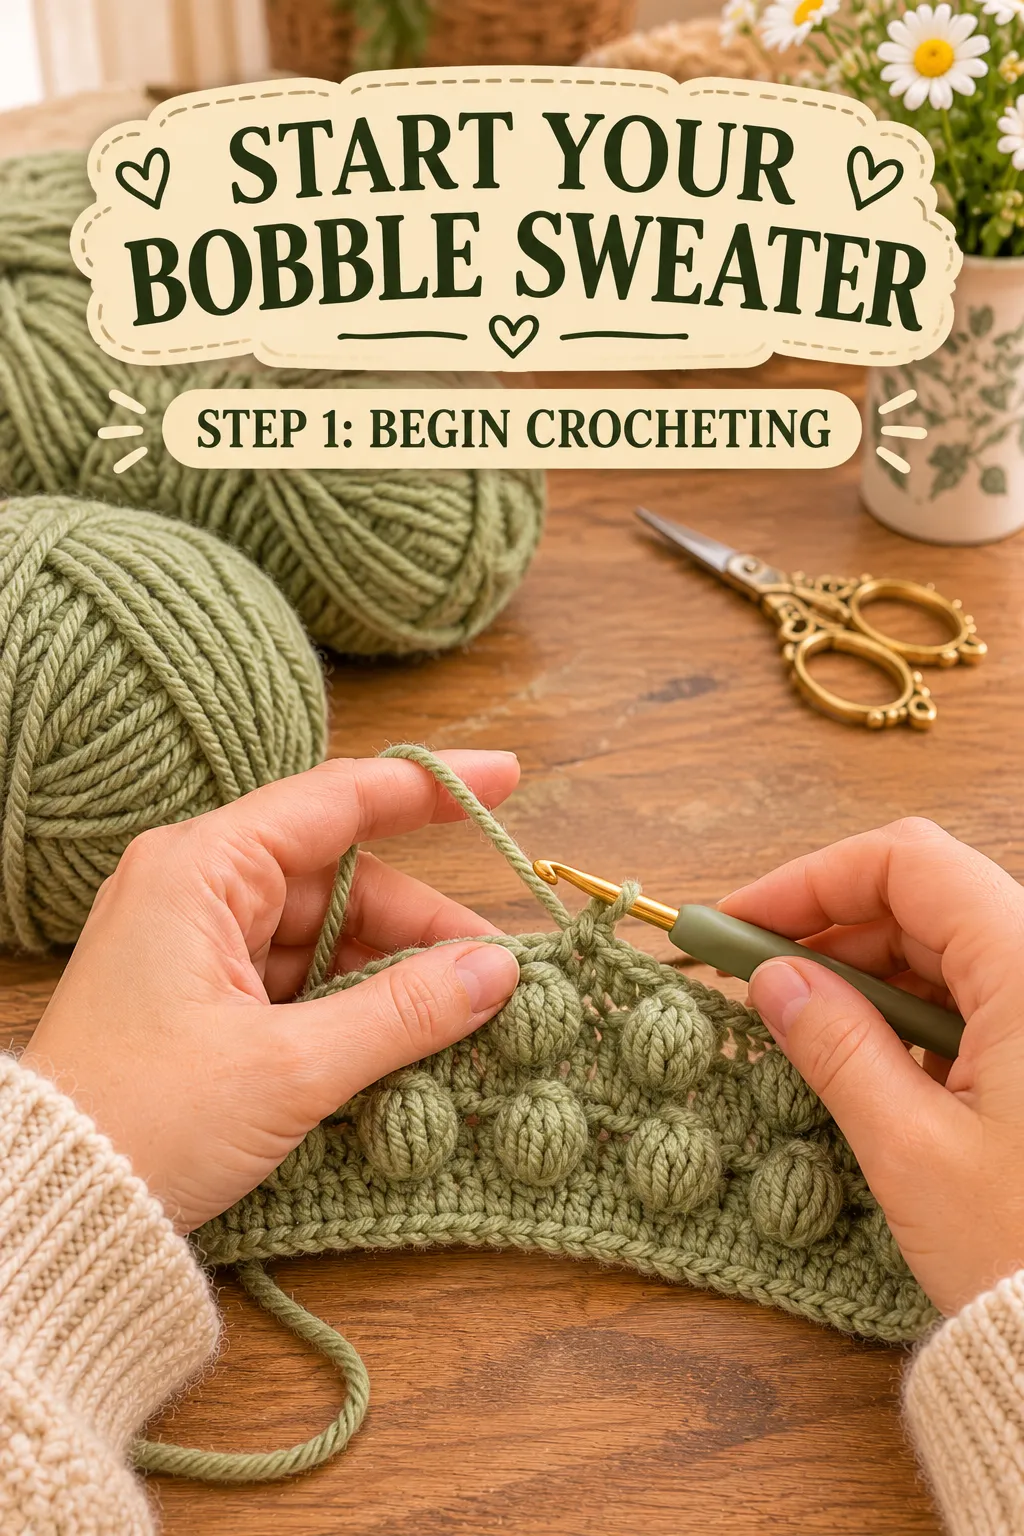
Every great sweater begins with a humble foundation chain, and ours is no different. We will start with the back panel, since it is the simplest, and then use what we learn to make the front.
For a finished chest of around 48 inches, each panel will be about 24 inches wide. At our gauge, that comes to roughly 91 stitches. The bobble pattern needs a stitch count that is a multiple of 4 plus 3, and 91 fits perfectly. So chain 92, which includes one extra chain for the turning stitch. If you are making a different size, simply choose a number that is a multiple of 4 plus 3 and adjust the chain accordingly.
A tip for the foundation chain is to keep it loose. A tight chain will pull in the bottom edge of your panel and make the hem look cinched. If you tend to chain tightly, use a hook one size larger just for the foundation chain. After you have chained, count your stitches carefully, because it is much easier to fix a counting error now than after twenty rows.
For the first row, single crochet in the second chain from the hook and in every chain across. You should end up with 91 single crochet stitches. Chain one and turn. This plain row creates a flat, tidy base for the bobbles to sit on.
Step Two, Learn the Bobble Stitch
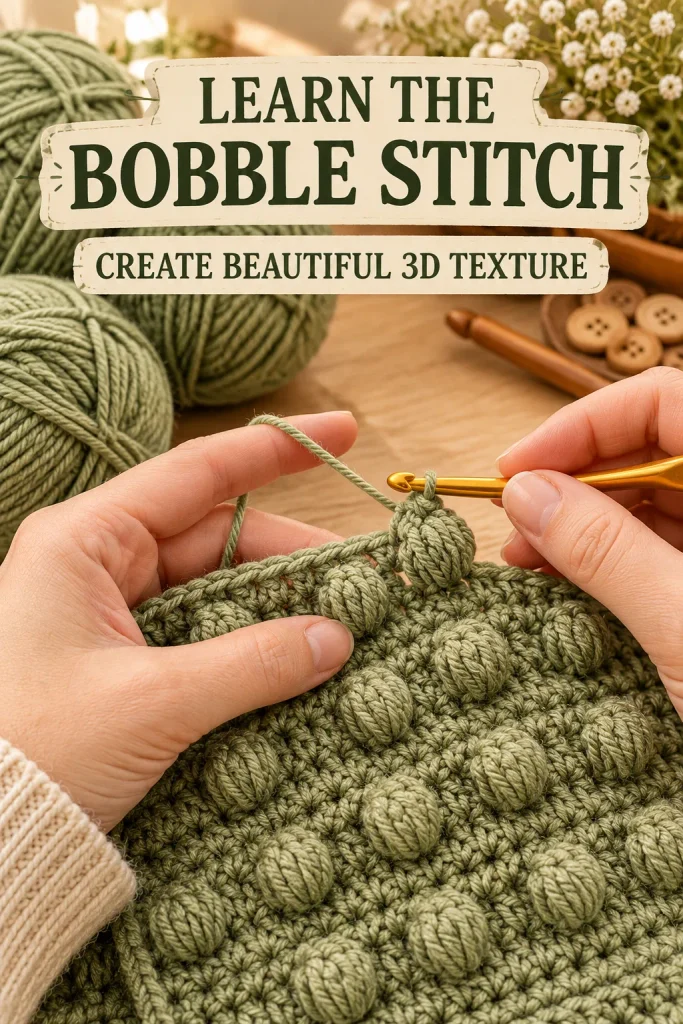
Now comes the star of the show. The bobble stitch looks impressive, but it is really just a cluster of unfinished double crochet stitches that are joined together at the top. Once you have made two or three, you will be able to do them without thinking.
How to Make a Bobble
Here is how a single bobble goes, in plain language. Yarn over, insert your hook into the stitch where you want the bobble, yarn over and pull up a loop. You now have three loops on your hook. Yarn over and pull through two loops, which leaves two loops on your hook. This is an unfinished double crochet.
Now repeat that same unfinished double crochet four more times in the very same stitch. Each time you will yarn over, insert your hook into the same stitch, pull up a loop, yarn over, and pull through two loops. After the fifth one, you will have six loops on your hook. Yarn over one final time and pull through all six loops at once. This closes the cluster and forms your bobble. It may feel a little tight, and that is normal. Give it a gentle tug and you will see a lovely round shape pop out.
For extra security, many crocheters like to work one single crochet or one chain stitch right after each bobble. This locks the bobble in place and stops it from slipping back. In our pattern, the single crochet stitches that follow each bobble naturally do this job, so you do not need an additional chain.
Making Your Bobbles Pop
Here is a very helpful secret. Bobbles pop toward the side of the fabric that faces you when you make them. That means if you work your bobble row while looking at the wrong side, the bobbles will pop out on the right side. This is why the pattern places bobble rows on the wrong side of the work. It keeps the little berries bulging out toward the front of the sweater, exactly where you want them.
If your bobbles look flat or flop to the back, check which side you are working on. If you accidentally make a bobble row while facing the right side, the bobbles will pop to the wrong side. You can fix this by undoing the row and working it again from the other side, or you can simply flip your fabric and let the bobbles show on that face. Either way, a little practice quickly makes this feel natural.
Keeping Your Bobbles Even
Consistency is the key to a polished look. Try to keep the same tension on every loop you pull up, and do not pull the final stitch tighter than the others. If your bobbles look different sizes, you may be varying the height of your unfinished double crochets. Aim for loops that are about the same height as a normal double crochet. It helps to hold your thumb and middle finger close to the hook while you work, so you control the size of each loop.
A common beginner mistake is making too many or too few unfinished double crochets in a bobble. Count each one as you make it, and say the numbers quietly to yourself. One, two, three, four, five, and then pull through all six loops. Counting out loud may feel silly at first, but it keeps your bobbles perfectly uniform.
The Bobble Pattern in Full
Now that you know the stitch, let me give you the complete pattern, written in a way that is easy to follow. The pattern repeats every four rows, and it uses a stitch count that is a multiple of 4 plus 3.
For the first row, single crochet across, as you did earlier. Chain one and turn.
For the second row, which is the first bobble row, single crochet in the first stitch. Then make a bobble in the next stitch, and single crochet in each of the next three stitches. Repeat this pattern of one bobble followed by three single crochet across the row, until you have only two stitches left. Make a bobble in the next stitch, and single crochet in the last stitch. Chain one and turn.
For the third row, single crochet in every stitch across, working each single crochet into the top of the stitch below, and into the top of each bobble. Chain one and turn.
For the fourth row, which is the second bobble row, single crochet in the first three stitches. Then make a bobble in the next stitch, and single crochet in each of the next three stitches. Repeat across until you have three stitches left, and single crochet in each of them. Chain one and turn. Notice how this row places the bobbles two stitches over from the previous bobble row. That shift creates the staggered, honeycomb arrangement you can see in the photos.
For the fifth row, single crochet across once more, and then repeat the whole four row pattern from the second row. That is your bobble sweater fabric, and it will grow quickly once you get the rhythm.
Step Three, Build Your Sweater
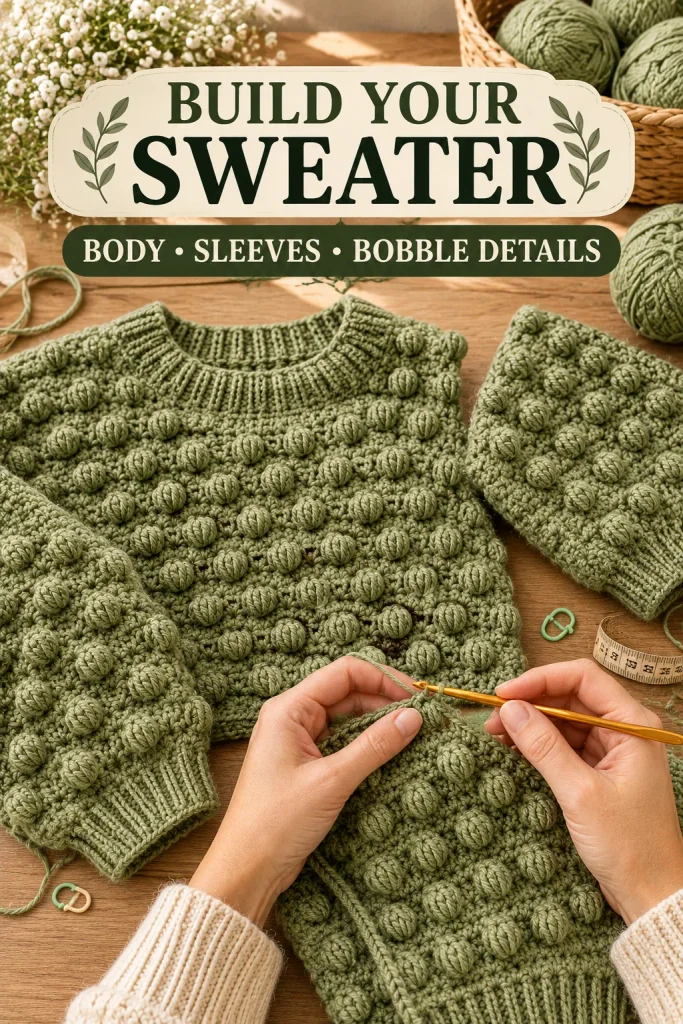
With the stitch under your belt, it is time to build the actual sweater. As you can see in the photo, the body and the sleeves are made as separate pieces and then joined, which keeps everything manageable and gives you plenty of chances to check the fit.
The Back Panel
Continue working the bobble pattern until your back panel measures about 24 to 26 inches from the bottom, or whatever length you chose earlier. Measure with the fabric laid flat, without stretching it. This usually takes around 90 rows at our gauge. Try to end on a plain single crochet row, so the top edge is smooth and easy to seam.
When you reach the desired length, fasten off, leaving a long tail for weaving in later. Do not worry about shaping the neckline on the back. A straight edge is perfect, and the neck opening will be created when you join the shoulders.
The Front Panel
The front panel is made exactly like the back, with the same stitch count and the same number of rows. This keeps your sweater balanced and makes the joining much easier. If you would like a slightly lower neckline in the front, you can make a small shaped opening, but for a first sweater I suggest keeping the front identical to the back and creating the neck opening by leaving a gap when you join the shoulders.
Lay both panels side by side and compare them. They should be the same width and length. If one is slightly different, block them gently to match, or simply ease the seams when you sew. A little difference will not be noticeable once everything is joined.
The Sleeves
The sleeves in this design are slightly puffed, with the same bobble texture running all the way down, and they taper gently toward the wrist. Start at the top of the sleeve, where it will attach to the body. For a roomy sleeve, chain about 80 stitches, adjusting to be a multiple of 4 plus 3, so the width measures around 20 inches at the top.
Work the bobble pattern in rows, and decrease at each end of every sixth row by working two stitches together at the beginning and end. This slowly tapers the sleeve toward the cuff. Continue until you have about 43 stitches left, which gives a cuff width of around 11 inches before the ribbing. When the sleeve measures about 15 inches, which leaves room for a 3 inch ribbed cuff, fasten off. Make a second sleeve exactly the same.
Because the pattern shifts bobbles from row to row, it helps to keep track of whether the next row is a bobble row or a plain row. Use a stitch marker on the first stitch of each bobble row, or keep a tally on a notepad. This small habit keeps your sleeves matching, and it saves you from the heartbreak of discovering that one sleeve has an extra row.
Blocking Your Pieces
Before you join anything, take a moment to block your pieces. Blocking relaxes the stitches, evens out the bobbles, and helps every panel match its measurements. Lay each piece on a towel or blocking mat, spritz it lightly with water or steam it gently, and pin it to the right shape. Be careful not to press down on the bobbles, because flattening them takes away their charm. Let everything dry fully before continuing.
If your yarn is acrylic, be gentle with heat, as too much steam can ruin the texture. A light spritz and a little patting into shape is usually enough. For wool or wool blends, a thorough soak followed by pinning gives lovely results. Either way, you will notice that the fabric feels softer and drapes more nicely once it has been blocked.
Step Four, Assemble and Finish Your Bobble Sweater
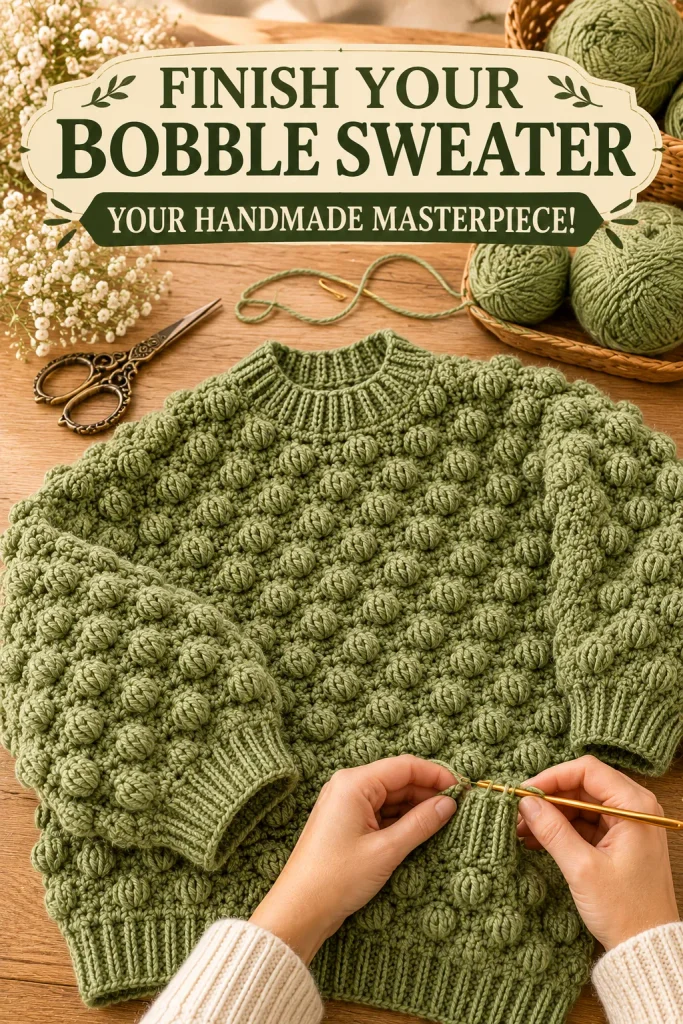
Here is the most rewarding stage of the whole project. Your separate pieces are about to become a real sweater. Take your time, stay patient, and enjoy watching it come together.
Joining the Shoulders
Place your back and front panels together with the right sides facing each other, meaning the bobble sides face inward. Line up the top edges and pin or clip them. Decide how wide you want your neck opening. For a comfortable crew neck, leave about 8 to 9 inches unjoined in the center, which is around 30 stitches at our gauge. Each shoulder seam will then measure about 7 inches or so, depending on your panel width.
You can join the shoulders with a slip stitch seam, using your hook, or with a yarn needle and a mattress stitch. The slip stitch method creates a firm, slightly raised seam that supports the weight of the shoulders, which is helpful in an oversized sweater. The mattress stitch gives a flatter, nearly invisible join. Choose whichever you find more comfortable.
Attaching the Sleeves
Lay your sweater flat with the shoulders joined and the sides open. Find the center of the top edge of one sleeve and match it to the shoulder seam. Pin the sleeve along the side edges of the body, spreading the fabric evenly. Since this is a drop shoulder design, the sleeve edge should sit along the straight side of the panel, creating a boxy, relaxed armhole.
Join the sleeve to the body using the same method as the shoulders. Work slowly and check the right side often to make sure the seam looks smooth. Repeat on the other side. At this point, you will begin to see the true shape of your sweater, and it is quite exciting.
Closing the Side and Sleeve Seams
Fold your sweater so that the front and back line up, and the sleeve sides meet. Starting at the cuff of one sleeve, join the sleeve seam all the way up to the underarm. Then continue down the side of the body to the bottom hem in one continuous line. This keeps the seam tidy and prevents bumps at the underarm. Repeat on the other side.
Weave in any ends as you go. Tackling them now saves a mountain of work at the end, and you will not have to hunt for tails later. Thread each tail onto your yarn needle, weave it through the stitches for a few inches, then back in the opposite direction, and trim the extra.
Making the Ribbed Collar
Now for the neckband, which gives your sweater a clean, finished look. Switch to your smaller 4.5 millimeter hook. Attach your yarn at a shoulder seam and work single crochet stitches evenly around the neck opening. You want a number of stitches that is divisible by an even number, such as 84 or 88, so that the ribbing fits smoothly. Join with a slip stitch to make a round.
Next, chain two and work half double crochet stitches into the back loop only of each stitch around. Join each round with a slip stitch and chain two to begin the next. Working in the back loop only creates the vertical ridges that look like knitted ribbing. Continue for about 6 to 8 rounds, until the collar measures around 1.5 to 2 inches, then fasten off.
If you prefer a roomier collar, make the ribbing slightly taller, or go up a hook size for a looser fit. If it feels tight, you can always undo a few rounds and try again. Try the sweater on before you finalize the neckband, and make sure it slips easily over your head.
Adding the Cuffs and Hem
The cuffs and hem use the same ribbing technique as the collar. For the cuffs, attach your yarn at the bottom edge of one sleeve and work single crochet around to create a base. Then work half double crochet in the back loops only, round after round, for around 3 inches. The cuffs will gather the generous sleeves gently, giving that lovely puffed shape.
For the hem, you can either work the ribbing directly onto the bottom edge or make it as a separate strip and sew it on. Working directly onto the sweater is easier for most people. Attach your yarn at a side seam, single crochet around the bottom edge, and then work rounds of back loop half double crochet until the ribbing measures about 3 inches. Fasten off and weave in the ends.
The ribbing gives the sweater structure and a polished finish. It also stops the bottom edge from rolling or stretching out, which can happen with textured crochet fabric. When all the ribbing is done, you will have a sweater that looks just like something from a boutique.
Final Blocking and Care
Once all your ends are woven in, give the finished sweater one more gentle blocking. Lay it flat on a towel, shape it to the right measurements, and let it dry completely. This final blocking relaxes the seams, smooths the ribbing, and helps your bobbles sit beautifully.
When it is time to wash your sweater, check the care instructions on your yarn label. For most wool blends, a gentle hand wash in cool water with a mild detergent is best. Press the water out with a towel, never wring it, and lay the sweater flat to dry. Do not hang it, as the weight of the wet fabric can stretch it out of shape. Store it folded in a drawer or on a shelf, rather than on a hanger, to keep the shoulders from stretching.
Troubleshooting Common Problems
Every maker meets a few bumps along the way, so let me offer some friendly solutions. If your bobbles look uneven, check that you are working the same number of unfinished double crochets in each one, and that you are pulling up loops of similar height. If your bobbles seem loose and floppy, try pulling the final yarn over through all the loops with a little more firmness.
If your panels look wavy at the edges, you may be adding or missing stitches at the turning chain. Count your stitches at the end of each row until the pattern feels natural. If your fabric is stiff, go up a hook size, as bobble fabric naturally uses more yarn and can become dense. If it looks too loose, go down a size.
If your sweater feels heavy, remember that bobbles add weight. Choose a lighter yarn blend or reduce the length slightly if this bothers you. And if you run out of yarn near the end, look for a matching dye lot or use a slightly different shade for the ribbing as a design feature. Many makers love a contrasting cuff and collar anyway.
Styling Your Oversized Bobble Sweater
Now for the fun part, wearing it. An oversized sage green sweater is a wardrobe dream. Pair it with high waisted jeans and white sneakers for an easy everyday outfit. Layer it over a collared shirt for a preppy, cozy look. Wear it with a flowing midi skirt and boots for a cottagecore vibe. The color is gentle and earthy, so it blends beautifully with creams, browns, denim, and soft florals.
If you like color, consider making your next one in dusty rose, mustard, or a deep forest green. The bobble texture works with nearly any shade, and a different color gives it a whole new personality. You could even make a child sized version by adjusting the panel width and length, which makes a delightful matching set for a family photo.
A Few Final Words
Making a sweater from scratch is a big accomplishment, and I hope this tutorial has shown you that it is much more doable than it looks. You learned a new stitch, built simple panels, joined them into a garment, and added ribbing that makes it all look polished. Each step was small, and together they created something you can wear and treasure for years.
Do not worry if your first bobble sweater has a few quirks. Honestly, those little imperfections are what make handmade clothing feel alive. When someone compliments your sweater, you will get to say the best words in the world, which are “I made it myself.”
If you enjoyed this pattern, I would love to hear about your version. Tell me what color you chose and any changes you made. And if you are hungry for more cozy projects, there are plenty of seasonal bags, ornaments, and tutorials waiting for you. Grab your hook, pick out a yarn that makes you happy, and begin your first bobble today. Happy crocheting!