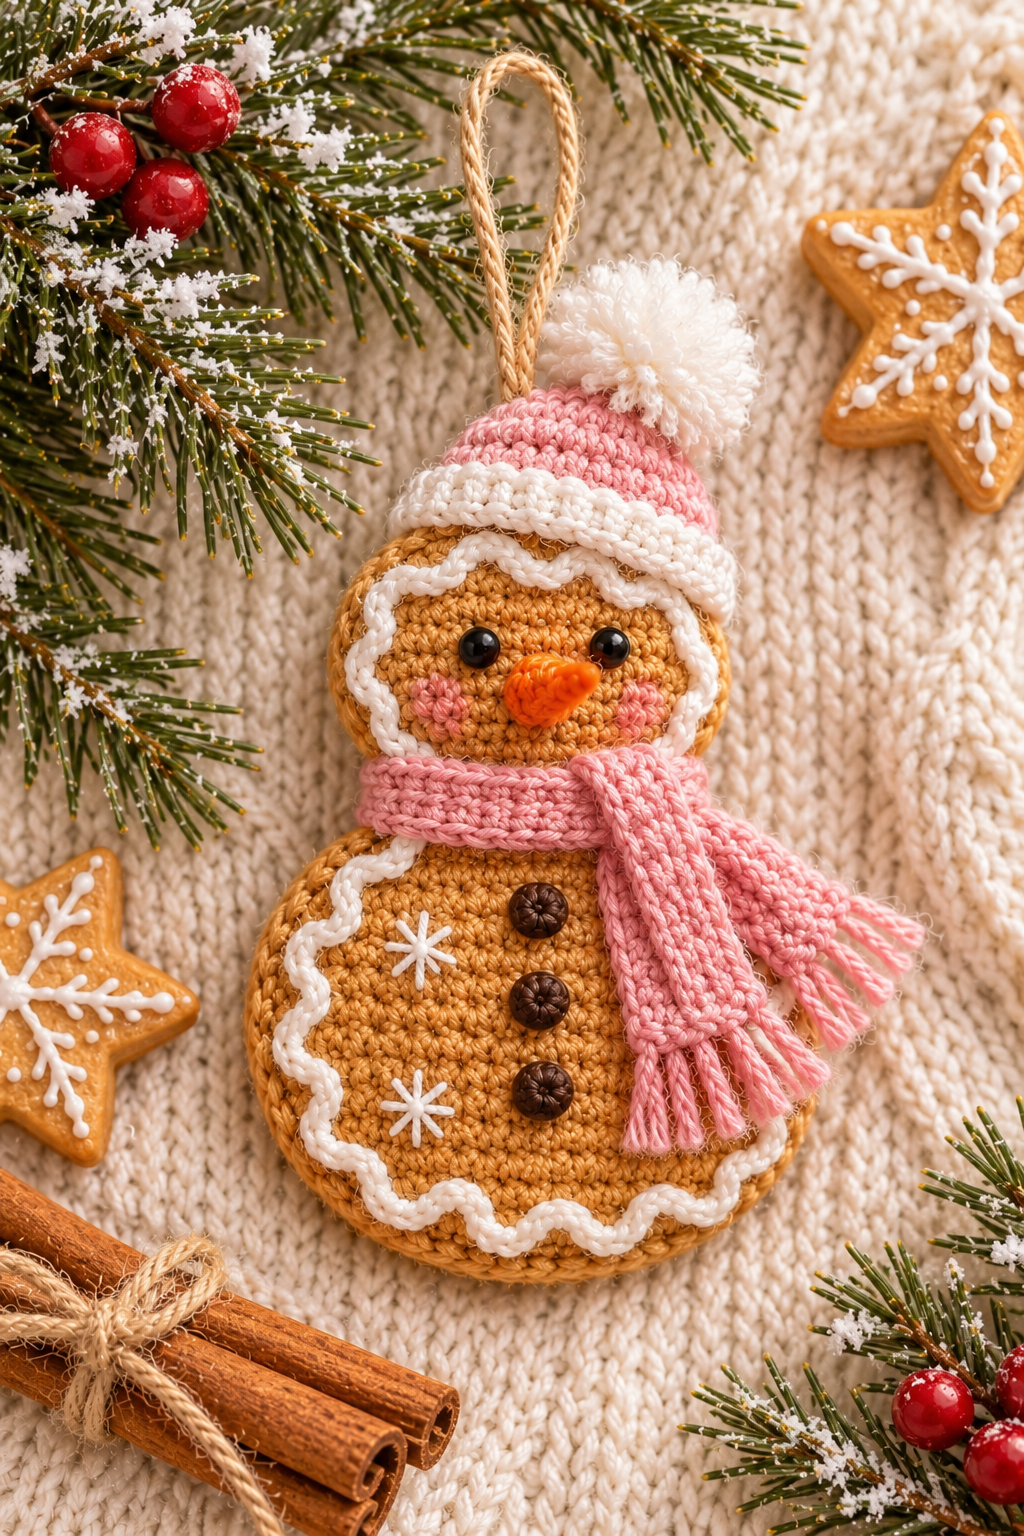
Every December, there is one handmade decoration that people stop to admire, pick up, and ask about, and that is the little ornament that looks good enough to eat. This iced biscuit snowman crochet Christmas ornament is exactly that kind of piece. It has the warm golden brown color of a freshly baked gingerbread cookie, wavy white icing that follows the edge of its round body, tiny embroidered snowflakes, chocolate colored buttons, and rosy cheeks that give it a sweet, cheerful face. Add a soft pink hat with a fluffy pom pom and a little knitted looking scarf, and you have a keepsake that belongs on the front of your tree.
This free pattern is written for crocheters who are comfortable with the basics. If you can make a magic ring, work single crochet in a spiral, and increase and decrease evenly, you can make this snowman. I will guide you through every stage, from the peanut shaped gingerbread body to the hat, scarf, face, icing details, and hanging loop. Along the way I will share the small tricks that make the difference between an ornament that looks homemade and one that looks like it came from a boutique.
Why This Ornament Is Special
Christmas ornaments are very personal. Each one carries a memory, whether it is the year you learned a new skill, the friend who received it as a gift, or the tree that it decorated. A crochet ornament has something extra, because it is made slowly, stitch by stitch, with your own hands. That quality is what makes handmade ornaments so treasured.
The iced biscuit idea works beautifully because it combines two beloved symbols of the season. The snowman reminds us of winter play and fresh snow, and the gingerbread color reminds us of cinnamon, ginger, and warm kitchens. When you combine the two, you get a piece that feels cozy, nostalgic, and slightly playful. People who do not even crochet fall in love with it.
The design is also practical. It is small enough to hang on a tree branch, but sturdy enough to be handled by children. It can top a gift box, hang from a doorknob, decorate a garland, or sit on a shelf as a miniature figure. Because it is made from cotton or acrylic yarn, it will not break the way glass ornaments do, and you can pack it away each year and bring it out again for decades.
Finally, it is a wonderful project for gifting and selling. A set of three or four snowmen in different hat colors looks stunning in a gift box, and holiday markets always welcome handmade ornaments. Once you finish your first one, you will find that the next goes much faster.
Materials You Will Need
For the yarn, choose a smooth DK weight or light worsted cotton or cotton blend. Cotton shows each stitch clearly, which is important for amigurumi, and it holds its shape beautifully. Acrylic is also fine, and it is softer and easier to find in bright shades. You will need about 60 yards of a warm gingerbread brown for the body, about 20 yards of soft pink for the hat and scarf, about 15 yards of cream or white for the hat brim, icing, pom pom, and hanging loop, and tiny scraps of orange for the carrot nose and a deeper pink for the cheeks.
For the hook, a 2.5mm hook works well with DK weight yarn. In amigurumi, you want the stitches to be tight so that the stuffing does not show through, which usually means using a hook a size or two smaller than the yarn label recommends. If your fabric looks gappy, go down half a millimeter.
You will also need polyester fiberfill for stuffing, a pair of 6mm black safety eyes, a yarn needle for sewing and embroidery, sharp scissors, and stitch markers. A stitch marker is essential because the body is worked in a spiral, and it is easy to lose your place. Three small brown buttons, about half an inch wide, give the snowman his chocolate colored buttons, and a little cream embroidery thread or a single strand of cream yarn is used to sew them down. If you prefer to avoid buttons, because the ornament will be given to small children, you can crochet three tiny brown discs instead, and I will explain how.
If you want a very neat pom pom, a small pom pom maker is helpful, but you can easily make one by wrapping yarn around two fingers.
Abbreviations and Basic Stitches
This pattern uses standard US crochet terms. Mr means magic ring. Ch means chain. Sc means single crochet. Inc means increase, which is 2 sc in the same stitch. Dec means decrease, which is single crochet two stitches together. Sl st means slip stitch. Blo means back loop only. The body is worked in a continuous spiral without joining, so do not chain at the start of a round. Mark the first stitch of each round and move your marker up as you go.
For decreases, I like to use the invisible decrease. Insert your hook through the front loop only of the next two stitches, yarn over, pull through both loops, and then yarn over and pull through the remaining two loops. This hides the decrease, giving you a smoother surface, and that smoothness matters on a small piece that will be looked at closely.
Finished Size
The finished snowman measures about 4 and a half inches tall, not counting the hat and hanging loop, and about 3 inches wide at the base. With the hat and pom pom, he measures around 5 and a half inches. If you want a larger ornament, use a thicker yarn and a bigger hook, and he will grow accordingly. If you want a tiny version for a garland, use fingering weight yarn with a 2mm hook.
Step One: Crochet the Gingerbread Body
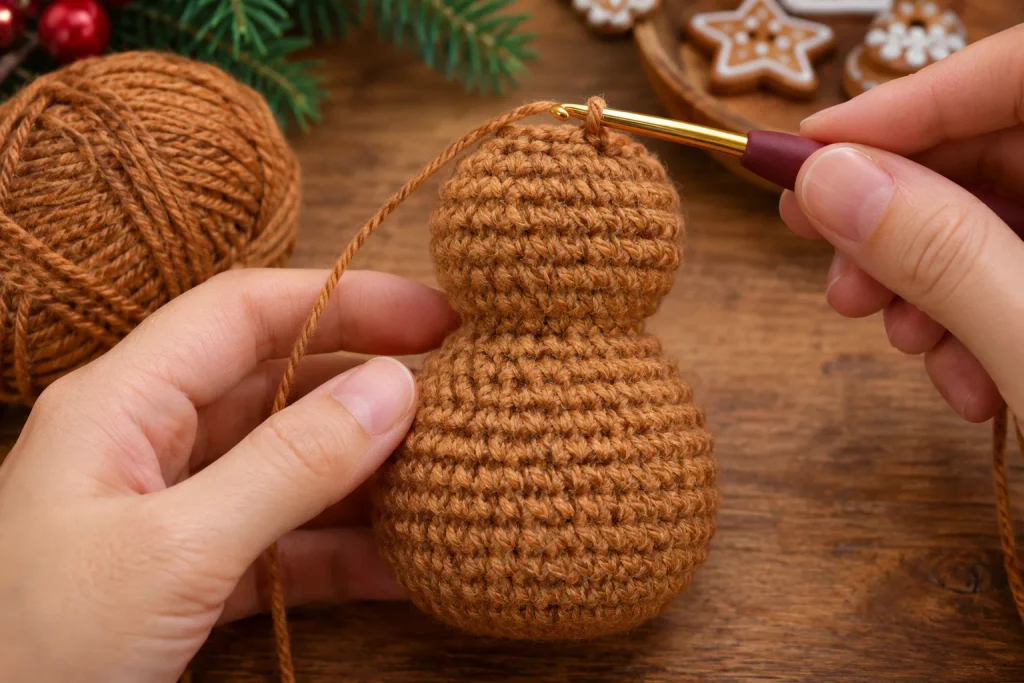
The body is worked in one piece, starting at the bottom of the large round section, narrowing to a neck, and then widening again for the head. This peanut shape is what gives the snowman his classic silhouette, and working it in one piece avoids bulky seams.
Using the gingerbread brown yarn, make a magic ring and work 6 sc into it. Pull the tail to close the ring tightly. For round two, work inc in each stitch around, giving 12 stitches. For round three, work sc then inc around, giving 18. For round four, work sc in the next 2 and inc in the next around, giving 24. For round five, work sc in the next 3 and inc in the next around, giving 30. For round six, work sc in the next 4 and inc in the next around, giving 36.
Work rounds seven through thirteen in plain sc, one stitch in each of the 36 stitches. This creates the straight, plump sides of the large lower body. Take a moment to check your stitch count at the end of round thirteen, because you will start shaping the neck next.
For round fourteen, work sc in the next 4 and dec in the next around, leaving 30. For round fifteen, work sc in the next 3 and dec in the next around, leaving 24. For round sixteen, work sc in the next 2 and dec in the next around, leaving 18. Begin stuffing the lower body now. Use small tufts of fiberfill, pushing them firmly into the base first and then up toward the waist. A well stuffed body should feel firm but not rock hard, and it should hold its shape when you press it gently.
For round seventeen, work sc in the next 2 and inc in the next around, giving 24 stitches. This is the start of the head. Work rounds eighteen through twenty one in plain sc, 24 stitches each. Insert the safety eyes now, between rounds nineteen and twenty, about 5 stitches apart, and secure the washers firmly on the inside. Placing the eyes low and fairly wide apart gives a sweeter, more childlike expression.
For round twenty two, work sc in the next 2 and dec in the next around, leaving 18. For round twenty three, work sc then dec around, leaving 12. Finish stuffing the head firmly, because a soft head will droop. For round twenty four, work dec 6 times, leaving 6 stitches. Cut the yarn, leaving a tail, and weave it through the front loops of the remaining stitches. Pull tight to close, and hide the end inside the body.
Take your time with the stuffing. This ornament is small, and the shape is more visible than on a larger toy, so uneven stuffing will show. Roll the body gently between your palms to smooth lumps. If a stitch pulls open, add a little more stuffing and gently nudge the fabric to cover it.
Step Two: Make the Pink Hat With a Cream Brim
The hat is what gives this snowman his personality. A pink hat with a cream brim and a white pom pom looks sweet and festive, but you can choose any colors that suit your tree.
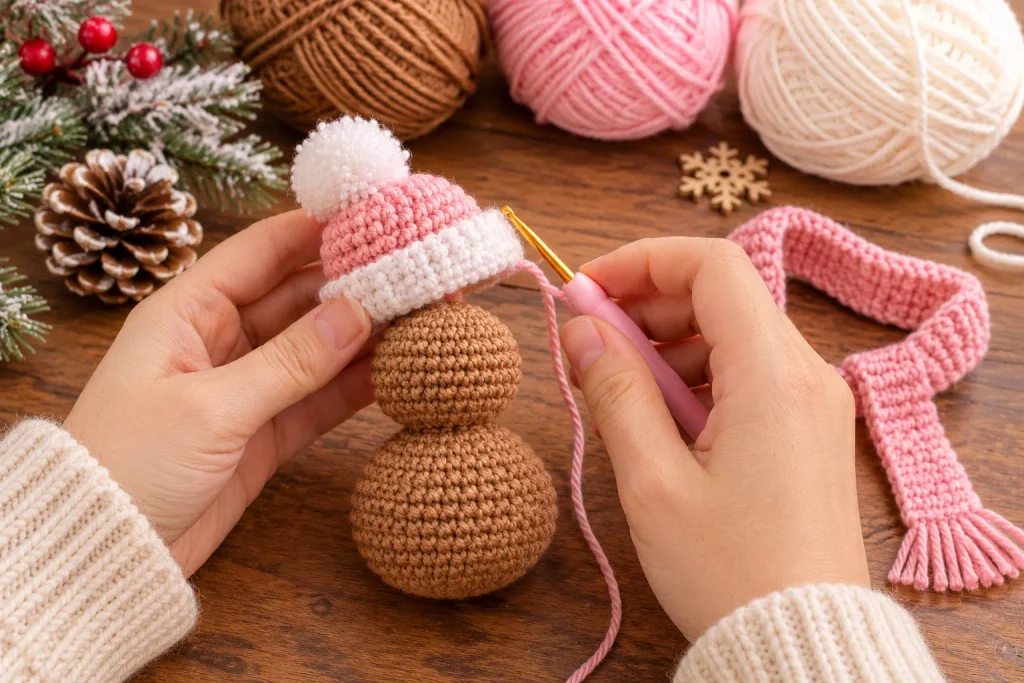
Using the pink yarn, make a magic ring and work 6 sc. For round two, work inc in each stitch for 12. For round three, work sc then inc around for 18. For round four, work sc in the next 2 and inc in the next around for 24. Work rounds five through eight in plain sc, 24 stitches each. This forms the dome of the hat.
Now change to cream yarn. For rounds nine and ten, work 24 sc in each round. On round eleven, work sc in the back loop only of each stitch around. This creates a gentle ridge where the brim will fold or flare. Work one more plain round of 24 sc, slip stitch into the next stitch, and fasten off, leaving a tail for sewing.
To make the pom pom, wrap cream yarn about 40 times around two fingers, slide the loops off carefully, and tie tightly in the center with a separate strand. Cut the loops and trim into a neat round ball. Sew the pom pom to the top of the hat with the tail from the tying strand.
With a strand of cream yarn on your yarn needle, embroider a small snowflake on the front of the hat. Make three straight stitches crossing at the center like an asterisk, and add a tiny V shape at the end of each arm. Keep the stitches small and even, and the snowflake will look crisp and delicate.
Place the hat on the head so that the brim sits just above the eyes, slightly tilted for a playful look. Pin it, check from the front and the side, and then sew it firmly in place with small stitches around the inside of the brim, going through the head fabric every few stitches. A well sewn hat will not shift when the ornament is handled.
Step Three: Crochet the Little Scarf
The scarf is a small detail that makes the ornament feel complete. In pink yarn, chain 7. Work 1 sc in the second chain from the hook and in each chain across, giving 6 stitches. Chain 1 and turn. Work 1 sc in the back loop only of each stitch across. Repeat this row until the scarf measures about 6 inches. Working in the back loop only creates a ribbed, knit like texture that looks just like a real scarf.
Fasten off and leave a short tail. To make the fringe, cut 6 pieces of pink yarn, each about 2 inches long. Fold three pieces in half and pull the fold through the end of the scarf with your hook, then pull the ends through the loop to secure it. Repeat on the other end with the remaining three pieces. Trim the fringe so it is even.
Wrap the scarf around the neck of the snowman, where the head meets the body. Overlap the ends slightly, with one end hanging down in front, and sew the overlap firmly to the body so that it does not slip. For a gift, you can embroider a small cream snowflake on the hanging end, which echoes the one on the hat.
Step Four: Add the Face
A good face turns a simple crochet shape into a character. We will add a carrot nose, rosy cheeks, and a smile.
For the carrot nose, use orange yarn. Make a magic ring and work 4 sc. For round two, work 4 sc. For round three, work sc then inc around, giving 6 stitches. For round four, work 6 sc. Fasten off and leave a tail. Stuff the nose very lightly, only a tiny wisp of fiberfill, so that the little cone holds its shape. Sew the wide end to the face, centered between and slightly below the eyes. Angle the tip slightly so it looks natural.
For the cheeks, use a deeper pink or rose yarn. Make a magic ring and work 6 sc, then work sc then inc around for 9 stitches. Slip stitch to finish and leave a tail. Make two. Sew one cheek to each side of the face, just below and slightly outside each eye. The cheeks should look soft and blended, so use small stitches and avoid pulling the yarn too tightly.
For the smile, use black embroidery thread or a single strand of black yarn. Bring the needle up from the back of the head at one side of the mouth, make a gentle curved stitch to the other side, and bring the needle down. Add a tiny stitch at each end to form dimples. If the curve looks uneven, pull out the thread and try again, since embroidery thread is easy to remove. A smile placed slightly below the nose gives a happier look.
Step Five: Decorate With Icing and Snowflakes
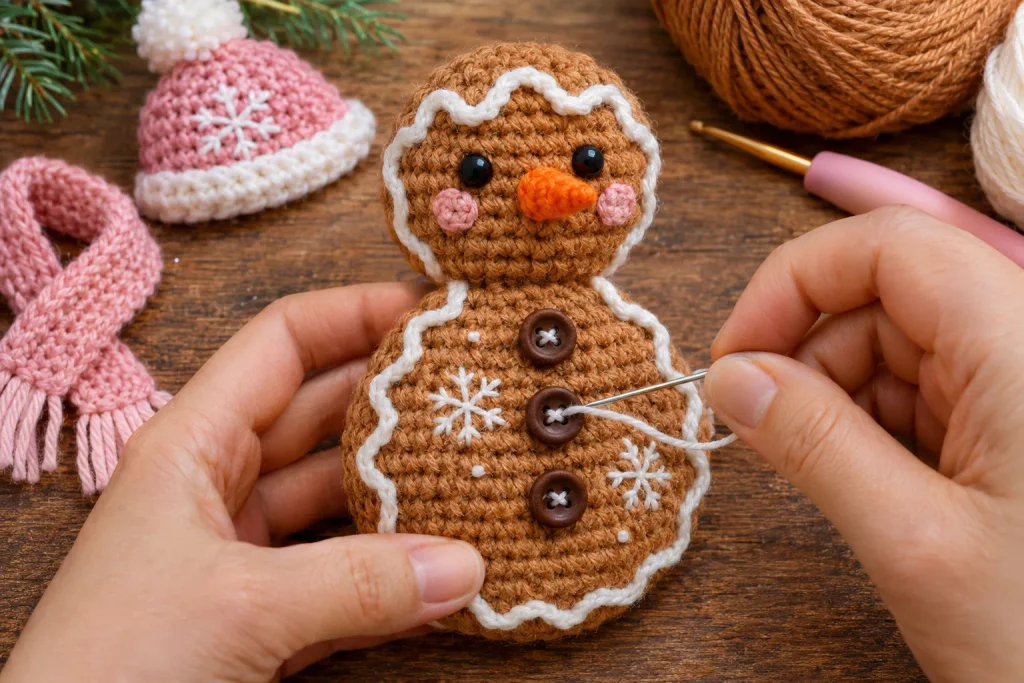
This is the step that makes the snowman look like a real iced biscuit. With cream yarn on a yarn needle, you will embroider wavy lines of icing along the edges of the body and around the head, and add a few snowflakes and dots.
Start with the body. Imagine a line following the outer edge of the large lower body, about half an inch inside the edge. Using a chain stitch, which looks like a little rope, work a wavy line that dips and rises in soft scallops. To keep the waves even, make a few small dots with a water soluble pen or place a pin at the top of each wave and bottom of each dip before you start. Work from the neck down one side, around the bottom, and up the other side, meeting at the neck. A wavy border of this kind gives the snowman the piped icing look of a real gingerbread cookie.
For the head, work another wavy chain stitch line framing the face, starting at one side of the hat, going around the face, and ending on the other side. Keep the line slightly inside the edge so that it does not get covered by the hat or scarf.
For the snowflakes, work three straight stitches crossing at the center, and add small V shapes at the tips. Place two or three snowflakes on the body, one larger and one smaller, and scatter tiny single stitch dots around them. Keep the pattern slightly irregular, because real icing is never perfectly symmetrical.
For the buttons, line up three small brown buttons down the center front of the body, evenly spaced between the neck and the waist. Use cream thread to sew each button down with a small cross stitch through the holes, which gives it the look of a candy button. If you prefer no buttons, crochet three small brown discs by making a magic ring of 6 sc and then sc then inc around for 9, then sew them on firmly with a cross stitch of cream thread. Handmade discs are safer for children and look just as charming.
Step Six: Make the Hanging Loop
A sturdy hanging loop lets you display the ornament on a tree, a garland, or a doorknob. Using cream yarn, chain 25 and slip stitch into the first chain to form a ring, then flatten it. Twist it into a loop and tie a small knot at the base. Alternatively, chain 25 and fasten off, then fold the chain in half and knot the ends together. A thicker loop looks more substantial, so you can double the strand if you like.
Thread the ends of the loop onto a yarn needle and sew it securely to the top of the hat, just under the pom pom. Pass the needle through the hat fabric and the head several times, then knot and hide the ends inside. Give the loop a firm tug to make sure it holds, because an ornament that falls off the tree is a sad thing.
If you prefer a more traditional look, use a piece of red or green ribbon, or a thin gold cord, in place of the yarn loop. A contrasting ribbon can match your tree theme.
Finishing Touches and Care
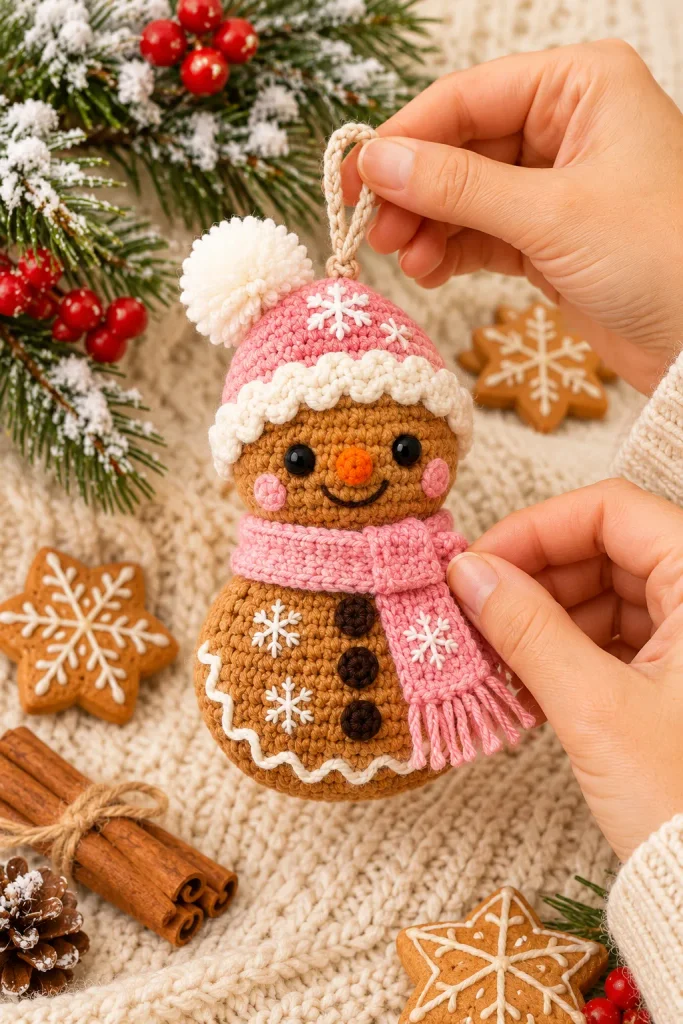
Weave in every remaining end carefully, running each tail through several stitches in different directions before trimming. With a small piece like this, a loose end can pop out and spoil the look. Check the ornament from every angle, and smooth any lumps in the stuffing.
If the body looks slightly uneven, you can gently shape it by rolling it in your palms or pressing it against a table. If the wavy icing looks wobbly, you can neaten it by adding a few small stitches over the dips and tops to guide the shape. Embroidery is very forgiving, and a few extra stitches can transform it.
To clean the ornament, spot clean with a damp cloth and a drop of mild soap. Avoid soaking, because the stuffing can hold water and the buttons can rust. Let it air dry, and store it in a box with tissue paper between ornaments to keep the colors fresh. A small sachet of cedar or lavender in the box keeps away moths.
Troubleshooting Common Problems
If your body looks lumpy, you probably stuffed unevenly or used too much stuffing at once. Open the last few stitches, remove a little stuffing, and add it back in smaller pieces. If your shape looks pointed rather than round, check that your increases were evenly spaced, because stacking them in the same spot creates corners.
If the head leans to one side, the neck may be too soft. Add a little more stuffing around the waist and make sure the head is centered before you sew the scarf. A scarf sewn firmly around the neck also helps to hold the head upright.
If the hat does not fit well, try a slightly larger hook for the hat only, or add a round to the brim. A hat that is too tight can distort the head, while one that is too loose can slip, so test the fit before sewing.
If the embroidery looks messy, switch to a thinner thread and make smaller stitches. Practice on a spare scrap before working on the real ornament. Marking the wavy line lightly with a water soluble pen gives you a guide.
If the buttons keep loosening, use a stronger thread, such as button thread, and pass through the holes several times. Knot firmly on the inside of the body.
If your yarn splits, switch to a hook with a rounder tip, or use a tighter plied yarn. Working in good light helps you see the strands clearly.
Color Variations to Try
Once you have made the classic version, you can create a whole family of snowmen. For a traditional look, try a red hat with a white brim and a green scarf. For a modern look, use a mint green hat and a cream scarf. For a Scandinavian look, try a navy hat with white snowflakes and a red pom pom. For a baby’s first Christmas, make a soft white snowman with a pale blue hat and add the year embroidered on the body.
You can also change the gingerbread tone. A deeper chocolate brown gives the look of dark gingerbread, while a lighter tan gives the look of shortbread. For a vanilla biscuit, use cream yarn with brown icing. For a whimsical touch, add tiny embroidered stars, hearts, or candy canes instead of snowflakes.
For gifts, personalize each ornament with a name. Embroider a name across the body in cream chain stitch, or add a small tag on the hanging loop. A personalized ornament makes a lovely gift for teachers, neighbors, and new babies.
Fun Ways to Use Your Snowman
The ornament looks wonderful on a Christmas tree, but there are many other ways to use it. Tie it to a gift as a decoration, so the present comes with a second surprise. Hang it from a wreath or a mantel garland. Place it in a bowl with pine cones and cinnamon sticks as a table centerpiece. Clip it to a stocking, hang it from a doorknob, or add a small magnet to the back so it sticks to the refrigerator.
A group of snowmen in different colors makes a charming garland. String five or six on a length of cord with small pom poms between them, and hang the garland across a window or fireplace. Children love helping to choose the colors, and it makes a fun holiday craft to do together.
If you sell ornaments, display them on a small artificial tree at your stall. Customers love to see the ornaments in context, and a tree makes the whole display look festive and inviting.
Frequently Asked Questions
Many readers ask whether this pattern is suitable for beginners. It is best for crocheters who have made at least one amigurumi before, because the shaping and embroidery take some patience. If you are brand new, start with a simple ball, practice your magic ring, and then come back to the snowman.
People also ask how long it takes. Most crocheters finish the body in about 2 hours, the hat and scarf in another hour, and the face and embroidery in about an hour. Allow a relaxed afternoon, and you will have a finished ornament by evening.
Another common question is about yarn. Cotton gives crisp stitches and a sturdy shape, while acrylic is soft and easy to find. Avoid fuzzy yarns, because they hide the stitches and make the embroidery harder to see.
Readers also wonder about safety. If the ornament will be given to a child under three, skip the buttons and safety eyes, and embroider the face and crochet the button discs. Make sure all pieces are sewn securely, and do not hang the ornament within reach of very small children.
Finally, many ask whether they can sell the finished ornaments. You are welcome to sell items made from this pattern. I would be grateful if you credit this blog and link back to the pattern when you share your work.
Final Thoughts
This iced biscuit snowman crochet Christmas ornament is a project that brings together warmth, whimsy, and craftsmanship. The gingerbread colored body, the wavy white icing, the embroidered snowflakes, the little buttons, the rosy cheeks, and the cozy hat and scarf all combine to create a piece that feels like Christmas in miniature. Make one for yourself, make a set for your family, or make a whole batch to give as gifts, and watch how much joy a few yards of yarn can bring.
I would love to see your finished snowmen, so share your photos and tell me which colors you chose for the hat and scarf. Happy crocheting, and merry stitching this holiday season.