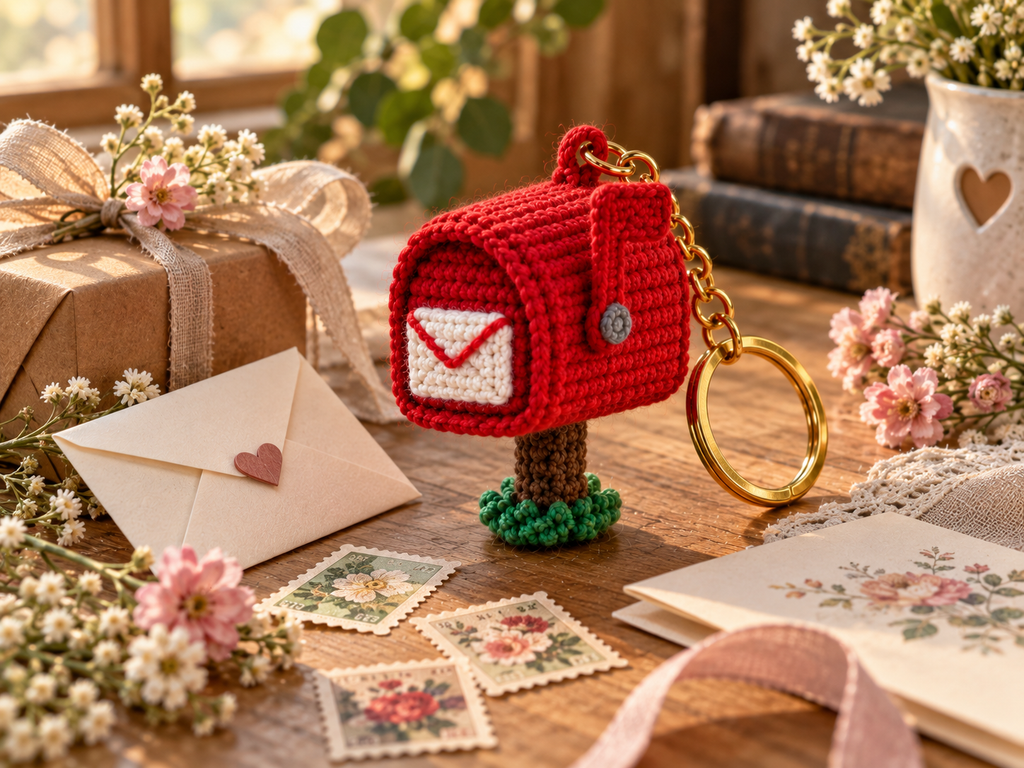
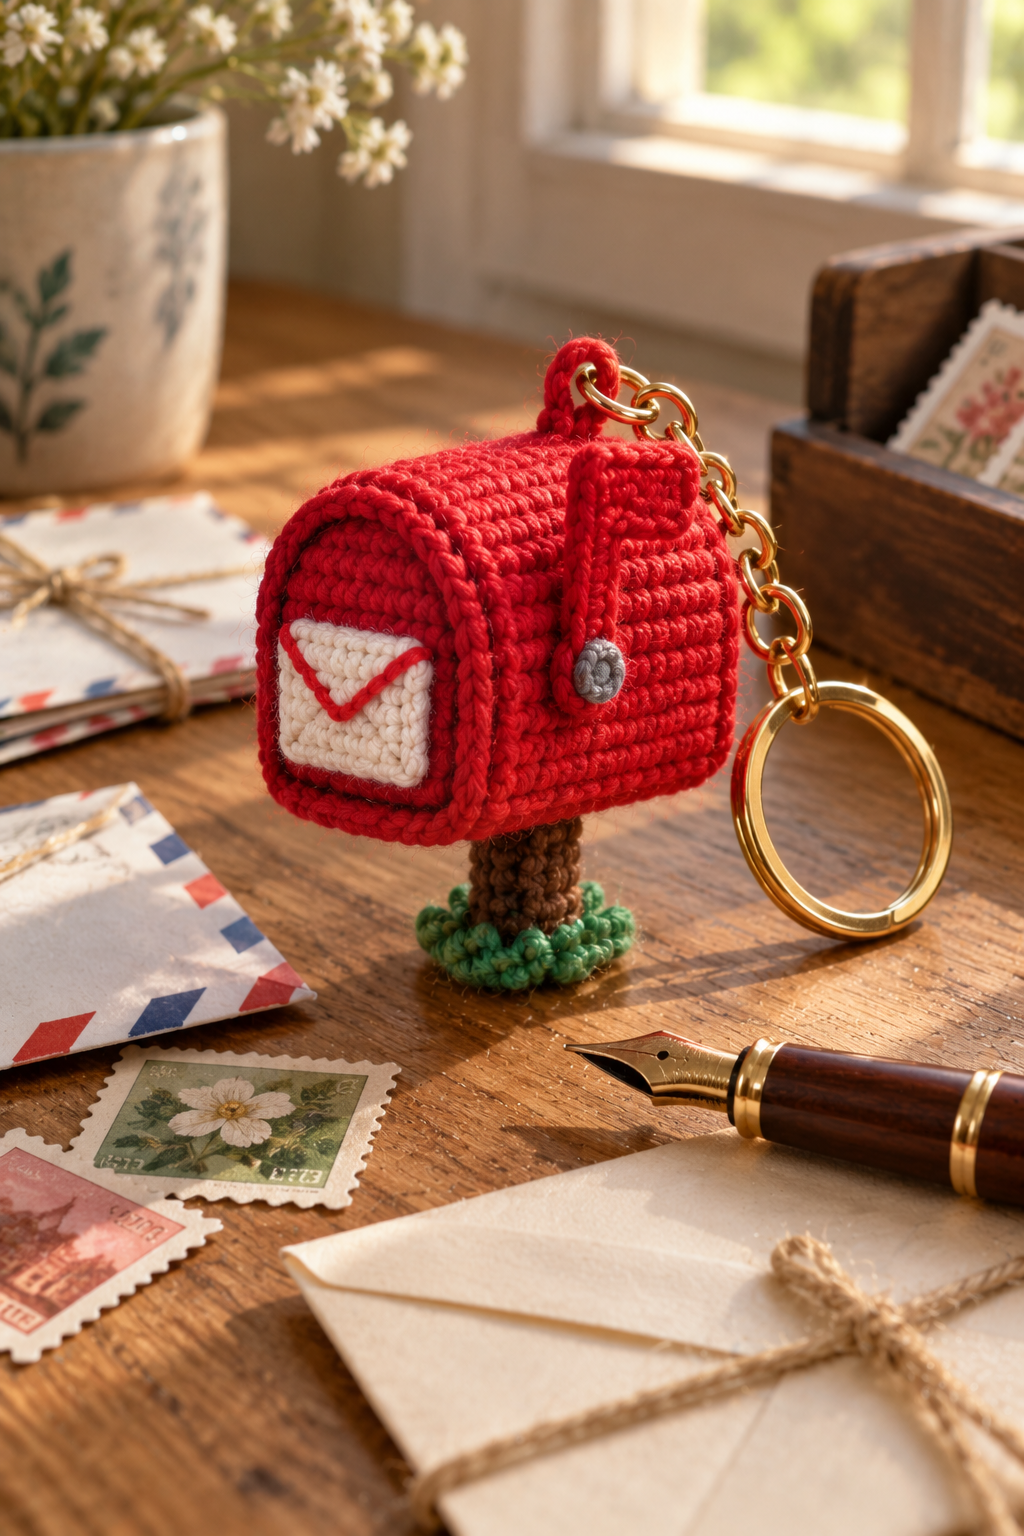
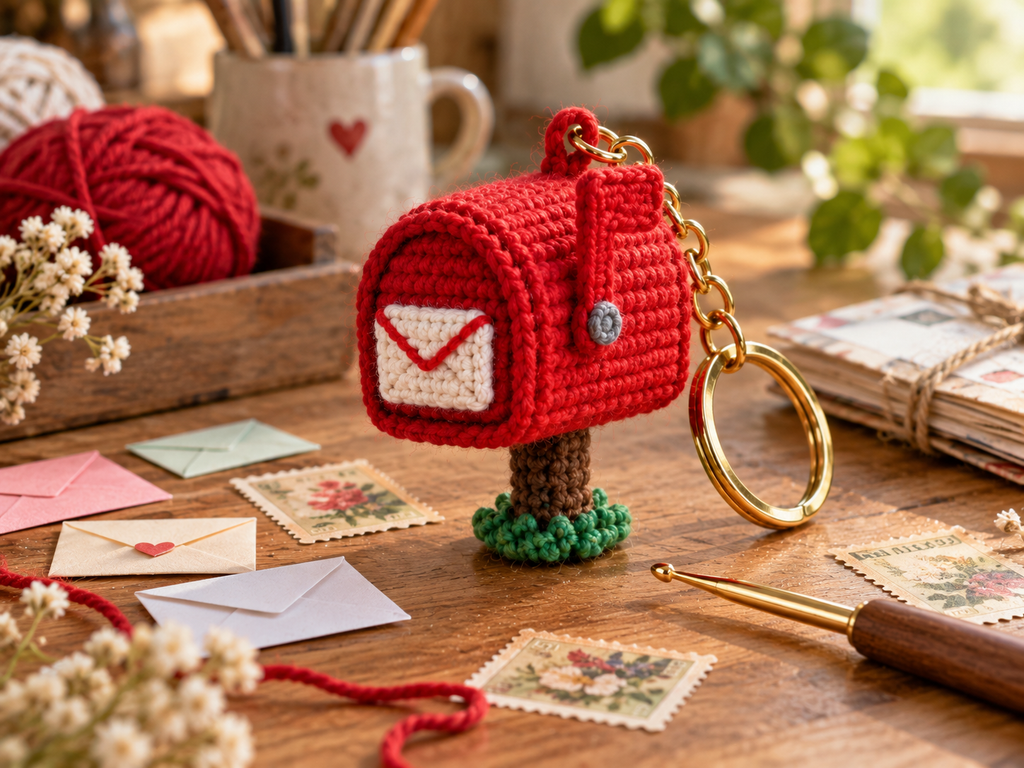
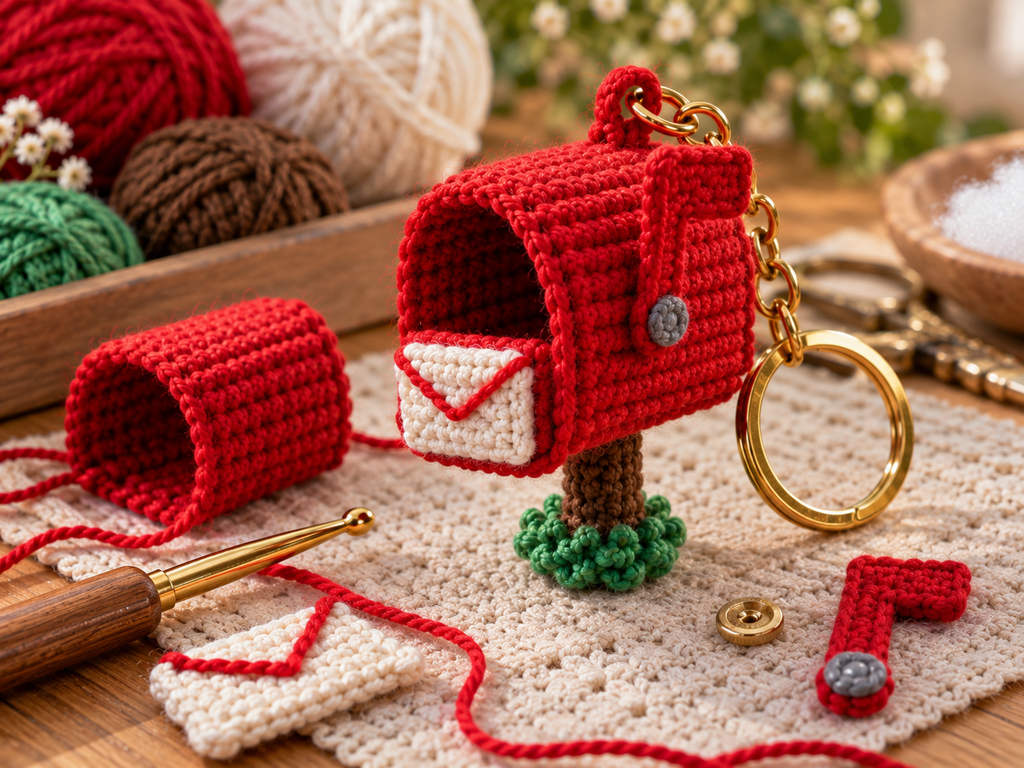
Looking for a small crochet project that is cute, practical, and genuinely fun to make? This adorable crochet mailbox keychain free pattern turns a few basic crochet techniques into a miniature red mailbox complete with a raised flag, tiny envelope, brown post, green grass base, and gold keyring.
It makes a sweet handmade keychain, bag charm, stocking stuffer, teacher gift, Valentine’s Day gift, or small item to sell at a craft market or handmade shop.
The best part is that you don’t need a large amount of yarn or a complicated crochet technique. The project is made from small, manageable pieces that are assembled at the end.
Pattern note: The stitch counts below are designed as a practical beginner-friendly construction guide. If you want the finished piece to match a particular size exactly, adjust your hook size and yarn weight consistently throughout the project.
Why You’ll Love This Crochet Mailbox Keychain
This miniature mailbox is a great project when you want something that feels special without committing to a large crochet project.
It uses small amounts of yarn
The main mailbox uses red yarn, while small amounts of cream, brown, and green yarn are enough for the decorative pieces.
It’s a beginner-friendly project
The basic construction relies on familiar stitches such as single crochet, increases, decreases, chains, and slip stitches. The project is also divided into separate components, making it easier to work on one piece at a time.
It’s easy to personalize
You can change the mailbox color, envelope color, flag position, or keyring style. Try pastel blue for a spring version, pink for Valentine’s Day, or black and orange for a Halloween-inspired mailbox.
It’s a useful finished item
Instead of sitting on a shelf, the finished crochet mailbox can become a keychain or bag charm that someone can actually use.
Crochet Mailbox Keychain Materials
Before you begin, gather everything in advance. Having the small components ready makes assembly much easier.
| Material | Suggested use |
|---|---|
| Cherry-red yarn | Mailbox body and flag |
| Cream or ivory yarn | Mini envelope |
| Brown yarn | Mailbox post |
| Green yarn | Grass/base |
| Crochet hook | Choose a size appropriate for your yarn |
| Polyester fiberfill | Light stuffing |
| Gold keyring | Keychain attachment |
| Small metal button | Flag detail |
| Tapestry needle | Sewing pieces together |
| Scissors | Cutting yarn |
| Stitch marker | Keeping track of rounds |
For a miniature keychain, worsted-weight or cotton yarn can work well, although the finished size will depend on the yarn and hook you choose.
Cotton is particularly useful when you want defined stitches and a firm shape.
Crochet Abbreviations
If you’re newer to crochet, these are the main abbreviations used in the pattern.
- ch — chain
- sc — single crochet
- inc — increase
- dec — decrease
- sl st — slip stitch
- st — stitch
- FO — fasten off
- BLO — back loop only
The pattern is worked mainly in single crochet to create a firm fabric suitable for a keychain.
How to Crochet a Mini Mailbox Keychain
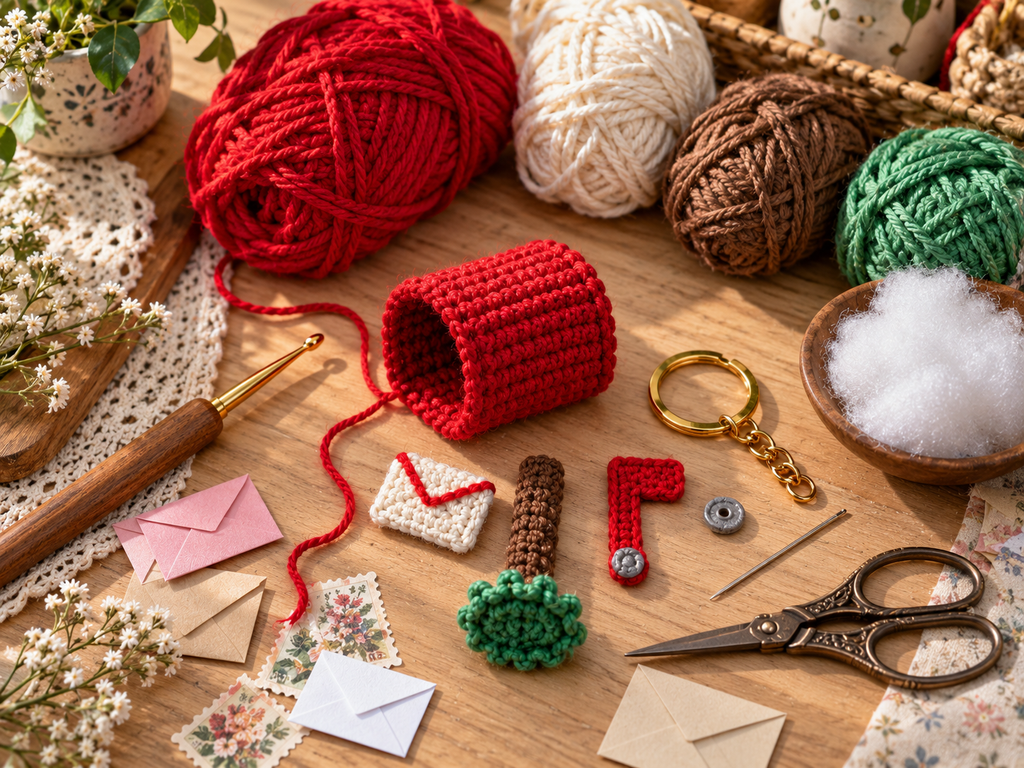
The easiest way to approach this project is to think of the mailbox as several small components:
- Mailbox body
- Mailbox flap/opening
- Raised flag
- Mini envelope
- Brown post
- Green grass base
- Keyring attachment
Making the pieces separately gives you more control over the final shape.
Step 1: Crochet the Mailbox Body
Start with your red yarn.
The mailbox body should form a small rounded rectangular structure rather than a completely flat rectangle.
A simple construction method is:
- Make a foundation chain long enough to create the desired mailbox width.
- Work single crochet across the chain.
- Continue working rows of single crochet.
- Increase gradually where the rounded top begins.
- Continue around the curved section.
- Decrease slightly to maintain a compact mailbox shape.
- Join the edges carefully with slip stitches or a tapestry needle.
Keep your stitches relatively tight.
A loose fabric can allow the stuffing to show through and may make the miniature mailbox lose its shape.
Shape-checking tip
Don’t wait until the end to check the shape.
After several rows, gently fold the piece into the approximate mailbox form. If the sides are becoming too wide or the top is not rounding correctly, correct the shaping before continuing.
Step 2: Add Light Stuffing
Once the mailbox body is sufficiently constructed, add a small amount of polyester fiberfill.
Don’t overstuff it.
The goal is to create a softly rounded miniature mailbox while keeping the crochet stitches clearly visible.
Add the stuffing gradually and use the blunt end of your crochet hook or a stuffing tool to push fiberfill into the corners.
Important: For a keychain, a firm but lightweight structure is usually easier to handle than an extremely soft, heavily stuffed shape.
Step 3: Create the Mailbox Flag
The flag is one of the details that makes this project instantly recognizable.
Using red yarn:
- Chain a short foundation.
- Work several rows of single crochet.
- Shape the upper portion into a simple flag silhouette.
- Fasten off.
- Weave in the loose ends.
Attach a small decorative button near the lower portion of the flag.
The button can be silver, gold, bronze, or another color that complements your keyring.
Make the flag stand out
Sew the flag securely to the side of the mailbox while leaving enough definition around the edges so it doesn’t disappear into the body.
A slightly raised flag creates a more dimensional finished piece.
Step 4: Crochet the Mini Envelope
Now switch to cream or ivory yarn.
The envelope is intentionally small, so you don’t need a complicated design.
Create a small rectangular crochet piece using single crochet.
Then add a triangular-looking flap using cream yarn or red yarn.
For the reference-style design, a red yarn outline around the flap creates a charming contrast against the cream envelope.
Sew the envelope securely onto the front of the mailbox.
You can also make the envelope removable if you’re designing your own variation, but a securely attached envelope is generally better for an everyday keychain.
Step 5: Crochet the Mailbox Post
Use brown yarn for the post.
Because this is a miniature accessory, the post only needs to be short and sturdy.
Work a narrow tube or compact rectangular piece in single crochet. Add a small amount of stuffing if necessary.
The post should be proportional to the mailbox body.
Too tall and thin, and the finished keychain may look unbalanced. Too short, and the mailbox may appear to sit directly on the grass.
Sew the post securely to the bottom of the mailbox.
Step 6: Make the Green Grass Base
The green base adds a fun finishing detail and visually anchors the mailbox.
Using green yarn:
- Create a small foundation.
- Work several rounds or rows of single crochet.
- Increase slightly to create a wider base.
- Shape the outer edge into a small rounded patch.
- Fasten off and weave in the ends.
Sew the bottom of the brown post firmly into the center of the green base.
For extra texture, you can use slightly longer stitches or small loops around the outside to suggest grass.
Step 7: Attach the Gold Keyring
The keyring is the part that turns the miniature mailbox into an actual accessory.
Create a small red crochet loop at the top of the mailbox.
Then:
- Pass the loop through the keyring connector.
- Pull the loop securely through itself.
- Reinforce the attachment with several sewing passes.
- Weave the yarn ends securely into the mailbox.
Don’t skip the reinforcement
The keyring will experience pulling and movement during everyday use.
A decorative attachment may look good but still fail if it isn’t sewn securely. Reinforce the connection through several nearby stitches rather than relying on a single stitch.
Step 8: Finish and Shape Your Crochet Mailbox
Before calling the project finished, inspect the entire keychain.
Check:
- Is the keyring firmly attached?
- Is the flag securely sewn?
- Is the envelope centered?
- Is the post straight?
- Is the green base firmly attached?
- Are all yarn ends woven in?
- Is the stuffing evenly distributed?
- Are there any loose buttons or decorations?
Give the mailbox a gentle squeeze and reshape it with your fingers if necessary.
Small handmade projects often look noticeably better after this final shaping step.
Easy Ways to Customize Your Crochet Mailbox
One of the reasons this project works so well for Pinterest and handmade gifting is that the basic design can be changed in many ways.
Change the mailbox color
Instead of classic red, try:
- Powder blue
- Mint green
- Blush pink
- Lavender
- Cream
- Mustard yellow
- Sage green
You could even create a set of different colors.
Change the envelope
A cream envelope gives the traditional look, but pastel pink, lavender, or pale blue can create a completely different aesthetic.
Add initials
For a more personalized gift, you could embroider a single initial onto the envelope.
Keep embroidered details small so they don’t overwhelm the miniature mailbox.
Turn it into a seasonal decoration
The mailbox can also be adapted for different holidays.
For example:
- Valentine’s Day: pink envelope and tiny heart
- Christmas: green mailbox with a red-and-white envelope
- Spring: pastel mailbox with flower details
- Halloween: orange or black mailbox
- Back-to-school: tiny school-themed envelope
Tips for a Neater Crochet Mailbox
Miniature crochet can actually be more challenging than larger projects because small imperfections are easier to notice.
Keep your tension consistent
Uneven tension can cause the mailbox to become wider on one side.
Use a stitch marker
When working in rounds, a stitch marker makes it much easier to identify the beginning of each round.
Don’t overstuff
Too much stuffing can stretch the stitches and distort the mailbox shape.
Sew pieces on before hiding every yarn end
It’s easier to position the flag, envelope, and post while you still have accessible sewing tails.
Reinforce high-stress areas
Pay particular attention to the keyring attachment and any button or decorative element that may be pulled during use.
How to Use a Crochet Mailbox Keychain
Once finished, there are plenty of ways to use this little crochet project.
Attach it to:
- Your everyday keys
- A backpack
- A purse or tote
- A crochet project bag
- A zipper
- A gift package
- A craft-room storage basket
It also makes a thoughtful small handmade gift because it is inexpensive to make but has plenty of personality.
If you’re making crochet products to sell, consider photographing the finished keychain next to an envelope, yarn, or other craft supplies. Lifestyle photography helps communicate the handmade story behind the product.
Is This Crochet Mailbox Keychain Good for Beginners?
Yes, especially if you already know basic single crochet.
The individual pieces are small, and you don’t have to commit to a large project.
However, beginners may find the shaping and assembly slightly more challenging than making a simple flat crochet square.
If this is your first amigurumi-style project, take your time with:
- Counting stitches
- Maintaining tension
- Shaping the rounded mailbox
- Sewing the components together
- Attaching the keyring securely
The finished result is small enough that mistakes can usually be corrected without having to restart a large amount of work.
Common Problems and How to Fix Them
Why does my mailbox look flat?
You may need more shaping or slightly more stuffing. Check that the curved portion of the mailbox is being formed correctly.
Why is my mailbox leaning?
Check the connection between the body, brown post, and green base. The post should be centered underneath the mailbox.
Why is the flag falling down?
Reinforce the flag attachment and use a small button or additional stitches to give it more structure.
Why can I see the stuffing?
Your stitches may be too loose, or the mailbox may be overstuffed. Try tighter tension or reduce the amount of fiberfill.
Why does my keyring feel loose?
The attachment loop needs reinforcement. Sew through several stitches around the attachment point rather than relying on one connection.
Frequently Asked Questions
How much yarn do I need for a crochet mailbox keychain?
Only a small amount of each color is needed because the finished project is miniature. Red will be the primary color, while cream, brown, and green are used for the smaller components.
What yarn is best for a crochet keychain?
Cotton yarn is a good choice because it provides defined stitches and tends to hold its shape well. Other yarn types can work too, but the finished size and texture will change.
Can I make this crochet mailbox without a keyring?
Absolutely. You can leave off the hardware and use the finished mailbox as a miniature decoration, ornament, gift topper, or bag charm.
Can I sell crochet mailbox keychains made from this pattern?
If you’re using your own handmade version of the design, you can generally sell the physical finished item, but always check the specific terms of any pattern or designer whose instructions you use. Don’t sell or redistribute a written pattern as your own.
Can I make this crochet mailbox in different colors?
Yes. Changing the main yarn color is one of the easiest ways to personalize the project.
How do I make the keychain more durable?
Use firm crochet tension, avoid excessive stuffing, weave yarn ends securely, and reinforce the keyring attachment and decorative pieces with multiple sewing passes.
Final Thoughts
This adorable crochet mailbox keychain free pattern is a great example of how a small amount of yarn can become a genuinely useful handmade accessory.
The classic red mailbox, tiny cream envelope, raised flag, brown post, green grass, and gold keyring give the project plenty of character without making the construction unnecessarily complicated.
If you’re new to miniature crochet, focus on keeping your tension consistent and taking your time during assembly. The finishing work—especially shaping and reinforcing the keyring—is what turns a collection of small crochet pieces into a polished final product.
And once you’ve made one, it’s easy to create your own variations with different colors, envelopes, seasonal details, and personalized decorations.
Save this pattern for your next small crochet project, and use the same basic construction to create an entire collection of miniature mailbox keychains.