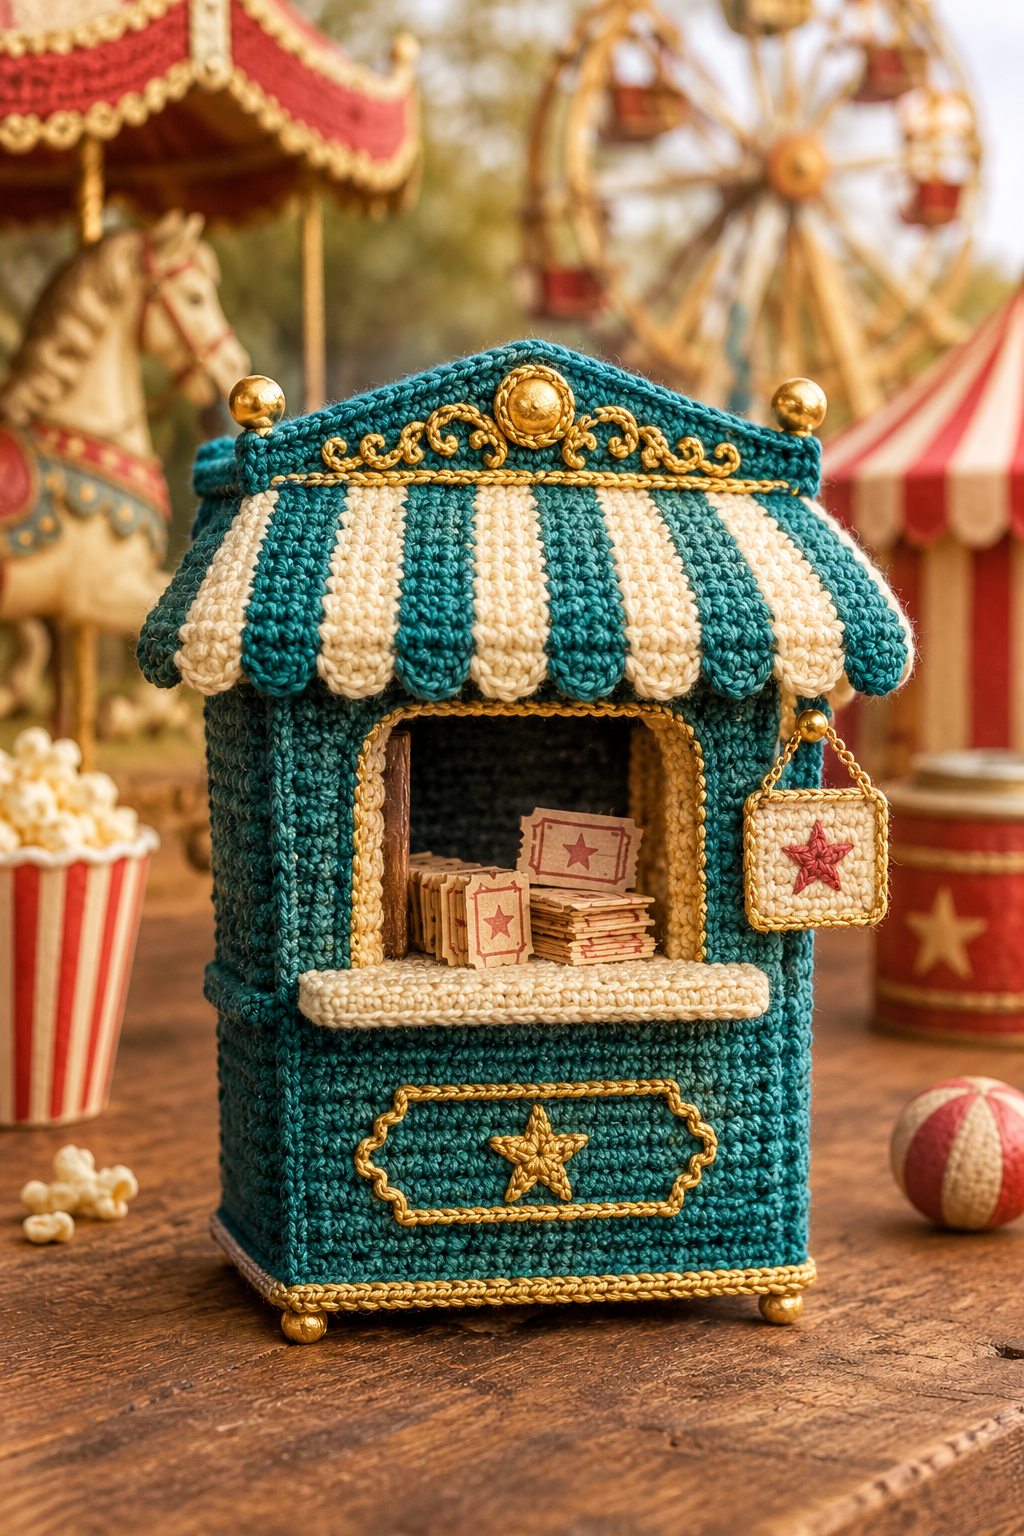
Some handmade projects are made to be used, and some are made to be treasured. This petrol teal ticket kiosk belongs firmly in the second group. It is a miniature fairground booth, crocheted in deep teal cotton, finished with a cream striped awning, trimmed with shimmering gold embroidery, and topped with tiny golden finials. A little paper ticket sits on the counter, a star shaped sign swings from a gold chain, and the whole thing looks as though it wandered out of an old carnival and landed on your shelf.
I designed this pattern for crocheters who love a small project with a big payoff. The kiosk is not difficult, but it does ask for patience and a little care with shaping and finishing. In return, you get a keepsake that works as a display piece, a ring and trinket holder, a holiday decoration, a gift for a collector of miniatures, or a beautiful prop for photographs. Every stage is explained in plain language, and I will share the tricks that keep the walls straight, the awning neat, and the gold details crisp.
Why You Will Love This Fairground Keepsake
First, it is a project with real personality. Most crochet projects are soft and cuddly, but this kiosk has structure, architecture, and a vintage charm that feels completely different from anything else in your basket. Making it is a bit like building a tiny house out of yarn, and the process is deeply satisfying.
Second, it is genuinely useful. The hollow body can hold rings, earrings, small keepsakes, or a handful of buttons. Place a tiny battery tea light inside and the window glows like a real fairground booth at night. Many people display it with a collection of miniature carnival items, such as a tiny carousel, striped popcorn boxes, and little paper bunting.
Third, it makes an unforgettable gift. A handmade kiosk shows time, skill, and thought. It suits collectors, theatre lovers, vintage fans, and anyone who adores small, beautiful objects. Add a name or a date to the sign, and it becomes a personal keepsake that can be treasured for years.
Finally, the pattern teaches many useful skills. You will practice working rectangular shapes in the round, turning rows to make a window, shaping striped scalloped pieces, stiffening a crochet structure, embroidering with metallic thread, and attaching beads. These techniques open the door to countless other miniature projects.
Why Petrol Teal Works So Well
Petrol teal is a rich blue green with a hint of gray. It is deeper than turquoise and calmer than emerald, and it has a vintage feel that suits the fairground theme beautifully. Paired with cream, it looks classic and fresh. Paired with gold, it looks luxurious and festive. Together, the three colors create a palette that feels like an antique carousel, with painted wood, brass fittings, and striped canvas.
If you want a different look, the same pattern works in other colors. Deep red and cream gives a traditional circus feel. Navy and cream with silver trim looks wintery and elegant. Blush pink with gold looks sweet and romantic. Choose colors with good contrast between the main body and the awning stripes, because that contrast is what makes the awning stand out.
Materials You Will Need
For the yarn, choose a smooth, mercerized cotton in DK or light worsted weight. Cotton gives crisp stitch definition and holds its shape, which is essential for a structured piece like this. You will need about 150 yards of petrol teal for the body and roof, about 50 yards of cream for the awning stripes and counter, and about 40 yards of gold. For the gold, you can use a metallic crochet thread, a gold embroidery floss, or a fine gold yarn. Metallic threads vary in texture, so test one before you start. A thread that is smooth and slightly thick works best for the embroidery scrolls and star.
For the hook, a 2.5mm hook works well with DK cotton. Because this is a structured piece, you want your stitches very tight so that the fabric is firm and holds its shape. If your stitches look loose, go down half a millimeter. A hook with a comfortable handle is a big help, since you will be crocheting tight stitches for a long time.
For stiffening, you will need a sheet of plastic canvas in the seven count size, which is easy to find in craft shops, and a thin piece of cardboard for the roof. Cut the plastic canvas into panels that fit the inside walls and base. These hidden panels turn the crochet into a rigid little building that will stand for years.
You will also need a yarn needle, sharp scissors, stitch markers, and a handful of finishing materials. Four gold beads, about 10mm each, form the feet. Two or three smaller gold beads, about 8mm each, make the finials on the roof. A short length of fine gold chain, about 3 inches, hangs the sign. A small piece of cream cardstock or felt and a fine red pen or red thread make the tiny tickets. A glue that dries clear, such as fabric glue, is helpful for securing the plastic canvas and tickets.
Size, Gauge, and Abbreviations
The finished kiosk measures about 4 and a half inches wide, 3 inches deep, and 6 inches tall including the awning and roof. Gauge is not critical, but your stitches should be tight and even. A good test is to crochet a small square in single crochet. In the 2.5mm hook and DK cotton, you should get about 7 stitches and 8 rows in one inch.
This pattern uses standard US crochet terms. Ch means chain. Sc means single crochet. Dec means single crochet two stitches together. Sl st means slip stitch. Blo means back loop only. The body is worked mostly in the round without joining, so do not chain at the start of a round. Mark the first stitch of each round with a stitch marker and move it up as you go. When we reach the window, we work in turned rows, and I will explain that clearly when we get there.
A quick note on stitch counts. Because yarn and tension vary, your counts may differ slightly from mine. What matters most is that the corners are neat and the sides are straight. Keep a note of your own count after the edge round, and adjust the window width in proportion if needed.
Step One: Crochet the Rectangular Base
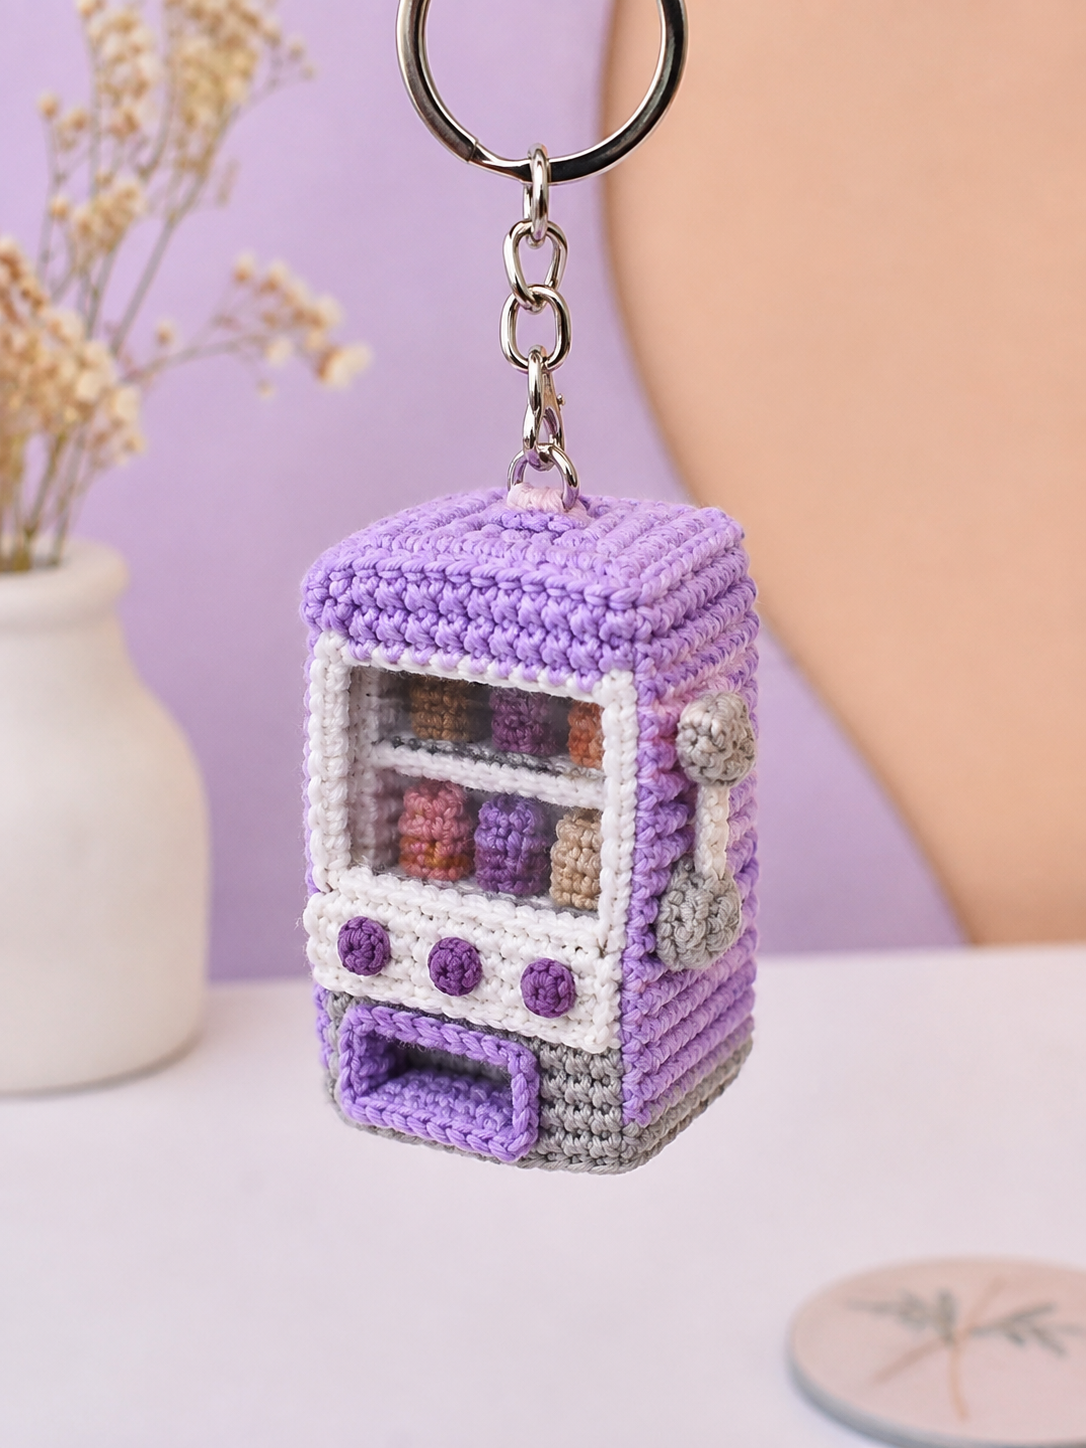
Every sturdy building needs a good foundation. The base of this kiosk is a firm rectangle, which is the same shape as the little basket in the first photo.
Using petrol teal, chain 29. Work 1 sc in the second chain from the hook and in each chain across, giving 28 stitches. Chain 1 and turn. Work 1 sc in each stitch across, chain 1, and turn. Repeat until you have 20 rows in total. The result is a flat rectangle about 4 inches wide and 2 and a half inches deep. Do not fasten off. Keep your working loop, and rotate the piece so you can work along the outer edge.
For the edge round, work 1 sc in each stitch along the bottom edge, placing 3 sc in the corner stitch. Work 1 sc in each row end up the side, 3 sc in the corner, 1 sc in each stitch across the top, 3 sc in the corner, and 1 sc in each row end down the other side, finishing with 3 sc in the last corner. You should end up with about 104 stitches, with 30 across the front and back and 22 down each side. Place a marker in the first stitch of the round.
For the next round, work sc in the back loop only of every stitch around. This creates a crisp fold line where the base meets the walls and gives the kiosk its square shape. From here on, work 1 sc in each stitch around, one round after another, without increasing or decreasing. Work 16 rounds, which brings the walls up to about 2 inches. Your piece now looks like a small rectangular basket, ready to become a kiosk.
While the piece is still easy to reach, cut a rectangle of plastic canvas to fit the base, trimming off the corners so that it sits flat inside. You will glue or sew it in place later, but it is helpful to test the fit now.

Step Two: Make the Window Opening
The window is what gives this kiosk its charm, so let us make it neatly. To create an opening in a tube, we switch from working in rounds to working in rows around the sides and back, leaving the window space empty. It sounds complicated, but it is easy once you try it.
Look at the front of the kiosk, which is one of the long sides. Find the center of the front and count 8 stitches to the left and 8 to the right of center, which leaves 16 stitches for the window and 7 stitches on each side as pillars. Place a marker at the first stitch of the window opening, with 16 stitches counted forward.
Now we turn into rows. Skip the 16 window stitches, join the yarn to the next stitch, and work 1 sc in each of the remaining 88 stitches until you reach the stitch just before the window opening again. Chain 1 and turn. Work 1 sc in each of the 88 stitches back across. Chain 1 and turn. Repeat these rows until you have worked 9 rows in total, which creates an opening about 1 and a quarter inches tall.
For the tenth row, work 88 sc across, then chain 16 and join with a slip stitch to the first stitch of the row, which closes the window with a lintel at the top. Now you can continue in rounds again. Work 1 sc in each of the 88 stitches and 1 sc in each of the 16 chains, giving you the original 104 stitches. You now have a sturdy teal box with a rectangular window opening on the front.
Work 6 more rounds of plain sc to create the band above the window. This band is where you will later embroider the golden scrolls. Slip stitch into the next stitch, fasten off, and leave a tail.
If your window looks slightly lopsided, do not worry. A neat gold trim around the edge will hide small irregularities, so you can fix a lot with embroidery. If it looks very uneven, count the stitches on each side and make sure the opening is centered.
Step Three: Create the Striped Scalloped Awning
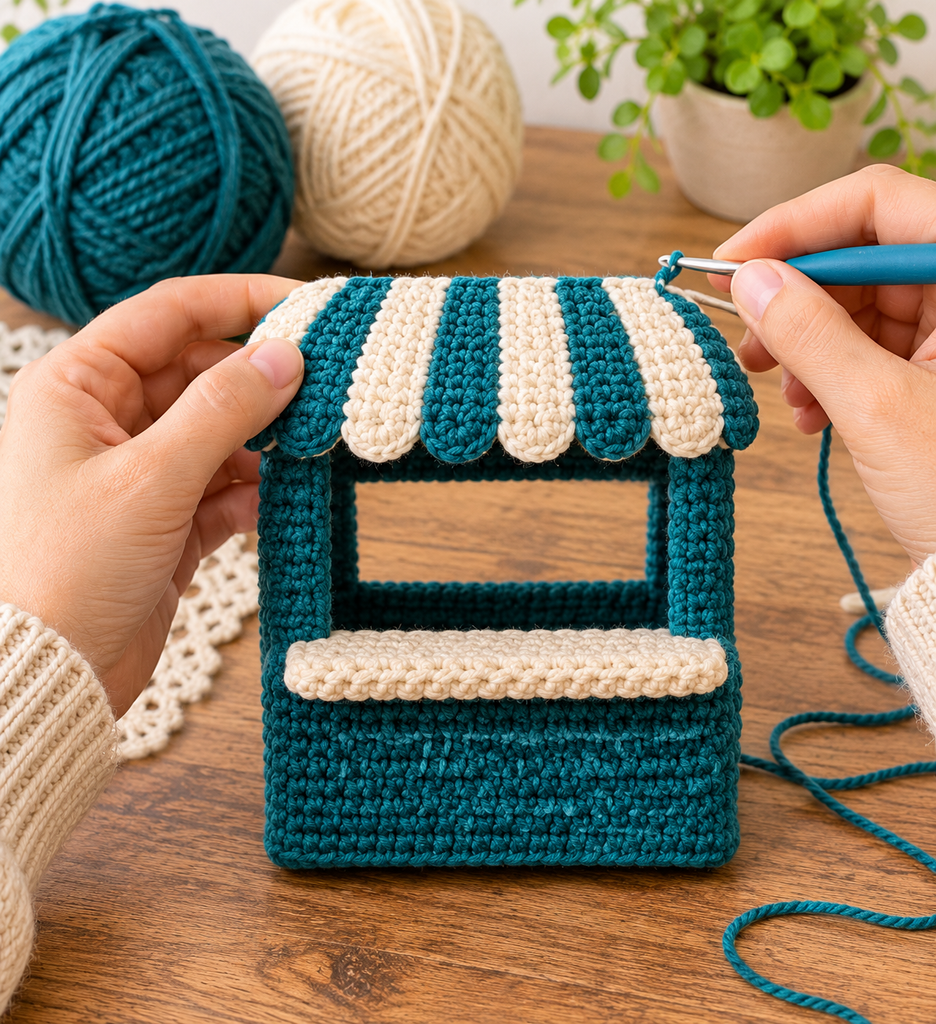
The awning is the star of the kiosk. Its cream and teal stripes, ending in soft scalloped edges, look just like canvas on a vintage carnival stall. We make it as seven separate stripes, four teal and three cream, and sew them together into one piece.
Each stripe is worked in rows. Chain 6, and work 1 sc in the second chain from the hook and in each chain across, giving 5 stitches. Chain 1 and turn. Work 8 rows of sc, 5 stitches each. For the rounded end, work a decrease row of sc2tog, sc, sc2tog, giving 3 stitches. Chain 1 and turn. Work sc3tog, which pulls the stitches together into a point, and fasten off, leaving a tail about 8 inches long. The result is a long strip with a rounded tip.
Make four stripes in teal and three in cream. Lay them out in order, alternating teal and cream, starting and ending with teal. Using the tails and a yarn needle, whip stitch the long edges together, joining them side by side into a single flat piece. Keep your stitches small and the tension relaxed so the awning does not pucker. The rounded tips will form a lovely scalloped edge along the bottom.
Now place the awning over the top front of the kiosk, so the scalloped edge hangs about half an inch below the lintel and overhangs the window. Pin it in place and sew the upper edge to the top of the band, using small stitches that pass through the teal fabric. To give the awning a gentle curve, tuck a little scrap of stuffing under it or shape it with your fingers before sewing the sides. You can also sew a small side piece, made from three stripes, to each side of the kiosk if you want a wraparound awning.
Step Four: Add the Cream Counter
The little cream counter gives customers a place to rest their tickets, and it adds a soft contrast to the teal body. Using cream yarn, chain 22. Work 1 sc in the second chain from the hook and in each chain across, giving 21 stitches. Chain 1 and turn. Work 3 more rows of sc, 21 stitches each, giving a small strip about 3 inches wide and half an inch deep. Fasten off and leave a long tail.
Place the strip across the bottom of the window opening, so that it sits on the lower edge and projects forward by about a quarter of an inch. Sew the back edge firmly to the bottom of the window, going through both the strip and the kiosk wall. For a neat finish, slip stitch around the edges in cream yarn. The counter should feel solid and level, so check it from the side to make sure it does not droop.
If you want a deeper counter, add two more rows and fold the strip in half before sewing it on. A folded counter has a thicker, more realistic look.
Step Five: Build the Roof and Top Panel
The roof gives the kiosk its finished look. The crocheted band above the window already forms the front of the roof, and now we add a lid.
Using teal yarn, chain 29. Work 1 sc in the second chain from the hook and in each chain across, giving 28 stitches. Work rows of sc until the piece is about 3 inches deep, which is about 24 rows. Fasten off, leaving a long tail. This forms a rectangular lid to cover the top opening.
Cut a piece of thin cardboard slightly smaller than the lid, and sandwich it between the crochet and the top of the kiosk for extra stiffness. Pin the lid to the top edge, and sew it down using whip stitch all the way around. If you want the lid to lift off, sew it to only one edge and use a tiny bead and loop closure on the front.
At the two front corners of the roof, sew a small gold bead as a finial. Bring the needle up through the roof, thread a bead, pass the needle back down through the bead and the roof, and then secure it firmly. Repeat with a slightly larger bead at the center top if you like, which gives the roof a regal crown. A drop of clear glue under each bead keeps it from turning.
Step Six: Stiffen the Structure
Before decorating, give the kiosk its hidden skeleton. Cut four panels of plastic canvas to fit the inside walls, trimming each one so it sits below the window and above the base. Cut a fifth panel for the base. Slide the wall panels inside, pressing them gently against the crochet, and secure them with a few dabs of glue or a few stitches of cotton thread. Place the base panel on the bottom.
This step makes a remarkable difference. The kiosk now stands upright without slumping, and the walls stay flat and straight. It also gives you a firm surface to embroider on, because the fabric will not stretch or pucker while you stitch. If you plan to use the kiosk as a trinket holder, leave the back panel loose so you can slide items in and out.
Step Seven: Embroider the Gold Details
Now comes the most magical stage. Gold embroidery transforms the plain teal walls into a rich, ornate fairground booth. Take your time, work in good light, and enjoy the process.
For the star panel on the front below the counter, thread your needle with gold thread. Embroider a five pointed star in satin stitch, working small straight stitches side by side, radiating from the center. Frame it with a rounded rectangle in stem stitch or chain stitch, with little curved corners that give it a vintage cartouche shape. On each side of the panel, embroider a small curling scroll, working a flowing line with a spiral at the end.
For the band above the window, embroider a long flowing scroll pattern. Use chain stitch or stem stitch to create a wave with curls at each peak, and add a small fleur de lis in the center. Mark the lines lightly with a water soluble pen, or place pins at the high and low points to guide you. A symmetrical pattern looks elegant, so measure from the center outward.
Around the window, work a border of gold chain stitch along the edge of the opening. This gives the window a polished frame, and it also hides any small irregularities. Do the same along the bottom edge of the kiosk, working a twisted cord or a slip stitch edging in gold, which looks like a gold rope around the base.
Add scalloped gold outlines along the bottom of the awning. Using small stem stitches, follow the curve of each scallop. The gold outline makes the awning look beautifully finished.
Finally, sew a gold bead at each bottom corner as a foot. Pass the needle through the base and through the bead several times to secure it, and add a touch of glue for strength. The beads lift the kiosk slightly, giving it a refined, furniture like quality.
Metallic thread can be tricky, because it frays and tangles easily. Use short lengths of about 18 inches, and keep your tension gentle. If the thread twists, let the needle hang freely and untwist it. Waxing the thread with a little beeswax makes it glide more smoothly.

Step Eight: Make the Hanging Sign
The little star sign is a charming detail that makes the kiosk feel alive. Using cream yarn, chain 9. Work 1 sc in the second chain from the hook and in each chain across, giving 8 stitches. Chain 1 and turn. Work 7 more rows of sc, 8 stitches each, giving a small square about 1 inch across. Do not fasten off. Work a border of sc around the square in gold thread, placing 3 sc in each corner, then fasten off and weave in the ends.
With red thread, embroider a small star in the center of the square, using satin stitch. The red against the cream makes the star pop. Sew a tiny jump ring or loop to the top corners, and attach a short piece of gold chain to each, so that the sign hangs from two points.
Hang the sign from a small bar attached to the side of the kiosk. To make the bar, thread a short length of gold wire or a thin gold bead strand and sew it firmly to the upper side wall, near the awning. A small gold bead at each end finishes it. Hang the chains from the bar so that the sign swings gently in front of the kiosk.
Step Nine: Make the Tiny Tickets
The tickets are the final touch, and they are the part that makes people smile. Cut small rectangles from cream cardstock or felt, about three quarters of an inch wide and half an inch tall. Trim the short edges with decorative scissors for a perforated look. With a fine red pen, draw a tiny star and a thin border, or embroider a small red star with a single strand of thread.
Place two or three tickets on the counter, slightly overlapping, and glue them down with a dot of clear glue. For a more playful look, stand one ticket upright against the window frame. If you want the tickets to be removable, leave them loose and let the owner arrange them.
If the kiosk will be given to a child under three, skip the beads, gold chain, and loose tickets, and embroider everything instead. This keeps the piece safe and washable.

Finishing Touches and Care
Weave in all remaining ends carefully, running each tail through several stitches in different directions. Trim them close, and check the inside of the kiosk for any loose threads. Give the whole piece a gentle shape, pressing the corners and straightening the walls.
If you like, lightly steam the cotton from a short distance, being careful not to touch the metallic thread or beads with the iron. Steaming helps relax the stitches and smooth the surface.
This kiosk is a display piece, so it does not need washing. Dust it gently with a soft brush or a clean makeup brush. If it gets a small mark, dab it with a barely damp cloth. Keep it away from direct sunlight, which can fade the teal, and away from damp areas, which can tarnish the metallic thread.
Troubleshooting Common Problems
If your walls are curving inward, you may have crocheted too tightly at the base or skipped a stitch. Count your stitches at the end of each round, and use the plastic canvas to straighten the shape.
If the corners look rounded rather than square, add a little extra firmness by pinching them as you work, and press the walls flat after finishing. The plastic canvas panels will also sharpen the corners.
If the window looks crooked, check that you counted the same number of stitches on each side of the opening. If it is uneven, add a gold trim to disguise the difference, or unpick and redo the rows.
If the awning puckers, you probably pulled the whip stitches too tightly. Unpick a few stitches and sew again with a looser tension. Stretching the stripes gently before sewing can also help.
If the metallic thread frays, use shorter lengths, and avoid pulling it through the fabric too many times. Replace the thread when it starts to look worn.
If the beads loosen, add a drop of clear glue and sew them again through the plastic canvas base, which gives a strong anchor.
If your embroidery looks messy, mark the pattern lightly first, and use small, even stitches. Unpicking embroidery is easy, so do not be afraid to start again.
Variations and Ideas
Once you have mastered the basic kiosk, you can explore many variations. Make a round version with a domed roof, like the one in the embroidery photo, by working the body in a circle and shaping the roof with decreases. Make a series of kiosks in different colors for a miniature fairground, including an ice cream stall, a popcorn stand, and a carousel. Add a tiny flag on the roof for a festive touch.
For the holidays, make a kiosk in red and green with silver trim and fill it with tiny gifts. For weddings, make one in ivory and gold as a ring box. For Halloween, try black and orange with purple trim and tiny pumpkins. For a nursery, use pastel stripes and place a small plush toy inside.
You can also personalize the sign. Embroider a name, a date, or a short message, such as a family name or a birthday year. A personalized kiosk makes a thoughtful gift for any special occasion.
Frequently Asked Questions
Many readers ask whether this pattern is suitable for beginners. It is best suited to confident beginners and intermediate crocheters, because it involves shaping, sewing, and embroidery. If you have made a few amigurumi pieces or baskets, you will be fine. If you are new, practice making the base and a simple basket first.
People also ask how long it takes. Most crocheters finish the body, awning, and roof in about 8 to 10 hours, and the embroidery and finishing in another 4 to 6 hours. It is a project to enjoy over a few days, so do not rush.
Another common question is about yarn. Mercerized cotton works best, because it holds its shape and shows stitch definition. Acrylic can work, but it may stretch and look less crisp. Avoid fuzzy yarns, since they hide the details.
Readers also wonder whether the kiosk can be washed. It is a display piece, so washing is not recommended. Spot clean as needed, and keep it dry.
Finally, many ask whether they can sell finished kiosks. You are welcome to sell items made from this pattern. I would be grateful if you credit this blog and link back to the pattern when you share your work.
Final Thoughts
This petrol teal ticket kiosk is a project that rewards patience with beauty. From the sturdy rectangular base to the striped scalloped awning, the golden scrolls, the glittering beads, and the tiny star sign, every part adds to the charm of a miniature fairground treasure. It is a piece that people will stop to admire, pick up, and ask about, and you will have the joy of saying that you made it yourself.
I would love to see your finished kiosk, so share your photos and tell me which colors you chose. Happy crocheting, and enjoy every stitch of your little fairground keepsake.