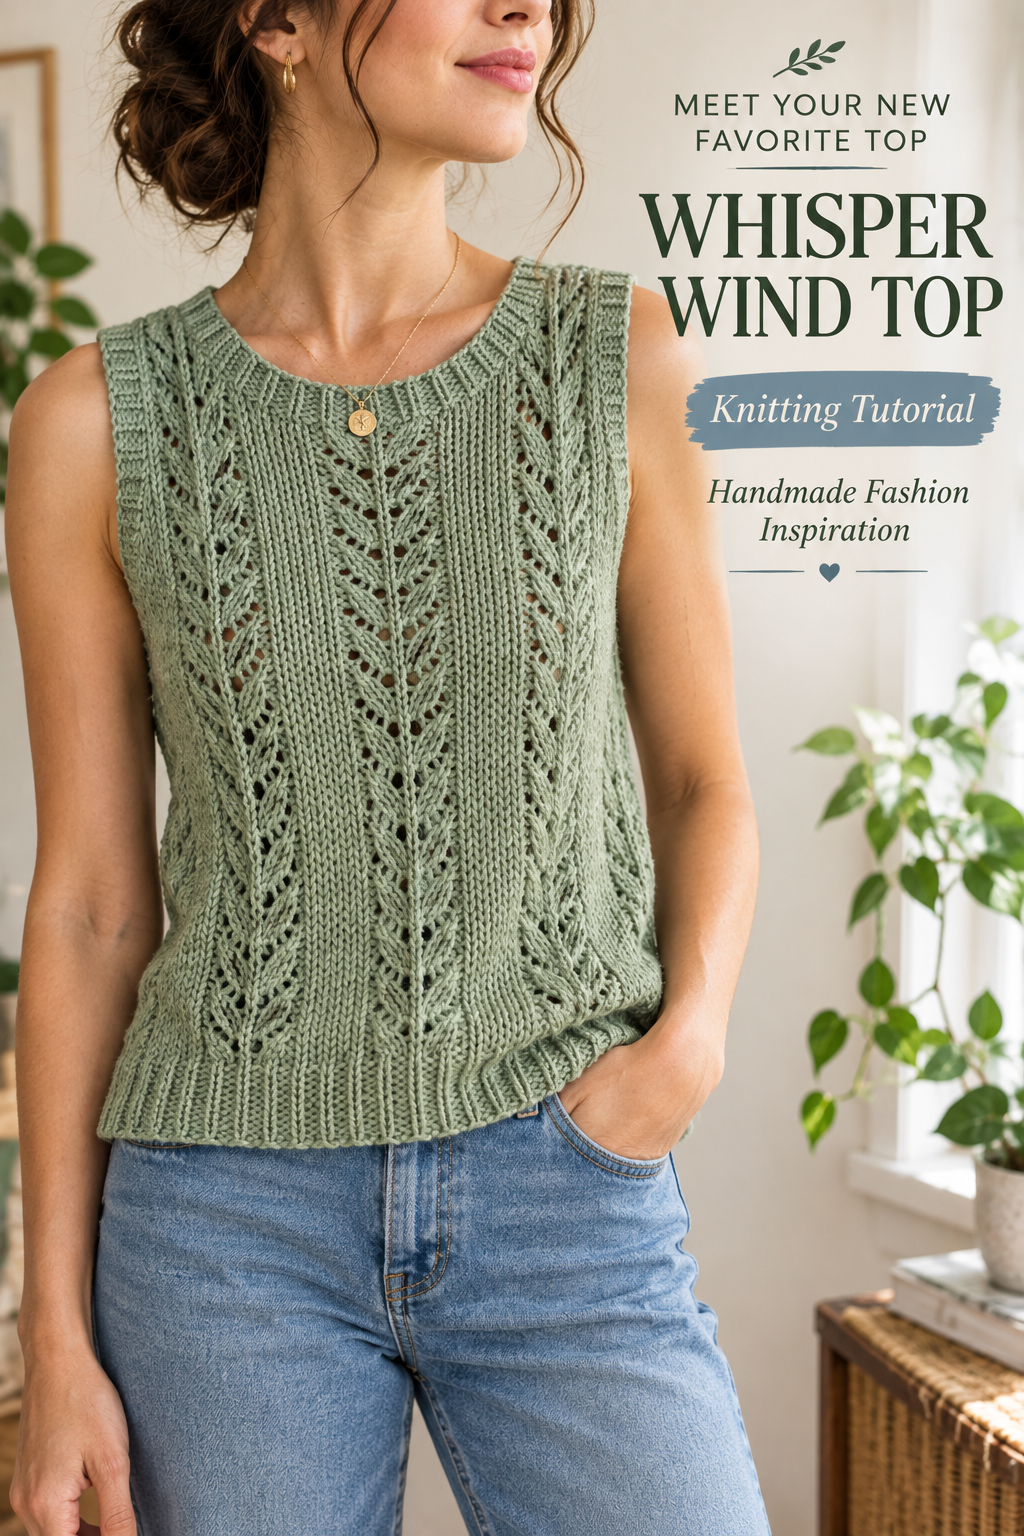
Some projects just feel like summer the moment you start them. For me, the Whisper Wind Top is one of those.
It began with a skein of sage green cotton yarn that had been sitting in my stash for months. I kept picking it up, putting it down, and telling myself I’d find the right project eventually. Then I sketched a simple tank with soft lace leaves running down the front, and suddenly the yarn had a purpose.
The result is a light, airy knit that looks great with jeans, a linen skirt, or over a swimsuit at the beach. The lace panels give it that “whisper of wind” look, and the ribbed edges keep everything neat and tidy.
If you’ve never knit lace before, don’t worry. This chic knitted summer top uses only three basic moves: yarn overs, knit-two-togethers, and slip-slip-knits. We’ll go through each one slowly. By the end, you’ll have a handmade top that looks like it came from a boutique.
Let’s get started.
Why You’ll Love the Whisper Wind Top
The lace is easy. Each lace panel is just nine stitches wide, and the pattern repeats every eight rows. Half of those rows are plain purl rows, so you get to rest your brain.
It works in summer weather. Cotton and cotton blends breathe well, and the eyelet holes let air through. It’s much more comfortable than a solid knit tank.
It’s a flattering shape. The straight silhouette and slim shoulder straps suit most body types, and you can easily adjust the length.
It’s a satisfying size. There are no sleeves, so you’ll finish faster than you would with a sweater. Many knitters complete this in two to three weeks of evening knitting.
It’s a real wardrobe piece. Sage green is one of those quiet colors that goes with almost everything. And if green isn’t your thing, the pattern looks lovely in cream, dusty blue, or soft terracotta.
Skill Level and Time
I’d call this an advanced beginner project. You should already know how to knit, purl, and work basic decreases. Lace is the new skill, and this pattern is a gentle introduction to it.
Plan on about 20 to 25 hours of knitting for a size medium.
Materials
- DK weight (light worsted) cotton or cotton blend yarn in sage green. You’ll need about 750 to 850 yards (690 to 780 m) for a size medium. A mercerized cotton or a cotton and bamboo blend gives beautiful stitch definition and a bit of shine. Avoid very fuzzy yarns, because they’ll hide the lace holes.
- 4 mm (US 6) knitting needles for the main body.
- 3.25 mm (US 3) knitting needles for the ribbed hem.
- 3.25 mm (US 3) circular needle, 16 inches (40 cm) for the neckband and armhole bands.
- Stitch markers, at least six.
- Tapestry needle for seaming and weaving in ends.
- Scissors and measuring tape.
- Blocking mats and pins, which are very helpful for lace.
A tip about cotton: it has no stretch, so any uneven tension shows up more than it would in wool. Take it slow, especially on the lace rows.
Gauge and Size
Gauge isn’t glamorous, but it matters, especially with a fitted summer top.
Gauge: 22 stitches and 30 rows = 4 inches (10 cm) in stockinette stitch on 4 mm needles, after blocking.
Cast on 30 stitches, work about 40 rows in stockinette, then wash and block your swatch the way you plan to treat the finished top. Measure it once it’s dry. If you get more stitches than the gauge, try a larger needle. If you get fewer, go smaller.
Sample size (Medium, fits a 36 to 38 inch bust with a little ease):
- Finished width: about 19.5 inches (50 cm) front and back each
- Total length: about 21 inches (53 cm)
- Armhole depth: about 8 inches (20 cm)
To change the size, add or remove stitches in the plain stockinette sections beside the lace panels, in multiples of 2 stitches at a time. That way the lace stays centered and untouched.
Abbreviations
- K: knit
- P: purl
- St(s): stitch(es)
- RS / WS: right side / wrong side
- Yo: yarn over (wrap the yarn over the right needle to make a new stitch and a hole)
- K2tog: knit two together (right-leaning decrease)
- Ssk: slip one stitch knitwise, slip another stitch knitwise, then knit both together through the back loops (left-leaning decrease)
- Sk2p: slip one stitch knitwise, knit the next two stitches together, then pass the slipped stitch over (a centered double decrease)
- Kfb: knit into the front and back of a stitch (increase)
The Leaf Lace Panel
Before we cast on, let’s look at the lace. It’s the heart of the top, and it’s much simpler than it looks.
Leaf Lace Panel (9 stitches, 8-row repeat):
- Row 1 (RS): K1, yo, ssk, K3, K2tog, yo, K1
- Row 2 and all WS rows: P9
- Row 3 (RS): K2, yo, ssk, K1, K2tog, yo, K2
- Row 5 (RS): K3, yo, sk2p, yo, K3
- Row 7 (RS): K9
- Row 8 (WS): P9
Every yarn over is paired with a decrease, so your stitch count stays at 9 on every row. That’s what makes it so beginner-friendly. If you ever end a row with 8 or 10 stitches, you know exactly where to look for a mistake.
Notice how the holes move closer together as you go up. Row 1 has them at the edges of the panel, Row 3 brings them in, and Row 5 closes them to the center. Stacked up, that makes the leaf shape. Row 7 gives the pattern a breath before it repeats.
The Full Front Layout
The top uses three lace panels with plain stockinette between them. Here’s how one right-side row is arranged:
RS row (109 stitches): K15, Lace Panel (9), K26, Lace Panel (9), K26, Lace Panel (9), K15
Work the lace panels following Rows 1, 3, 5, or 7 in the chart above. On all wrong-side rows, purl every stitch.
That’s the entire pattern. Plain knit rows with three little lace strips.
Step 1: Cast On and Work the Ribbed Hem
With your 3.25 mm needles, cast on 108 stitches using a stretchy method such as the long-tail cast on.
Row 1 (RS): K2, P2 repeat to the end.
Row 2 (WS): Knit the knits and purl the purls as they appear.
Repeat these two rows until the ribbing measures about 1.5 inches (4 cm), which is roughly 12 rows. End after a WS row.
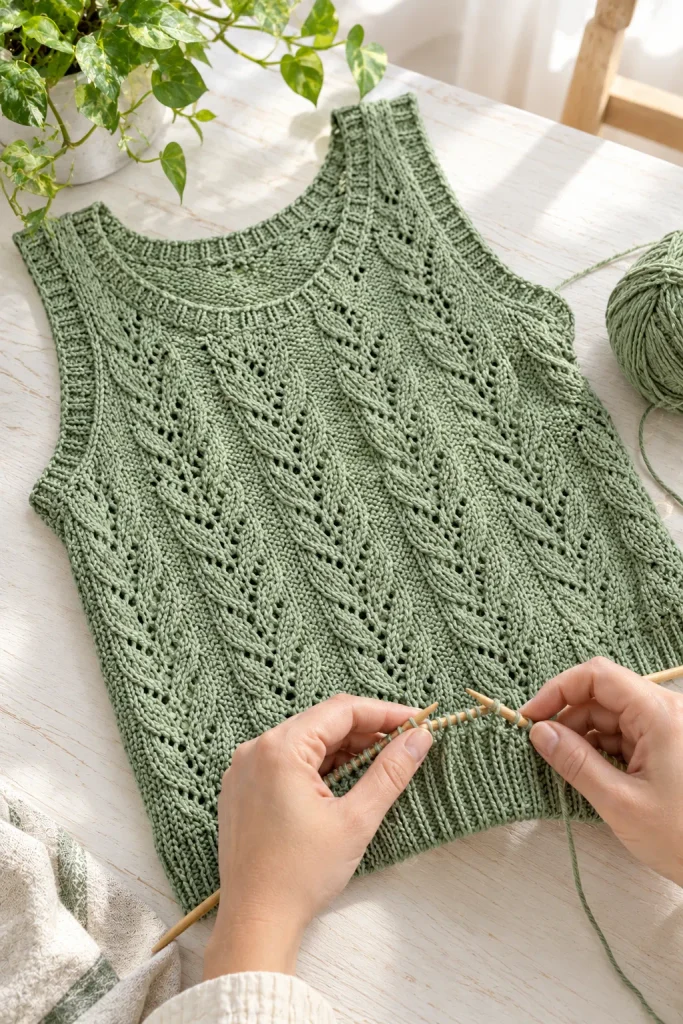
A few things that make the hem look better:
- Keep your tension steady when you switch between knit and purl. Cotton shows uneven ribbing clearly.
- Use the smaller needles. They stop the hem from flaring out.
- Count your stitches. You want exactly 108 before you move on.
Step 2: Set Up the Body
Change to your 4 mm needles.
Set-up row (RS): Kfb in the first stitch, then knit to the end. You now have 109 stitches.
Next row (WS): Purl all stitches.
You’re ready to start the lace.
Step 3: Work the Lace Pattern
Now the fun begins. On your next right-side row, begin Row 1 of the lace.
Row 1 (RS): K15, work Row 1 of the Leaf Lace Panel, K26, work Row 1 of the Leaf Lace Panel, K26, work Row 1 of the Leaf Lace Panel, K15.
Row 2 (WS): Purl all stitches.
Row 3 (RS): K15, work Row 3 of the lace, K26, work Row 3, K26, work Row 3, K15.
Row 4 (WS): Purl.
Row 5 (RS): K15, work Row 5 of the lace, K26, work Row 5, K26, work Row 5, K15.
Row 6 (WS): Purl.
Row 7 (RS): Knit all stitches.
Row 8 (WS): Purl all stitches.
Then repeat these 8 rows.
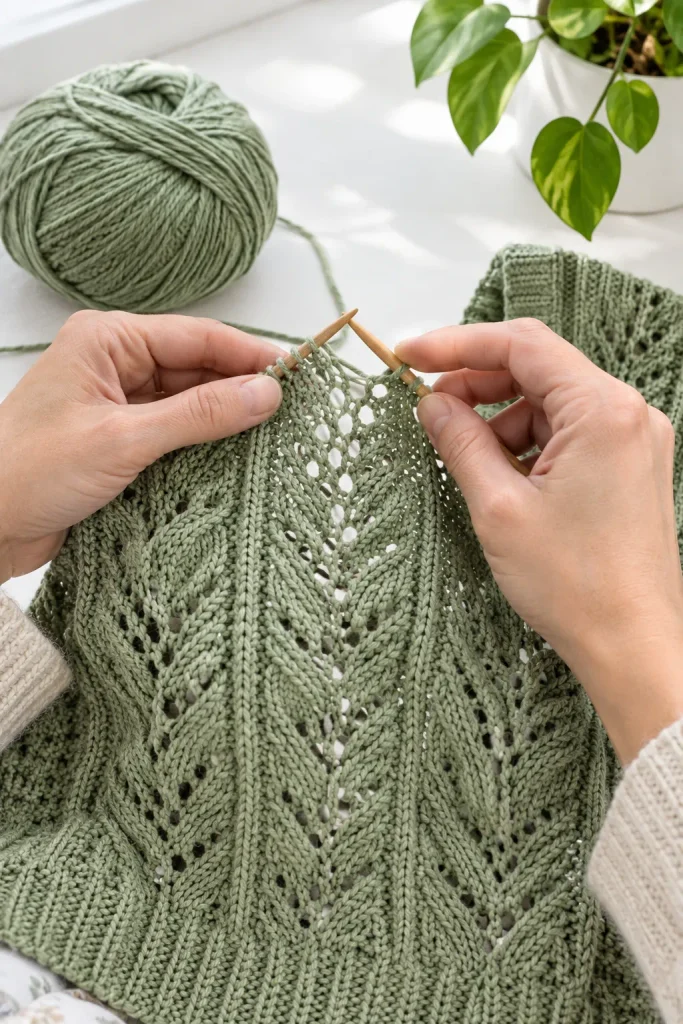
Lace tips that really help
Use stitch markers around each panel. Place a marker before and after every lace panel. When you reach a marker, you know it’s time to start or finish a panel. It takes seconds and saves so many rows of frogging.
Count after every lace row. Each panel should always have 9 stitches. If one doesn’t, stop and fix it right away. A missed yarn over is easy to spot early and awful to find 20 rows later.
Don’t pull the yarn over too tight. A yarn over is just yarn laid across the needle. Keep it loose enough to make a nice open hole.
Use a lifeline if you’re nervous. Thread a piece of waste yarn through your stitches every 16 rows. If you make a big mistake, you can rip back to the lifeline without losing everything.
Practice the sk2p first. The double decrease in Row 5 is the trickiest move. Slip one, knit two together, pass the slipped stitch over. Try it on a swatch if it feels awkward. After three or four attempts, it clicks.
Be gentle with tension. Cotton is unforgiving. If your stitches look tight and your yarn feels stiff, loosen your grip a little.
Step 4: Keep Going Until the Armholes
Continue repeating the 8-row lace pattern until your piece measures about 11.5 inches (29 cm) from the cast-on edge. This is usually after 11 full repeats (88 rows of lace, plus the two set-up rows). End after a WS row (Row 8 of the pattern).
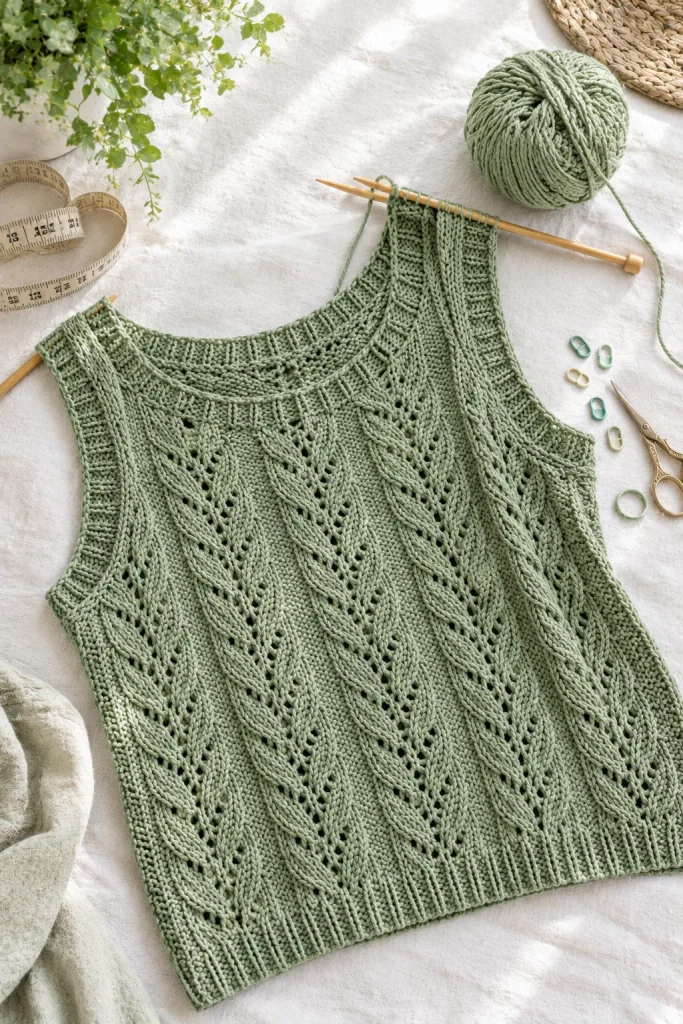
Now is a good time to lay your work flat and check the length. Compare it with a top you already own. If you want a longer top, knit an extra repeat or two. If you want it shorter, stop one repeat early. Just make sure you end on Row 8 of the lace.
Don’t worry if the fabric looks a bit rumpled. Lace always looks unimpressive until it’s blocked.
Step 5: Shape the Armholes
With the right side facing:
Row 1 (RS): Bind off 6 stitches, work in pattern to the end. (103 stitches)
Row 2 (WS): Bind off 6 stitches, purl to the end. (97 stitches)
Then start decreasing on the right side:
Decrease row (RS): K1, ssk, work in pattern to the last 3 stitches, K2tog, K1.
Work this decrease row on every RS row, 5 times in total. You’ll have 87 stitches remaining. Keep working the lace panels in pattern on the rows in between. On the WS rows, just purl.
Continue straight in pattern until the armhole measures about 4.5 inches (11.5 cm), or around 34 rows from the bind-off. This is where the front and back differ, so let’s do the front first.
Step 6: Front Neck Shaping
The Whisper Wind Top has a soft round neckline. Here’s how to shape it.
Next row (RS): Work 29 stitches in pattern, bind off the center 29 stitches, work the remaining 29 stitches.
You’ll now work each shoulder separately. Start with the left side (the stitches you’re currently holding on the needle), and attach a second ball or use the same yarn for the other side later.
On the neck edge, decrease 1 stitch on every RS row, 5 times:
- Left side: work to the last 3 stitches, K2tog, K1.
- Right side: K1, ssk, work to the end.
You’ll be left with 24 stitches on each shoulder. Continue straight until the armhole measures about 8 inches (20 cm), or around 26 more rows. End after a WS row, then bind off all stitches.
Rejoin the yarn to the other side, work the same shaping in reverse, and bind off.
A trick for matching neck curves
Mark the row where you start each decrease with a small safety pin. When you work the second shoulder, you can compare it to the first and make sure the curves match. It’s an easy way to avoid a lopsided neckline.
Step 7: Knit the Back
The back is worked exactly like the front, including the hem, lace panels, and armhole shaping. The only difference is the neckline.
Work straight in pattern until the armhole measures about 8 inches (20 cm).
Next row (RS): Work 24 stitches, bind off the center 39 stitches, work the remaining 24 stitches.
Next, bind off the shoulder stitches on the following WS row (or place them on holders if you prefer a three-needle bind off for a super neat shoulder seam).
The back neck is wider and shallower than the front, which is perfectly normal. The two curves come together when you pick up the neckband.
Step 8: Block the Pieces
Please don’t skip blocking. It’s the step that transforms lace.
- Soak both pieces in lukewarm water for 15 to 20 minutes with a tiny bit of gentle wool wash.
- Press out the water with a towel. Don’t wring.
- Lay the pieces flat on blocking mats and gently shape them to the finished measurements.
- Pin out the lace panels slightly so the eyelets open up nicely.
- Leave the ribbing alone so it keeps its stretch.
- Let everything dry fully, which usually takes about a day.
Once you take the pins out, you’ll see the leaves open up and the fabric relax. That’s the moment the project turns from “knitting” into “clothing.”
Step 9: Join the Shoulders
Place the front and back with right sides together and sew the shoulder seams. I like mattress stitch for a flat, almost invisible seam, but a three-needle bind off also works well, especially if you held the stitches.
Take your time here. Shoulder seams carry the weight of the garment, and you want them to look tidy from the outside.
Step 10: Add the Neckband
With the 3.25 mm 16-inch circular needle and the right side facing, start at one shoulder seam.
- Pick up and knit stitches evenly around the neckline. As a rule of thumb, pick up 3 stitches for every 4 rows along the curved side edges, and 1 stitch for every bound-off stitch across the front and back necks.
- Aim for about 108 stitches. The exact number doesn’t matter as long as it’s a multiple of 4 and the stitches look evenly spread.
- Place a marker and join in the round.
Rounds 1 to 8: K2, P2 around.
Bind off loosely in rib. If your bind off feels tight, use a needle one size larger for that last round so the neckband stays flexible enough to go over your head.
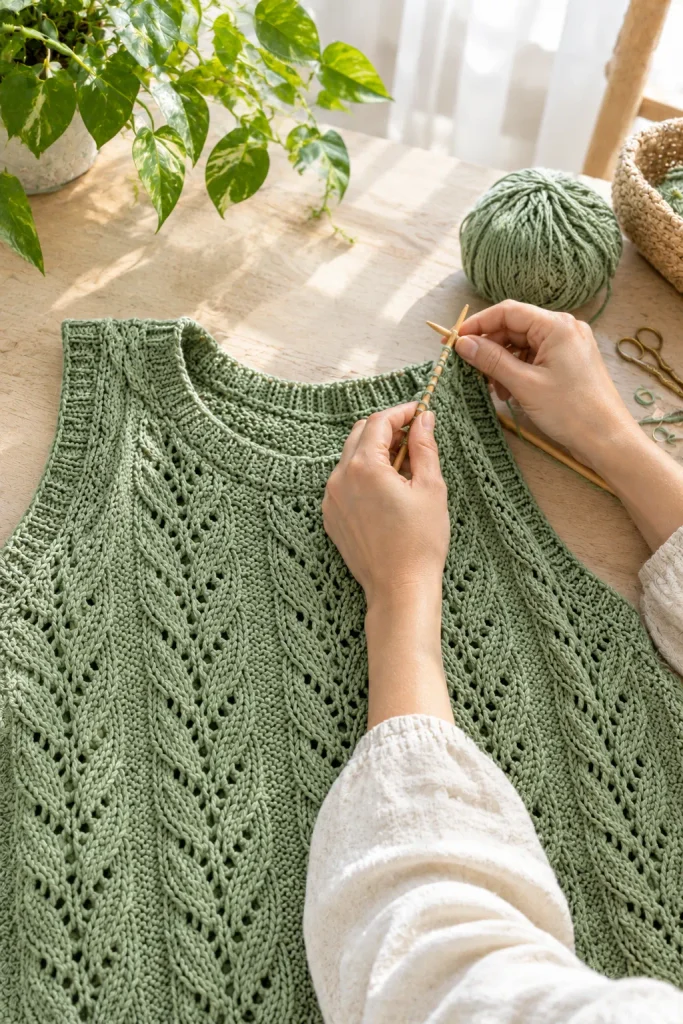
Step 11: Sew the Side Seams and Finish the Armholes
Before the armhole bands, sew the side seams from the hem up to the armhole using mattress stitch. Line up the stockinette columns so the seam disappears.
Then, with the circular needle and the right side facing, start at the underarm seam:
- Pick up and knit stitches evenly around the armhole, about 3 stitches for every 4 rows, and 1 stitch for every bound-off stitch at the underarm.
- Aim for about 96 stitches (a multiple of 4).
- Join in the round.
Rounds 1 to 6: K2, P2 around.
Bind off loosely in rib. Repeat for the other armhole.
Weave in all the ends with your tapestry needle, and trim neatly. Give the finished top one last gentle press or steam, being careful not to flatten the lace.
Common Mistakes (and How to Fix Them)
I’ve made most of these myself, so here’s what I’d warn you about.
A missed yarn over. If a panel has 8 stitches instead of 9, you probably forgot a yarn over. Drop down and fix it, or rip back to the last good row.
Holes that look uneven. Usually this comes from inconsistent tension. Try to keep your yarn overs the same size every time.
The top turns out too short or too long. Measure as you go, and remember that cotton can grow slightly when washed. Block your swatch first so you know what to expect.
Lace that looks closed after blocking. If the eyelets are small, the pins may not have opened them enough. Re-wet the piece and pin it more firmly.
A tight neckband. Always bind off loosely. A tight edge will make the neckline curl and sit awkwardly.
Not counting stitches. Count after every armhole decrease and after every lace row. It’s the single best habit for avoiding disasters.
Ways to Customize Your Top
Once you know the basic pattern, there are lots of ways to personalize it.
Try a different color. Cream, dusty blue, butter yellow, or soft terracotta all look gorgeous. Solid or lightly tonal yarns show lace best. Avoid busy variegated yarns, which fight the pattern.
Go cropped. Work one or two fewer lace repeats before the armholes, and add a few extra ribbing rows for a shorter hem. It looks great with high-waisted bottoms.
Make it longer. Add two or three extra repeats and finish with a slightly deeper hem. This gives you a relaxed tunic-style top that works over leggings.
Add a V-neck. Instead of a round neckline, divide the front at the center when you start the neck shaping and decrease gradually on each side. The leaf panel at the center looks pretty framed by a V.
Swap the lace panel. Replace the leaf with another 9-stitch lace repeat. Just keep the stitch count the same and the rest of the pattern stays intact.
Try a linen blend. Linen yarns soften beautifully with washing and make a gorgeous summer top. They can be a little stiff while knitting, so give yourself time to get used to them.
How to Care for Your Lace Top
- Hand wash in cool water with a mild detergent.
- Don’t wring or twist. Squeeze gently, then roll it in a towel to remove excess water.
- Dry flat. Lay it on a clean towel and reshape it. Hanging a wet knit will stretch it.
- Store folded. Hangers can pull on the shoulders and leave bumps.
- Re-block if needed. If the lace relaxes after a few wears, a quick wet block will bring it back to life.
Frequently Asked Questions
Can I use a different yarn weight?
You can, but you’ll need to recalculate your stitch counts. Use your own gauge and keep the lace panels at 9 stitches. Fill the remaining width with stockinette stitch.
Is this pattern suitable for first-time lace knitters?
Yes, as long as you’re comfortable with basic knitting. The lace panels are small, and the WS rows are all purl. If you want extra practice, work a small swatch with a single panel before you begin.
How much yarn do I need for other sizes?
For a small, plan on about 650 yards. For a large, 950 to 1,000 yards is safer. If you’re between sizes or want a longer top, buy one extra skein to be safe.
What if I run out of yarn near the end?
Try to buy all your yarn at the same time and check the dye lot numbers. If you do run short, work the neckband and armhole bands in a coordinating color. It can look intentional and pretty.
Can I knit this in the round?
Yes. Work the body in the round up to the armholes, then divide for the front and back. You’d work the wrong-side rows as knit rounds, so remember to replace the purl rows in the pattern with knit rows.
Why does my knitting look uneven before blocking?
Lace always looks messy until it’s blocked. Cotton especially needs that soak and stretch to show off the pattern. Trust the process.
Final Thoughts
There’s something really satisfying about wearing a top you made yourself. The Whisper Wind Top is light, easy to wear, and surprisingly simple to knit. The lace gives it a gentle, pretty texture, and the sage green makes it feel calm and fresh.
If lace has felt intimidating, I hope this tutorial shows you it’s just a handful of small steps repeated. Start with that swatch, take your time with the yarn overs, and enjoy watching the leaves grow row by row.
When you’re done, I’d love to see your version. Share your color choices, any changes you made, and the tricks you discovered along the way. Every knitter has a different approach, and I learn something from each one.
Happy knitting, and enjoy every breezy summer day in your new favorite top!
More handmade ideas to explore next: If you love cozy knits, you may also enjoy our Easy Cable Knit Vest Tutorial | Classic Sweater Vest Pattern. And for something playful, take a look at our Jack-o’-Lantern Pumpkin Bag Crochet Halloween Idea.