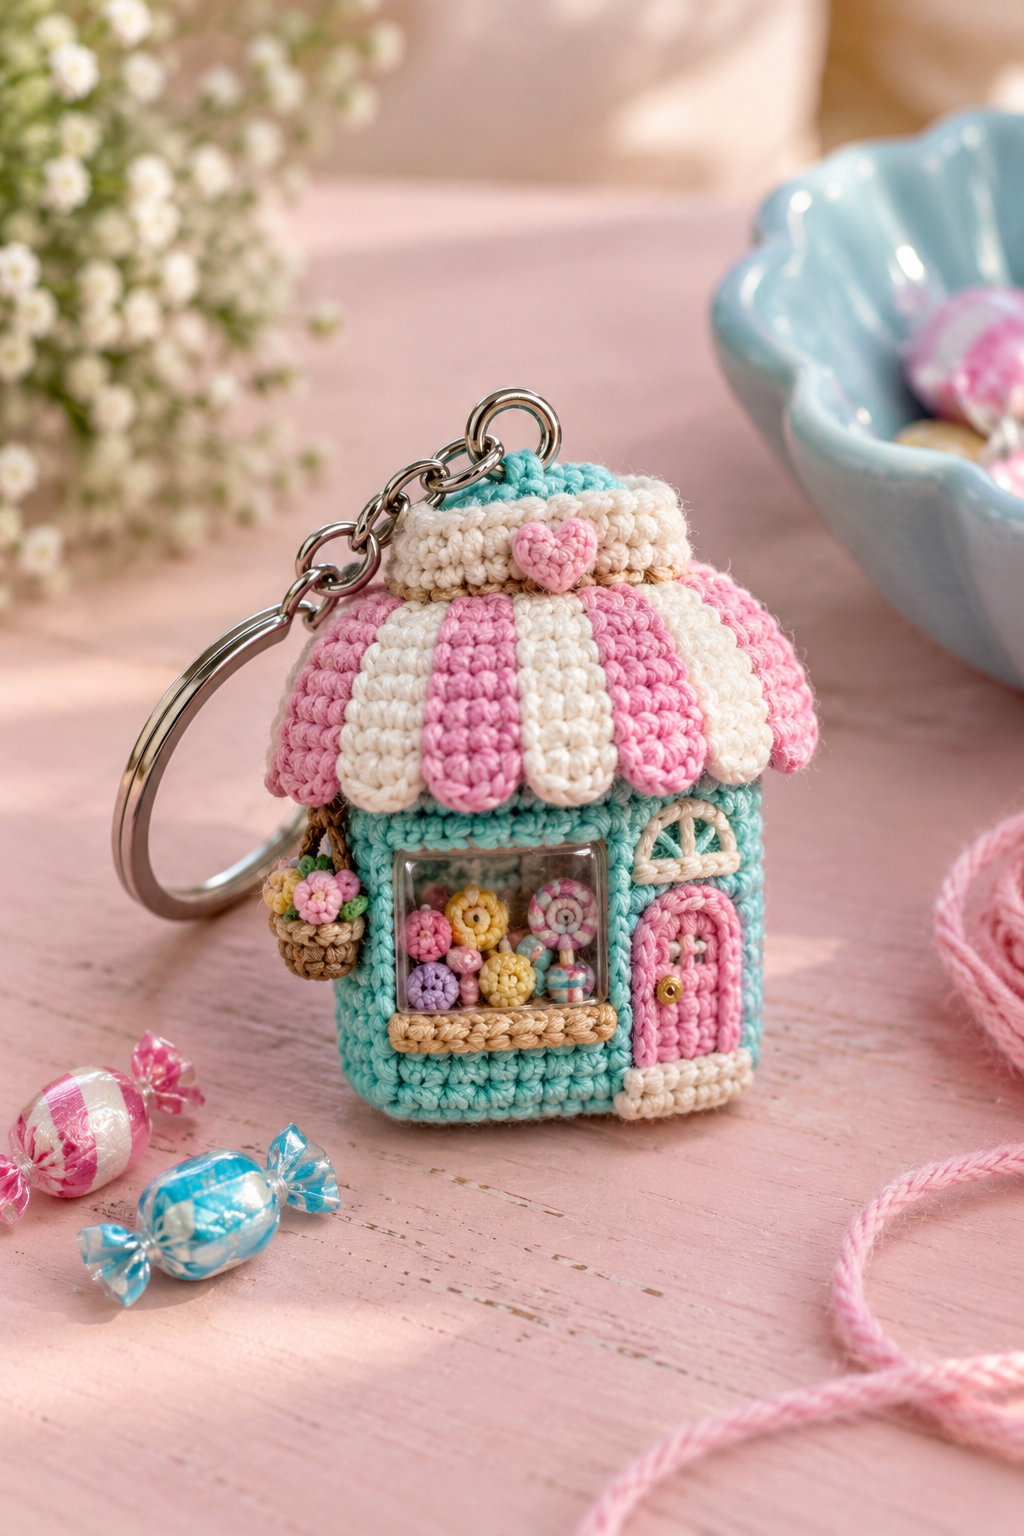
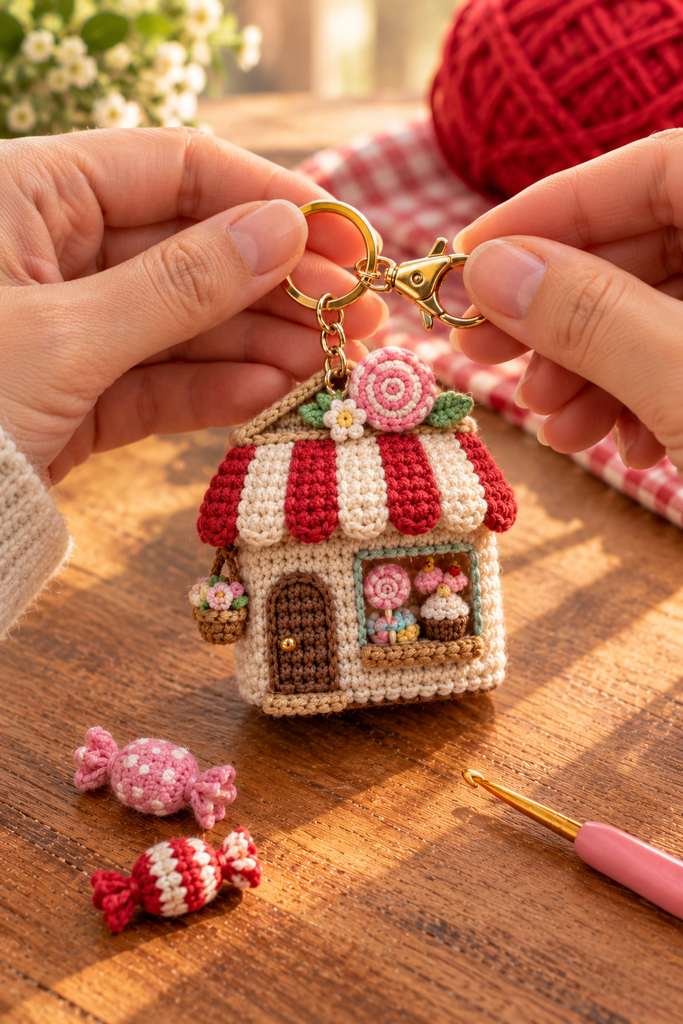
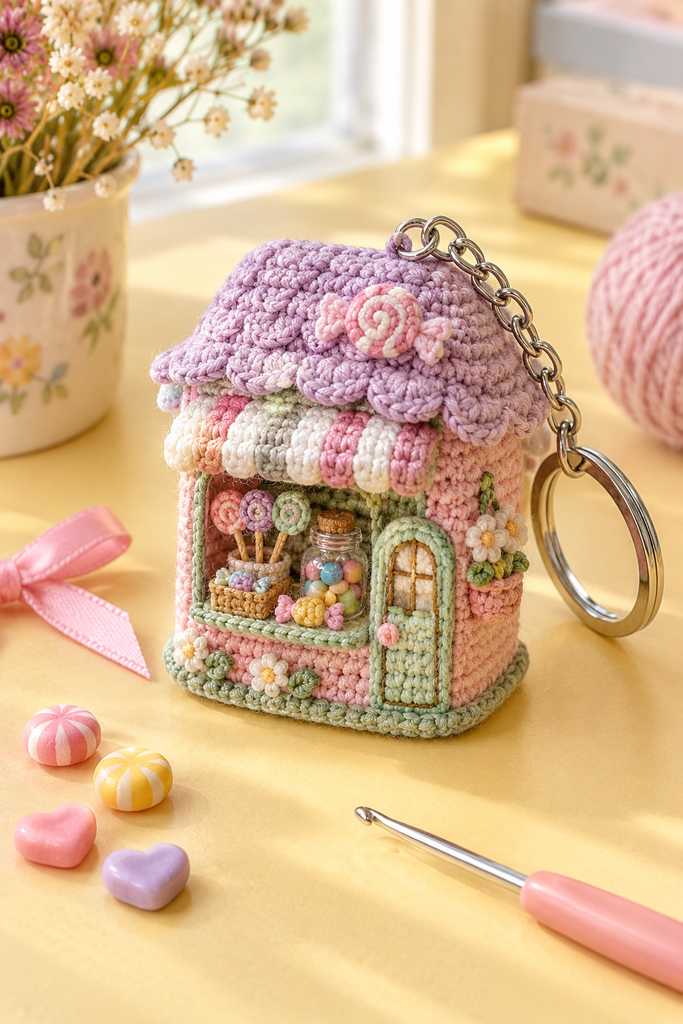
Some projects are made to be useful, and some are made purely to make you smile. This mini candy shop keychain is a bit of both. It has a striped red and cream awning, a tiny window full of lollipops and cupcakes, a little brown door, a flower box, and a pair of wrapped candies waiting on the counter. It is small enough to clip onto a bag, but detailed enough that everyone who sees it wants to hold it for a closer look.
If you have been searching for a cute crochet keychain pattern that feels special without being impossible, you are in the right place. This tutorial walks you through every part of the shop, from the first stitch of the cream walls to the final loop that holds the keyring. I have written each round out in full, added notes about where makers usually run into trouble, and included image placeholders so you can see how each stage should look.
You do not need to be an expert. If you are comfortable with single crochet, increases, and decreases, you can make this little shop. It simply asks for patience, a small hook, and a good cup of tea.
Why You Will Love This Mini Candy Shop Keychain
First of all, it is a wonderful way to use up small scraps. The whole project uses only a few yards of each color, so your leftover cotton and thread finally get a purpose.
Second, it is a project made of small parts. Each piece, the walls, the roof, the door, the window display, and the candies, can be made in a short sitting. That makes it ideal for busy makers who only have an hour here and there.
Third, it makes a lovely handmade gift. A keychain is personal, portable, and charming. Make one for a friend who loves sweets, a baker, a teacher, or anyone who appreciates tiny things.
Finally, it is a great craft fair and shop item. People are drawn to miniature food and storefront designs, and a crochet candy shop has an instant eye catching look.
Project Overview
Skill level: Confident beginner to intermediate
Finished size: About 2 inches (5 cm) tall and 1.5 inches (4 cm) wide, not including the keyring
Time to make: Around 6 to 8 hours in total, depending on how many candies you add
Construction: Walls worked in the round, roof worked flat, small details made separately and sewn on
Pieces: Base and walls, roof awning, door, window display, flower box, hanging peppermint charm, roof lollipop, mini candies, keyring loop
Materials You Will Need
Mini projects look best when the yarn is thin and the stitches are tight. Here is what I used.
Yarn or thread. Fingering weight or sport weight cotton, or size 3 crochet cotton thread. Cotton has a firm finish that keeps the little shop square and gives crisp stitch definition. You will need small amounts of the following:
- Cream or ecru for the walls: about 40 yards
- Bright red for the roof stripes and details: about 25 yards
- Soft brown for the door, base trim, and flower box: about 15 yards
- Pink, yellow, light blue, and white for the candies: a few yards each
- Olive or leaf green for the leaves: a few yards
Crochet hook. A 2.0 mm hook works for most of the pieces. If you crochet loosely, drop to 1.75 mm. The stitches should be tight enough that the polyfill does not show through.
Other supplies:
- A small keyring with a clasp or a lobster clasp
- Polyester fiberfill
- A piece of thin cardboard or plastic canvas, cut to the size of the base, for stability
- A tiny piece of clear plastic (from packaging or an acetate sheet) for the window
- A tiny gold bead for the door knob
- A yarn needle with a small eye
- Small sharp scissors
- Fabric glue (optional but helpful)
- Stitch markers
Abbreviations (US Terms)
- ch: chain
- MR: magic ring
- sc: single crochet
- hdc: half double crochet
- dc: double crochet
- inc: two single crochets in the same stitch
- dec: single crochet two stitches together
- sl st: slip stitch
- BLO: back loop only
- st(s): stitch(es)
- FO: fasten off
- ( ) x3: repeat the steps in the brackets the number of times shown
- (12): the total number of stitches at the end of the round
Helpful Tips Before You Begin
Miniature crochet rewards care. A few habits make a big difference.
Use a tight tension. If your work looks loose or lacy, go down a hook size. In miniature work, a tiny gap looks huge.
Mark your rounds. Walls are worked in a continuous spiral, so keep a stitch marker in the first stitch of every round.
Do not overstuff. The walls are stiffened with cardboard, so you only need a light layer of polyfill. Too much stuffing will warp the box shape.
Block the flat pieces. Pin the roof and door to a flat surface, mist lightly with water, and let them dry. Blocking makes the pieces lie flat and sew neatly.
Work in good light. Small stitches are hard to count in dim light. Sit near a window or use a daylight lamp.
Leave long tails. Every small piece needs a long tail for sewing. About 8 inches (20 cm) is enough for everything in this pattern.
Step 1: Crochet the Base and Cream Walls
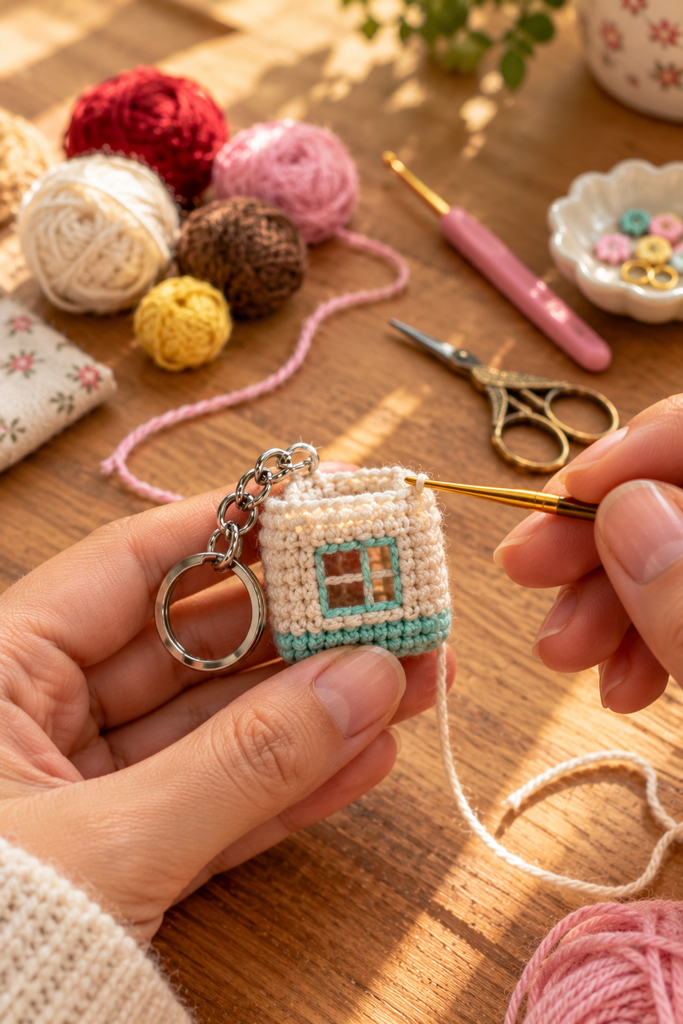
We begin with the foundation of the shop. Use cream yarn and your 2.0 mm hook.
The Base
Row 1: ch 11, sc in the 2nd chain from the hook and in each chain across (10)
Rows 2 to 7: ch 1, turn, sc in each stitch across (10)
You now have a small rectangle about 10 stitches wide and 7 rows deep. This is the floor of the shop. Do not fasten off.
The Walls
We now turn the corner and work the walls up from the edge of the base.
Round 1: Working in the back loops only, sc evenly around the entire edge of the rectangle: 10 sc along the bottom edge, 7 sc along the first short side, 10 sc along the top edge, and 7 sc along the second short side (34). Place a marker in the first stitch.
Working in the back loops creates a clean ridge around the floor, and the walls will stand up straight.
Rounds 2 to 11: sc in each stitch around (34) for 10 rounds
Your little box should now stand on its own. If it leans or curls inward, your tension is probably a bit tight at the corners, which is easy to fix when you stuff and stiffen it.
Cut a piece of thin cardboard or plastic canvas to fit inside the base and slide it in. Add a thin layer of fiberfill on top. Do not close the top yet, because the roof will cover it.
Round 12: sl st in each stitch around (34)
Fasten off, leaving a long tail, and weave in any loose ends on the inside.
Common Problem: My Walls Are Curving Inward
This happens when the stitches are too tight or when the cardboard is cut too small. Make sure the cardboard fits snugly against the walls. You can also pin the walls out while the piece dries after a light mist of water.
Common Problem: My Corners Look Rounded
If the corners round off, mark them with stitch markers and add one extra sc at each corner for the first two rounds. Then continue with the plain rounds. A small block of cardboard inside the corners also helps square them off.
Step 2: Make the Striped Awning Roof
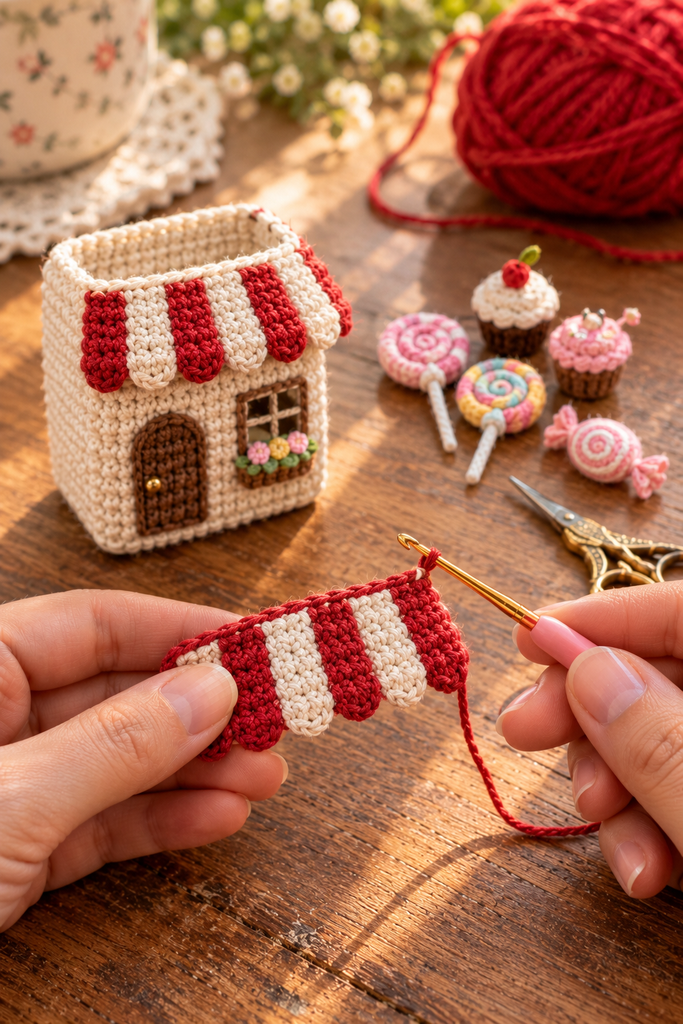
The striped awning is what makes the whole shop feel like a sweet little bakery storefront, so give it your best attention. Use red and cream yarn, plus your 2.0 mm hook.
The roof is worked flat from one edge across the ridge to the opposite edge. Every two rows form one stripe.
With red yarn:
Row 1: ch 17, sc in the 2nd chain from the hook and in each chain across (16)
Row 2: ch 1, turn, sc in each stitch across (16)
Change to cream on the last stitch of Row 2 (pull the new color through the last two loops of the stitch).
Rows 3 and 4: ch 1, turn, sc in each stitch across (16). Change to red on the last stitch of Row 4.
Rows 5 to 12: repeat the two row stripe sequence, changing color every two rows, so you have 6 stripes in total (3 red, 3 cream). End with a cream stripe.
Fasten off. Weave in all the loose ends neatly, since they are visible on the flat roof.
Making the Scalloped Edge
The scallops are what give the awning its charming bakery look. They go on the long edge of the roof, along the row ends, which will become the front.
For each stripe, join the matching color at the start of that stripe’s two row ends. Then:
ch 1, work 5 dc into the two row end spaces of that stripe (distributing them evenly), sl st into the base of the next stripe.
The five double crochets will fan out into a soft scallop. Repeat for every stripe, matching the scallop color to the stripe color above it. Fasten off and weave in the ends.
Block the roof by pinning it flat and misting it lightly. When it is dry, fold it in half across the 16 stitches to create the ridge.
Tip for Sharp Stripes
Carry the unused color loosely up the side of the work rather than cutting it. At this size, the carried yarn hides inside the seam. Just make sure it is not pulled tight, or the roof will pucker.
Common Problem: My Roof Is Too Floppy
Mini roofs often lack structure. Spray the finished piece lightly with a fabric stiffener, or brush a very thin layer of diluted white glue on the back. Let it dry completely before you sew it on.
Step 3: Crochet the Door
The door gives the shop its homey, storybook look. Use brown yarn and your 2.0 mm hook.
Row 1: ch 6, sc in the 2nd chain from the hook and in each chain across (5)
Rows 2 to 9: ch 1, turn, sc in each stitch across (5)
Round 10 (border): ch 1, sc evenly around the entire door, putting 2 sc in each corner. Join with a sl st and fasten off, leaving a tail.
The Door Window
Cut a very small square of clear plastic to fit in the upper part of the door. With white thread, make four tiny straight stitches across it to create a cross of window bars. Sew it to the door using the tail, hiding the stitches under the border.
If you prefer a simpler version, embroider the window straight onto the door with white thread, using a small square outline and a cross in the middle.
The Knob
Sew a tiny gold bead on the right side of the door at about the middle. If you do not have a bead, use a single French knot made with yellow thread.
Step 4: Make the Window Display
The window is the sweetest detail on the shop, because everything inside it looks like a real candy counter.
The Display Panel
With cream yarn:
Row 1: ch 8, sc in the 2nd chain from the hook and in each chain across (7)
Rows 2 to 7: ch 1, turn, sc in each stitch across (7)
Fasten off, leaving a tail. This little rectangle is the backdrop for your candies. You will sew the mini treats onto it before it goes on the shop, so it is easiest to work with a flat piece.
Mini Lollipops (make 3)
Use pink, red, or blue yarn.
Round 1: MR, 6 sc (6)
Round 2: inc in each stitch around (12)
Round 3: (sc, inc) x6 (18)
Fasten off with a tail. Using white thread, embroider a spiral from the center outward. For the stick, chain 8 with white yarn, sl st back along the chain, fasten off, and sew it behind the disc.
Mini Cupcakes (make 3)
With brown or yellow yarn for the wrapper:
Round 1: MR, 6 sc (6)
Round 2: inc in each stitch around (12)
Round 3: sc in the back loop of each stitch around (12)
Rounds 4 and 5: sc in each stitch around (12)
Fasten off. For the frosting, use pink or white yarn:
Round 1: MR, 6 sc (6)
Round 2: inc in each stitch around (12)
Fasten off with a tail, and sew the frosting on top of the wrapper. Add a tiny red bead or a French knot as a cherry. Stuff the cupcake lightly before sewing the frosting on.
Assembling the Display
Arrange the lollipops and cupcakes on the panel, with the lollipops standing at the back and the cupcakes in front. Sew each one down with small stitches through the base. When you are happy with the arrangement, place the clear plastic piece over the whole panel. Using brown thread, sew a neat border around the edge of the plastic through the panel to hold everything in place. This is the shop window.
Common Problem: My Candies Look Too Big for the Window
If the candies crowd the panel, make them one round smaller. The lollipops can stop after Round 2, giving a 12 stitch disc, and the cupcakes can have a single plain round. Mini details should feel delicate, not bulky.
Step 5: Make the Flower Box
The flower box beneath the window adds a lovely finishing touch.
With brown yarn:
Row 1: ch 9, sc in the 2nd chain from the hook and in each chain across (8)
Rows 2 to 4: ch 1, turn, sc in each stitch across (8)
Fasten off, leaving a tail.
The Flowers (make 3)
Use red or pink yarn:
Round 1: MR, 5 sc, sl st to join (5)
Round 2: (ch 2, sl st in the next stitch) x5
Fasten off with a tail. These create tiny five petal flowers.
The Leaves (make 4)
With green yarn: ch 4, sl st in the 2nd chain from the hook, sc in the next chain, hdc in the last chain. Fasten off with a tail.
Sew the flowers along the top of the brown rectangle, with the leaves tucked in between them. Stitch a few extra green stitches along the top edge to look like trailing greenery.
Step 6: Make the Hanging Peppermint Charm and Roof Lollipop
These two details give the shop a playful, finished look.
The Peppermint Charm
With red yarn:
Round 1: MR, 6 sc (6)
Round 2: inc in each stitch around (12)
Round 3: (sc, inc) x6 (18)
Fasten off with a tail. With white thread, embroider six spokes from the center to the outside edge, like a pinwheel peppermint. Add a short chain loop of brown thread at the top so it can hang from the side of the shop.
The Roof Lollipop
With pink yarn:
Round 1: MR, 6 sc (6)
Round 2: inc in each stitch around (12)
Round 3: (sc, inc) x6 (18)
Round 4: (2 sc, inc) x6 (24)
Fasten off with a long tail. Using cream thread, embroider a spiral from the center. Sew two green leaves beside it and add a tiny red bow made of two small loops and a center wrap of thread. This is the sweet little crown on top of the roof.
Step 7: Crochet the Wrapped Candies
The wrapped candies are the final detail, and they sit beside the shop like little props. You can make as many as you like.
With red, pink, or yellow yarn:
Round 1: MR, 6 sc (6)
Round 2: inc in each stitch around (12)
Rounds 3 to 5: sc in each stitch around (12)
Round 6: dec x6 (6)
Stuff lightly and fasten off. For the wrappers, use white yarn and make two fans, one for each end. Join the white yarn at one end of the candy, and work ch 3, 4 dc in the first chain, sl st into the end of the candy. Repeat on the other end.
For a striped peppermint style candy, change colors every round to make bands, and add a few embroidered white lines over the top for extra detail.
Step 8: Assemble the Candy Shop Keychain
Now comes the part that makes it all feel real. Take your time and place everything with pins before you sew.
Attach the door. Position the door on the right side of the front wall, about two rows above the base. Sew it on with small whip stitches around the border.
Attach the window. Place the display panel on the left side of the front wall, about three rows above the base. Sew around the border with brown thread.
Add the flower box. Sew the flower box below the window, on the front wall, so it appears to sit against the base of the house.
Attach the roof. Place the roof over the box with the ridge running along the length. The scalloped edge should hang over the front like an awning. Sew along the top edge of the walls with a small whip stitch, hiding the stitches under the roof.
Add the roof lollipop. Sew the lollipop on top at the center of the ridge, with a leaf on each side.
Attach the peppermint charm. Sew it to the left side of the shop, so it dangles beside the window.
Add the keyring. Make a small loop of red thread or a chain of about 12 stitches. Sew it securely to the center of the roof ridge. Attach your keyring or clasp through the loop. Double check that the loop is firmly sewn on, because the keychain will take daily wear.
Finish. Weave in any loose ends, trim fuzzy strands, and brush away any lint.
Troubleshooting Guide
Even careful makers run into small problems with miniatures. Here are the most common ones.
The shop leans to one side. The walls may not be evenly stuffed or the base may be uneven. Open the top, adjust the cardboard, and add a little more stuffing on the lighter side.
The roof does not sit flat. Make sure the roof has been blocked, and sew it on from the center outward, adding a few stitches at each corner.
The candies are too big or too small. Mini food is easy to scale. Add a round for a larger candy, or skip a round for a smaller one. Always check the size against the window before sewing.
The colors look dull. Choose a slightly brighter shade than you think you need. Cotton looks softer once it is stitched.
The keyring loop feels weak. Reinforce it by sewing the loop through the cardboard base and the roof, or use a small metal ring sewn on with strong thread.
The window plastic keeps slipping. A tiny dab of fabric glue under the edges keeps it in place. Let it dry completely before you stitch the border.
Fun Variations to Try
This pattern is a template, and it is easy to give it a new personality.
- Bakery version: Change the awning to pastel pink and cream, and add a little loaf of bread and a croissant in the window.
- Ice cream parlor: Use mint and cream stripes, with mini ice cream cones in the window.
- Christmas candy shop: Use red and green stripes, add a small wreath to the door, and top the roof with a candy cane.
- Halloween sweet shop: Use orange and black stripes, with a tiny pumpkin and a ghost in the window.
- Tea shop: Use sage and cream, with little teapots and cups in the display.
- Pastel candy shop: Choose soft lavender, mint, and peach for a modern gentle look.
You can also make a whole village. A bakery, a flower shop, and a candy store together make a lovely tiny street.
How to Photograph Your Mini Shop
A miniature deserves a good photo. Place your finished keychain on a warm wooden surface near a window, and shoot in soft morning light. A few props, like a ball of yarn, a crochet hook, and a checkered cloth, add a cozy handmade feel. Keep the background simple and slightly blurred, so the little shop stands out.
Take a close up of the window display too. That small detail is often the part people love most.
Care Instructions
A handmade keychain gets a lot of daily wear, so treat it gently.
- Spot clean with a damp cloth and a tiny amount of mild soap.
- Avoid soaking, since the cardboard inside will warp.
- Keep it away from direct sunlight, which can fade the red.
- Remove it from your bag before washing anything it is attached to.
This keychain contains small parts like beads and plastic, so it is not suitable for babies or young children. It is best as a decorative accessory for older kids and adults.
Frequently Asked Questions
What yarn is best for a mini candy shop keychain? A fine cotton, such as fingering weight or size 3 crochet thread, gives the best definition and holds its shape. Acrylic works too, but cotton looks crisper at this scale.
What hook size should I use? A 2.0 mm hook works well for most fingering weight cotton. If your stitches look loose, drop to a 1.75 mm hook.
Can a beginner make this keychain? If you can do single crochet, increases, and decreases, and you are comfortable working small, you can. Start with the base and walls to practice the tension.
How long does it take? Most people finish in six to eight hours across several sessions. The candies and small details take the most time.
Can I make the shop bigger? Yes. Use a thicker yarn and a larger hook, and add more rounds to the walls. A worsted weight yarn with a 3.5 mm hook gives you a shop about twice the size, which makes a lovely desk decoration.
What can I use instead of clear plastic for the window? If you do not have plastic, you can embroider the window frame directly onto the wall, or use a small piece of clear sticker sheet. The look is slightly softer but just as charming.
Can I sell items made from this pattern? Yes, you may sell the finished keychains. Please credit StitchNestStudio as the pattern designer, and do not copy or resell the pattern itself.
Final Thoughts
A mini candy shop keychain is the sort of project that feels like a tiny celebration. Each small piece is simple on its own, but when they come together, the striped awning, the little door, the window full of treats, and the lollipop on the roof, the whole thing suddenly has a world inside it.
I hope this pattern gives you a project that is fun to make and even more fun to carry. Take your time, enjoy the small details, and do not worry if your first candies come out a little wonky. Every handmade piece has its own charm.
If you make this keychain, I would love to see it. Share a photo, tag StitchNestStudio, and tell me which colors you chose. And if you get stuck anywhere along the way, leave a comment and I will gladly help.
Happy crocheting, and enjoy your sweet little shop!