Introduction: Greet Trick-or-Treaters With a Handmade Halloween Wreath
The front door is the first thing visitors see, and in October it sets the mood for your whole home. A pumpkin and ghost welcome wreath for Halloween is one of the friendliest ways to do that. It is not scary in a heavy way. It is cheerful, a little playful, and warm enough to stay up from the first week of October until the last piece of candy is gone.
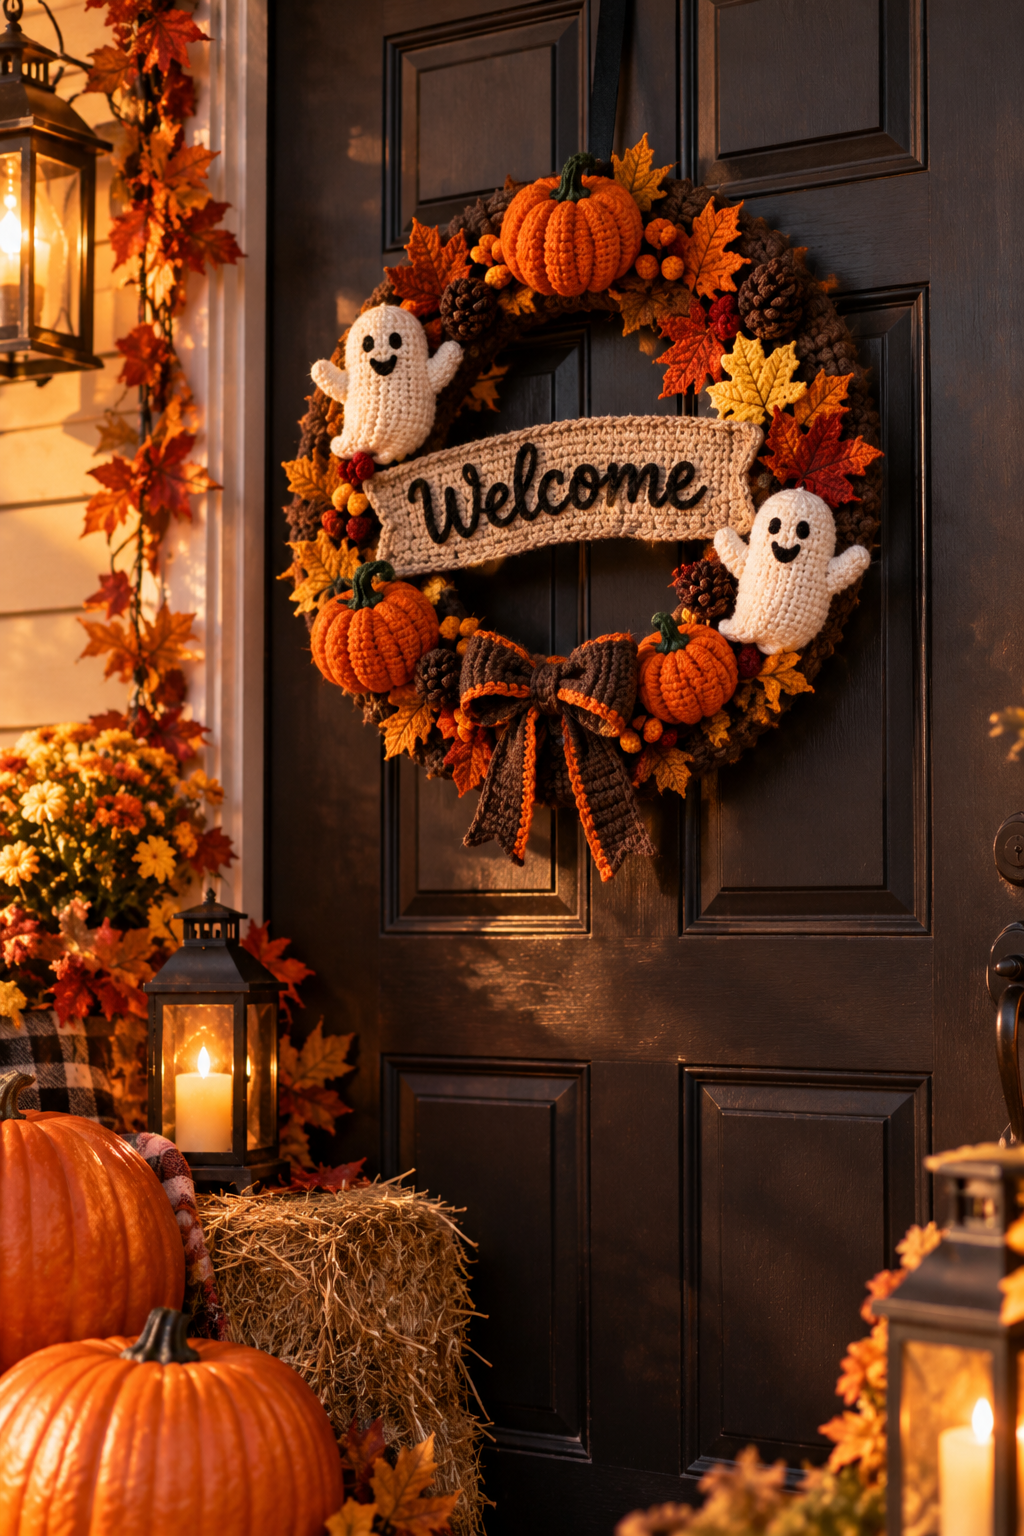
This kind of wreath combines two classic Halloween characters: round, bright orange pumpkins and sweet, smiling ghosts. Add a few autumn leaves, a ribbon or bow, and perhaps a small “welcome” detail, and you have a decoration that feels personal and handmade. Unlike a plastic store-bought wreath, a crocheted version is soft, washable, and sturdy enough to bring out for many Halloweens.
In this guide, you will learn how to plan your wreath from start to finish: choosing a base, selecting colors, making the pumpkins and ghosts, adding leaves and finishing touches, assembling everything, and hanging it safely. You will also find styling ideas, common mistakes to avoid, and answers to the questions crafters ask most.
Looking for another handmade treat for the season? Check out our guide to the Jack-o’-Lantern Pumpkin Bag Crochet Halloween Idea, a perfect trick-or-treat companion for this wreath.
Why Make a Pumpkin and Ghost Wreath?
There are many Halloween door ideas, but this combination keeps winning hearts for good reasons.
It is family friendly
Pumpkins and ghosts are cozy symbols of the season. They appeal to children, grandparents, and neighbors alike, so the wreath works for homes with toddlers and for adults who prefer a softer, cute style of Halloween.
It is a great scrap-yarn project
Each pumpkin and ghost is small. That means you can use leftover orange, white, black, green, and brown yarn instead of buying a lot of new supplies. If you have been collecting odds and ends from other projects, this is the perfect place to use them.
It lasts through fall
Because the design is not strictly spooky, you can leave the pumpkins on display through Thanksgiving. Remove the ghosts after Halloween if you like, and the wreath becomes a general harvest decoration.
It is customizable
You can make three pumpkins and two ghosts, or fill the whole ring. Change the faces, swap colors, add a bat, or spell out a welcome message. The wreath is a template, not a rigid pattern.
Planning Your Wreath: Design Choices to Make First
Before touching a hook, spend a few minutes planning. A little thought up front prevents a lopsided or crowded finished wreath.
Decide on the overall layout
There are three popular arrangements.
- Full ring. Pumpkins, ghosts and leaves are placed all the way around the wreath. This looks lush and festive.
- Bottom cluster. The decorations gather at the lower left or right, with the rest of the ring left plain or wrapped in yarn. This is a modern, balanced look.
- Top and bottom accents. Place a bow or leaf group at the top and a cluster of pumpkins and ghosts at the bottom.
Draw a rough sketch or lay your finished pieces on the base before sewing anything down. Take a photo so you can compare options.
Pick a color palette
A classic Halloween palette uses bright orange, white, and black. For a softer fall mood, add olive green, brown, cream, and mustard yellow. If you want a pastel or boho look, try pale pumpkin colors with soft gray ghosts.
Remember that contrast helps. White ghosts stand out best against orange pumpkins and dark leaves. If your front door is white or pale, choose a base wrapped in darker yarn so the ghosts do not disappear.
Choose the wreath size
Most door wreaths measure about 12 to 16 inches (30 to 40 cm) across. Smaller wreaths suit narrow doors and apartments. Larger ones look dramatic on wide double doors. Keep the weight of your decorations in mind: the bigger the wreath, the heavier it becomes.
Materials You Will Need
For the wreath base
You have several easy options.
- Foam wreath form. Lightweight, inexpensive, and simple to wrap with yarn.
- Wire wreath frame. Strong and good for heavier decorations. Wrap it with fabric strips or yarn for a fuller look.
- Straw or grapevine wreath. Gives a rustic style. You can leave parts of the natural texture showing.
- Pool noodle ring. A budget option: cut a pool noodle, join the ends with tape to form a circle, and wrap it with yarn.
- Embroidery hoop or cardboard ring. Good for a small, flat, lightweight wreath.
Yarn
- Orange yarn for the pumpkins.
- White or off-white yarn for the ghosts.
- Black yarn for ghost faces and any pumpkin faces.
- Green and brown yarn for leaves, stems, and vines.
- Base-wrapping yarn. Choose black, orange, cream, or green, depending on your color scheme.
A worsted weight (medium, category 4) yarn works well for most pieces. Cotton keeps its shape nicely, and acrylic is soft and affordable.
Tools and notions
- Crochet hook, usually one size smaller than the yarn label recommends for a firm fabric
- Stitch markers
- Yarn needle
- Scissors
- Polyester fiberfill for stuffing the pumpkins and ghosts
- Hot glue gun or strong craft glue (optional, for attaching pieces to a foam base)
- Floral wire or pipe cleaners for securing pieces to a wire frame
- Ribbon for hanging and for the bow
- Safety eyes (optional; skip them for homes with small children and embroider the faces instead)
How to Make the Wreath: Step-by-Step Overview
This section is a clear roadmap rather than a stitch-by-stitch pattern. It is aimed at confident beginners who can crochet in the round, increase, and decrease.
Step 1: Wrap the wreath base
Cover the base with yarn so no foam or wire shows. Tape the tail to the form, then wind the yarn around and around, keeping each wrap snug and close to the last. When you run out, tie the new yarn to the old and hide the knot on the back of the wreath. Finish by tucking the end under several wraps or securing it with a dab of glue.
A wrapped base gives a neat, professional look and acts as a backdrop for your pumpkins and ghosts.
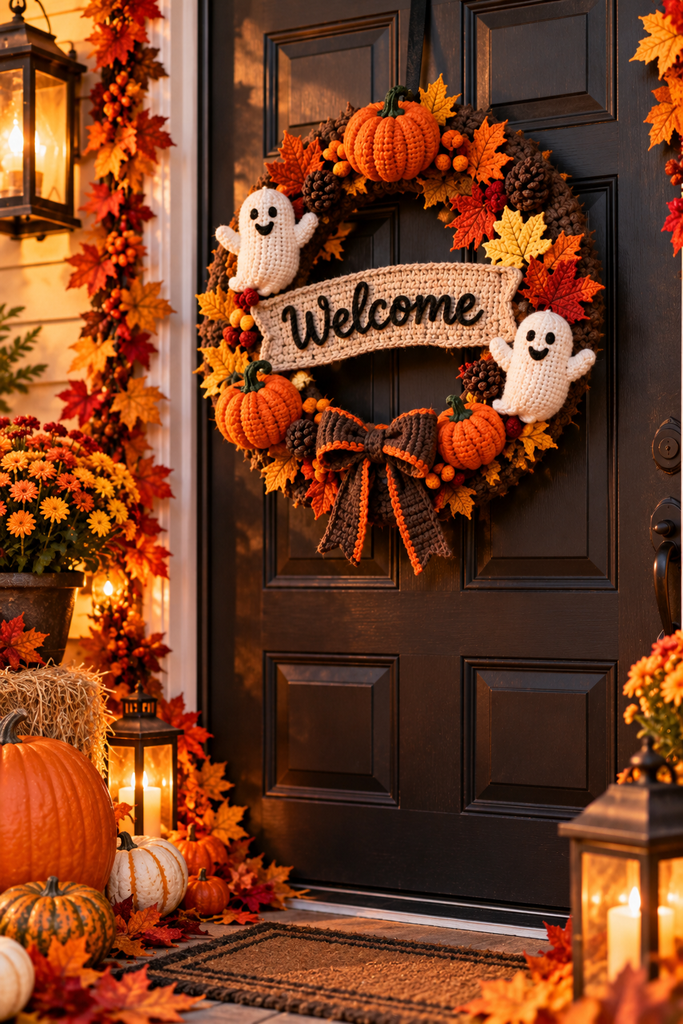
Step 2: Crochet the pumpkins
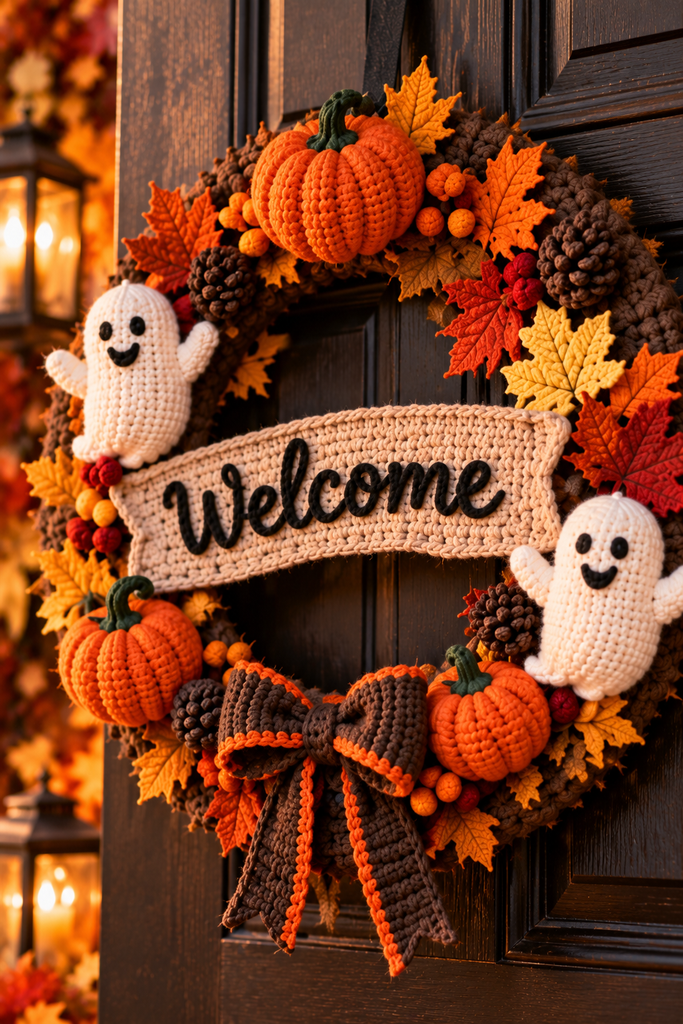
Each pumpkin begins as a small, plump sphere.
- Start with a magic ring and work in the round, increasing evenly until the circle is as wide as you want.
- Work several rounds without increasing so the sides rise.
- Begin decreasing evenly, and stuff firmly before the opening gets too small.
- Close the top and fasten off.
- To create the classic pumpkin ribs, thread a long length of orange yarn onto your needle. Take it from the top center, down the outside, through the bottom, and back up. Pull gently so the fabric dimples. Repeat five or six times around.
- Add a short stem in brown or green and a small curly vine.
Make pumpkins in different sizes. A mix of large, medium, and tiny pumpkins looks more natural than identical ones. If you want to keep the pumpkins flatter so they sit well against the wreath, make them as half-spheres or stuff them lightly.
Step 3: Make the faces for the pumpkins (optional)
Some pumpkins can be jack-o’-lanterns. Crochet small black triangles for the eyes and nose and a curved band for the smile, or embroider them with black yarn. Leave a few pumpkins plain for variety.
Step 4: Crochet the ghosts
Ghosts are as simple as pumpkins and just as charming.
- Work a rounded head in white yarn, the same way you would make a sphere.
- Continue down into the body, widening slightly toward the bottom.
- Stuff lightly so the ghost stays soft and squishy.
- For the wavy bottom edge, work a round of alternating stitches, such as a shell pattern or short scallops, so the hem looks like a floating sheet.
- Add two little arms if you like, or leave the ghost armless for a cleaner shape.
There are many ghost shapes to choose from. A tall teardrop ghost is classic, while a short, round, chubby one looks extra cute. Make both and mix them.
Step 5: Give the ghosts their faces
Use black yarn to embroider two oval eyes and a small round or smiling mouth. Keep the face small and low on the ghost for a cuter look. If you add blush circles in pink, the ghost looks sweet and friendly.
For safety, embroider rather than using plastic safety eyes if the wreath will hang low or if young children will be around.
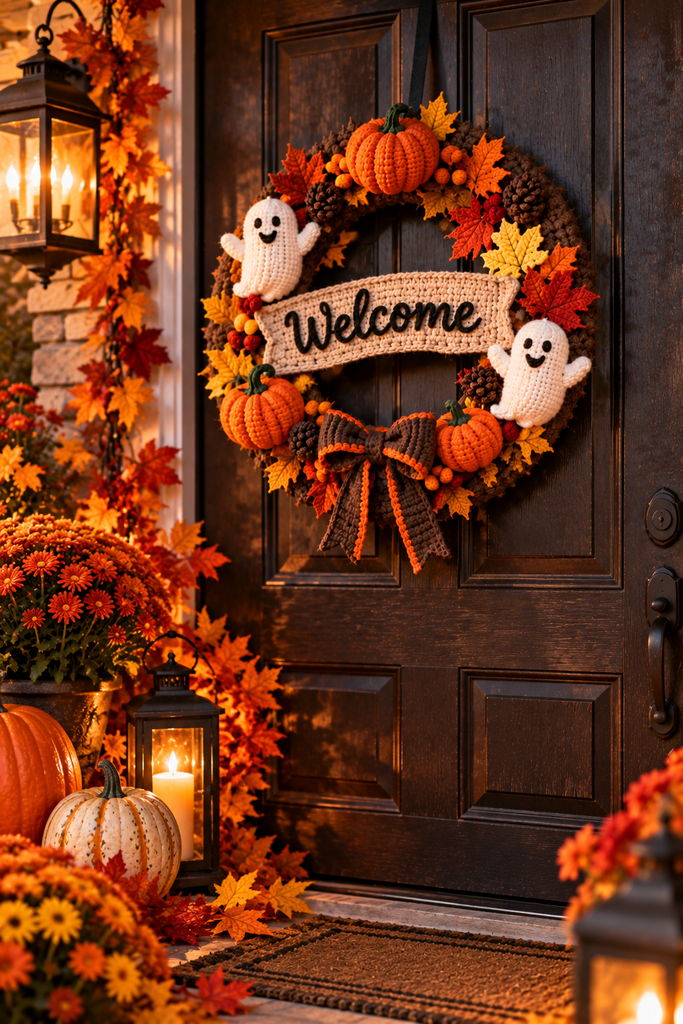
Step 6: Make leaves and extras
Leaves fill the gaps between the larger pieces and add fall color. Crochet a few in green, orange, mustard, and brown. A simple leaf worked from a chain with stitches of varying heights is enough. Add some small curly vines for extra charm.
Other easy extras include:
- Little black bats
- Tiny spiders on a strand of yarn
- Candy corn shapes
- A small crocheted “BOO” or “WELCOME” banner
- Mini acorns or berries
Step 7: Arrange before attaching
Lay the wreath flat and arrange every piece. Start with the largest pumpkins, then place the ghosts, then fill spaces with leaves and extras. Step back, look at it from a distance, and adjust. A good rule of thumb is to group in odd numbers, such as three pumpkins or five leaves, and to vary sizes and heights.
Step 8: Attach the pieces
How you attach depends on the base.
- Foam base: Sew pieces directly to the wrapped yarn with a yarn needle, or use hot glue for quick results. Sewing is more secure and keeps the pieces removable.
- Wire frame: Use floral wire or pipe cleaners to tie each piece to the frame. Twist the ends and tuck them behind.
- Straw or grapevine: Push floral pins through the pieces, or tie them on with yarn.
Secure each piece in at least two places so it cannot flip or droop. Pumpkins are heavier than ghosts, so give them extra support.
Step 9: Add the bow and hanging loop
A ribbon bow in orange, black, or plaid ties the wreath together. Place it at the top or at the lower cluster. Make a hanging loop on the back with a strong ribbon or cord, and stitch or tie it firmly to the base. Test the loop by lifting the wreath gently.
Adding a “Welcome” Touch
The word “welcome” turns a nice wreath into a true greeting. You have several options.
- Crochet letters. Make small letters to sew across the wreath or onto a banner.
- Felt or fabric letters. Quick, flat and easy to attach.
- Wooden sign. Paint or buy a small wooden “welcome” plaque and hang it from the bottom of the wreath with ribbon.
- Embroidered ribbon. Stitch the word on a length of ribbon and let it hang down the center.
Keep the lettering simple and legible. Use contrasting colors, such as black on cream, so people can read it from the sidewalk.
Styling and Hanging Your Wreath
Choose the right spot
Hang the wreath on the front door at eye level. If you have a covered porch, it will last longer because rain and strong sun can fade yarn. If your door is exposed, consider hanging the wreath inside the glass storm door or on an interior door.
Hanging options
- Over-the-door hook (best for doors without a hole)
- Adhesive hook that suits your door finish
- Ribbon looped over the top of the door
- Wreath hanger on a wall, mantel, or window
Always check that your chosen hook can support the weight of the finished wreath.
Coordinate your porch
Let the wreath guide the rest of your Halloween setup. Add real pumpkins on the steps, a lantern with a flameless candle, a few mums, and a doormat that matches the palette. Warm string lights help the white ghosts glow after dark.
Indoor uses
The wreath does not have to stay outside. Hang it above a mantel, on a hallway wall, over a bed in a child’s room, or on the back of a party door. It also makes a wonderful backdrop for Halloween photos.
Tips for a Professional-Looking Wreath
- Use a firm tension. Tight stitches hide the stuffing and keep shapes crisp.
- Stuff evenly. Lumpy stuffing creates lopsided pumpkins. Add small tufts at a time and shape as you go.
- Block the flat pieces. Leaves and bats look better after a light steam or damp press.
- Mix textures. Add a few pieces in a fuzzy or velvet yarn for contrast.
- Hide the hardware. Tuck wires, pins, and knots behind the decorations.
- Keep the weight balanced. Spread the heavier pieces so the wreath hangs straight.
- Leave breathing room. Overcrowding looks messy. A few gaps of wrapped base add visual rest.
- Take progress photos. They help you decide on placement and make great blog content.
Common Mistakes to Avoid
- Making all pieces the same size. This looks stiff. Vary the sizes.
- Choosing a base that is too small. The decorations end up cramped and overlapping.
- Using only white for the ghosts on a white door. They will vanish. Add dark leaves or a dark base.
- Under-securing the pieces. A strong wind or a bump can send a pumpkin flying. Attach each piece in several places.
- Over-stuffing the ghosts. They look best soft and slightly floppy.
- Forgetting the back. A neat back with no loose ends or glue strings looks professional if the wreath hangs where it can be seen.
- Hanging it in direct rain. Yarn can absorb moisture and sag. Choose a sheltered spot.
Creative Variations
Once you master the basic wreath, try one of these twists.
- Pastel Halloween. Peach pumpkins, lilac ghosts, and mint leaves create a gentle, modern look.
- Glow-in-the-dark ghosts. Use glow yarn for the ghosts so they shine at night.
- Boho fall wreath. Combine neutral pumpkins, cream ghosts, pampas grass and dried flowers.
- Mini wreath. Make a 6-inch version for a window, cupboard door, or party favor.
- Garland. Crochet extra pieces and string them into a banner for the mantel or porch railing.
- Wreath with a name. Add the family surname or a child’s name on a crochet banner.
- Reversible pieces. Crochet ghosts that can be unpinned and used as ornaments or gift toppers.
Can You Sell Handmade Halloween Wreaths?
Wreaths like this are very popular at fall craft fairs and in online shops. If you plan to sell, consider these points.
- Check any pattern license. If you use a designer’s pattern, make sure selling finished items is allowed.
- Price for time and materials. Wrapping the base and crocheting several pieces takes hours.
- Photograph well. Clear, warm photos on a real door sell better than flat shots on a table.
- Describe the size and weight. Buyers want to know the diameter and how to hang it.
- Offer care guidance. Include a note about dusting and keeping the wreath dry.
Safety and Care Notes
- Keep away from flames. Use flameless candles near the wreath and never hang it close to a heat source.
- Secure small parts. Leaves, vines, and eyes should be firmly attached, especially if children will be near the wreath.
- Spot clean. Dust gently with a soft brush. For stains, dab with a damp cloth and mild soap.
- Store carefully. At the end of the season, place the wreath in a box or a large bag with tissue paper so it keeps its shape. Store it somewhere dry.
Frequently Asked Questions
How long does it take to make a pumpkin and ghost wreath?
Most crafters can finish one over a weekend or a few evenings. Each small pumpkin or ghost takes about an hour or less, and wrapping the base and assembling the wreath adds a few more hours.
Is this wreath suitable for beginners?
Yes, if you know the magic ring, single crochet, increases and decreases. The shapes are simple, and small mistakes are hidden by the decorations.
What is the best base for a crochet Halloween wreath?
A foam wreath form is the easiest and lightest. A wire frame is better for a heavier wreath, and a grapevine wreath suits a rustic style.
Can I leave the wreath outside?
You can, but a covered porch is best. Rain, wind, and sun can damage yarn and glue over time. Bring the wreath indoors in bad weather if you can.
How do I keep the ghosts from looking dingy?
Use bright white or cream yarn and keep the wreath away from dust and moisture. Spot clean as needed.
Can I use leftover yarn?
Absolutely. This project is ideal for scraps. Just keep the weight of the yarns similar so the pieces match in size.
How do I make the wreath hang straight?
Attach the hanging loop at the top center of the base and distribute the weight evenly. If the wreath tilts, add a small counterweight or move a pumpkin to the lighter side.
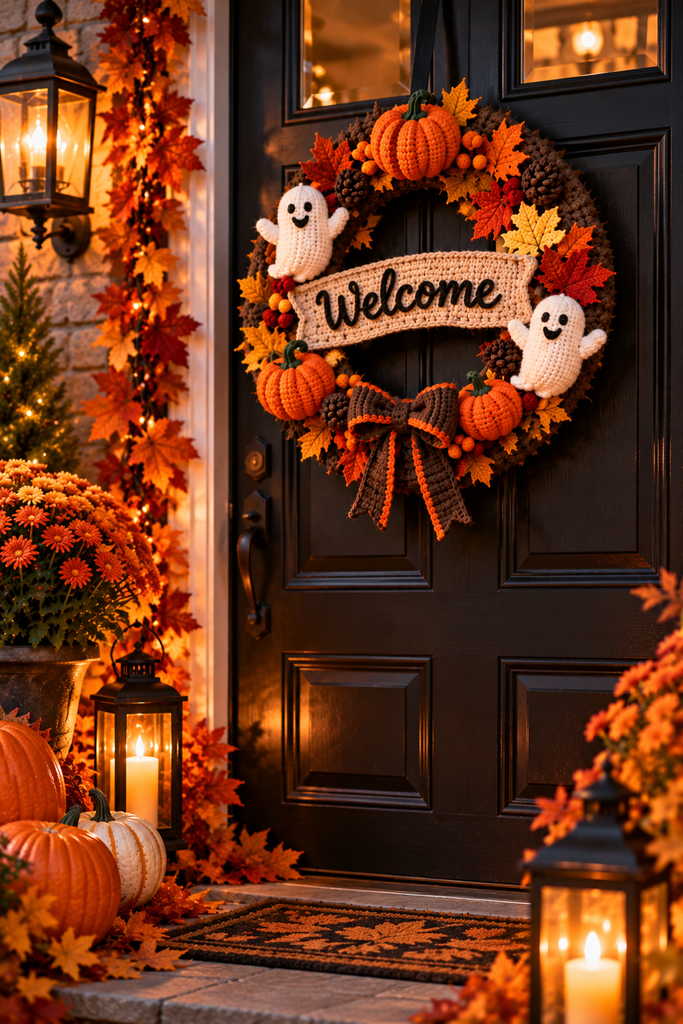
Final Thoughts
A pumpkin and ghost welcome wreath for Halloween is a joyful way to decorate your door. It is cute rather than creepy, easy to personalize, and a perfect use for leftover yarn. With a wrapped base, a handful of pumpkins and ghosts, a few leaves, and a ribbon, you can make something that guests will notice and remember.
Plan your layout, pick your colors, and start with one small pumpkin. By the time the autumn leaves are falling, you will have a handmade welcome ready for trick-or-treaters and neighbors alike.
Want to complete your Halloween set? Make the matching crochet jack-o’-lantern pumpkin bag to hold the candy while your new wreath greets guests at the door.

Did you make your own pumpkin and ghost wreath, or do you have a favorite twist? Share it in the comments, and save this idea to your Halloween crochet board so you can find it again next season. Happy crocheting and happy Halloween!