Introduction
Why This Tiny Chocolate Basket Is So Addictive
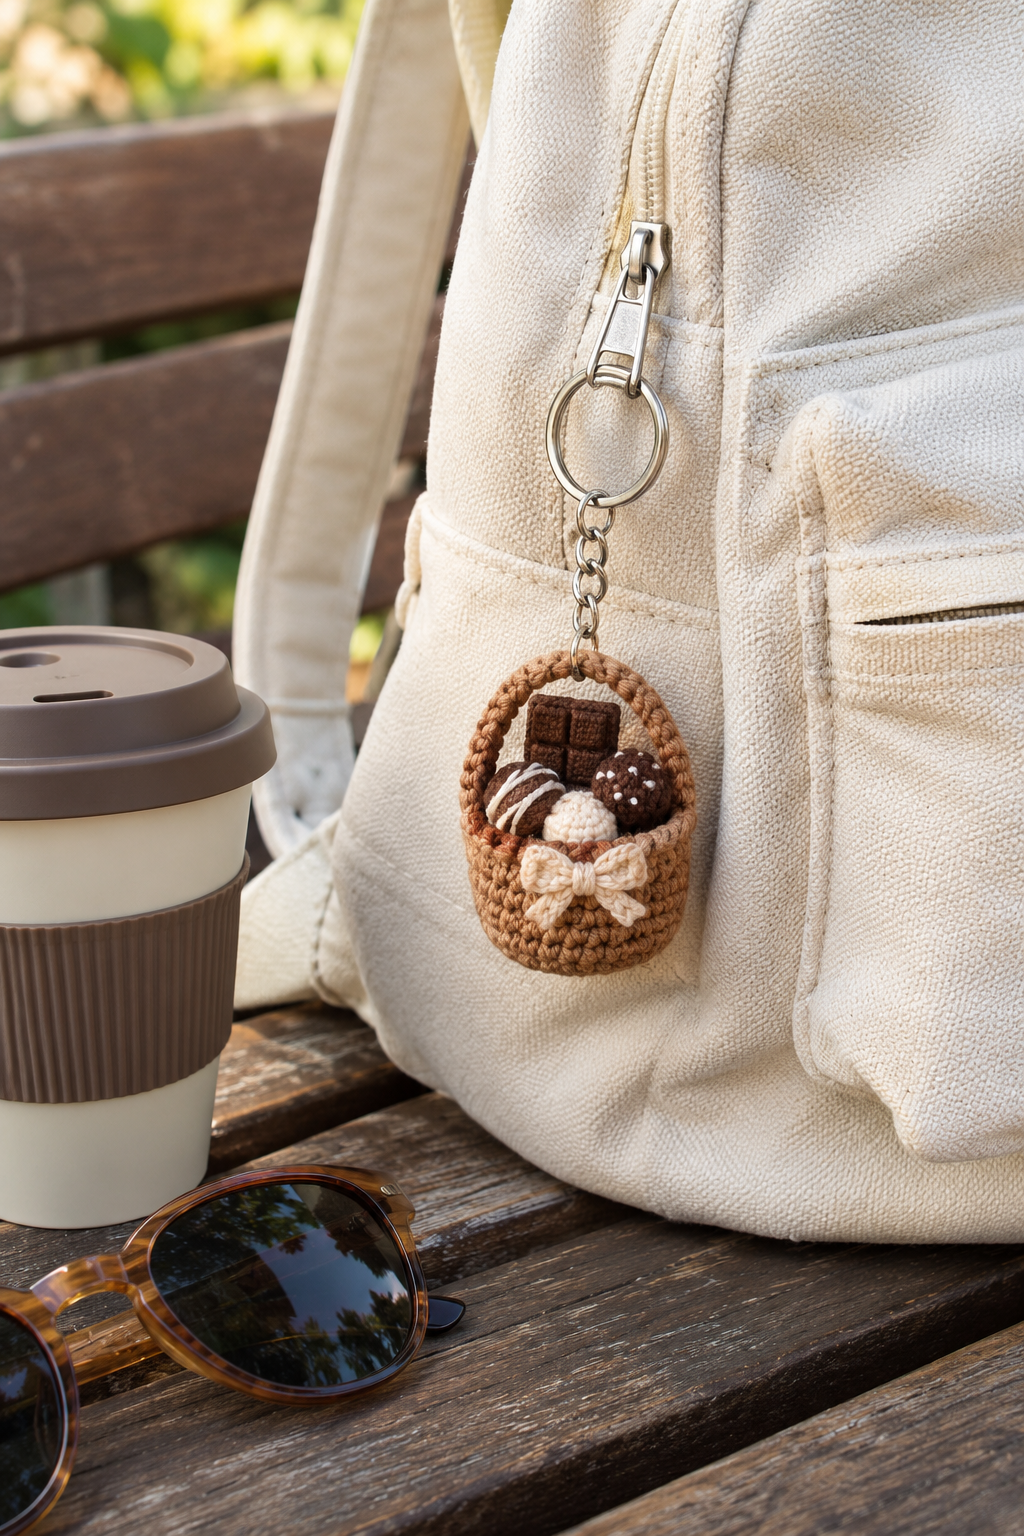
If you have ever wished you could carry a little box of sweets on your handbag that never melts, never runs out and never adds a single calorie, this DIY crochet chocolate basket bag charm is for you. It is a miniature woven-look basket filled with soft crocheted chocolates: a square bar, a round truffle and a foil-wrapped kiss. It is small enough to finish in one relaxed afternoon, cute enough to sell at a craft fair, and simple enough for a confident beginner.
In this guide you will get a complete free pattern, exact yarn and hook suggestions, stitch counts for every round, finishing tips, troubleshooting advice, gift and selling ideas, and care instructions. Every step is written in US crochet terms and kept as plain as possible, so you can follow along even if you have only made a handful of amigurumi before.
What you will learn in this article:
- What a crochet bag charm is and why this design works so well
- Materials and tools you need (with budget alternatives)
- Abbreviations and skill level
- The full pattern: basket, handle, three chocolates and assembly
- Pro tips for clean stitches, color choices and sturdy finishing
- Safety, care and selling advice
- Frequently asked questions
What Is a Crochet Bag Charm?
A bag charm is a small decorative accessory that hangs from the zipper pull, strap or handle of a purse, backpack or tote. Crochet versions have become hugely popular because they are handmade, customizable and affordable. Unlike a full keychain, a bag charm is usually lighter and more decorative, so you can use softer cotton yarn and delicate details without worrying about it being thrown around in a pocket full of keys.
The chocolate basket theme is especially fun because it combines two trending ideas: miniature food crochet and the cozy “gift basket” look. It also photographs beautifully, which matters if you plan to share your work on Pinterest, Instagram or a blog.
Why this design works
- Fast project: Most makers finish it in 2 to 3 hours.
- Low yarn use: You only need small scraps, so it is perfect for stash busting.
- Customizable: Change the basket color, chocolate flavors and ribbon to match any season or bag.
- Giftable: It is a lovely handmade present for birthdays, Valentine’s Day, teacher gifts, Mother’s Day and holidays.
- Beginner-friendly: It uses only basic stitches plus one post stitch technique that is explained below.
Skill Level and Finished Size
- Skill level: Easy to advanced beginner
- Finished size: About 2 inches (5 cm) wide and 1.75 inches (4.5 cm) tall for the basket, plus about 2.5 inches (6 cm) for the handle and hardware
- Time to complete: 2 to 3 hours
Your size will change slightly depending on yarn thickness, your hook size and your tension, so always treat the measurements as a guide.
Materials and Tools
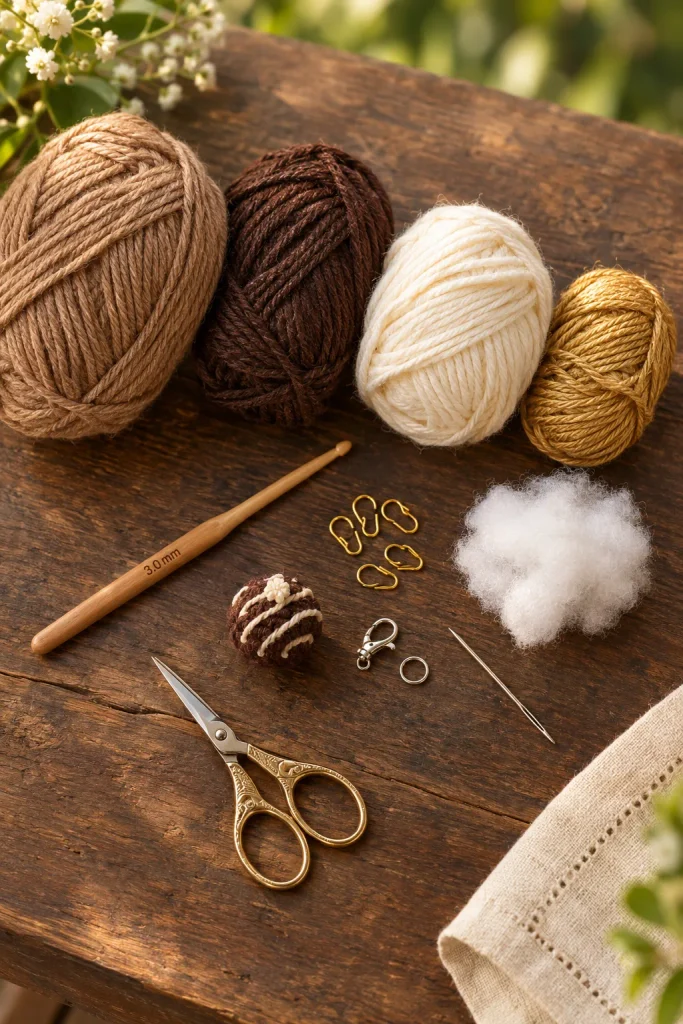
Yarn
For a bag charm, 100% cotton yarn is the best choice. It holds its shape, shows stitch definition clearly and feels sturdy. Mercerized cotton gives a slight shine that looks great for the foil-wrapped chocolate.
- Basket color: Light brown, tan or cream cotton yarn in DK or light worsted weight (about 10 to 15 yards)
- Chocolate color: Dark brown cotton yarn (about 10 yards)
- Foil wrapper color: Gold, silver or metallic pink yarn (about 5 yards)
- Optional accent: Red or pink yarn for a heart tag or ribbon (about 1 yard)
Hook
Use a 2.5 mm to 3.0 mm crochet hook. Going down one or two hook sizes from what the yarn label recommends gives tight stitches, which keeps the stuffing from showing through.
Notions
- Polyester fiberfill stuffing
- Tapestry (yarn) needle
- Stitch marker or a scrap of contrasting yarn
- Scissors
- Small jump ring and lobster clasp (or a keychain ring) for hanging
- Optional: ribbon, a tiny bead, black embroidery thread for a little face on the truffle
- Optional: a small piece of cardstock or plastic canvas cut to the basket’s base for extra stability
Budget tip
You do not need to buy brand-new yarn. Leftover cotton from dishcloths or amigurumi works perfectly, and a single jump ring set from a craft store will cover dozens of charms.
Abbreviations (US Terms)
- MR: magic ring
- ch: chain
- sl st: slip stitch
- sc: single crochet
- inc: two single crochet in the same stitch
- dec: single crochet decrease (invisible decrease recommended)
- FPdc: front post double crochet (work around the post of the stitch in the round below, from front to back to front)
- BLO: back loop only
- st(s): stitch(es)
- ( ): the number at the end of a round shows your total stitch count
Gauge: Gauge is not critical for a decorative charm, but aim for tight, firm stitches with no gaps.
The Pattern, Part 1: Woven-Look Basket
Work in continuous spirals (do not join) unless the pattern says otherwise. Place a stitch marker in the first stitch of every round and move it up as you go.
Base
- Round 1: MR, 6 sc in the ring. (6)
- Round 2: inc in each stitch around. (12)
- Round 3: sc in the next st, inc repeat 6 times. (18)
- Round 4: sc in the next 2 sts, inc repeat 6 times. (24)
Create the Base Edge
- Round 5: BLO, sc in each st around. (24)
Working in the back loops creates a neat ridge that defines the bottom corner of the basket. If you chose to add a cardstock or plastic canvas base, slip it inside now and let it rest on the flat circle.
Woven Wall
This section creates the basketweave look using front post double crochet stitches. Take your time with the first two rounds, because once you see the pattern appear, the rest becomes automatic.
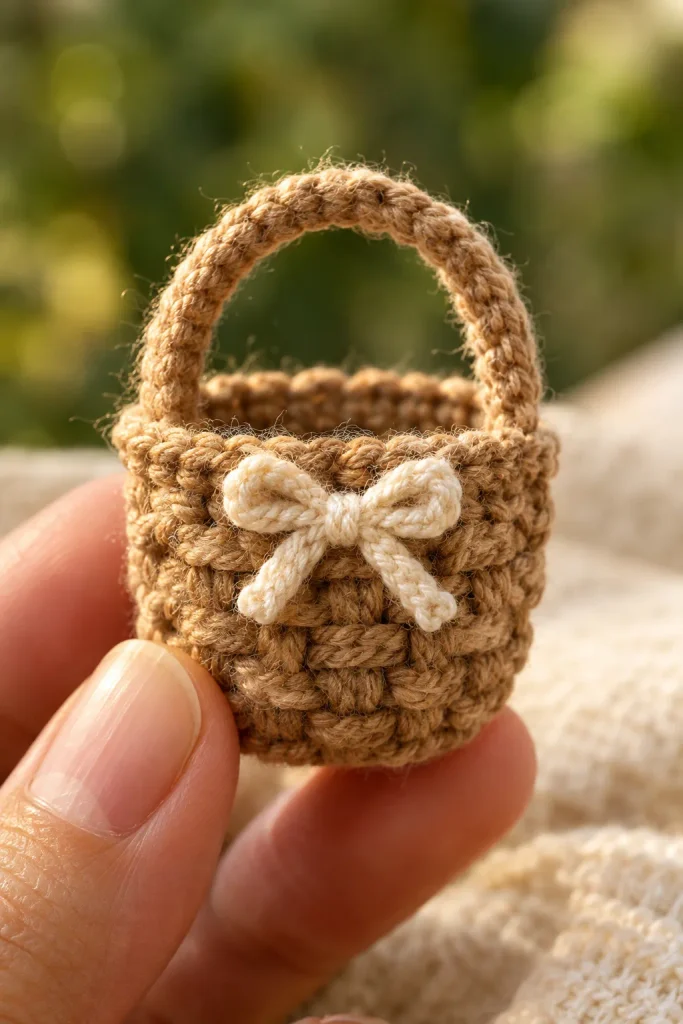
- Rounds 6 to 8: sc in the next 3 sts, FPdc around the post of the corresponding st two rounds below in the next 3 sts repeat 4 times. (24)
- Rounds 9 to 11: FPdc in the next 3 sts, sc in the next 3 sts repeat 4 times. (24)
Shifting the block order halfway up is what produces the checkerboard woven effect. If your posts look uneven, do not worry: slightly irregular texture looks natural on a woven basket.
Tip: To keep the FPdc stitches from sinking, pull your working yarn up a bit and make sure the hook goes around the full post, not just the top loops.
Rim
- Round 12: sc in each st around. (24)
- Round 13: sl st in each st around. (24)
Fasten off and leave the yarn tail on the inside, then weave it in carefully.
The Pattern, Part 2: Basket Handle
The handle is worked in rows so it stays flat and sturdy.
- Join your basket yarn to the rim at one side with a sl st.
- Chain 18.
- Skip 4 stitches along the rim on the opposite side and sl st into the 5th stitch to form an arch. (You can adjust the handle length by chaining more or fewer stitches.)
- Turn and sc into each chain across the arch (18 sc), then sl st into the rim to secure.
- Fasten off and weave in the end.
Optional strengthening: Work a second round of sc over the first so the handle has two layers. This helps it hold up when you add the jump ring and wear the charm on a bag.
The Pattern, Part 3: The Chocolates
These three little treats are what make the charm special. Make one of each, or make several for a fuller basket.
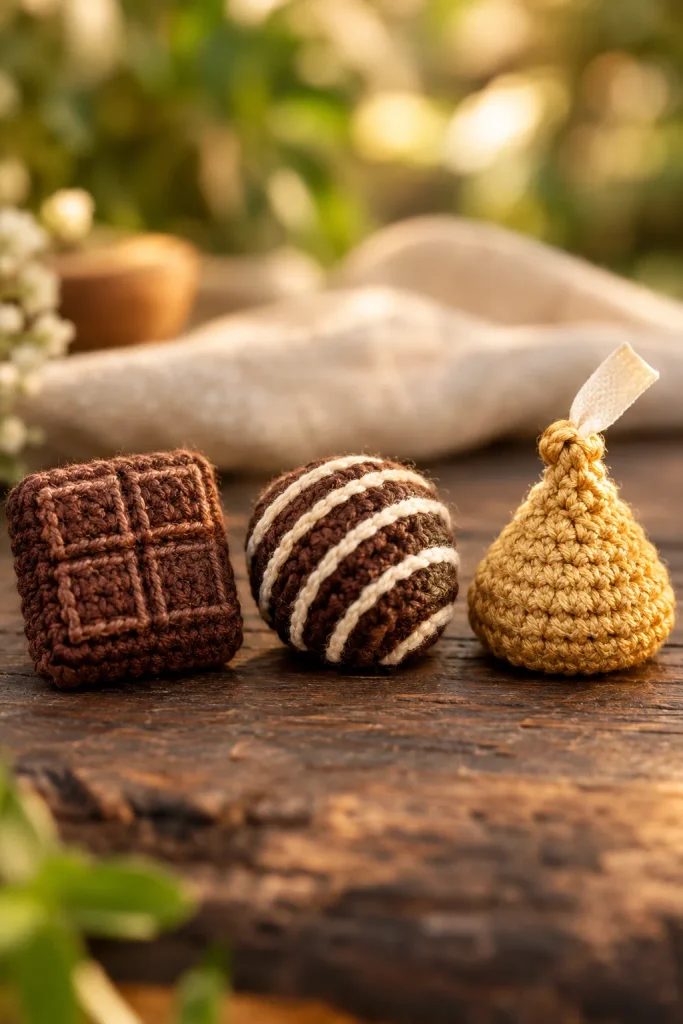
A. Square Chocolate Bar
Use dark brown yarn.
- Chain 6.
- Row 1: sc in the 2nd chain from the hook and in each chain across. (5)
- Rows 2 to 5: ch 1, turn, sc in each st across. (5)
- Border: Without turning, sc evenly around the entire square, working 3 sc in each corner. Join with a sl st and fasten off.
- Make a second square exactly the same.
- Hold both squares together and whipstitch three sides, add a pinch of stuffing, then close the final side.
- With a lighter brown or gold thread, embroider a simple grid of four small squares on the front to mimic a chocolate bar.
B. Round Truffle
Use dark brown yarn.
- Round 1: MR, 6 sc. (6)
- Round 2: inc in each st around. (12)
- Round 3: sc in the next st, inc repeat 6 times. (18)
- Rounds 4 to 6: sc in each st around. (18)
- Round 7: sc in the next st, dec repeat 6 times. (12)
- Stuff firmly.
- Round 8: dec around. (6)
Fasten off and close the hole with the tapestry needle. For a “cocoa dusted” look, add a few tiny French knots in a lighter brown, or gently brush the surface with a pinch of light brown yarn fuzz.
C. Foil-Wrapped Chocolate Kiss
Use gold or silver yarn for the wrapper.
- Round 1: MR, 6 sc. (6)
- Round 2: inc in each st around. (12)
- Rounds 3 and 4: sc in each st around. (12)
- Round 5: sc in the next 2 sts, dec repeat 3 times. (9)
- Stuff lightly.
- Round 6: sc in the next st, dec repeat 3 times. (6)
- Round 7: sc in each st around. (6)
- Tip: chain 4, sc back down the chain, fasten off. This forms the little paper tag that sticks out of the top of a classic foil kiss.
Fasten off and weave in your ends.
The Pattern, Part 4: Assembly and Finishing
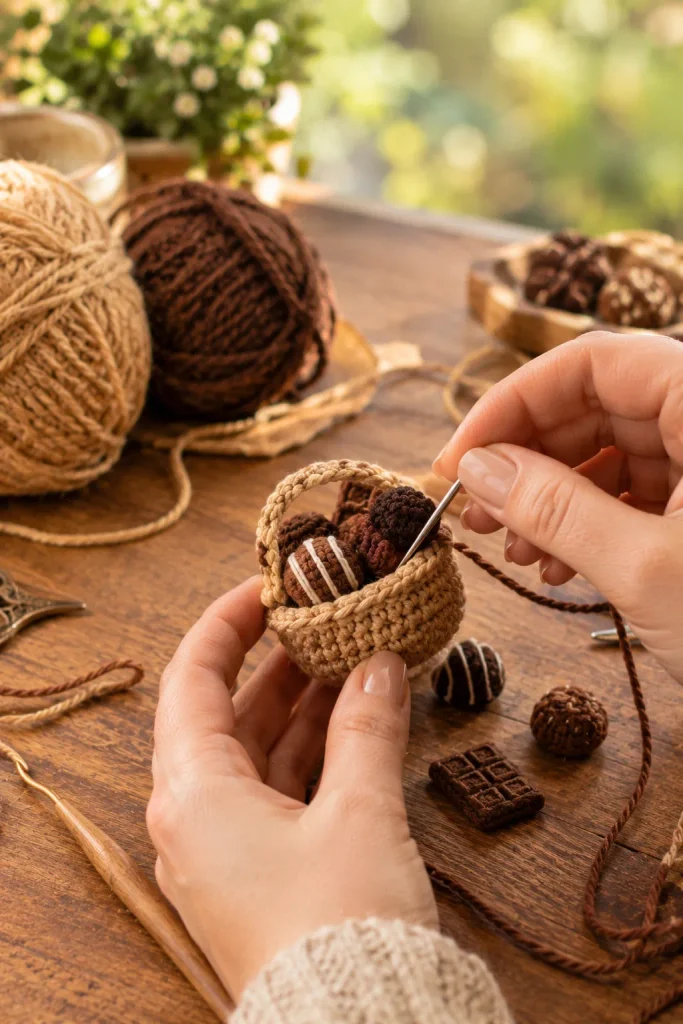
- Stuff the basket lightly. Only add enough stuffing to give the chocolates something to sit on. A small wad is plenty.
- Arrange your chocolates. Place the square bar leaning against the back wall, the truffle at the front and the foil kiss peeking out at an angle.
- Stitch each chocolate to the inside of the basket using a few secure stitches through the rim. Sewing them in place is much better than gluing, because glue can show through cotton and make the charm stiff.
- Add a ribbon bow around the base of the handle. Use a thin satin ribbon or a strand of coordinating yarn.
- Attach the hardware. Thread a jump ring through the top center of the handle, then add a lobster clasp. Close the jump ring securely with pliers.
- Final check: Gently tug each chocolate and the handle to make sure everything is secure.
Pro Tips for a Professional Finish
1. Choose the right yarn weight
Thin yarn creates a more delicate charm, while thicker yarn makes a chunkier, squishier version. If you want a bigger basket, simply increase your hook size by 0.5 mm or use worsted weight yarn. If you want to scale the pattern up significantly, add two more increase rounds in the base (24 to 30 to 36 stitches) and adjust the wall repeats to match.
2. Keep tension tight
Crochet with a hook one or two sizes smaller than recommended. Tight stitches create a firmer fabric that holds its shape and hides stuffing.
3. Use an invisible decrease
Insert your hook into the front loops of the next two stitches and pull a loop through both. It leaves a smoother surface than a standard decrease, which matters on a round truffle.
4. Block the basket
A gentle steam or a quick spritz of water shaped over a small jar helps the woven texture settle. Let it dry fully before assembly.
5. Add personality
A tiny pair of black bead eyes and a pink blush stitch turn the truffle into a kawaii chocolate. This is a great option for adults and older children, but remember the safety notes below before making it for small kids.
6. Photograph with good light
If you plan to share your finished charm online, shoot it near a window with soft natural light and a plain, neutral background. Pinterest favors bright, vertical, clearly lit images with the finished project front and center.
Color Palette Ideas
- Classic Cocoa: Tan basket, dark brown chocolates, gold foil
- Valentine’s Day: Pink basket, red heart accent, white truffle with pink swirls
- Spring Pastels: Mint basket, lavender truffle, cream kiss
- Holiday Edition: Cream basket, deep red ribbon, silver foil, tiny green leaf accents
- Mocha and Milk: Alternate milk chocolate brown and cream for a two-tone effect
Troubleshooting Common Problems
My basket is curling inward. Your stitches may be too tight at the base, or you may have skipped the BLO round. Make sure round 5 is worked in the back loops only and that round 4 has exactly 24 stitches.
The post stitches look messy. Make sure you are working around the post of the correct stitch two rounds below. Place your marker, count each block of three, and keep the working yarn at the front of the work while you make the FPdc stitches.
The chocolate has gaps showing the stuffing. Use a smaller hook, stuff in tiny amounts and try darker stuffing or a lining of brown felt inside, so any gap blends in.
The handle droops. Add the second layer of single crochet and consider a thin craft wire hidden inside the handle for structure.
The charm is too heavy for the zipper. Switch to a lighter yarn, skip the cardstock base or use a smaller lobster clasp.
Safety, Quality and Care Notes
Bag charms are decorative items, not toys. If you are making this for a child under 3, skip small beads, bead eyes and hardware, and instead embroider any details with thread. Stitch every piece securely to avoid detachable parts.
To clean your finished charm, spot clean with a damp cloth and a drop of mild soap, then air dry. Avoid soaking, because stuffing takes a long time to dry and can trap moisture. Store it away from direct sunlight to avoid fading, especially for dark brown and pink yarns.
If you sell finished charms, check your local regulations for handmade goods, label the fiber content (for example, “100% cotton”) and include a care tag. These small touches build trust with customers and show professionalism.
Gift and Selling Ideas
- Packaging: Place the charm in a small kraft box with a handwritten tag and a real wrapped chocolate for a sweet surprise.
- Bundles: Sell sets of three charms in different color palettes.
- Seasonal drops: Offer Valentine’s, Easter and holiday editions.
- Custom orders: Let customers choose the ribbon and basket colors.
- Photography: Show the charm on an actual bag so buyers can judge the scale.
If you share the pattern on your own website, always credit your sources, add your own photos and write original instructions. Most designers allow finished items to be sold but ask that you credit the pattern designer and do not copy the pattern text, so check each designer’s terms.
Frequently Asked Questions
How long does it take to crochet a chocolate basket bag charm?
Most crocheters finish it in two to three hours, including stuffing and assembly. Beginners may need a little longer for the post stitches and the magic ring.
What is the best yarn for a crochet bag charm?
Mercerized or regular 100% cotton yarn in DK or light worsted weight is ideal. It is durable, easy to clean and shows stitch details well. Acrylic works too, but it can look fuzzier and less crisp.
Can I make this charm without a magic ring?
Yes. Chain 2 and work 6 sc into the second chain from the hook, or chain 3, join with a sl st and work 6 sc into the ring. The magic ring gives the tidiest center, but the alternatives work fine.
What size hook should I use?
A 2.5 mm to 3.0 mm hook works best for DK or light worsted cotton. Use a smaller hook if your stuffing is showing through.
How do I attach the charm to a bag?
Fasten a jump ring to the top of the handle, add a lobster clasp and clip it to the zipper pull, strap or D-ring. For heavier versions, use a sturdier clasp.
Can I sell charms made from this pattern?
If you are using a pattern from another designer, always read their terms first. If you create your own variation, you can usually sell finished items, but credit the designer when required and never resell or republish the pattern text.
Is this charm safe for kids?
It is a decorative item and not a toy. For young children, skip hardware and beads, embroider all details and supervise play.
How can I make the basket larger?
Use a thicker yarn and bigger hook, or add extra increase rounds to the base and extra wall rounds above the post stitch section.
How do I keep my chocolates from falling out of the basket?
Stitch them to the inside rim and basket wall with a few firm stitches rather than just placing them in the basket.
Final Thoughts
This DIY crochet chocolate basket bag charm is the kind of project that makes people smile the moment they see it. It teaches useful skills, including magic rings, increases, decreases and post stitches, while giving you a gift-worthy accessory in a single afternoon. Once you have mastered the basic version, experiment with new flavors, colors and seasonal variations, and make a whole collection.
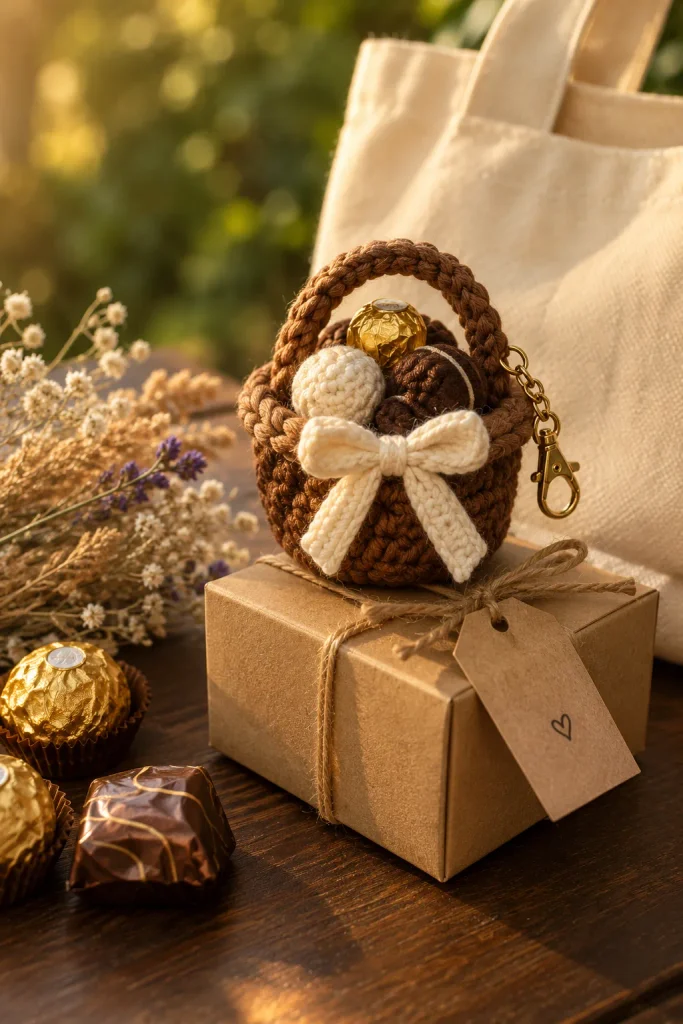
If you try this pattern, leave a comment below with your color choices and any questions. Share a photo of your finished charm, and save this guide to Pinterest so you can come back to it whenever you want to crochet something sweet.
Happy crocheting!