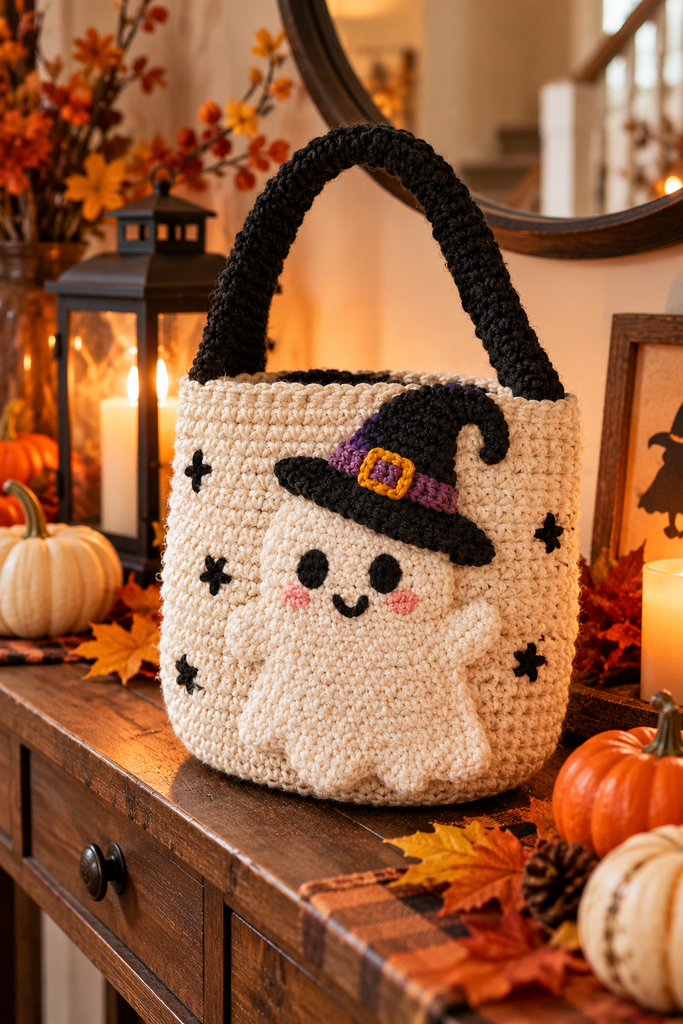
Some Halloween projects try very hard to be scary. This one doesn’t. A cute spooky ghost and witch hat crochet bag sits in that sweet middle spot where the thing is a little eerie, a little silly, and impossible not to smile at. Picture a soft white ghost with a wavy hem, two sleepy black eyes, and a tiny pointed witch hat tipped slightly to one side. Now picture it swinging from a kid’s arm on the way to the neighbor’s porch. That’s the whole idea.
If you’ve been scrolling through Halloween crochet ideas and nothing has grabbed you yet, stick around. We’ll go through what the bag looks like, which yarn and hook actually make sense, how to shape the body so it stands up, how to build the witch hat, and how to give your ghost a personality. There are also styling ideas, a list of mistakes that are easy to dodge, and a short FAQ at the end..
By the way, if you like making seasonal bags, you might enjoy our jack-o’-lantern pumpkin bag crochet idea. It uses a similar rounded shape, so the skills carry over nicely.
Why This Bag Is Worth Making
Let’s be honest: there are a lot of Halloween makes out there. Here’s why the ghost-and-witch-hat bag keeps earning a spot on people’s lists.
It’s actually useful. A lot of holiday crochet ends up on a shelf. This one goes outside, collects candy, gets dropped on the driveway, and comes back the next year. A dense crochet fabric is tough, and a bag that’s a little bulky can take a lot of chocolate.
It’s two characters in one. You get the friendly ghost and the witch hat at the same time. The hat is the detail that makes people say “oh, that’s clever,” and it’s much easier to make than it looks.
It works for any skill level above brand new. If you can work in the round, increase, decrease, and sew on a few small pieces, you can make this. Nothing here needs fancy stitches.
It makes a great gift. Fill it with treats, add a little tag, and you’ve got something a kid will remember. Teachers, nieces, and neighbors tend to love them.
It sells well, too. If you run a shop or sell at fall fairs, a ghost bag with a hat is the kind of thing buyers pick up and carry around the booth. It photographs well, and the colors are simple.
What the Finished Bag Looks Like
Before you start, it helps to have a clear picture in your head, so let’s describe the design we’re aiming for.
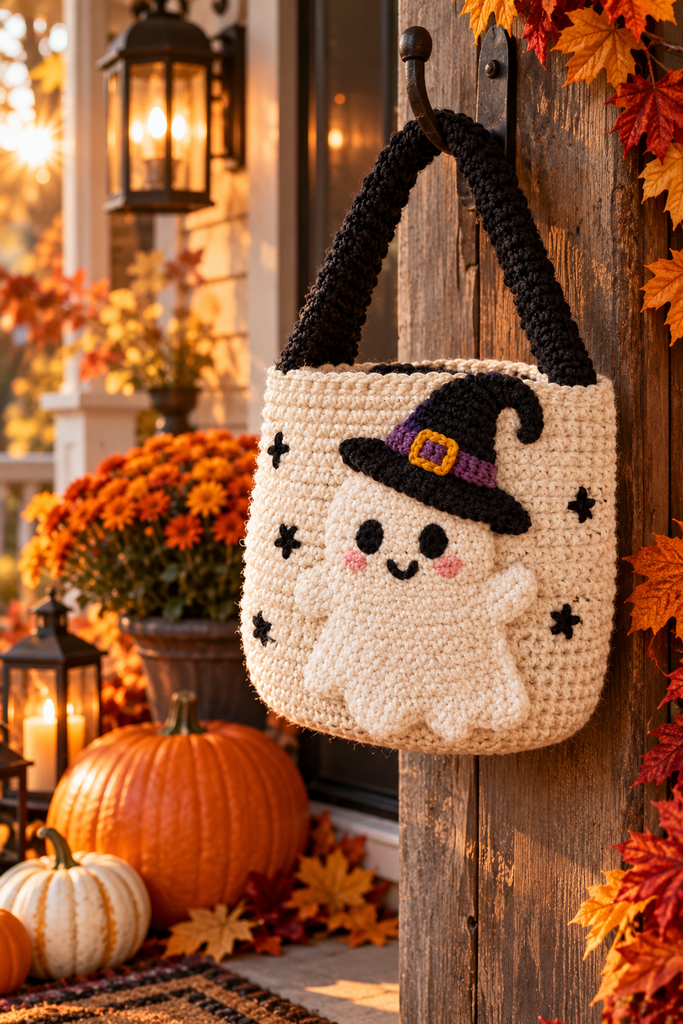
The body is a rounded, slightly tall shape, a bit like a bell or a teardrop with a flat bottom so it can stand on a table. It’s made in white or soft off-white yarn. At the bottom edge, the hem is scalloped or wavy, so the bag looks like a ghost floating just above the floor.
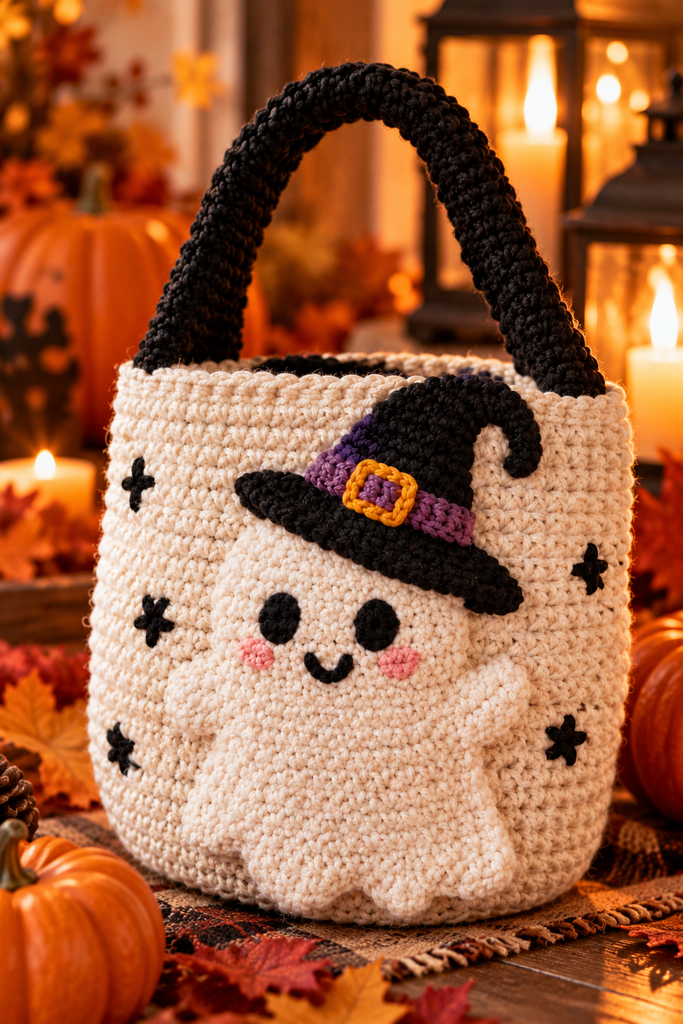
The face is simple. Two black ovals for eyes, maybe a small round mouth, and optionally a pair of pink cheeks. Keep the features small and set a bit low on the body; that’s what gives a ghost its sweet, sleepy look.
The witch hat sits on top, off to one side. It’s a cone with a wide brim, in black or deep purple, with a band in orange or a contrasting color. A little buckle or bow adds charm. Since the bag has an opening to hold candy, the hat can be attached at the back of the rim so it never blocks the top.
The handle is long and sturdy, either in white to match the body or in black for contrast.
Materials: What You’ll Need
Here’s a practical list. You can swap things depending on what’s in your stash.
Yarn
- White or cream for the ghost body and (optionally) the handle. Choose a smooth yarn so the stitches look clean.
- Black for the face, the hat, and sometimes the handle.
- Orange or purple for the hat band and tiny accents.
- Pink for cheeks (optional).
Worsted weight is the easiest to find and the easiest to work with. Cotton gives the bag a firm structure that holds its shape. Acrylic is softer and cheaper, but it can stretch when the bag is full. If you go with acrylic, use a smaller hook to keep the fabric tight.
Hook
Go down one or two sizes from what the yarn label suggests. If the label says 5 mm, try 4 mm. A tight fabric is what keeps a candy bag from sagging.
Other supplies
- Stitch markers
- Yarn needle
- Scissors
- Polyester stuffing for the hat tip and the handle
- A little stiff interfacing, plastic canvas, or cardstock to help the hat brim stay flat (optional)
- Fabric for a lining (optional but recommended)
- Black embroidery thread or yarn for the face
Skip plastic safety eyes. Embroidered eyes look sweeter on a ghost anyway, and they’re safer if small kids will carry the bag.
Picking a Stitch That Holds Up
The stitch you choose changes how the bag feels, so it’s worth a minute of thought.
- Single crochet is the simplest and gives a dense, sturdy fabric. It’s a safe pick if you’ve never made a bag.
- Half double crochet works up faster and has a soft texture, but you’ll need a smaller hook to keep it tight.
- Moss (linen) stitch looks woven and is great for bags. It’s a little slower, but the result is firm and attractive.
- Waistcoat stitch gives a smooth, knit-like surface that suits a ghost beautifully.
Whichever you choose, make a swatch first. Hold it up to the light. If you can see through the stitches, go down a hook size.
Shaping the Ghost Body
This is the part that decides whether your bag looks like a ghost or like a lumpy white sack. Take your time here.
Start with the base
Begin with a magic ring or a short chain and work in the round, increasing evenly until you have a flat circle. That circle is the bottom of the bag. Aim for a diameter you can comfortably hold in two hands for a child’s bag. If you want a bigger bag, keep going.
Build the sides
Once the base is the right size, stop increasing and work straight rounds. Place a marker at the start of each round. Add a few gentle increases partway up to round out the shoulders, then decrease a little toward the opening. This gives the body that soft bell shape.
A tip many people learn the hard way: don’t decrease too much. The opening of a candy bag needs to be wide enough for a hand. If it’s too small, kids will get frustrated.
Create the wavy hem
The ghost’s hem is what makes it look like it’s floating. There are two easy ways to do it.
- Scallops worked into the base edge. After the base, work a round of shells or small scallops around the outside before you start the body.
- Sewn-on frill. Crochet a separate strip with a wavy edge and stitch it around the bottom.
The first method is neater and holds up better. The second lets you use a different yarn.
Finish the rim
Work a round or two of single crochet or slip stitch around the opening so the edge is firm. A neat rim also gives you a solid place to attach the handle.
Making the Handle
A ghost bag with a weak handle is a sad thing. Candy is heavy. Here are three reliable ways to build one.
- Flat strap. Chain the length you want, then work several rows of single crochet. Fold it in half lengthwise and sew the edges together to make a firm tube.
- Spiral tube. Work a small circle and continue in the round for the full length, stuffing lightly as you go.
- Double-thickness strip. Make two identical strips and stitch them together.
Sew the handle to the inside of the rim, not just the outer edge. Go through it several times and add a small patch of extra stitches where the handle meets the body. This is the point that takes the most stress, so don’t rush it.
Length matters, too. For a little kid, a shorter handle keeps the bag off the ground. For a bag meant to hang from a door handle, go longer.
Adding the Ghost’s Face
This is where your ghost gets its personality, and it takes about ten minutes. Pin everything in place before you sew, and stand back to check it from a distance.
Some face ideas to try:
- Sleepy: two small ovals, slightly slanted, with a tiny round mouth.
- Surprised: large round eyes and a larger “O” mouth.
- Happy: two dots for eyes and a gentle curved smile.
- Shy: eyes looking to the side, with pink cheeks.
Embroider the face with black yarn or thread using satin stitches for the eyes. For a more raised look, crochet tiny ovals and sew them on instead. Place the face a little below the center of the body. Low faces look younger and cuter, and high faces look more serious.
Pink cheeks are an optional extra, but they add a lot of warmth for very little work.
Building the Witch Hat
The hat is the star of the show. It’s really just two parts: a cone and a brim.
The cone
Start with a small magic ring and work in the round with slow, steady increases, so the cone grows wider toward the bottom. Stuff lightly as you go so it keeps a pointy shape. If you want the tip to bend over in that classic witchy droop, add a bit less stuffing near the top, or use a short piece of wire and bend it gently.
The brim
Work a flat circle that’s large enough to look like a real brim, then stiffen it. A circle of plastic canvas or interfacing tucked between two crocheted layers makes it hold its shape. If you prefer no extra materials, work the brim in a tight stitch with a smaller hook.
Join and decorate
Sew the cone to the center of the brim. Then add a band around the base in orange, purple, or any accent color. A small buckle shape, crocheted in a few rows, or a little bow, makes it look finished.
A detail that’s easy to miss: slightly tilt the hat when you sew it to the bag. A hat that sits perfectly straight looks stiff, while a tipped one looks like it’s having fun.
Attach it to the bag
Sew the hat to the back of the rim or on one side near the handle, so it doesn’t block the opening. Use strong stitches and go around the hat base several times. If the bag is for a very young child, secure the hat firmly or skip the buckle and bow.
Extra Details That Make It Pop
Once the main parts are done, little extras can take the bag from nice to memorable.
- A mini bat or spider hanging from the handle on a short yarn string.
- Tiny stars or moons sewn on the hat.
- A stitched name or initial on the back, so kids know which bag is theirs.
- Glow-in-the-dark yarn for the eyes, so the ghost shines after sunset.
- A lining in orange or black fabric, which is a nice surprise when someone peeks inside.
- A button closure at the top if you want the bag to stay closed.
Don’t add all of them at once. Pick two or three and let the rest go. A crowded design loses the simple charm that makes it cute.
Ways to Use and Style Your Ghost Bag
For trick-or-treating
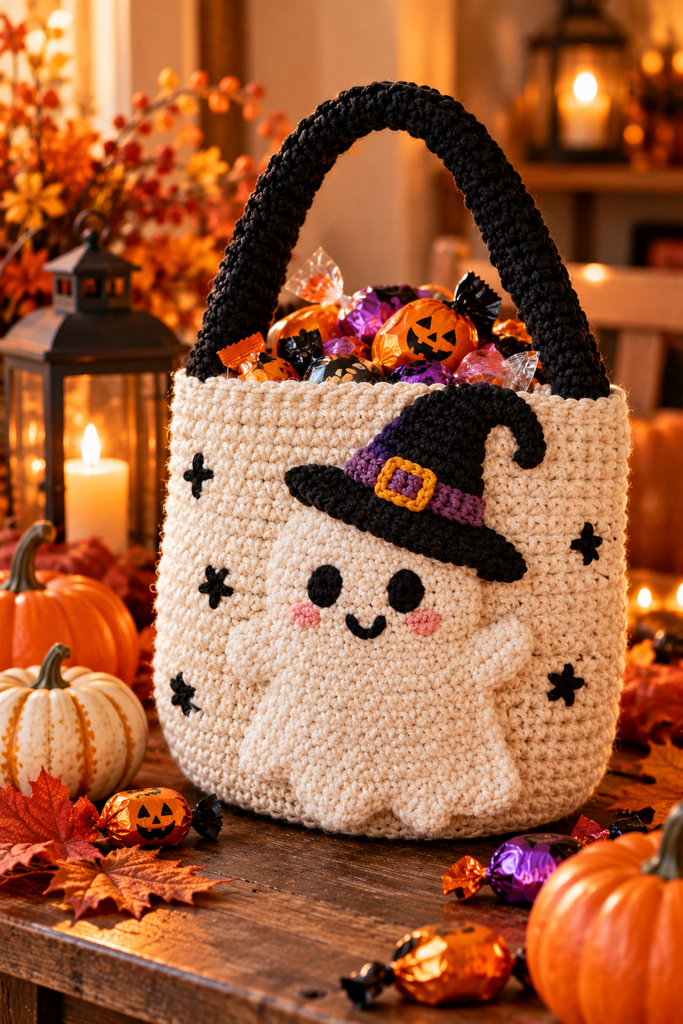
This is the classic use. The bag is soft, light enough to carry, and big enough to hold a good haul. If your child likes to hold the bag in one hand and a flashlight in the other, make the handle a bit longer so it can go over the arm.
As porch decor
Set the ghost on a stone step or a small table with a few pumpkins, and it welcomes visitors. Fill it with wrapped candy for guests. It looks lovely next to the pumpkin and ghost welcome wreath from our earlier guide, so if you want a matching door set, make both.
For a party
Use it as a candy station or a favor holder. A few ghost bags in different sizes, lined up on a table, look fantastic in photos.
As a gift
Fill with treats and tie a ribbon around the handle. For classmates or coworkers, make mini versions.
For photos
If you blog or sell, shoot the bag in warm, soft light. Autumn leaves, small pumpkins, and a wooden surface make a simple backdrop. Take a couple of close-ups of the face and the hat.
Tips for a Neat, Professional Finish
- Check your gauge with a swatch. It saves a lot of frogging.
- Use stitch markers every round. Without them, a round project drifts.
- Keep your tension steady. White yarn shows every uneven stitch.
- Wash your hands before you start. White and cream pick up dirt faster than any other color.
- Block the hat brim. A light steam press can flatten it nicely.
- Weave in ends carefully. Tails can pop out of a bag that gets handled a lot.
- Test the handle by loading the bag with candy before gifting.
- Line it if you can. A fabric lining stops small candies from slipping through the stitches.
Mistakes Worth Avoiding
- Using a hook that’s too large. The fabric turns floppy and gappy.
- Choosing a fuzzy white yarn. It hides the shaping and the face details.
- Placing the face too high. The ghost ends up looking more like a mask.
- Making the hat too big. It will tip the bag over or slide off.
- Sewing the handle only to the outside. It will tear away under weight.
- Skipping the stuffing in the hat. It collapses and looks sad.
- Forgetting about the base. A very small base makes the bag tip. Keep it wide enough to stand.
Easy Variations
When you’ve made one, you’ll probably want to try a few twists.
- Pastel ghost in pale lavender or mint with a cream hat.
- Black cat version, same shape but in black with ears and whiskers.
- Boy ghost with a top hat, in place of the witch hat.
- Mini ghost pouch for small treats or coins.
- Two-tone ghost with a gray gradient at the bottom for a misty look.
- Reversible bag, white on one side and orange on the other.
- Seasonal swap, a Santa hat on the ghost for a funny winter version.
Care and Safety
A bag meant for kids needs a bit of extra thought.
- Secure every attached piece. Hats, bows, and buckles shouldn’t come off in small hands.
- Choose embroidered features over plastic parts for young children.
- Wash gently. Use cool water and a mild soap, press out the water, and dry flat.
- Keep away from candles and heat. Use flameless lights in your display.
- Store with tissue inside to keep the shape through the year.
Frequently Asked Questions
How long does it take to make this bag?
Most people finish it in a few evenings. The body takes the longest. The hat and the face are quick by comparison.
Is it a good project for beginners?
It’s friendly if you already know how to work in the round and shape with increases and decreases. The pieces are simple, and mistakes are easy to hide.
What yarn should I use?
A smooth worsted weight cotton or cotton blend gives the best structure. Acrylic works too if you use a smaller hook.
How do I stop the white yarn from looking dirty?
Keep your hands clean, store the project in a bag while you work, and choose a yarn that’s machine washable.
Can I make it bigger or smaller?
Yes. Add more rounds to the base and body for a bigger bag, or use thinner yarn and a small hook for a mini version.
Can I wash it?
Yes. Hand wash in cool water, reshape, and lay it flat. Avoid hot water and the dryer.
Can I sell the finished bags?
If you’re using your own design, yes. If you use someone else’s pattern, check their terms first. Price your bags to reflect the time and materials.
Final Thoughts
A cute spooky ghost and witch hat crochet bag is one of those projects that’s more fun than it has any right to be. The shapes are easy, the colors are simple, and the little hat does most of the heavy lifting in the charm department. Whether you make one for your own trick-or-treater, a gift, or a shop, it’s a bag people will actually enjoy using.
Pick your yarn, shape the ghost, tilt that tiny hat, and get ready for Halloween. And if you want to build a whole set, take a look at our pumpkin bag and welcome wreath guides.
Have you made your own ghost bag? Tell us how it went in the comments, and save this idea to your Halloween crochet board for next year. Happy crocheting!