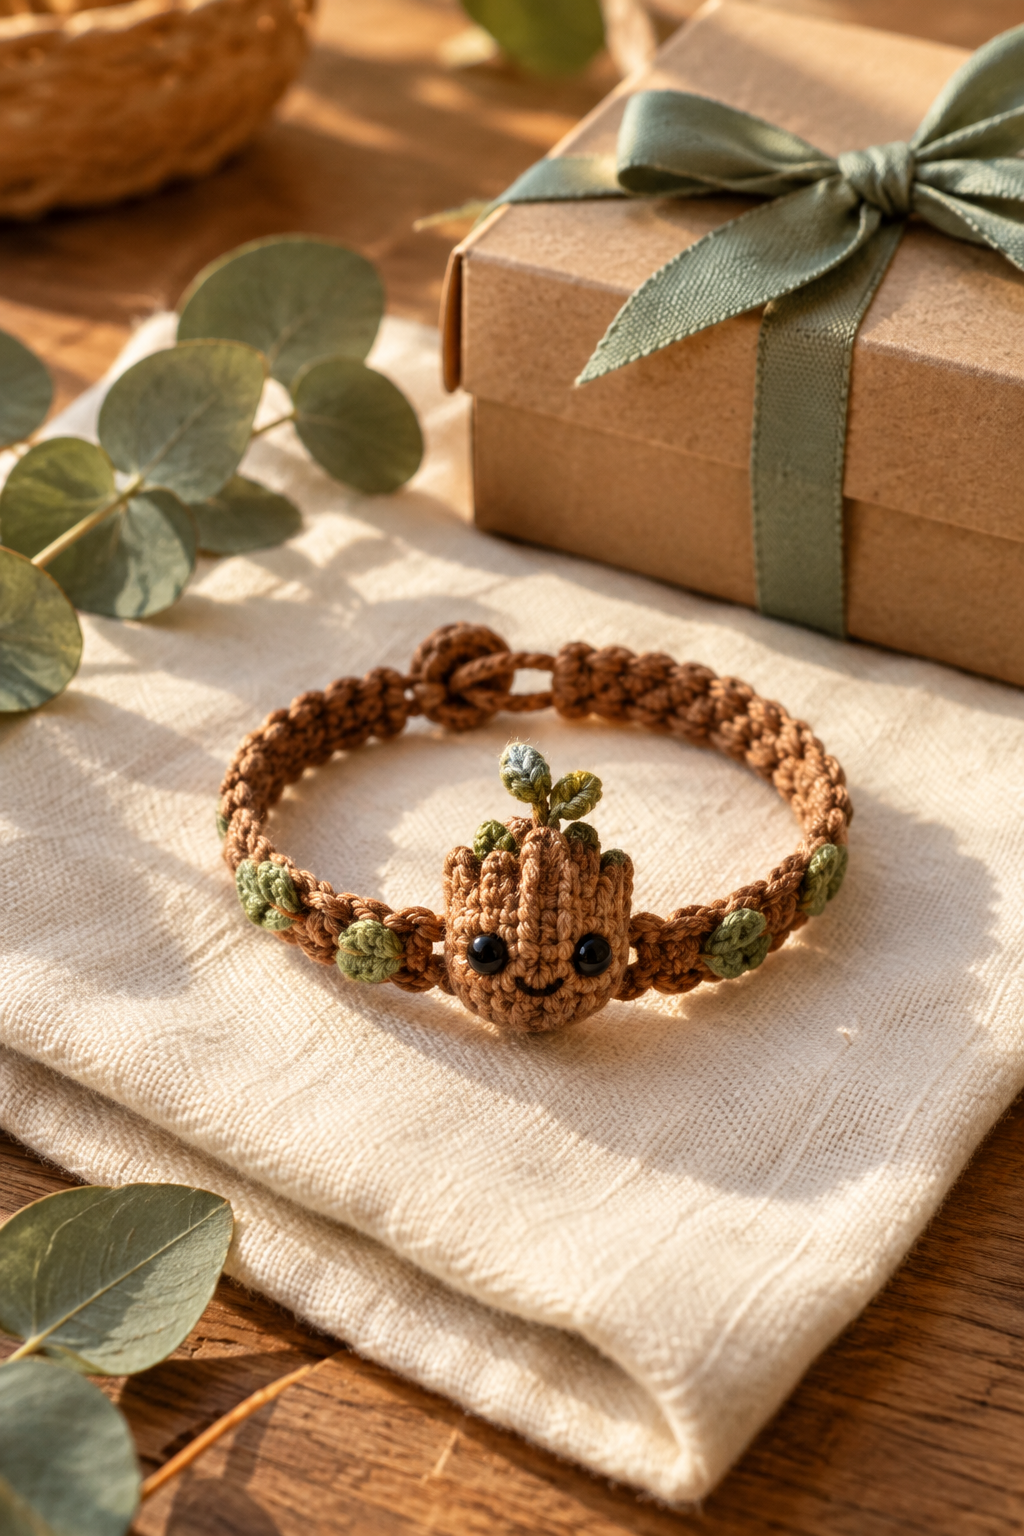
Some projects start as a joke and end up on your wrist every day. You see a tiny Baby Groot with his big dark eyes and a few leaves sprouting from his head, and you think, I could wear that.
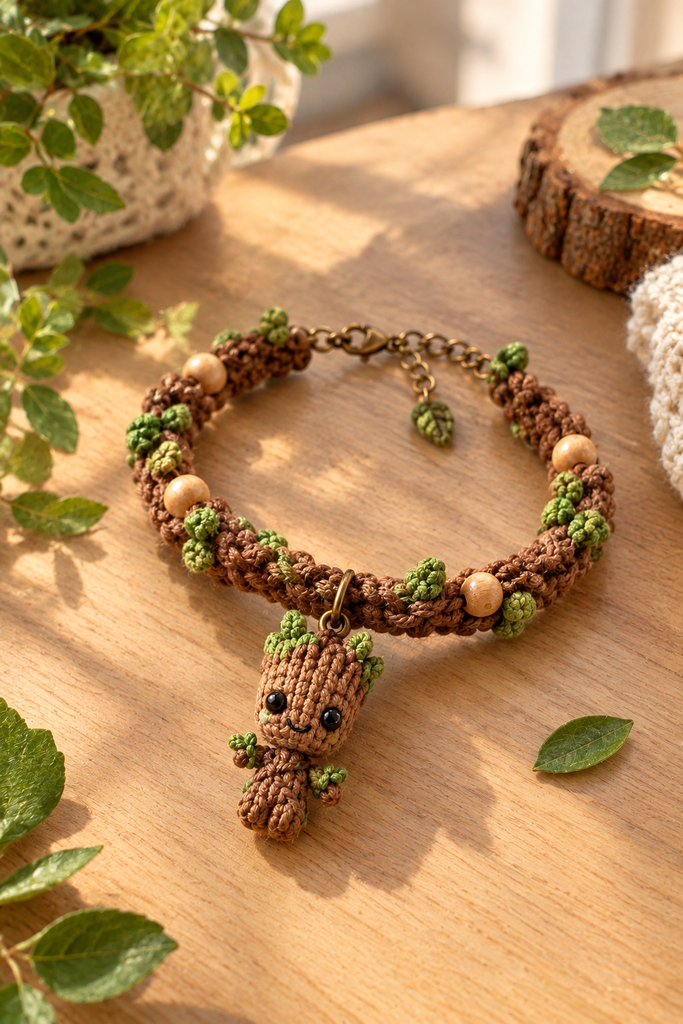
You can, and it is easier than it looks. This bracelet has three parts: a chunky rope band decorated with wooden beads and green moss bobbles, a small leaf charm that dangles from the extender chain, and a little Groot pendant that hangs from the center. If you can make a magic ring, a single crochet, and a double crochet, you have the skills for the whole thing.
This guide gives you the full pattern, and it also covers the problems that tiny crochet jewelry tends to cause. Lopsided heads, beads that refuse to slide, bobbles that go flat, and pendants that spin to face the wrong way all have fixes, and they are collected in the troubleshooting section so you are not guessing halfway through a row.
Why Baby Groot Works So Well in Crochet
Baby Groot has one of the simplest shapes in pop culture. His head is a rounded block, his face is two dark eyes and a small smile, and his character comes from the moss and leaves growing on him. That means no complicated shaping and no fiddly limbs, and the green bobbles do most of the storytelling for you.
A bracelet also solves the usual problem with amigurumi. A full plush takes a lot of yarn, a lot of stuffing, and several evenings. This project uses scraps and takes an afternoon, and the result feels personal without being a huge commitment.
If you plan to sell finished pieces, remember that Baby Groot is a licensed character. Describe your work as inspired by, avoid logos and official branding, and read the rules of the marketplace you sell on.
Materials You Will Need
Keep the supply list small. Nothing here is special or expensive.
- Mercerized cotton thread or fine cotton yarn in medium brown, about 25 meters
- Moss green cotton in the same weight, about 10 meters
- A 1.5 mm crochet hook (go down to 1.25 mm if you crochet loosely)
- Six wooden beads, 8 mm, with holes large enough to pass your thread through
- Two 4 mm black safety eyes, or two small black beads
- Black or dark brown embroidery thread for the smile
- Polyester fiberfill
- A lobster clasp, two small jump rings, and a 5 cm extender chain in antique bronze or gold
- A third jump ring for the pendant
- Two pairs of small pliers, or one pair of flat nose pliers and one pair of round nose pliers
- A tapestry needle, stitch marker, scissors, and measuring tape
Choose cotton over acrylic. Cotton has almost no stretch, so tiny stuffed shapes stay firm and the filling does not peek through the stitches. It also gives the band the slightly rough, bark-like texture that suits this character.
Sizing Your Bracelet
Measure your wrist with a soft tape just below the wrist bone, then add a little room. A bracelet that fits exactly will feel tight by the afternoon. The clasp and extender chain add about 2.5 cm to the crocheted band, and the extender gives you roughly 4 cm of adjustment on top of that.
With cotton thread and a 1.5 mm hook, most people get around 4.5 stitches per cm. Chain loosely, lay your chain against the tape, and check your own gauge before you commit.
| Wrist size | Starting chain | Stitches in Row 1 | Pattern repeats | Crocheted length |
|---|---|---|---|---|
| 13 cm (5 in) | 55 | 54 | 6 | about 12 cm |
| 15 cm (6 in) | 64 | 63 | 7 | about 14 cm |
| 16.5 cm (6.5 in) | 73 | 72 | 8 | about 16 cm |
| 18 cm (7 in) | 82 | 81 | 9 | about 18 cm |
| 19.5 cm (7.75 in) | 91 | 90 | 10 | about 20 cm |
Each repeat uses 9 stitches, so the chain counts above give you whole repeats. If your gauge is tighter or looser, add or remove a full repeat, which is 9 chains.
Abbreviations Used
All terms are US crochet terms.
- ch: chain
- sc: single crochet
- dc: double crochet
- inc: two single crochets in the same stitch
- dec: single crochet decrease over two stitches
- MR: magic ring
- sl st: slip stitch
- st(s): stitch(es)
- F/O: fasten off
- Bead dc: slide a bead up against the work, then make a double crochet in the next stitch so the bead sits on the front
- Bobble: yarn over, insert hook, pull up a loop, yarn over and pull through two loops. Repeat three times in the same stitch so four loops are on the hook, then yarn over and pull through all four.
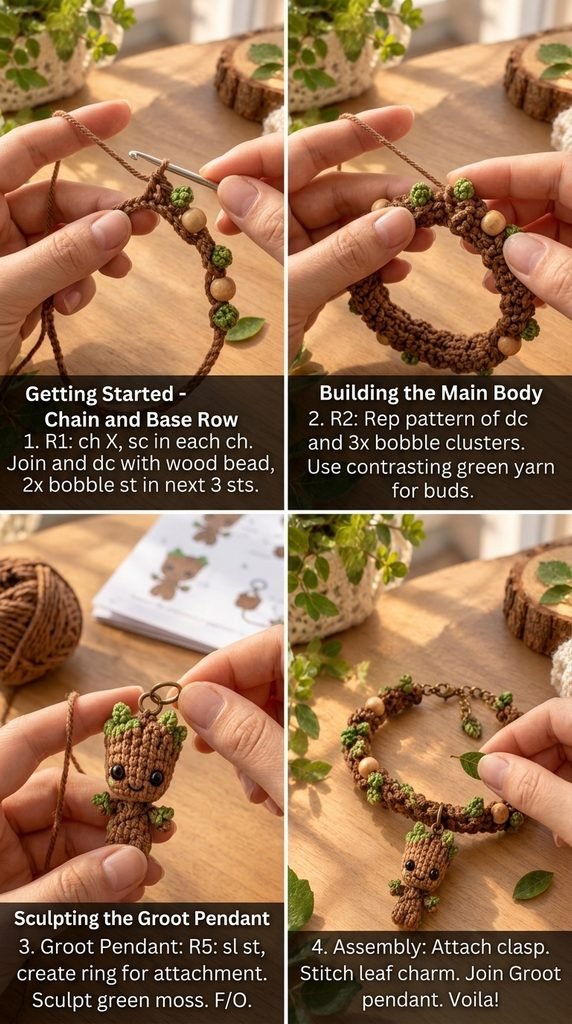
Step 1: Prepare the Beads
Before you make your first chain, thread all six wooden beads onto your brown cotton. Slide them down the strand toward the ball, well away from the hook end. They wait there until you need them.
If your beads have small holes, a loop of fine wire or dental floss makes a quick threading needle. Pull the thread through and cut the helper away.
Step 2: Crochet the Band
Use brown cotton and the 1.5 mm hook. Leave a 15 cm tail at the start.
Chain: Chain the number shown in the sizing table for your wrist.
Row 1: Sc in the 2nd chain from the hook and in each chain across. Ch 2, turn.
Row 2: Dc in the next 4 stitches. Bead dc in the next stitch. Change to green and work a bobble in each of the next 3 stitches. Change back to brown. That is one repeat of 9 stitches. Repeat across the row. Do not cut the green between bobbles. Carry it loosely along the back of the work, because that side ends up hidden inside the band. Ch 1, turn.
Row 3: Sc in each stitch across, working into the top of each bobble. F/O, leaving a 50 cm tail for the seam.
Your strip will look like a flat ribbon with beads and green clusters along the middle. Now it becomes a rope.
Fold the strip lengthwise so the foundation edge meets the Row 3 edge, with Row 2 and its beads facing out. Using your long tail and the tapestry needle, whipstitch the two edges together along the whole length. Keep your stitches small and snug so the seam stays tidy. If you want a firmer band, slide a strand of cotton cord inside before you close the seam.
Close each end by weaving your needle through the edge stitches and pulling tight, like a drawstring pouch. Stitch a jump ring into each closed end with six or seven passes of thread. Add the lobster clasp to one ring and the extender chain to the other.
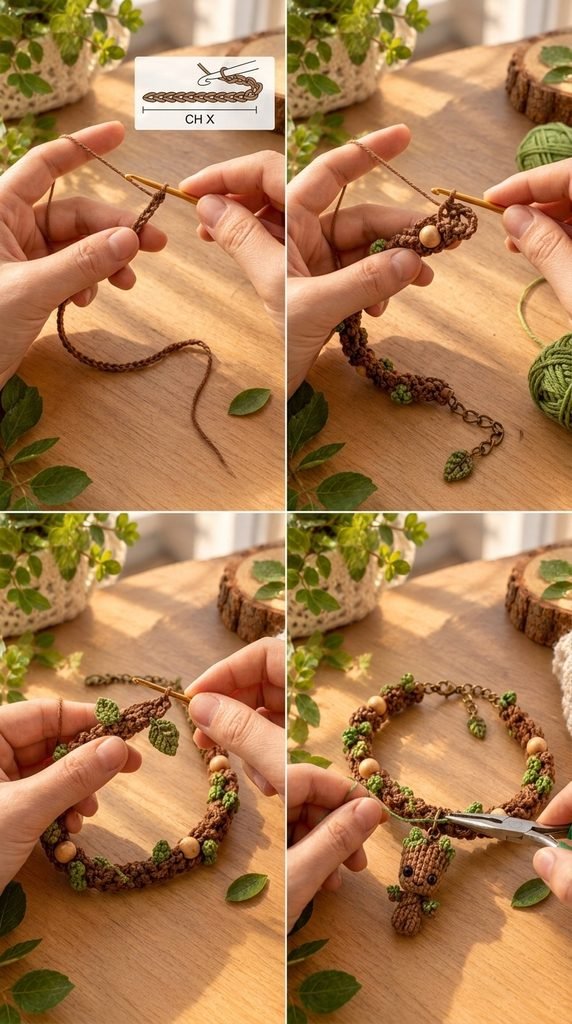
Step 3: Make the Leaf Charm
The little leaf at the end of the extender chain is a nice finishing detail, and it stops the chain from looking bare. Use green cotton.
Ch 7. Starting in the 2nd chain from the hook, sl st in the next stitch, sc in the next, hdc in the next, dc in the next, and work 3 dc into the last chain. Turn and work along the other side of the foundation chain: dc, hdc, sc, sl st. F/O, leaving a 10 cm tail.
The three double crochets in the last chain must all go into the same stitch. That is what creates the pointed tip. Sew the leaf to the last link of the extender chain, or attach it with a tiny jump ring.
Step 4: Crochet the Groot Pendant
The pendant has four small parts: a head, a body, two arms, and the moss. Work in continuous rounds without joining, and mark the start of each round.
The Head
Use brown cotton.
Round 1: MR, 6 sc into the ring. (6)
Round 2: Inc in each stitch. (12)
Round 3: Sc in the next stitch, inc in the next. Repeat around. (18)
Rounds 4 to 8: Sc in each stitch. (18)
Place the eyes between Rounds 5 and 6, with about 4 stitches between them. Hold the head at arm’s length and look at it straight on before you lock the backs on. If you are using beads, sew them on after stuffing.
Round 9: Sc in the next stitch, dec. Repeat around. (12)
Stuff the head firmly with small pinches of fiberfill, pushing them in with the blunt end of your hook.
Round 10: Dec around. (6)
Ch 6 and sl st into the same stitch to make a small loop for hanging. F/O and weave the tail through the front loops of the remaining stitches to close the opening. Leave the starting tail from the magic ring for sewing later.
The Body
Use brown cotton.
Round 1: MR, 6 sc. (6)
Round 2: Sc, inc. Repeat around. (9)
Rounds 3 to 6: Sc in each stitch. (9)
Round 7: Sc, dec. Repeat around. (6)
Stuff lightly. F/O, leaving a 20 cm tail, and close the end.
The Arms
Join brown to the side of the body at Round 4. Ch 4, sl st in the 2nd chain from the hook and in the next 2 chains, then sl st into the body to secure. F/O and weave in the ends. Repeat on the other side at the same height.
The Moss
Join green to a stitch near the top of the head, beside the hanging loop. Work a bobble, sl st into the next 2 stitches, and repeat until you have 4 or 5 bobbles clustered around the top and one on each side like little ears. Add one green bobble to each shoulder. Pull the ends through and trim.
The Face
With black or dark brown embroidery thread, make a small curved smile of 3 short stitches under the eyes. Keep the stitches small, because a big mouth makes the character look startled.
Step 5: Put It All Together
Assembly takes about fifteen minutes. This is where the pieces turn into a character.
- Sew the head to the body using the tails, going through both pieces at least six times. A wobbly neck is the most common weak point.
- Fold the band in half to find the center. Mark it with a pin or a loose strand of thread.
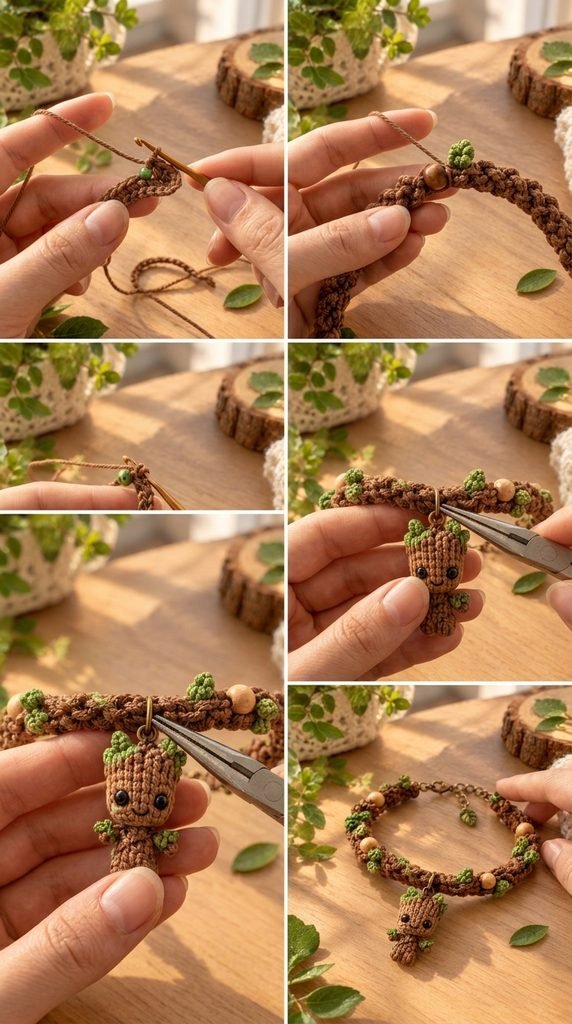
- Use pliers to open a jump ring by twisting the ends sideways. Never pull the ends apart, because that distorts the ring and it will not close flush.
- Thread the open ring through the pendant’s hanging loop, then through two stitches of the band at the center mark.
- Close the ring by twisting the ends back together until they meet with no gap.
- Check the clasp, the extender chain, and the leaf. Give every connection a gentle tug.
- Weave in all remaining tails and trim them close.
Try the bracelet on before you call it done. It is much easier to fix a loose jump ring at the table than after Groot drops into your coffee.
Common Problems and How to Fix Them
This is the part most patterns leave out, and it is what saves a project when something goes wrong.
The beads will not slide into place
Check the bead hole against your thread before you start. If the thread fits tightly, the bead will drag every time you bring it up. Use a needle or a bit of wire to ream the hole slightly, or switch to beads with a larger hole. Wooden beads with rough edges can also fray cotton, so rub them with a bit of fine sandpaper first.
The bobbles look flat instead of round
Bobbles flatten when your tension is too loose. Pull each loop up snugly before you yarn over, and tug the final loop closed firmly. If you still want more puff, work a fourth incomplete double crochet into the bobble. Doing the green bobbles with a hook half a size smaller also gives rounder clusters.
Brown shows through the green
This happens when the carried strand is too tight or when you change colors with a loose loop. Pull up the last loop of the stitch before the bobble in the new color, which is called a color change on the last yarn over. It hides the old color and keeps the green clean.
The band will not roll into a round tube
A flat strip that stubbornly stays flat usually means your Row 3 is too tight or your Row 1 is too loose. The two edges need to be the same length to meet neatly. If the edges do not line up, ease the shorter side while you whipstitch. Slipping a cotton cord inside before closing the seam also helps the tube hold its round shape.
The band feels stiff and does not drape
The thread is probably too thick for the hook, or the tension is too tight. Go up 0.25 mm on the hook for the band only. You can also skip the cord filling, since it makes the band firmer.
The pendant spins to face the wrong way
Jump rings let small pendants twist freely. Attach the ring through two stitches of the band instead of one, and use a closed ring rather than a split ring. If it still spins, add a small stitch from the back of the head to the band to hold it forward.
The head looks lopsided
Small shapes are very sensitive to filling, and one extra pinch can pull everything out of balance. Remove the stuffing and redo it in smaller pieces, packing the edges first and the center last. Rolling the finished head between your palms for a few seconds smooths out small bumps.
The eyes are crooked
Hold the head at arm’s length and check it straight on before you lock in the backs. Eyes that look fine up close often look off from a distance. If you have already locked them, pry off the back with a flat tool and reposition. With beads, snip the thread and sew them on again.
The pendant keeps falling off
Sewing a small stuffed shape to anything puts stress on a tiny area. Use at least six passes of thread when joining the head to the body, and double the thread if you can. Do not rely on yarn tails alone.
The jump ring opens when worn
You probably opened it by pulling the ends apart rather than twisting. Close it again with two pairs of pliers, twisting until the ends meet flush. A tiny drop of clear nail polish on the join keeps it shut.
Ways to Make It Your Own
Once the basic version is done, there are plenty of ways to play with it.
- Swap the wooden beads for glass or stone beads in earthy shades
- Use a variegated brown cotton for a more natural bark look
- Add a second Groot pendant to make a charm bracelet
- Make a matching anklet by adding one extra repeat to the band
- Turn the pendant into a keychain by attaching a split ring
- Use a gold clasp for a polished look, or antique bronze for a woodland feel
Caring for Your Bracelet
Crochet jewelry lasts a long time when you treat it kindly. Take it off before showering, washing your hands, or swimming, because soap and chlorine break down cotton over time. If it gets dirty, spot clean with a damp cloth and a drop of mild soap, then let it dry flat. Avoid hot water, which can cause the stuffed head to shrink slightly.
Store the bracelet in a small pouch instead of tossing it into a bag, where the clasp and chain can snag on keys or zippers.
Frequently Asked Questions
How long does this bracelet take to make?
Most crocheters finish it in three to five hours. Beginners may need a bit longer, mostly because of the small stitches and the sewing at the end.
Can I use thicker yarn?
Yes. Worsted weight yarn with a 3.5 mm hook gives a much larger piece, closer to a bag charm or keychain. You will need bigger beads and a larger clasp to match.
Do I have to use safety eyes?
No. Embroidered eyes with black thread are safer for children and look just as sweet. Use two small straight stitches or tiny French knots.
Is this bracelet safe for children?
The beads, eyes, and small parts are choking hazards. For children under three, avoid this project. For older children, embroider the eyes and secure every piece with extra stitching.
What if I cannot make a magic ring?
Chain 2 and work the first round of 6 sc into the 2nd chain from the hook. It leaves a tiny hole in the center, which you can close with the yarn tail.
Can I sell bracelets made from this pattern?
You can sell items you make yourself. Because Baby Groot is a licensed character, describe your work as inspired by, avoid official logos, and check the policies of the marketplace you use.
Final Thoughts
A Baby Groot crochet bracelet feels bigger than it is. You get a recognizable character, a piece you can actually wear, and a gift people tend to keep. The pattern is simple enough for a motivated beginner, and the troubleshooting tips mean a crooked eye or a stubborn bead will not end the project.
Start with the basic version, get comfortable with the bobbles, and then try your own twists. Change the colors, add a second pendant, or give the leaf charm a friend. The best crochet usually comes from the second or third attempt, once you know how your hands and your thread behave.
If you make one, take a photo of it on your wrist in good light and share it. Other crocheters love seeing how a pattern looks in real life, and your version might be the one that gets someone else to pick up a hook.