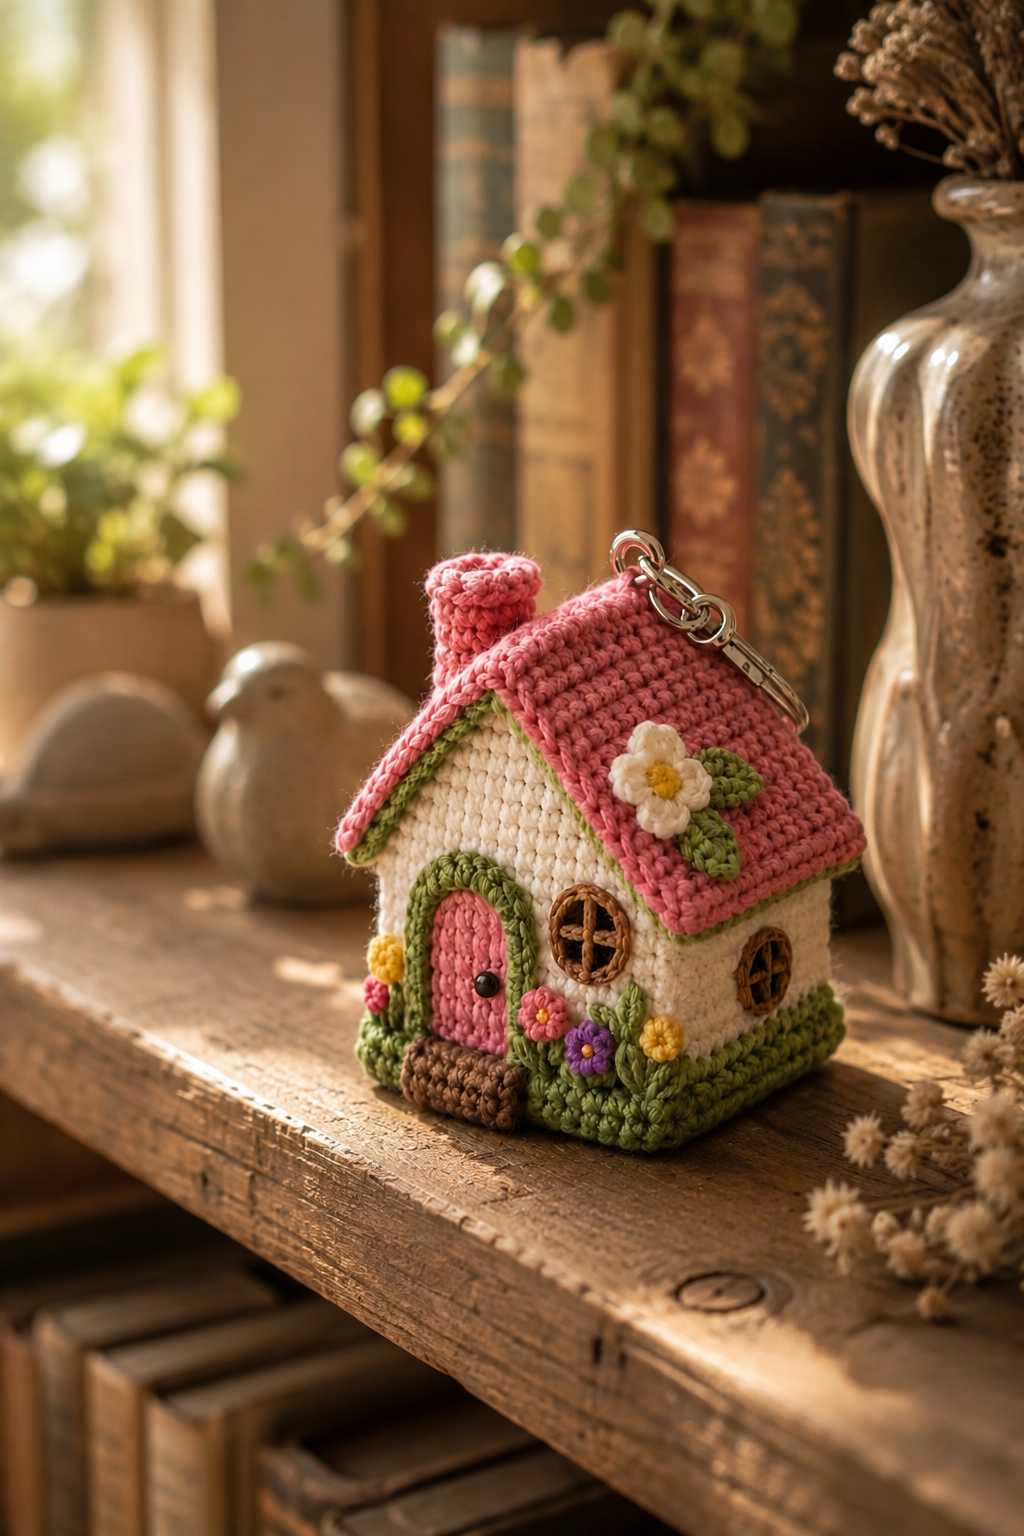
If you love tiny crochet projects with lots of personality, this DIY Crochet Fairy House Keychain Free Pattern is a project you will want to keep on your crochet list.
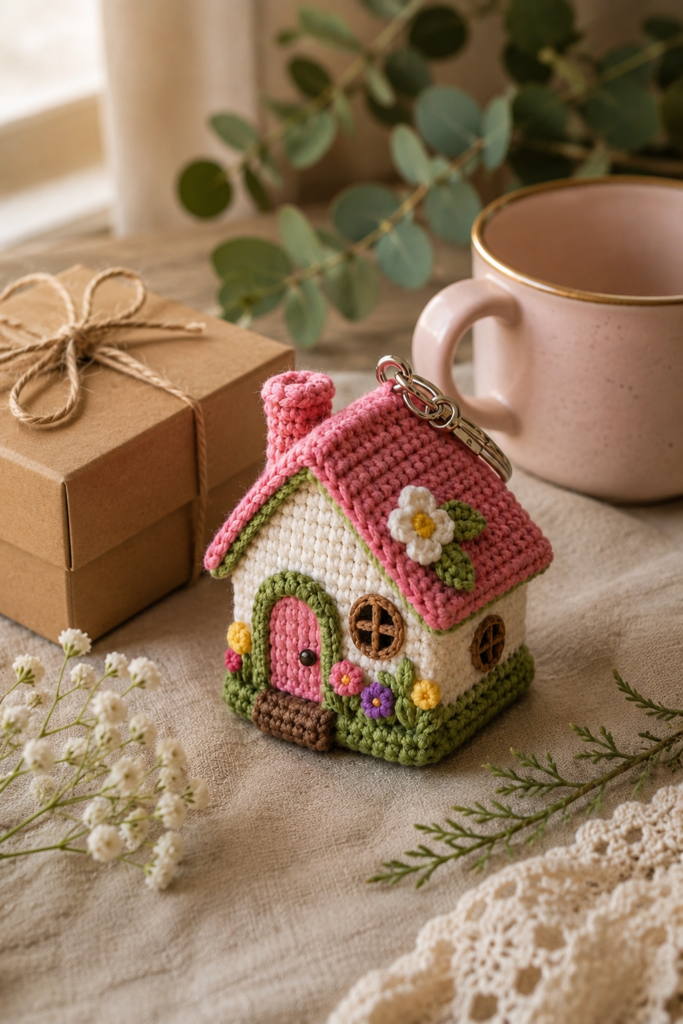
This miniature cottage combines several of the details that make handmade crochet so charming: a soft cream-colored house, a textured pink roof, green edging, a tiny chimney, a sweet arched door, round windows, colorful flowers, leaves, and a small metal keyring.
Although the finished house is small, it has plenty of detail. That makes it especially satisfying to crochet because every little feature contributes to the final fairy-cottage look.
It also makes a wonderful handmade gift. You can attach it to keys, handbags, backpacks, project bags, zipper pulls, or gift packaging. If you enjoy cottagecore, fairy gardens, miniature crafts, or colorful crochet accessories, this little house fits beautifully into all of those styles.
This guide explains the construction, materials, shaping, finishing techniques, and decorative details needed to create a miniature crochet fairy house. The pattern is designed as a practical framework, so you can adjust the exact size and color placement to suit your yarn and tension.
Important pattern note: Because miniature crochet can change size considerably with yarn weight and tension, always make a small test section first. The finished measurements are approximate, and the reference image should be treated as the visual guide for proportions and placement.
Table of Contents
- Why You’ll Love This Crochet Fairy House
- Materials You’ll Need
- Yarn and Color Guide
- Skill Level
- Understanding the House Construction
- Free Crochet Fairy House Keychain Pattern
- Making the House Body
- Creating the Pink Roof
- Making the Chimney
- Adding the Door and Windows
- Adding Flowers and Greenery
- Attaching the Keyring
- Finishing Tips
- Common Mistakes
- How to Customize Your Fairy House
- How to Care for Your Crochet Keychain
- Frequently Asked Questions
- Final Thoughts
Why You’ll Love This Crochet Fairy House
The best thing about a miniature crochet house is that it allows you to practice several useful crochet techniques in one small project.
You get to work with shaping, color changes, small decorative motifs, joining, stuffing, embroidery, and finishing.
The result is also much more than a simple crochet square.
The reference design has the visual character of a tiny storybook cottage. The pink roof immediately draws attention, while the green trim and colorful flowers give the house a garden-inspired appearance.
The metal keyring adds another practical element.
Instead of sitting on a shelf, the finished crochet house can travel with you.
Attach it to your keys and it becomes a tiny everyday companion. Add it to a handbag for a handmade charm. Or place it on a crochet project bag if you want your accessories to reflect your love of handmade crafts.
Another advantage is that this is a relatively small project. You do not need large amounts of yarn, and it is an excellent way to use leftover yarn from previous projects.
Materials You’ll Need
Before starting, gather all of your supplies.
Yarn
You will need several small amounts of yarn in different colors.
A smooth cotton or cotton-blend yarn works particularly well for this project because it gives the stitches a clean, defined appearance.
Suggested colors:
- Cream or off-white for the house
- Pink for the roof and door
- Green for trim, grass, and leaves
- Brown for the doorstep and window details
- White for flowers
- Yellow for flower centers
- Purple or pink for small flowers
- Optional additional colors for decorative flowers
Crochet Hook
Use a hook appropriate for your yarn weight.
For a small stuffed crochet accessory, a slightly smaller hook is often useful because it creates a denser fabric.
The most important thing is not the exact hook number. What matters is achieving firm stitches with minimal gaps.
Stuffing
Use a small amount of polyester fiberfill.
You do not need much because the house is miniature.
Tapestry Needle
A blunt tapestry needle is useful for:
- Sewing pieces together
- Attaching flowers
- Embroidering window details
- Hiding yarn ends
- Securing the keyring
Scissors
Use sharp scissors for clean yarn cuts.
Keyring or Lobster-Clasp Hardware
A small metal keyring, swivel clasp, or lobster clasp can be used.
For a bag charm, a lobster clasp is particularly convenient because it can be moved between bags.
Yarn and Color Guide
The color palette is a major part of the charm of this design.
The original visual style uses a warm cream house combined with a soft pink roof and green garden details.
This creates a gentle cottagecore appearance without making the piece look overly complicated.
Cream House
Cream or warm white creates a soft background for the colorful decorations.
Avoid an extremely bright white if you want a warmer handmade appearance.
Pink Roof
A medium or dusty pink gives the cottage its most recognizable feature.
You can choose:
- Rose pink
- Dusty pink
- Blush
- Coral pink
- Soft raspberry
Green Details
Use a natural medium green for the roof edging, garden border, leaves, and vines.
A slightly muted green works particularly well with cream and pink.
Flower Colors
The flowers are an opportunity to personalize your project.
Try combinations of:
- White and yellow
- Pink and yellow
- Purple and yellow
- Orange and yellow
- Lavender and white
You only need tiny amounts of these colors.
Skill Level
Skill level: Intermediate
The individual stitches are not necessarily difficult, but the project contains several small components.
You should be comfortable with:
- Magic ring
- Single crochet
- Slip stitch
- Increasing
- Decreasing
- Working in rounds
- Working through stitches
- Basic sewing
- Simple embroidery
- Changing colors
A confident beginner can attempt this project by working slowly and checking the shape frequently.
The decorative details can also be added gradually, so there is no need to complete everything at once.
Understanding the House Construction
Before crocheting, it helps to think about the fairy house as a collection of simple shapes.
The main structure consists of:
- The house body
- The roof
- The chimney
- The door
- The windows
- The garden border
- Flowers and leaves
- The keyring attachment
This makes the project much less intimidating.
Instead of thinking, “I have to crochet an entire tiny house,” think of it as several small crochet components that eventually come together.
Free Crochet Fairy House Keychain Pattern
Pattern Notes
This pattern is designed around the miniature cottage shown in the reference image.
Because the project is small, stitch tension can have a major effect on the finished dimensions.
Abbreviations:
- MR = magic ring
- SC = single crochet
- INC = increase
- DEC = decrease
- SL ST = slip stitch
- CH = chain
- FO = fasten off
Work in continuous rounds unless the instructions say otherwise.
Use a stitch marker to identify the beginning of each round.
Making the House Body
Start with the cream yarn.
The body should be compact and rounded rather than flat.
Base
Round 1: Make a magic ring and work 6 SC into the ring.
Round 2: INC around — 12 SC.
Round 3: SC around — 12 SC.
Round 4: (SC, INC) repeat around — 18 SC.
Round 5: SC around — 18 SC.
Round 6: (2 SC, INC) repeat around — 24 SC.
Rounds 7–12: SC around.
At this point, the body should begin developing a small rectangular cottage shape.
Continue building upward while checking the proportions against the reference image.
Shaping the Upper House
For the upper section, gradually reduce the width so the roof can sit naturally on top.
Work decreases evenly around the final shaping rounds.
Do not make the upper section too narrow. The roof should overlap the walls slightly and create the recognizable cottage silhouette.
Add stuffing gradually as the body becomes difficult to reach.
The stuffing should make the house firm but not stretched.
Closing the Body
Once the body reaches the desired height, begin decreasing.
Work evenly spaced decreases until only a small opening remains.
Add a final small amount of stuffing if necessary.
Close the opening securely and weave in the yarn end.
Creating the Pink Roof
The roof is one of the most important visual elements of the fairy house.
Use the pink yarn.
The roof should create two sloping sides meeting at the top.
A simple way to achieve the shape is to crochet two rectangular or slightly tapered panels and join them along the upper edge.
Roof Panel
Chain a starting length appropriate for the width of your house.
Work rows of SC, turning after each row.
Decrease one stitch at the appropriate edge on successive rows to create a gentle slope.
Repeat to make a second matching panel.
Join the two panels along the top.
The finished roof should sit over the cream house like a miniature cottage roof.
Green Roof Trim
Use green yarn to crochet a narrow edging around the lower roof edges.
A simple row of SC or SL ST can create a clean border.
This green edging is important because it visually connects the roof to the garden border around the base.
Do not make the trim excessively thick.
The reference design works because the green border remains clearly visible without overpowering the pink roof.
Making the Chimney
The chimney is a small but important decorative feature.
Use pink yarn to match the roof.
Create a tiny tube by crocheting a small rectangle or narrow cylinder.
Join the edges to form the chimney shape.
Stuff it lightly if needed.
Sew the chimney to the roof near one side of the peak.
Keep the chimney slightly shorter than the roof peak so that it looks proportional to the miniature house.
Adding the Door and Windows
The door and windows give the cottage its personality.
The Pink Door
Use pink yarn.
Crochet a small rounded or rectangular door panel.
A simple single-crochet rectangle can be shaped by adding a rounded top.
Add a green border around the door.
The green frame helps the pink door stand out against the cream house.
For the tiny doorknob, you can use:
- A small bead
- A French-knot style embroidery detail
- A tiny dark button
Secure any embellishment firmly.
Window Frames
The reference design uses small round windows with brown framing.
Create small circular window pieces using brown yarn.
Sew them securely to the sides of the house.
For the cross-shaped window divisions, use embroidery stitches.
Keep the lines neat and centered.
Because the windows are tiny, perfection is less important than consistency.
Creating the Garden Border
The green garden border around the base is what gives the house its fairy-garden appearance.
Use green yarn to crochet a strip around the lower edge of the house.
You can create a textured border using compact SC stitches, small loops, or simple raised stitches.
The goal is to create the impression of grass surrounding the cottage.
Keep the border slightly irregular rather than perfectly geometric.
A handmade miniature looks more charming when the details retain a little natural softness.
Adding Flowers and Greenery
This is where the project becomes especially fun.
The flowers do not need to be large.
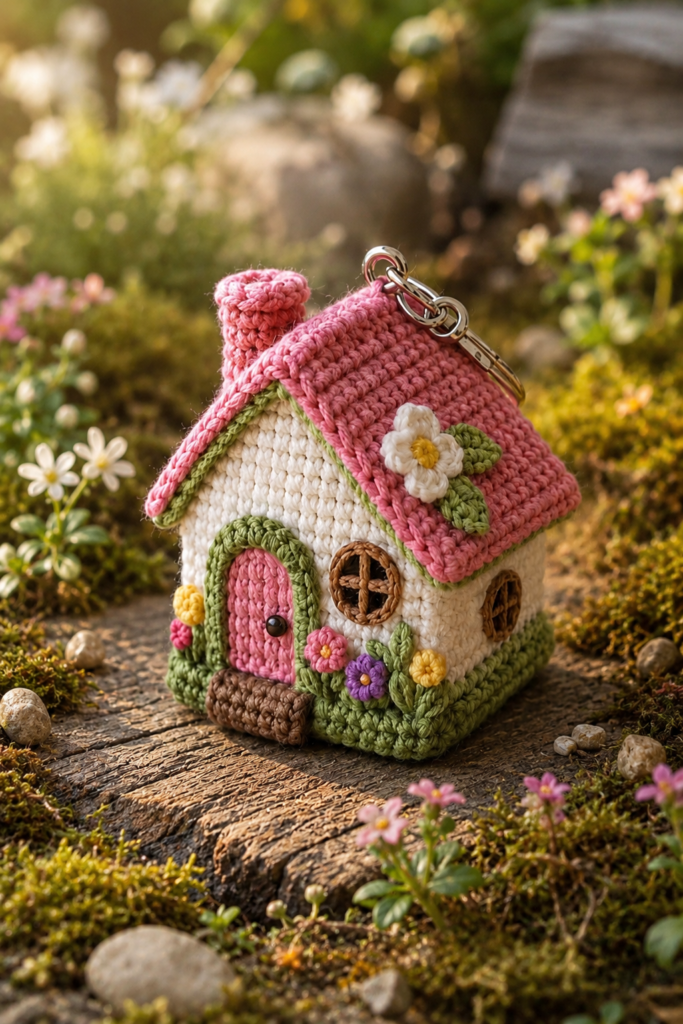
In fact, tiny flowers are better because they maintain the scale of the miniature cottage.
Simple Five-Petal Flower
Use your chosen flower color.
Make a small center and work several short loops or stitches around it.
For the center, use yellow yarn.
A tiny yellow center immediately makes the flower recognizable.
Leaves
Use green yarn.
Small leaf shapes can be created with a few chain stitches and strategically placed SC stitches.
Attach the leaves beside the flowers.
Flower Placement
Do not place every flower at exactly the same height.
Instead, create a small garden arrangement around the door and lower walls.
Use a mixture of colors.
For example:
- White flower + yellow center
- Pink flower + yellow center
- Purple flower + yellow center
This creates the colorful cottage-garden appearance seen in the reference.
Attaching the Keyring
The keyring needs to be securely attached because it will experience movement and pulling during everyday use.
The reference design uses a metal ring positioned at the top of the roof.
You can reinforce this area by sewing through a strong section of the roof or by creating a small crocheted attachment loop.
Simple Attachment Loop
Create a short chain.
Fold the chain into a loop around the keyring.
Sew the ends securely into the top of the crochet house.
Make several passes with the tapestry needle.
Do not rely on a single stitch.
Before using the keychain, gently pull the ring to test the attachment.
If the attachment moves significantly, reinforce it.
Finishing Tips for a Professional Look
Finishing can make the difference between a cute crochet project and a polished handmade accessory.
Hide Every Yarn Tail
Use a tapestry needle to weave loose ends into the interior of the project whenever possible.
Do not simply cut yarn tails close to the surface.
Check the Symmetry
Look at the house from the front.
Check:
- Is the door centered?
- Is the roof sitting evenly?
- Are the windows at similar heights?
- Is the chimney positioned naturally?
- Are the flowers balanced?
Secure Tiny Decorations
Small flowers and leaves can loosen if they are only attached with one or two stitches.
Sew through the base several times.
Keep the Roof Crisp
The roof should remain clearly defined.
If your roof looks floppy, consider using slightly tighter stitches or a firmer yarn.
Common Mistakes to Avoid
1. Using a Hook That Is Too Large
A large hook creates loose stitches.
For a stuffed miniature house, this can cause gaps and make the stuffing visible.
2. Overstuffing
Too much stuffing can stretch the cream body and distort the shape.
Add stuffing gradually.
3. Making the Roof Too Large
The roof should complement the body.
If it extends too far beyond the walls, the house can lose its balanced miniature appearance.
4. Making the Flowers Too Large
The flowers are decorative accents.
If they become too large, they can cover the windows and door.
5. Weak Keyring Attachment
This is one of the most important practical considerations.
Always reinforce the attachment point.
6. Changing Yarn Weight Without Adjusting the Pattern
Different yarn weights can dramatically change the size of a miniature project.
If you substitute yarn, make a test section first.
How to Customize Your Fairy House
One of the best things about a crochet fairy house is how easily you can personalize it.
Change the Roof Color
Try:
- Lavender
- Sky blue
- Yellow
- Mint
- Coral
- Burgundy
Create a Winter Cottage
Use white and pale blue yarn with tiny snowflake-style embroidery.
Make a Spring Cottage
Use pink, green, yellow, and lavender flowers.
Make a Halloween Cottage
Try a dark roof with orange flowers and tiny black details.
Create a Christmas Cottage
Use red, white, green, and gold accents.
The basic house structure can stay the same while the decorative palette changes.
Time-Saving Tips
Small projects can actually take longer than expected because of the finishing details.
Here are a few ways to work more efficiently.
Prepare Your Yarn First
Cut or organize small quantities of your accent colors before starting the decorative work.
Make Similar Flowers Together
If you need several flowers in the same color, make them all at once.
This reduces the amount of time spent switching yarn.
Sew as You Go
Instead of creating every component and leaving all the sewing until the end, attach pieces when practical.
Keep a Stitch Marker Nearby
A stitch marker can prevent repeated counting and reduce mistakes.
Photograph Your Progress
Taking a quick photo after completing each major stage can help you notice proportion problems that are easy to miss while holding the project.
How to Care for Your Crochet Fairy House Keychain
Because this is a small handmade accessory, gentle care will help preserve the stitches and decorative details.
Keep it away from excessive moisture.
If it becomes dusty, gently brush the surface with a soft cloth.
For small spots, use a lightly damp cloth and gently dab rather than aggressively rubbing the yarn.
Avoid pulling on the flowers, leaves, chimney, roof trim, or keyring attachment.
If the project becomes wet, allow it to air dry naturally.
Do not use high heat because heat can affect some yarn fibers and synthetic stuffing.
For long-term storage, place the keychain somewhere clean and dry where it will not be compressed under heavy objects.
Frequently Asked Questions
Is this crochet fairy house keychain suitable for beginners?
It can be suitable for confident beginners who already understand basic crochet stitches.
The main body uses relatively simple techniques, but the miniature size and decorative elements require patience.
If you are completely new to crochet, practice single crochet, increases, decreases, magic rings, and basic sewing before beginning.
What yarn is best for a crochet fairy house?
Smooth cotton or cotton-blend yarn is an excellent choice because it gives the miniature stitches clear definition.
It also works well for small decorative flowers and leaves.
How much yarn does this project require?
Only small quantities are needed because the finished item is miniature.
The house body uses the most yarn, while the flowers, leaves, windows, and other decorative elements require very little.
Can I make the house larger?
Yes.
You can use thicker yarn and a larger hook to make a larger cottage.
However, changing yarn weight will alter the finished proportions, so you may need to adjust the roof and decorative pieces as well.
Can I sell finished fairy house keychains?
If you are using your own original pattern, you can generally decide how you want to use your finished products.
If you use someone else’s pattern, always check that designer’s licensing and selling permissions before selling finished items.
Do not assume that purchasing a pattern automatically gives permission to reproduce or redistribute the pattern itself.
Can I use a lobster clasp instead of a keyring?
Yes.
A lobster clasp is a useful alternative if you want to attach the cottage to different handbags or project bags.
How do I make the crochet house keep its shape?
Use a suitably small hook, maintain consistent tension, avoid loose stitches, and stuff the body gradually.
The roof should also be crocheted firmly enough to hold its shape.
Can I wash the finished keychain?
Check the care instructions for your yarn first.
Because this project contains a metal keyring and several small decorative elements, gentle spot cleaning is usually preferable to aggressive washing.
Why Mini Crochet Projects Make Great Gifts
Large crochet projects can take weeks or months.
A miniature keychain is different.
It allows you to create something meaningful without committing to a huge amount of yarn or time.
That makes this fairy house particularly useful for handmade gifting.
You could make one for:
- A crochet friend
- A cottagecore enthusiast
- A fairy-garden lover
- A child who enjoys miniature houses
- A teacher
- A coworker
- A birthday gift
- A holiday stocking
- A handmade market
- A small thank-you present
You can even customize the colors to match the recipient’s favorite palette.
A handmade gift does not need to be large to feel special.
Why This Pattern Works So Well for Crochet Lovers
There is something satisfying about making a miniature object recognizable through yarn alone.
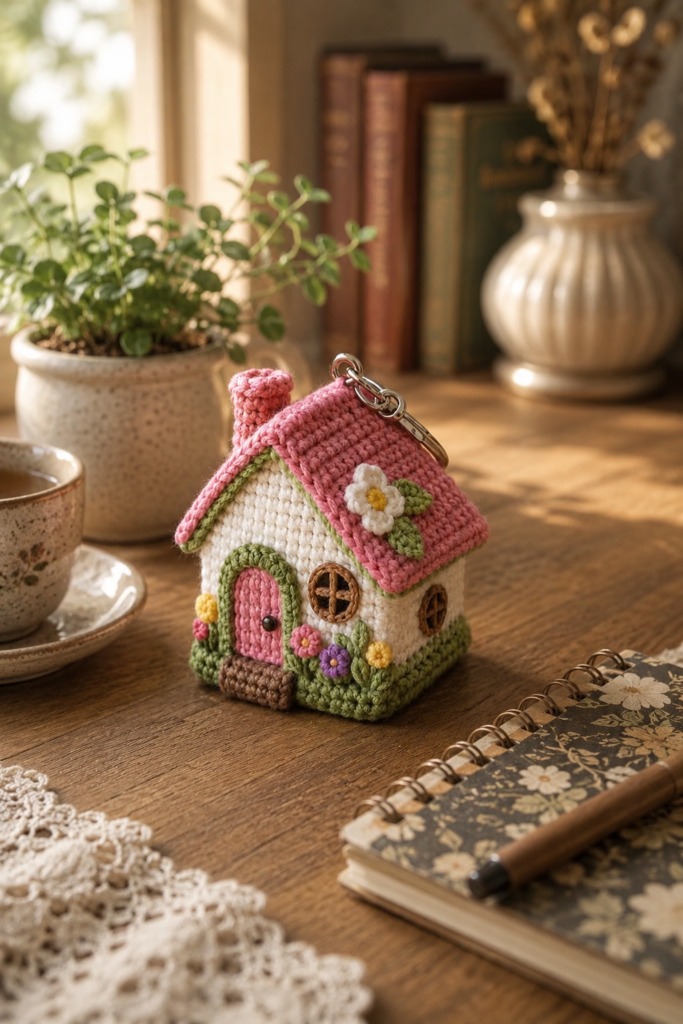
The cream walls create the foundation.
The pink roof gives the house its personality.
The green trim connects the building to the garden.
The tiny flowers add color.
The windows and door give the cottage a sense of character.
And finally, the keyring transforms the whole piece into a practical accessory.
This combination is what makes the project more than just another small crochet object.
It becomes a tiny scene.
That is one of the reasons miniature crochet is so popular among people who enjoy amigurumi, cottagecore crafts, fairy gardens, and handmade accessories.
Final Thoughts
This DIY Crochet Fairy House Keychain Free Pattern is a lovely project for anyone who enjoys small, detailed crochet designs.
The miniature cottage combines a cream crochet house with a pink roof, green garden trim, colorful flowers, tiny windows, a sweet door, a chimney, and a metal keyring.
Although there are several decorative steps, you do not need a huge amount of yarn or supplies.
The key to getting a polished result is patience.
Work slowly when shaping the house. Keep your stitch tension consistent. Add stuffing gradually. Take your time with the roof and tiny decorative pieces. Most importantly, secure the keyring and all embellishments properly so the finished piece can handle everyday use.
Once you are comfortable with the basic construction, there are countless ways to customize the cottage.
Change the roof color. Add different flowers. Create a seasonal version. Make a whole collection of tiny cottages in different color palettes.
Whether you make one for yourself or give it to someone special, this little crochet house is the kind of project that turns simple yarn into something full of personality.
If you make your own fairy house keychain, save this pattern for your next crochet session and share the idea with another crochet lover who enjoys tiny handmade projects.