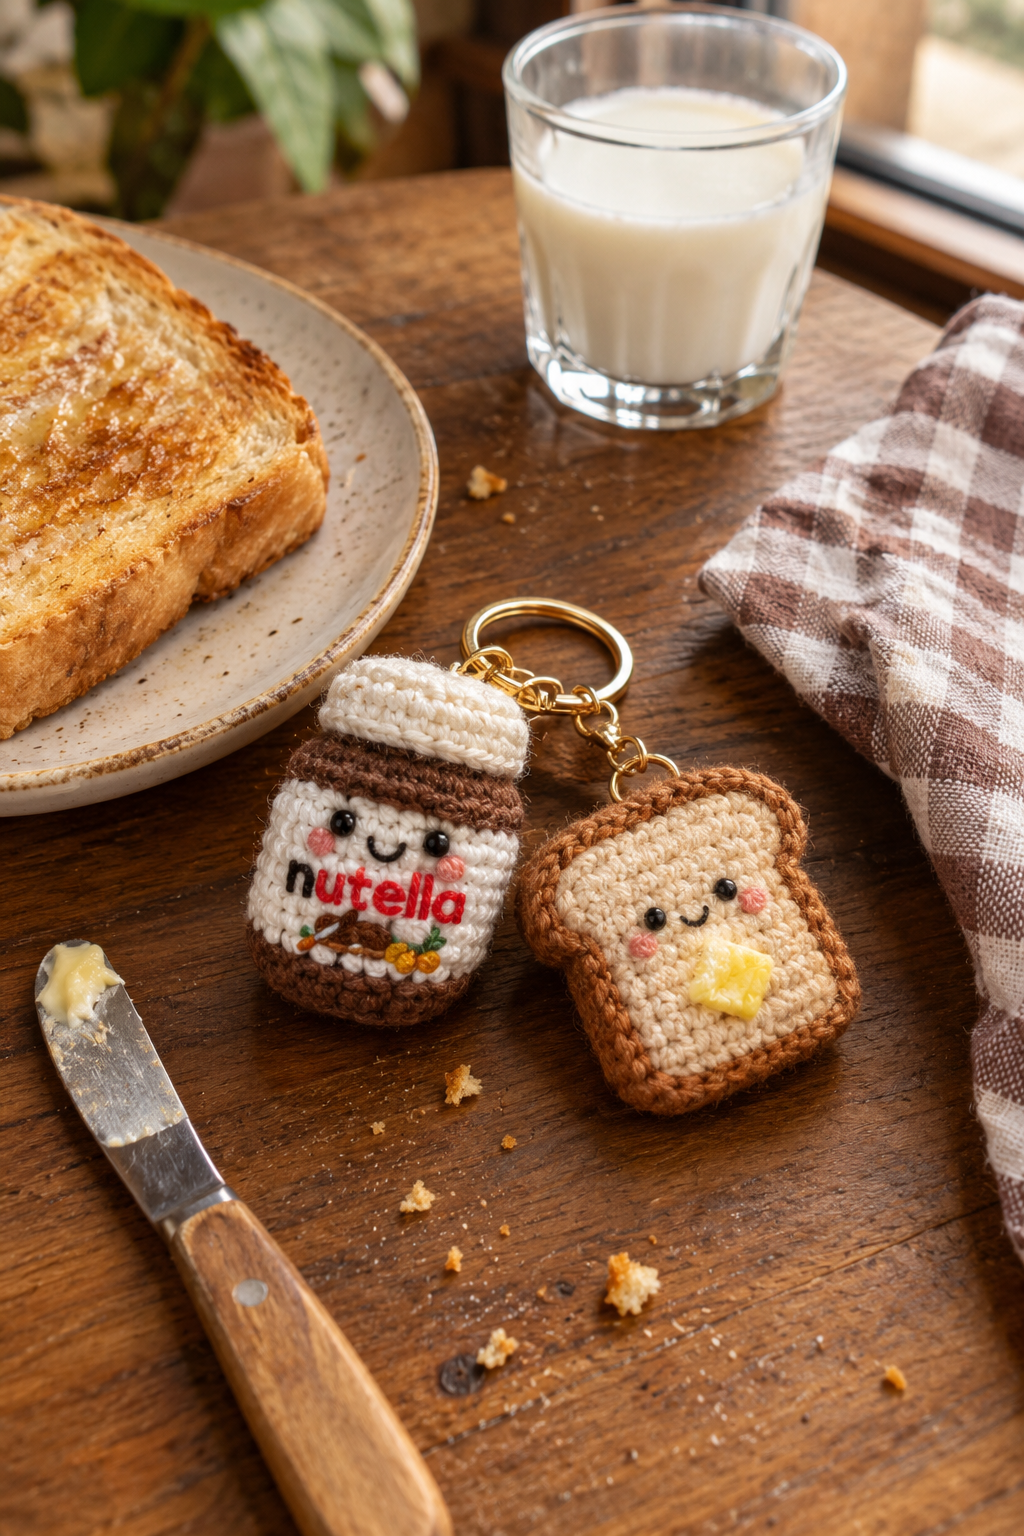
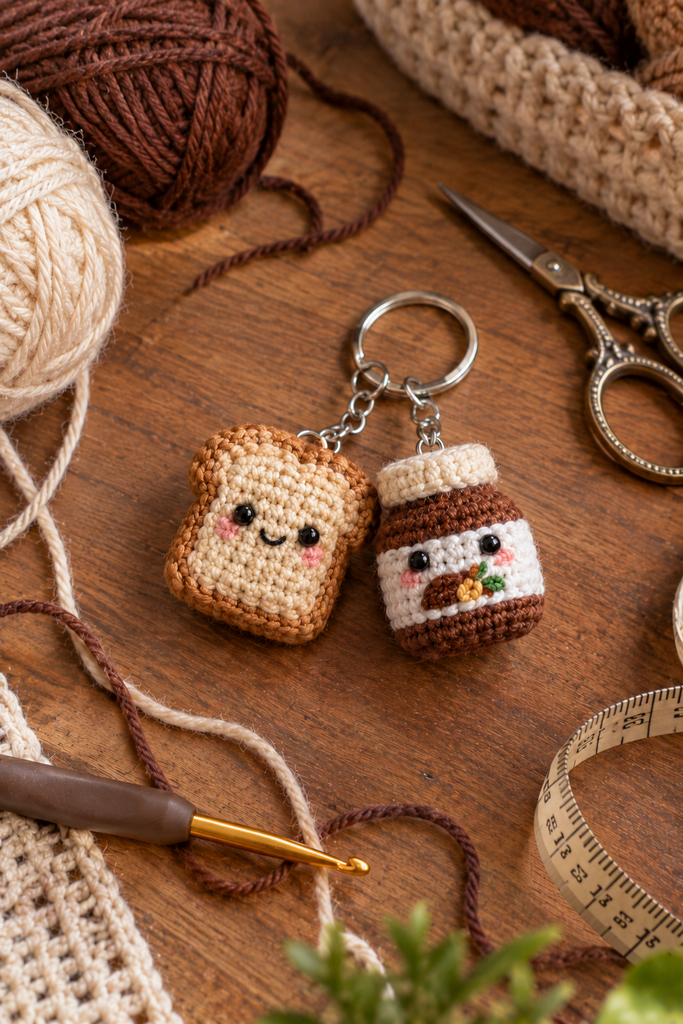
If you love cute food-inspired crochet projects, this Crochet Nutella Toast Bag Charm Free Pattern is a fun little project to add to your bag, backpack, purse, keys, or crochet gift collection.
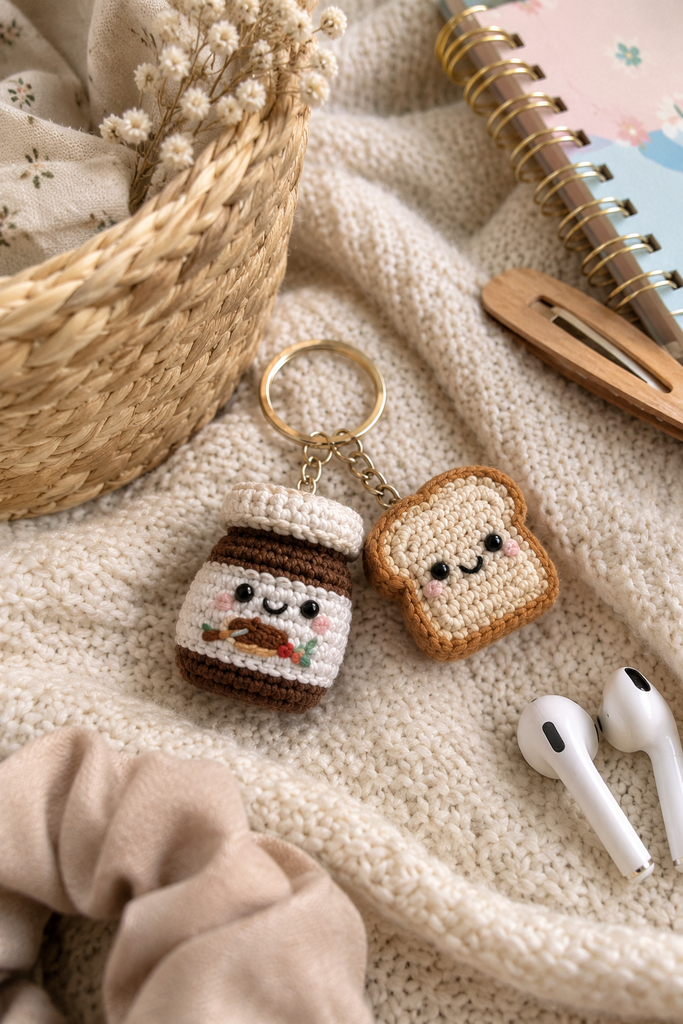
The design combines two adorable miniature food charms: a cozy slice of toast and a tiny chocolate-spread-style jar. The finished charms use simple amigurumi techniques, small amounts of yarn, and basic embroidery to create their sweet expressions.
This project is especially nice for crocheters who enjoy making small crochet keychains, food amigurumi, handmade bag charms, and quick gifts. Because the pieces are small, they are also a practical way to use leftover yarn from other projects.
Design note: The photos in this tutorial show the intended visual style of the finished charms. If you use a different yarn weight or hook size, your finished dimensions may vary.
What Makes This Crochet Toast Bag Charm So Cute?
There is something fun about turning an everyday breakfast favorite into a tiny crochet accessory.
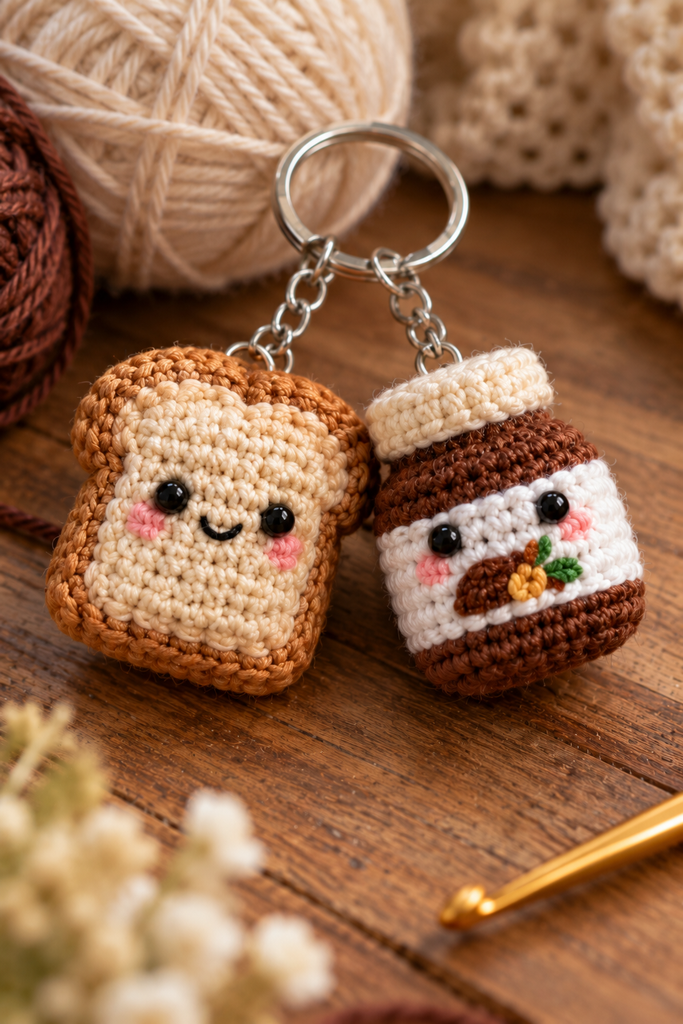
The toast charm has a soft cream center surrounded by a warm golden-brown crust. A simple embroidered smile and rosy cheeks give it a cute kawaii-style expression.
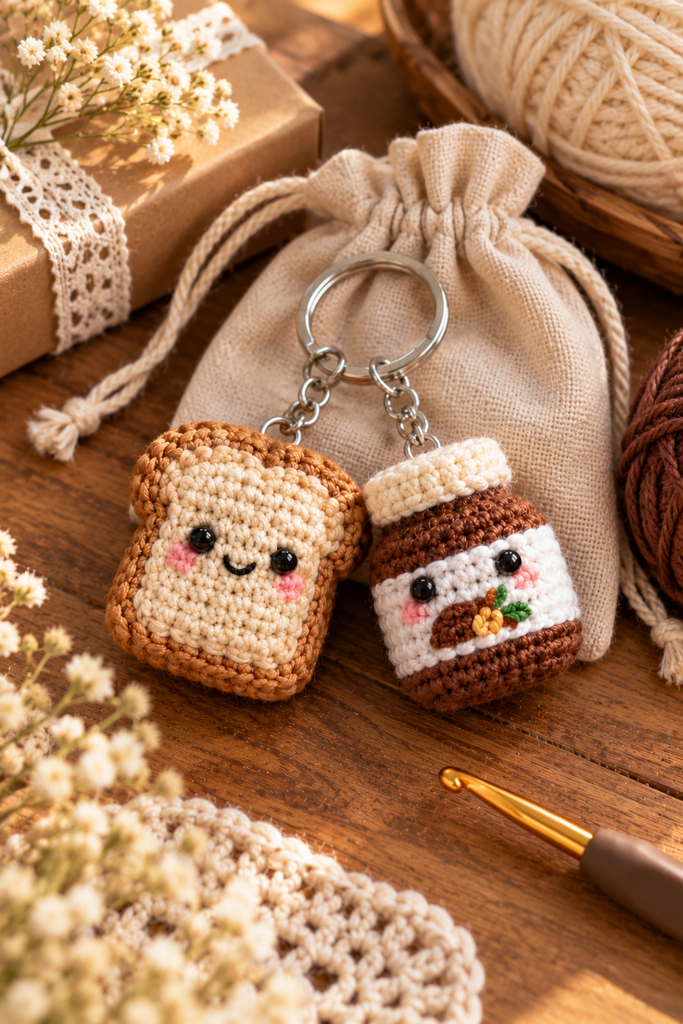
The matching chocolate-spread-style jar uses cream, brown, and white yarn with tiny embroidered details. Together, the two charms create a coordinated breakfast-inspired accessory.
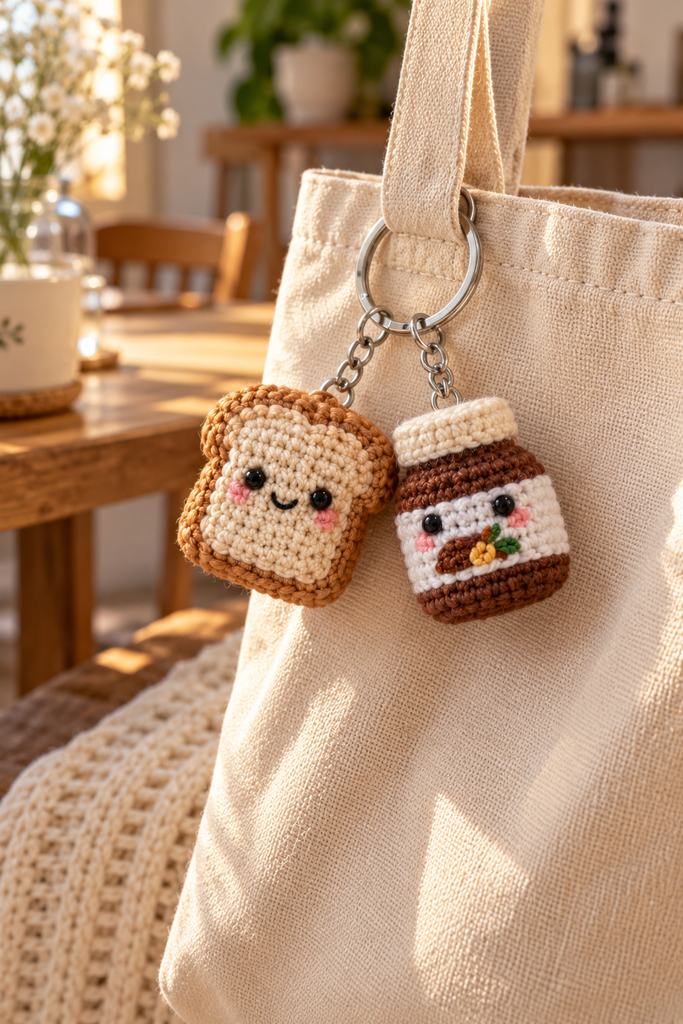
The most important part of recreating this look is keeping the proportions small and slightly rounded. You don’t need complicated stitches to achieve the overall effect. Clean single crochet, careful stuffing, and neat finishing make a big difference.
Materials You’ll Need
You don’t need a large collection of supplies for this project.
For the Toast Charm
- Cream or light beige yarn
- Golden brown yarn
- Small amount of black yarn for the face
- Small amount of pink yarn for cheeks
- Crochet hook appropriate for your yarn
- Polyester fiberfill
- Yarn needle
- Small scissors
- Safety eyes, if preferred
- Keychain ring
- Small chain or connector
For the Chocolate-Spread-Style Jar
- Dark brown yarn
- Cream or white yarn
- Small amount of green yarn
- Small amount of yellow or orange yarn
- Black yarn or embroidery thread
- Polyester fiberfill
- Crochet hook
- Yarn needle
- Keychain hardware
Yarn Recommendation
For miniature bag charms, a smooth worsted-weight or DK-weight yarn can work well. Cotton yarn is particularly useful because it gives small crochet pieces a defined stitch appearance and generally holds its shape nicely.
If you want a very tiny charm, use a thinner yarn with a smaller hook.
Tip: Always choose a hook that creates a fairly tight fabric. If your stitches are too loose, stuffing can show through the finished piece.
Crochet Skills You Should Know
This project is suitable for a confident beginner who is comfortable working in the round.
You should be familiar with:
- Magic ring
- Chain stitch
- Single crochet
- Slip stitch
- Increasing
- Decreasing
- Working in continuous rounds
- Stuffing amigurumi
- Changing yarn colors
- Basic embroidery
- Sewing pieces together
If you’re completely new to crochet, practice a small sphere first. Learning how increases and decreases change the shape will make the bag charms much easier to construct.
Crochet Nutella Toast Bag Charm Free Pattern
The following is a simplified construction guide for creating a toast-style miniature charm. Because finished size depends heavily on yarn and hook choice, focus on matching the proportions shown in the reference photographs rather than trying to force an exact measurement.
Step 1: Crochet the Toast Center
Start with your cream yarn.
Create a small rounded rectangle using single crochet. Work evenly around the shape and use increases near the corners to create softly rounded edges rather than sharp corners.
Continue working until the piece reaches the approximate height you want for your charm.
Make two matching cream panels.
Keep your tension consistent between the two panels. Uneven tension can make one side noticeably larger than the other.
Beginner Tip
Don’t overstuff miniature crochet pieces.
A small amount of stuffing is enough to give the toast a soft, dimensional appearance. Too much stuffing can stretch the stitches and make the piece look overly round.
Step 2: Add the Toast Crust
Use golden-brown yarn around the outside of the cream toast section.
The crust should create a slightly wider border around the lighter center.
Work slowly around the edges and keep your stitches consistent. The goal is a smooth, rounded toast silhouette.
When you are happy with the shape, join the two sides together while adding a small amount of stuffing.
Continue stitching around the edge until the toast is completely closed.
Fasten off and carefully hide the yarn tail inside the piece.
Step 3: Create the Cute Face
Now comes one of the details that gives the charm its personality.
Place the eyes evenly on the cream portion of the toast.
You can use small safety eyes or embroider the eyes with black yarn.
Add a tiny curved smile underneath.
For the rosy cheeks, use a small amount of pink yarn and make two tiny embroidered circles.
A Helpful Placement Trick
Before permanently attaching the eyes, place them temporarily and look at the charm from a short distance.
Small changes in eye spacing can completely change the expression.
For a cute, friendly look, keep the eyes relatively close together and position the smile slightly below the center.
Step 4: Make the Chocolate-Spread-Style Jar
For the second charm, start with dark brown yarn.
Create a small rounded jar shape using single crochet worked in the round.
Build the body gradually, keeping the bottom slightly narrower than the widest part if you want a softly rounded jar silhouette.
Add cream or white yarn around the middle section to create the lighter label area.
Continue with brown yarn toward the lower section.
The top can be finished with cream yarn to create the appearance of a little lid.
Step 5: Add the Tiny Decorative Details
The little decorative elements are what make the second charm visually interesting.
Using small amounts of green, yellow, orange, and brown yarn, add miniature embroidered or crocheted details to the front.
Keep these details small.
At this scale, even a few stitches can create the impression of leaves, fruit, or a tiny decorative motif.
You don’t need to make every detail perfectly symmetrical. Handmade irregularities can actually make miniature crochet pieces look more charming and authentic.
Step 6: Add the Faces
Attach the safety eyes or embroider the eyes using black yarn.
Add small pink cheeks and a tiny smile.
Before permanently securing the embroidery, check that both charms have a similar expression style.
This helps the toast and jar look like they belong to the same collection.
Step 7: Attach the Keychain Hardware
Once both crochet pieces are finished, securely attach the metal hardware.
You can use:
- A split key ring
- Small jump rings
- Short chain sections
- Lobster clasp hardware
For a bag charm, make sure the attachment point is firmly sewn into the crochet piece.
Don’t rely only on a loose yarn tail to hold the metal ring.
The charm may be pulled repeatedly when attached to a bag, so the connection needs to be secure.
How to Get Clean, Professional Crochet Stitches
Small crochet projects can actually be more demanding than large ones because every stitch is visible.
Here are a few techniques that can improve the finished result.
Keep Your Tension Consistent
Changing tension halfway through a small project can cause visible bumps or uneven edges.
Try to maintain the same hand position and yarn tension throughout each section.
Use Tight Stitches
Amigurumi generally looks cleaner when the stitches are relatively tight.
If stuffing is visible between stitches, try using a smaller hook.
Stuff Gradually
Add tiny amounts of stuffing as you work.
This makes it easier to control the shape and prevents large lumps from developing inside the charm.
Hide Yarn Ends Carefully
Small projects have very little room for loose ends.
Weave the ends securely through several stitches before trimming them.
Common Mistakes to Avoid
Making the Charm Too Large
A bag charm should remain lightweight and compact.
If you use bulky yarn, the finished piece may become more like a plush toy than a keychain.
Overstuffing
Too much stuffing can stretch the crochet fabric and distort the face.
Add stuffing little by little instead.
Uneven Eyes
Before attaching safety eyes, measure their placement visually.
Even a small difference can make the face look tilted.
Loose Keychain Attachment
This is particularly important for an item that will hang from a frequently used bag.
Reinforce the area where the hardware connects to the crochet piece.
Changing Yarn Weight Mid-Project
Using noticeably different yarn thicknesses can make the toast and jar look mismatched.
For a coordinated set, try to use the same yarn weight throughout.
How to Customize Your Crochet Toast Bag Charm
One of the best things about small crochet accessories is how easy they are to personalize.
You could change the toast crust from golden brown to a darker toasted shade.
You could also create different facial expressions:
- Happy
- Sleepy
- Surprised
- Winking
- Blushing
For the jar charm, experiment with different label colors and tiny embroidered decorations.
You could even make an entire breakfast-themed collection with miniature:
- Pancakes
- Waffles
- Strawberries
- Coffee cups
- Eggs
- Croissants
- Donuts
This makes the basic construction technique useful for many future crochet food keychain patterns.
How Long Does It Take to Make?
Because these are miniature crochet projects, they can usually be completed much faster than a larger amigurumi project.
Your actual time will depend on:
- Crochet experience
- Yarn thickness
- Hook size
- How quickly you crochet
- Amount of embroidery
- Whether you’re making one charm or a matching pair
For beginners, it’s better to work slowly and focus on consistent stitches rather than trying to finish as quickly as possible.
How to Use Your Finished Crochet Bag Charm
These little charms aren’t limited to keyrings.
You can attach them to:
- Canvas tote bags
- Backpacks
- Purses
- Pencil cases
- Crochet project bags
- Zippers
- Key sets
They also make cute handmade gifts for people who enjoy food-themed accessories and crochet.
Care and Storage
Crochet charms are small, but they can still collect dust and lint.
For everyday care, gently remove surface dust with your fingers or a soft brush.
Avoid soaking the finished charm unless the yarn and attached components are specifically suitable for washing.
If it becomes dirty, spot-clean carefully with a slightly damp cloth and allow it to air dry completely.
Store handmade crochet charms somewhere dry and away from prolonged direct sunlight to help preserve their colors.
If your charm contains safety eyes or small decorative components, keep it away from young children who may pull or swallow small parts.
Frequently Asked Questions
Is this crochet bag charm beginner-friendly?
Yes. The basic construction uses common amigurumi techniques such as single crochet, increases, decreases, stuffing, and simple embroidery. Beginners may want to practice the shaping techniques before starting the finished charm.
What yarn is best for a crochet toast keychain?
Smooth cotton or cotton-blend yarn is a practical choice because the stitches remain clearly visible and the finished piece holds its shape well.
Can I make the charm smaller?
Yes. Using thinner yarn and a smaller crochet hook will generally produce a smaller finished charm. Remember that changing yarn weight also changes the amount of detail you can comfortably add.
Can I make only the toast?
Absolutely. The toast works as a standalone crochet keychain. The matching chocolate-spread-style jar is simply a fun companion piece.
Can I change the colors?
Yes. Try different crust shades, pastel colors, or seasonal palettes while keeping the basic construction the same.
How do I keep a crochet keychain from falling apart?
Secure the yarn ends properly and reinforce the point where the keychain hardware attaches to the crochet fabric. This is especially important for charms that will be used regularly.
Why Small Crochet Projects Are Worth Making
Small projects like this are useful for more than creating cute accessories.
They’re also a great way to practice crochet techniques without committing to a large project.
A miniature bag charm gives you an opportunity to practice:
- Increasing and decreasing
- Working in the round
- Shaping
- Color changes
- Embroidery
- Sewing
- Amigurumi construction
They’re also excellent scrap-yarn projects. Those small leftover amounts of cream, brown, pink, green, and yellow yarn can become useful details instead of sitting unused in your yarn basket.
Final Thoughts
This Crochet Nutella Toast Bag Charm Free Pattern brings together two things crocheters love: tiny handmade projects and cute food-inspired designs.
The toast is simple enough to customize with different expressions and crust colors, while the chocolate-spread-style jar gives the pair a little extra personality. Once you’ve made one set, the same basic techniques can be adapted into dozens of other miniature food charms.
If you’re building a collection of crochet food keychains, this is a fun project to add to it. Save the idea for your next small crochet session, gather a few scraps of yarn, and enjoy making something that’s quick, practical, and full of handmade character.