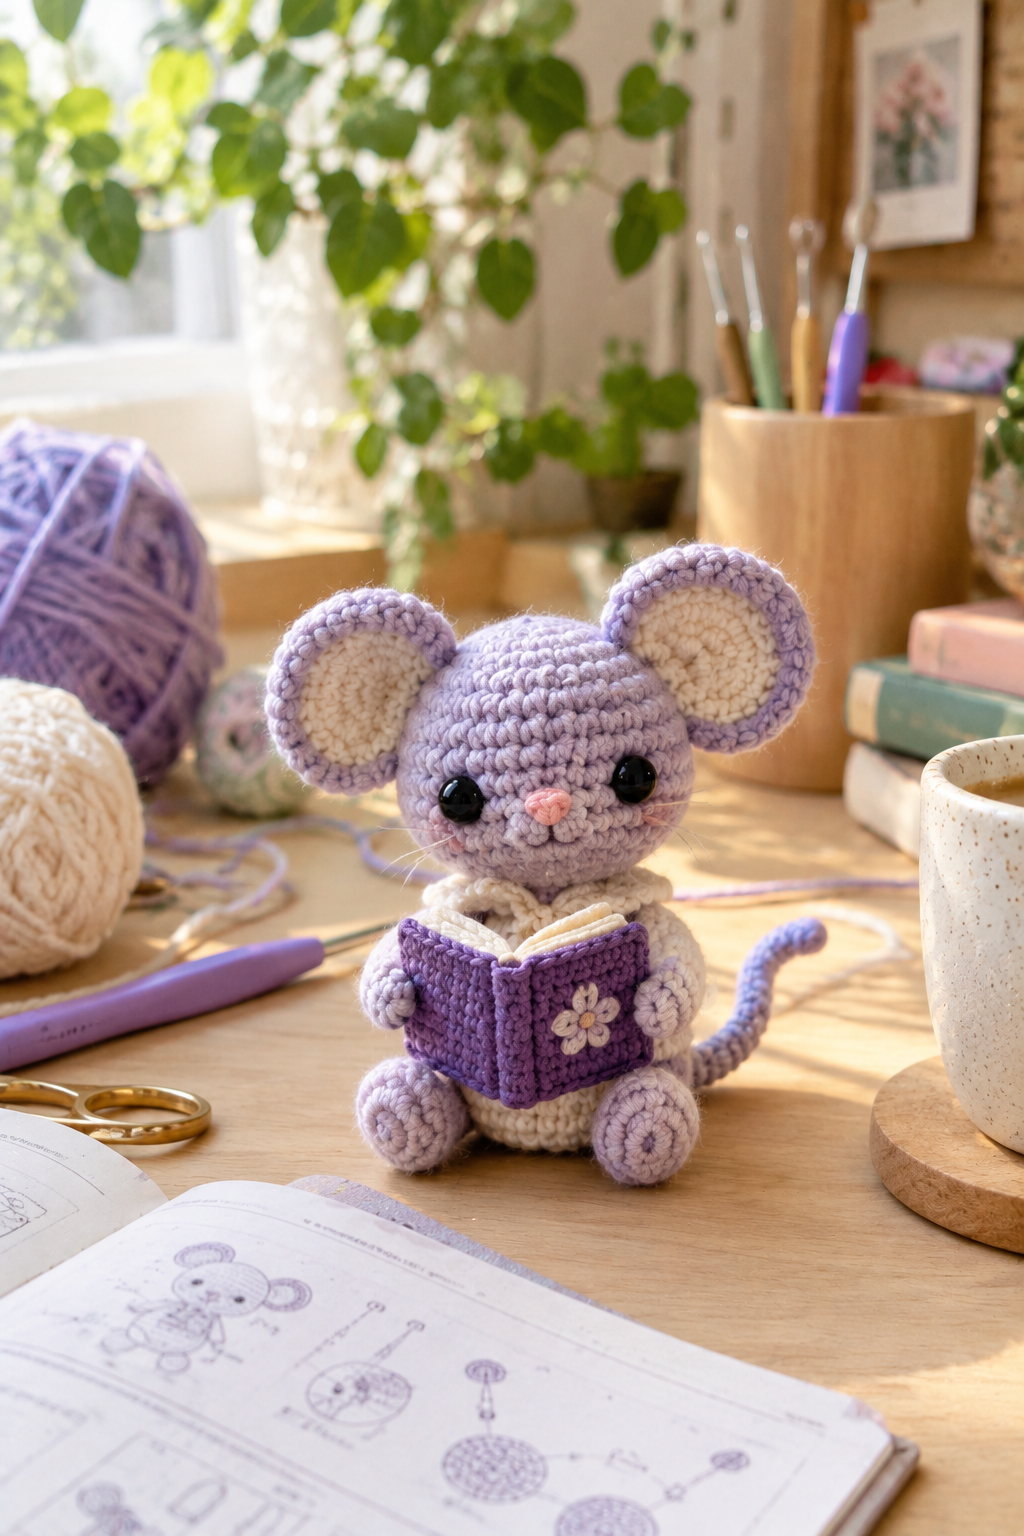
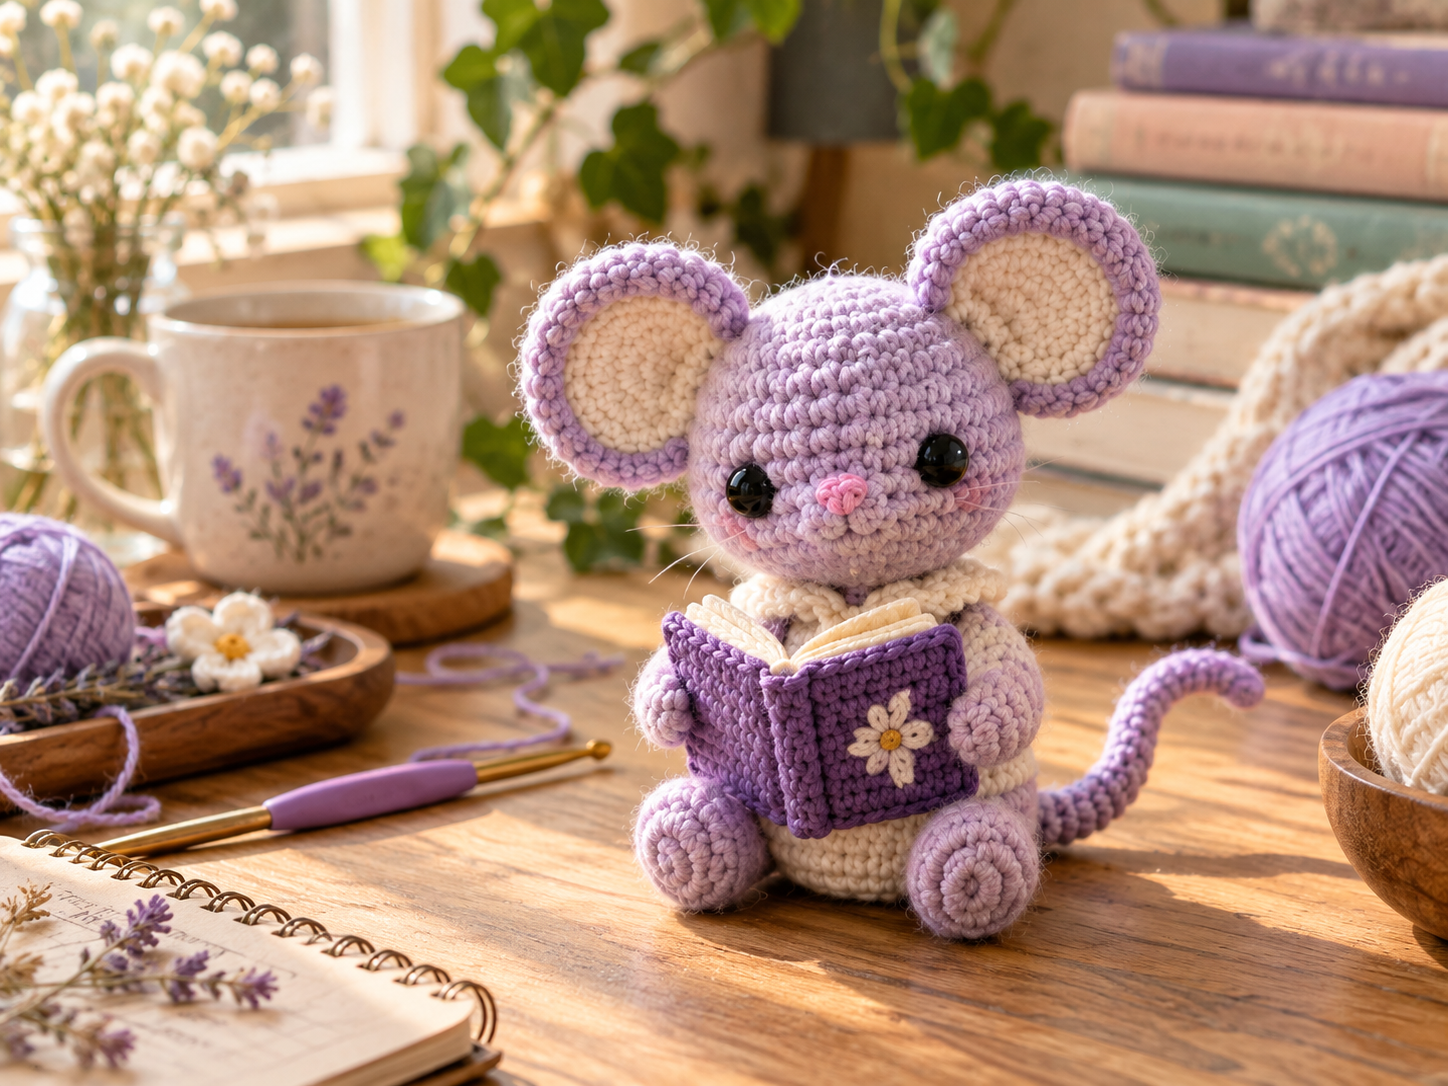
If you love crochet, books, and cute handmade characters, this adorable crochet reading mouse amigurumi is a project worth adding to your inspiration list. With oversized ears, a soft lavender color palette, a tiny purple book, and a sweet seated pose, this little mouse has all the charm of a cozy reading companion.
It works especially well as a handmade gift, desk decoration, bookshelf companion, or part of a larger collection of crochet amigurumi.
This guide walks through the design idea, materials, construction process, finishing tips, customization options, and ways to make the finished mouse look polished and gift-ready.
Note: This article is a project and design guide rather than a substitute for a specific row-by-row crochet pattern. If you are following a separate pattern, use that pattern’s stated yarn weight, hook size, stitch counts, and assembly instructions.
Why You’ll Love This Crochet Reading Mouse
What makes this project particularly appealing is the combination of a classic amigurumi animal with a bookish theme.
The mouse has several small details that work together:
- Lavender-purple crocheted head
- Oversized rounded ears
- Cream inner ears
- Glossy black eyes
- Tiny pink nose
- Delicate whiskers
- Cream-colored body
- Rounded paws and feet
- Long curved tail
- Miniature purple book
- Small floral decoration on the book
The color palette is soft enough for a nursery, reading corner, craft room, or bookshelf while still giving the finished mouse plenty of personality.
It is also a design that can easily be customized.
Materials for a Crochet Reading Mouse
Before starting, gather your materials and keep the small components organized.
Yarn
For a mouse with a similar appearance to the reference design, consider:
| Color | Suggested use |
|---|---|
| Lavender or light purple | Head, ears, paws, feet and tail |
| Cream | Body and inner ears |
| Dark purple | Miniature book |
| Pink | Nose and small facial details |
| White or cream | Book pages and decorative details |
The exact amount of yarn will depend on the finished size, yarn thickness, hook size, and your crochet tension.
Other Supplies
You’ll typically need:
- Crochet hook appropriate for your yarn
- Fiberfill stuffing
- Tapestry or embroidery needle
- Small scissors
- Stitch markers
- Black safety eyes or embroidery thread
- Pink embroidery thread
- Yarn needle for assembly
- Optional wire-free shaping materials if your chosen pattern specifically calls for them
- Materials for the miniature book
For a small amigurumi, keeping your tools and components in separate small dishes can prevent tiny pieces from getting lost.
Choosing Yarn and Hook Size
For amigurumi, stitch definition matters just as much as color.
A yarn with clearly visible stitches can help the mouse retain its rounded shape and make small details easier to see.
When selecting your hook, follow the recommendation for the specific yarn and pattern you are using. Amigurumi is generally worked with a relatively firm fabric, but the correct hook size depends on the yarn and your tension.
A Simple Test Before You Begin
Make a small sample using your chosen yarn and hook.
Check whether:
- The stitches look neat.
- The fabric is firm enough for stuffing.
- The stuffing does not show through easily.
- Your stitches are consistent.
- The finished fabric has the texture you want.
This small test can save time before you start making the actual pieces.
How the Crochet Reading Mouse Is Built
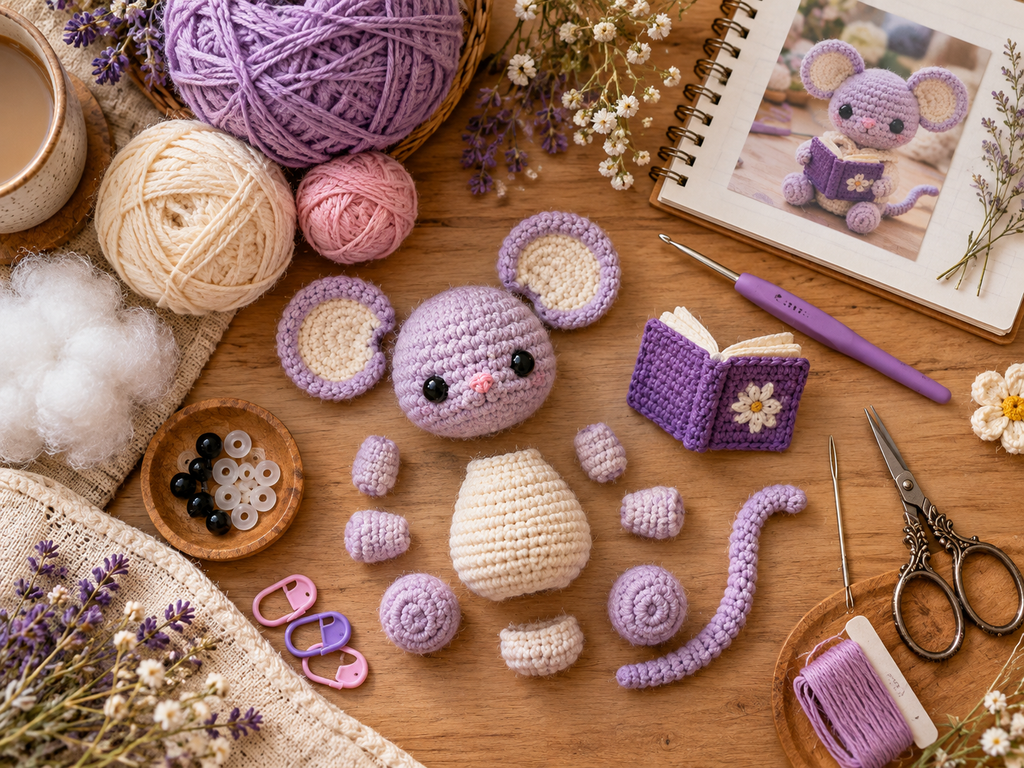
Rather than thinking about the project as one complicated piece, break it into smaller components.
This makes the construction easier to understand and gives you opportunities to check the shape and proportions as you go.
1. Crochet the Mouse Head
The head is the most recognizable part of the character.
The basic shape should be rounded, with enough room for the eyes, nose, muzzle details, and ears.
As you work, pay attention to the overall shape rather than simply focusing on individual stitches.
A smooth, evenly stuffed head will give the finished mouse a much more polished appearance.
Adding the Face
Once the head has been shaped, add the facial features.
The eyes should be positioned evenly on either side of the face. The small pink nose can then be centered between them.
If you’re using safety eyes, make sure they are securely installed according to the instructions for the particular eyes and the intended recipient.
For projects intended for very young children, avoid loose small parts and follow appropriate toy-safety practices.
2. Make the Oversized Ears
The large ears are one of the defining features of this mouse.
Each ear can have:
- A lavender outer section
- A cream inner section
- A rounded shape
- A secure attachment point
Before sewing the ears permanently, position them on the head and check them from the front.
This is important because even a small difference in height can make the face look uneven.
3. Create the Cream Body
The body provides the base for the seated character.
The cream color creates a soft contrast with the lavender head and limbs.
Keep the stuffing firm enough to maintain the shape but avoid packing it so tightly that the crochet fabric becomes stretched or distorted.
4. Crochet the Paws and Feet
The small paws and rounded feet give the mouse its seated pose.
When attaching them, temporarily position both sides before sewing.
Look at the mouse from the front and side to make sure:
- The paws sit at similar heights.
- The feet have balanced spacing.
- The body remains upright.
- The mouse can sit naturally.
5. Add the Curved Tail
The long curved tail adds movement to the design.
A gentle curve works particularly well because it makes the character look more playful.
Secure the tail firmly to the body and position it so that it doesn’t interfere with the mouse’s sitting balance.
Making the Tiny Crochet Book
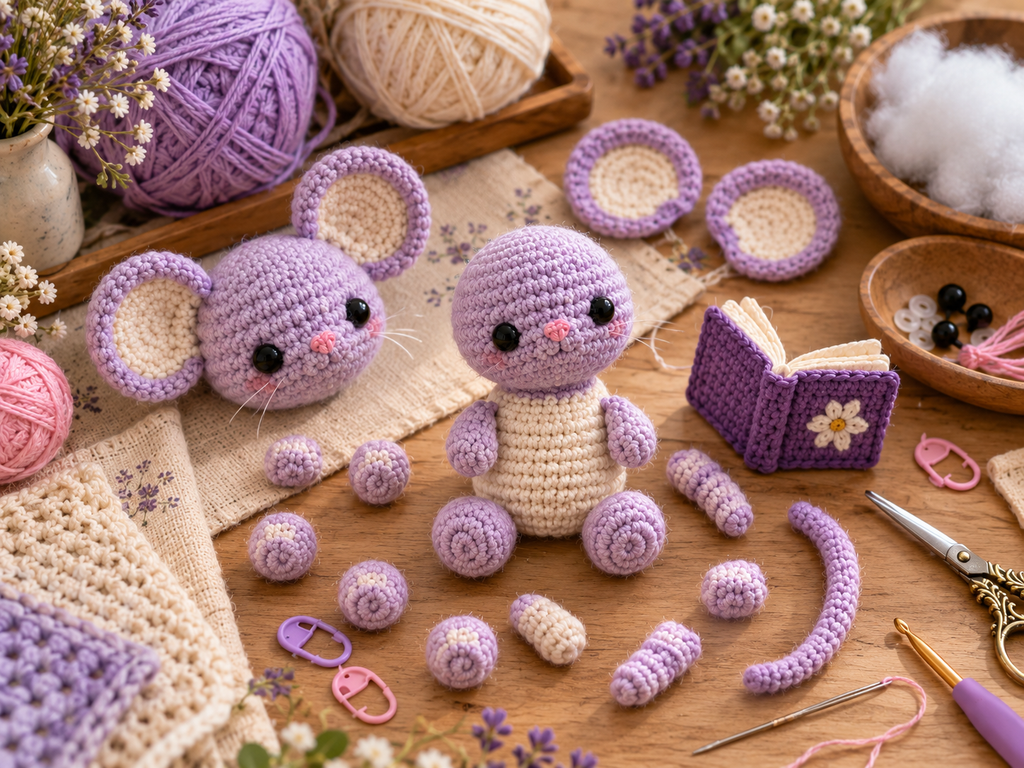
The miniature book is what transforms this from a regular mouse amigurumi into a crochet reading mouse.
It doesn’t need to contain complicated details.
A simple purple cover with cream pages can be enough to create the book effect.
Book Construction Ideas
You can create the miniature book with:
- A purple crocheted cover
- Cream or white pages
- A central fold
- A small decorative flower
- Optional embroidered details
Keep the book proportional to the mouse.
If the book is too large, it can hide the character’s body. If it’s too small, the reading theme may not be immediately obvious.
Adding the Floral Detail
A tiny cream flower on the front cover provides a simple decorative accent.
You can make the flower separately or embroider a small floral motif, depending on the construction method you’re using.
Avoid adding too many details to such a small accessory. A clean design usually looks better at miniature scale.
Assembling the Reading Mouse
Once the individual components are complete, lay everything out before permanently attaching the pieces.
This gives you a chance to correct the proportions.
A practical assembly sequence is:
- Shape and finish the head.
- Position the facial features.
- Attach the inner ear details.
- Secure the ears to the head.
- Finish and stuff the body.
- Attach the head to the body.
- Position the paws.
- Attach the feet.
- Secure the curved tail.
- Finish the miniature book.
- Position the book between the paws.
- Check the complete character from several angles.
Don’t immediately sew everything in place.
Take a photograph from the front before final assembly. Looking at the project as a photograph can sometimes reveal uneven positioning that isn’t obvious while you’re holding it.
Getting the Face Right
For small amigurumi, the face has a huge impact on the finished appearance.
The reference design uses a very simple expression, which is part of its charm.
Check These Details
Before permanently finishing the face, check:
Eye spacing:
The eyes should be balanced around the center of the face.
Nose position:
The pink nose should sit between and slightly below the eyes.
Whiskers:
Keep them delicate and relatively symmetrical.
Cheeks:
Small pink accents can add warmth without overwhelming the face.
Ears:
Make sure both ears sit at approximately the same height.
Small adjustments here can make the difference between an ordinary-looking amigurumi and a character with a polished expression.
How to Keep Amigurumi Neat and Even
Small crochet projects make inconsistencies easier to notice.
Here are a few useful techniques.
Use a Stitch Marker
A stitch marker can help you identify the beginning of each round when working in continuous rounds.
This is especially useful when creating rounded amigurumi pieces.
Count Regularly
Don’t wait until the end of a piece to discover that your stitch count has changed.
Regular counting helps you identify mistakes early.
Stuff in Small Amounts
Instead of adding a large amount of stuffing at once, add it gradually.
Use your fingers or a suitable blunt tool to distribute the filling evenly.
Avoid Overstuffing
Too much stuffing can stretch the crochet fabric and make the stitches appear uneven.
The goal is a smooth, rounded shape that holds its form without becoming overly firm.
Color Ideas for Your Reading Mouse
Lavender and cream create a soft bookish aesthetic, but there are plenty of ways to personalize the character.
Classic Lavender
- Lavender head
- Cream body
- Purple book
- Pink nose
This gives you the soft look shown in the reference.
Dusty Rose
Replace lavender with dusty pink for a warmer, romantic palette.
Sage Green
A sage-and-cream mouse would work beautifully in a nature-inspired reading nook.
Blue and Cream
Use soft blue for a cooler, calming bookshelf companion.
Brown and Cream
For a traditional woodland-inspired mouse, combine warm brown with cream and a muted book color.
The character’s personality can change dramatically just by changing the yarn colors.
Ways to Personalize the Crochet Book
The miniature book gives you another opportunity to make the project unique.
You could add:
- A tiny flower
- A heart
- A star
- Initials
- A simple bookmark
- A contrasting border
- A tiny embroidered pattern
If you’re creating the mouse as a gift, matching the book cover to the recipient’s favorite color can make it feel more personal.
Avoid trying to put detailed text on such a small surface unless your chosen technique can reproduce it cleanly.
Common Problems and How to Fix Them
The Head Looks Lopsided
Check your stitch count and stuffing distribution.
Uneven stuffing can make a perfectly crocheted piece appear misshapen.
The Ears Don’t Match
Place both ears beside each other before attaching them.
If necessary, mark the attachment points on the head so they are positioned consistently.
The Mouse Falls Forward
Check the body stuffing, feet placement, and position of the book.
The book can also affect the character’s center of gravity.
The Book Covers Too Much of the Body
Reduce the book size or move it slightly lower.
The face should remain the main visual focal point.
The Tail Looks Too Straight
Gently shape the tail before securing it.
The curved silhouette is an important part of the playful appearance.
How to Make the Finished Mouse Look More Professional
Once the basic construction is complete, spend a few minutes on finishing.
Look for:
- Loose yarn ends
- Uneven seams
- Misaligned eyes
- Uneven ears
- Poorly positioned paws
- Loose decorative pieces
- Uneven stuffing
- A crooked miniature book
Trim and secure loose ends carefully.
Then gently shape the mouse with your fingers.
The goal isn’t perfection. Small handmade characteristics are part of what makes amigurumi appealing. The important thing is that the overall shape looks intentional and the components are securely attached.
Where to Display a Crochet Reading Mouse
This little character isn’t limited to a craft table.
It can become part of a cozy reading-themed display.
Bookshelf
Place the mouse between a few favorite books.
Reading Nook
Set it beside a lamp, mug, and stack of books for a cozy decorative arrangement.
Craft Room
Display it near your yarn and crochet supplies.
Desk
A small amigurumi can add personality to a home office or study space.
Gift Basket
Pair it with a book, bookmark, notebook, or other reading-themed handmade items.
Is a Crochet Reading Mouse a Good Gift?
Absolutely.
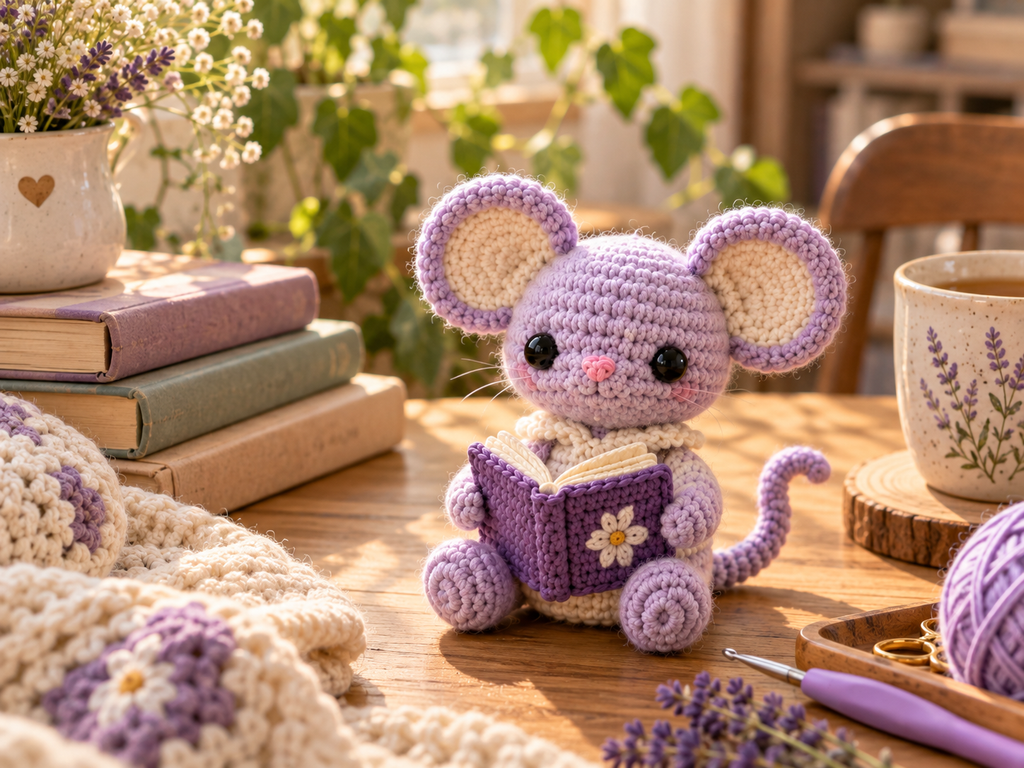
The design combines two recognizable interests—reading and handmade crochet—which makes it easy to personalize for someone special.
It can be a thoughtful idea for:
- Book lovers
- Librarians
- Teachers
- Students
- Readers
- Crochet enthusiasts
- Handmade-gift lovers
- Children, when made with appropriate safety considerations
- Friends who enjoy cozy home décor
You can also create different versions for different personalities simply by changing the mouse and book colors.
Crochet Reading Mouse FAQs
What is a crochet reading mouse?
A crochet reading mouse is a small amigurumi mouse designed around a reading theme. The character typically features a miniature book held between its paws, making it especially appealing to book lovers and readers.
Is this a beginner-friendly crochet project?
It can be approachable if you are comfortable with basic amigurumi construction, but the small components and final assembly require patience. Beginners may find it easier to start with simpler amigurumi shapes before attempting very small accessories.
What yarn should I use for a crochet mouse?
Choose a yarn suitable for amigurumi and follow the yarn and hook recommendations of the specific pattern you’re using. Smooth yarn with clear stitch definition is generally helpful for small crocheted characters.
Can I change the colors?
Yes. Lavender and cream are simply one color combination. You can use pink, blue, sage, brown, or other colors to create a different personality.
How do I make the mouse’s book?
A miniature crocheted book can be constructed from a small purple cover with cream pages and a simple decorative detail. Keep the finished book proportional to the mouse.
Can I make a larger version?
Yes. A different yarn weight and hook size can change the finished dimensions. However, changing materials can also affect the proportions, stitch tension, stuffing requirements, and appearance, so test your materials before making the complete project.
How can I make the crochet mouse sit upright?
Pay close attention to the body shape, stuffing, feet placement, and position of the miniature book. Temporarily position the components before sewing them permanently to find the most stable arrangement.
Final Thoughts
This crochet reading mouse amigurumi pattern idea is a lovely combination of two cozy hobbies: crochet and reading.
The oversized ears, lavender yarn, cream body, tiny pink nose, curved tail, and miniature purple book give the character a distinctive personality while leaving plenty of room for customization.
Whether you’re making one for your own reading corner, creating a handmade present, or simply looking for your next cute amigurumi project, this little mouse offers plenty of opportunities to add your own creative touches.
Start with the basic shapes, take your time with the facial placement, and treat the miniature book as the finishing detail that brings the whole character together.